
You are here:
Define How a Product Decomposes
Use the decomposition workspace to set up rules that control how a commercial product or product classification breaks down into technical products. Define conditions and priorities for the decomposition rules. By default, all products decompose into fulfillment line items unless you specify an execution rule and that rule evaluates to false for a given sales transaction item.
Required Editions
| Available in: both Salesforce Classic (not available in all orgs) and Lightning Experience |
| Available in: Enterprise, Unlimited, and Developer Editions |
| User Permissions Needed | |
|---|---|
| To define how a product decomposes: | Fulfillment Designer OR DRO Admin User |
| To define decimal quantity at design time and run time: | Decimal Quantity Design Time AND Decimal Quantity Run Time |

Before you can define how products decompose, you must create your product catalog and understand the role of the Decomposition Scope. See Build Your Technical Product Catalog for Dynamic Revenue Orchestrator.
For information on the number of products and decomposition rules supported, see Dynamic Revenue Orchestrator Limits.
- From the App Launcher, find and select Dynamic Revenue Orchestrator.
- From the app navigation menu, select Products.
- Click a product.
-
Go to the Decomposition tab.
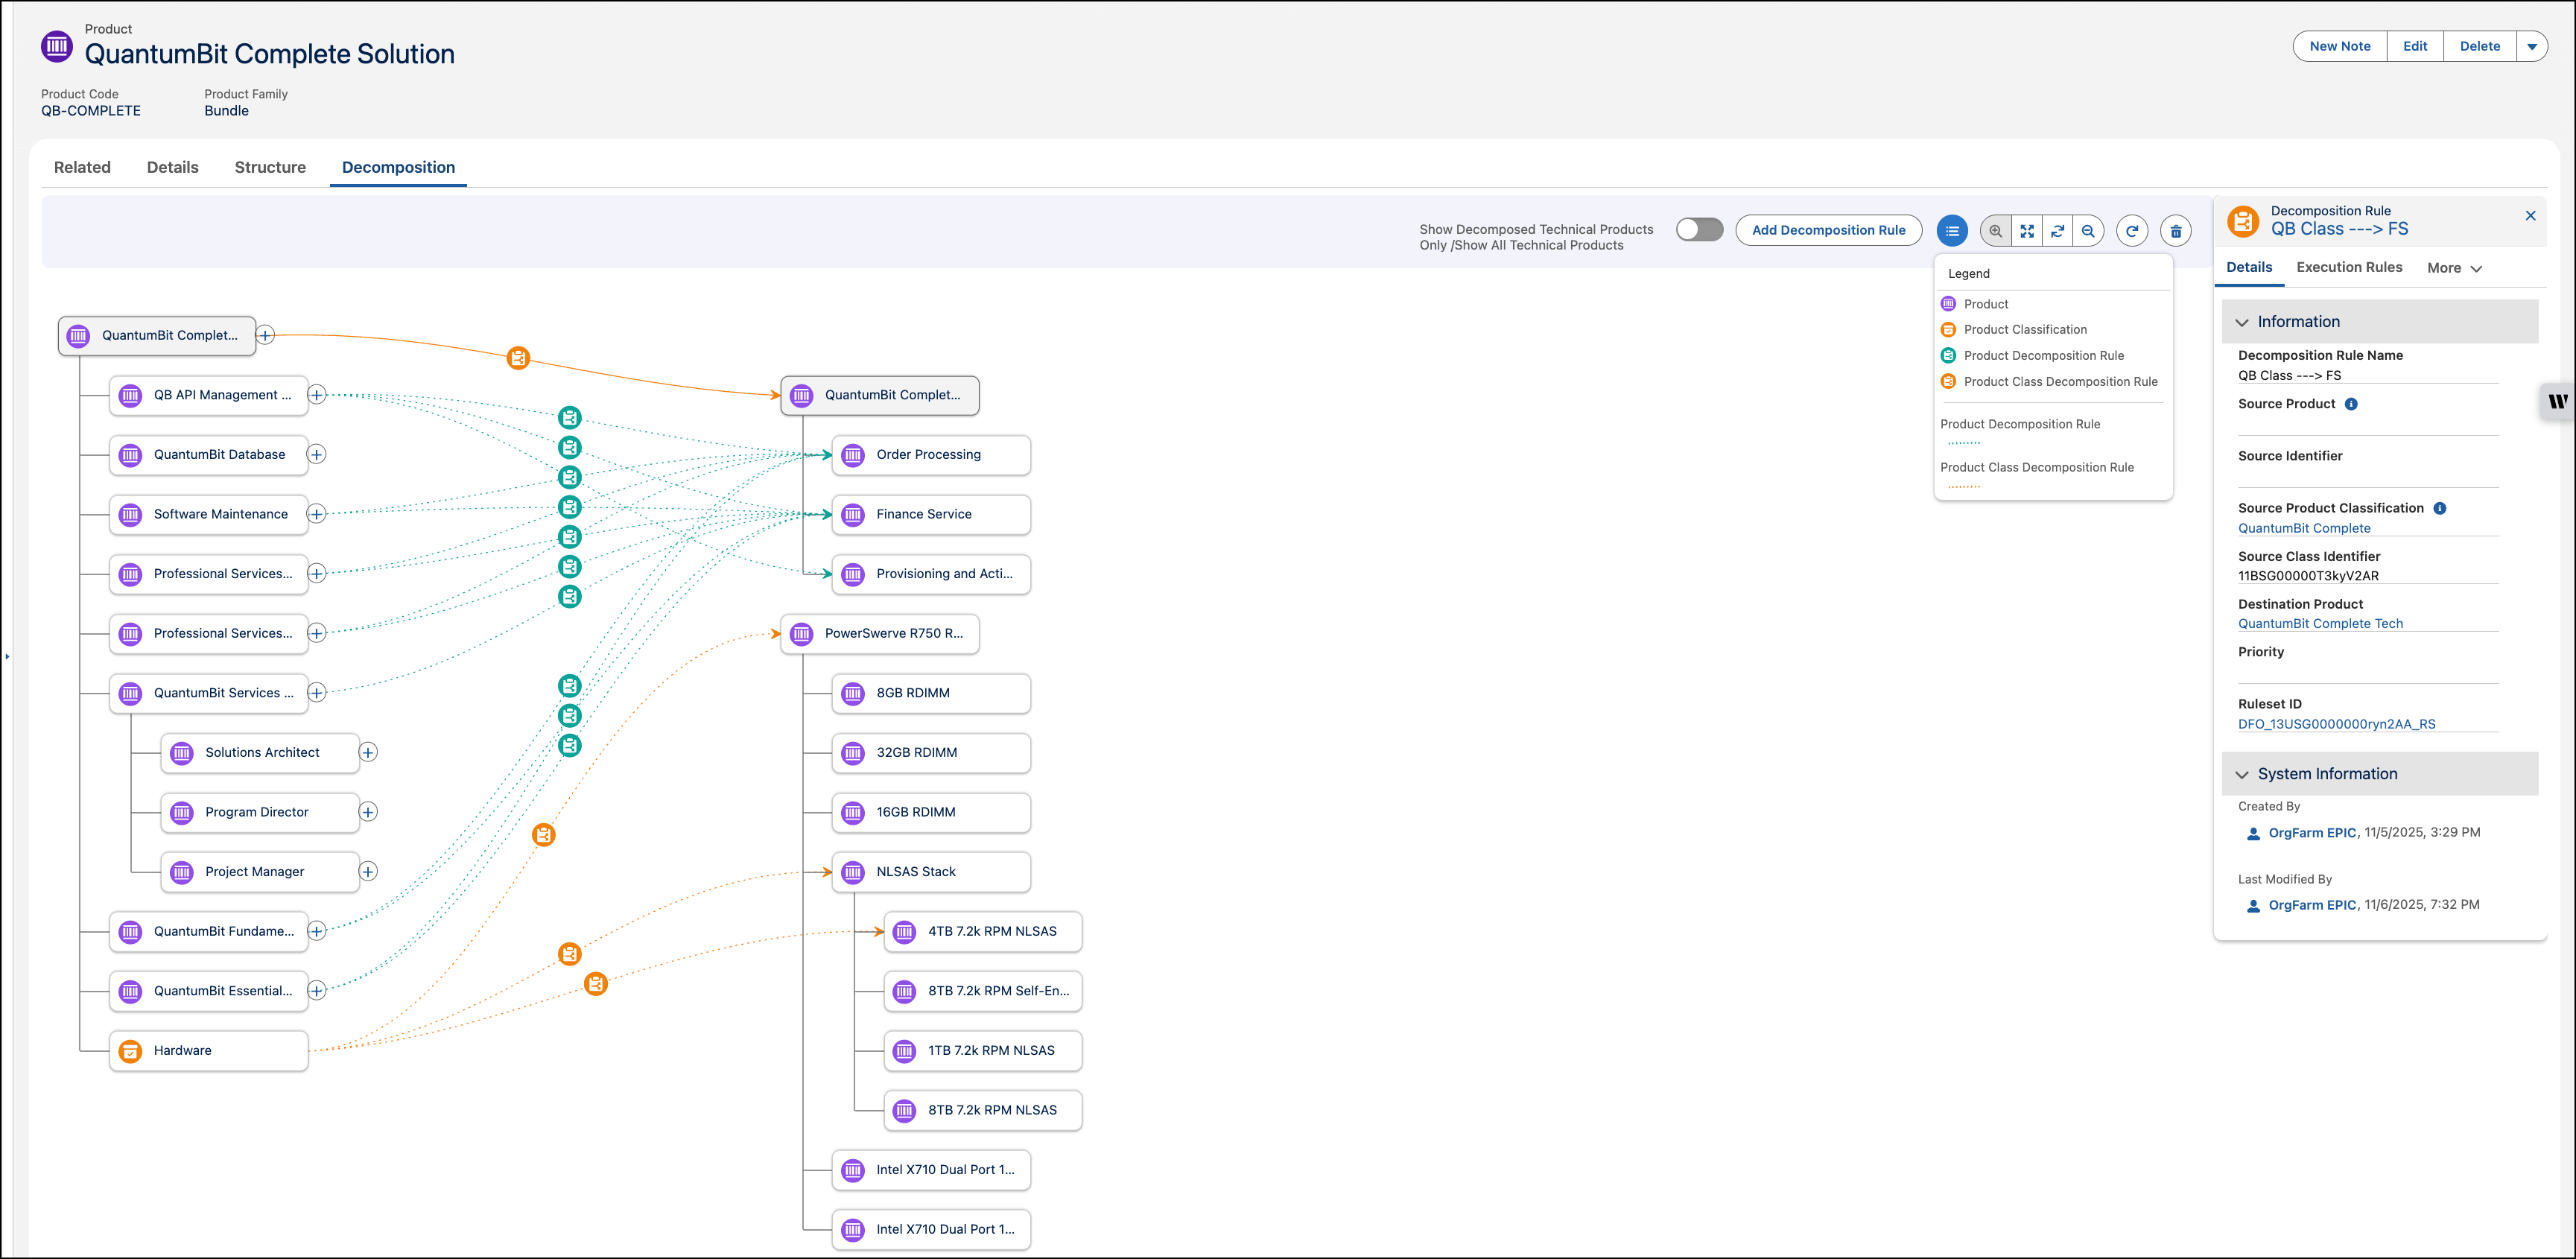
The Decomposition tab is available out-of-the-box when accessing the product page within the DRO app. For other applications, manually add and configure the Product Decomposition Workspace Lightning Web Component to the record page using Lightning App Builder.The workspace shows product class-based decomposition rules that the product inherited alongside the product’s decomposition rules. If the destination is a technical bundle, the workspace shows the complete hierarchy starting from the decomposed product as the root. By default, the canvas shows the full structure, including parent products. Switch the action bar toggle to only see the decomposed technical products. In the workspace side panel, rules are grouped and sorted to list the product class-based decomposition rules first, followed by product-based rules. Within these groups, rules are sorted by priority and then by modification date.
For details on how technical bundles affect grouping, see. Technical Bundles
- Click Add Decomposition Rule and enter a unique name.
- Enter a unique name for the decomposition rule.
-
Enter the priority. The lower the number, the higher the priority.
When you configure two decomposition rules that map to the same target, Dynamic Revenue Orchestrator writes data from the rule with the lowest number to the destination product. If two decomposition rules have the same priority, then the most recently modified rule takes precedence.
-
Enter a destination product.
The source product or product classification decomposes to the destination product.
-
Save your work:
- To save and view the details page for the rule, click Save.
- To save and then define conditions for when the rule runs during fulfillment, click Save & Add Execution Rules. See Define Execution Rules for a Decomposition Rule.
You can map fields and attributes between the commercial and technical products of your decomposition rules, so that the fulfillment line items inherit data from the source products. See Define Field and Attribute Mapping.
