
Work with the FSC Portal Home Page
The Financial Services Client Portal home page and tiles are ready to brand and personalize for your Experience Cloud site.
Required Editions
| Available in: Lightning Experience |
| Available in: Professional, Enterprise, and Unlimited Editions |
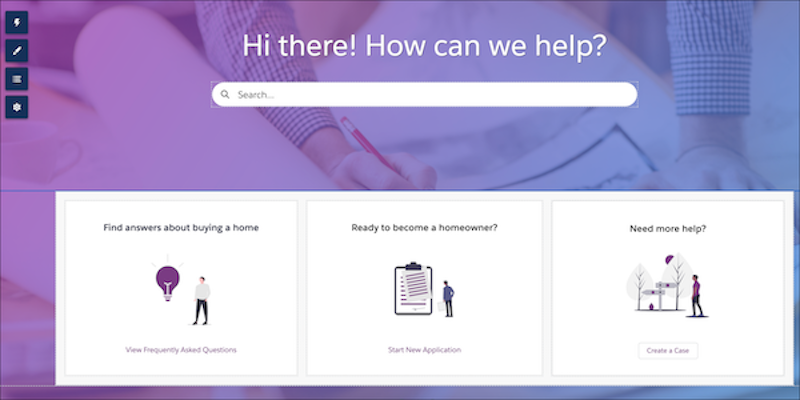
Using Experience Builder, you can:
- Add your own logo, colors, font, and copyright so that the Client Portal site matches your company’s branding and is instantly recognizable to your site members.
- Add and apply branding sets and optionally select audiences for specific branding sets.
- Edit page menus, navigation links, and component placement.

Note The FSC Portal components, menus, navigation, and linked pages allow thorough thematic
branding and layout modification but require minimal flow configuration. The prebuilt
components, navigation, and flows support self-guided loan application and financial account
customer journeys.

Example From Setup, in the Quick Find box, enter Digital Experiences,
and then select All Sites. On the All Sites page, click
Builder next to your Client Portal site.
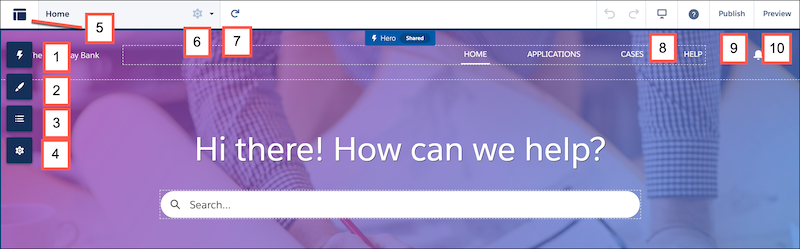
- Drag additional Lightning components as needed onto your page. The three portal tiles contain prebuilt, self-guided flows that are customer-ready.
- Theme the site to match your organization’s brand and style. Upload and manage branding sets and optionally assign audiences to each set.
- View all the components on the current page. To brand or change a component’s properties, select the component.
- Edit site settings and accept updates to your site’s template.
- Use the Experience menu to:
- Navigate to the currently live version of your site.
- Open Experience Workspaces or Experience Management to manage site analytics, login, registration, reputation, topics, and other settings.
- Return to Setup.
- Navigate to the site page that you want to edit using the Pages menu and Page Variation menu. Customize the Hero, Header, and Footer elements and menus. Manage, create, delete, and set the visibility of pages in Page Properties for each page.
- Refresh the current page.
- Preview your site on different devices.
- Publish your changes to make your updates available to everyone in your site.
- Preview the site in a new browser window.
Did this article solve your issue?
Let us know so we can improve!
