
Loading
Feature degradation | Gmail Email delivery failureRead More
Table of Contents
Select Filters

          No results
          No results
          Here are some search tips

          Check the spelling of your keywords.
          Use more general search terms.
          Select fewer filters to broaden your search.

          Search all of Salesforce Help
          Schedule an Appointment with Multiple Resources

          Schedule an Appointment with Multiple Resources

          Ensure that all relevant resources are available for patient appointments. Use the Multi-Resource Appointment option on the Appointment Management console to schedule an appointment with two providers or with a single provider and a single asset. Find the common open time slots for selected providers, clinics, rooms, equipment, or other assets. Designate provider attendance as mandatory or optional, and conveniently book all the resources at the same time.
          Required Editions

          Available in: Lightning Experience

          Available in: Enterprise and Unlimited Editions with Health Cloud

          User Permissions Needed
          To schedule appointments: Health Cloud Appointment Management
          To use the home page:

          Omnistudio User permission set

          OR

          Omnistudio Admin permission set

          1. From the patient’s account page or a clinical service request page, open the Appointment Management console.
          2. If your console shows an appointment list, click Schedule Appointments.
          3. If your console shows appointment workflows, click Start Multi-Resource Scheduling.
          4. Select a visit type. Ask your patient about the purpose of the appointment. The patient’s answer helps you choose the correct visit type.
          5. Verify the Scheduling Mode is set to Multi-Resource Appointment.
          6. Select the patient’s time zone if it's different from your time zone.
          7. Enter a facility and add appointment resources, which are either providers, assets, or a provider and an asset.
            If a selected provider’s attendance is optional, deselect Required on the provider card. The console shows available time slots only for required providers.
            By default, you can book up to two required resources per appointment, such as two providers or a provider and an asset such as a room.
          8. Select a time.
            If you’re scheduling a series of related appointments, click Next, and then repeat these steps.
            If you switch a provider’s attendance from optional to required, also select a time slot before you click Next or Previous. If you switch it from required to optional, deselect their time slot. Otherwise the console doesn’t save your change to the Required setting.
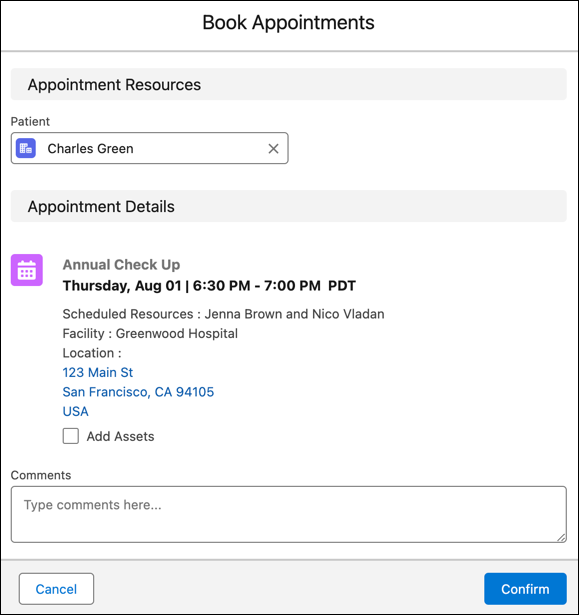
          9. Review the appointment details.
            To add non-bookable assets such as a wheelchair or cane to an appointment, select Add Assets. Then look up and select up to five assets.
            Add extra details in the Comments field.
            Confirmation screen for a multi-resource appointment
          10. Confirm your changes.
           
          Loading
          Salesforce Help | Article