
You are here:
Create a Small Group Quote in the Group Benefits App
Walk through the steps to upload census data for a small group plan, create a quote, and generate a quote document.
Required Editions
| Available in: Lightning Experience |
| Available in: Enterprise and Unlimited Editions with Health Cloud, the Insurance managed package, and the Insurance Industries Extension managed package |
| User Permissions Needed | |
|---|---|
| To use the Group Benefits workflows: | Industries Group Benefits User permission set |
Your Salesforce admin customizes the Group Benefits app to suit your business requirements, so your small group quote workflow can vary from what we describe.
-
Click the small group quote action in the Action Launcher on the Group Benefits app home
page, or from a record page such as an account or opportunity.
Or start the Small Group Quote workflow from a tab on a record page such as an account or opportunity.Your Salesforce admin can set up the small group workflow on different pages and tabs.
- Enter a broker related to the quote.
- Enter the business account that represents the employer offering group insurance. You can select an existing account or create an account.
-
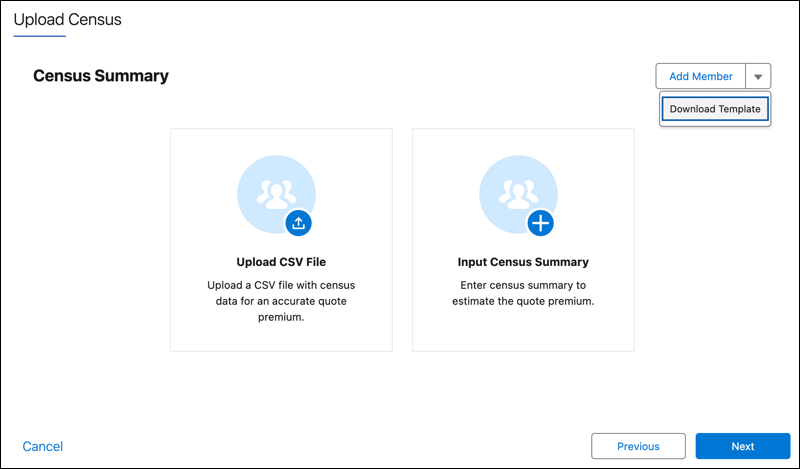
Enter group census information for quoting.
You can enter summary information about the group or you can upload a group census in .csv format.If you haven’t formatted census data for uploading, click the Download Template action to download a spreadsheet template to use for census data uploads.
 After you upload a census, browse through details about group members, dependents, and plan selections. Add, edit, or delete participant data as needed.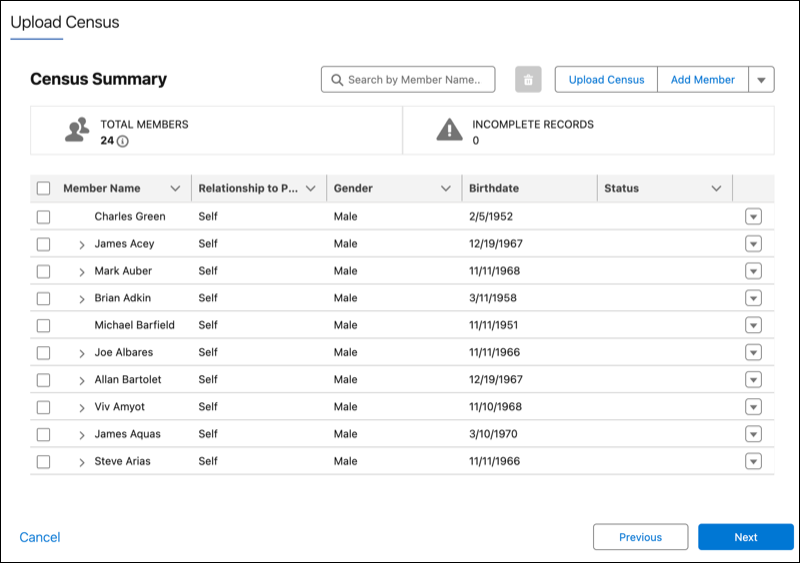
-
Select insurance plans.
- Apply filters to narrow the list of plans by type and subtype.
- Configure attributes for each plan.
- Add or remove plans from your cart.
- Review selected plans.
-
After the quote is created, select options to generate a quote document, view the account
record, or view the quote record.
Find the quote document in .pdf and .docx format in the quote record, in the Files related list.
Did this article solve your issue?
Let us know so we can improve!
