You are here:
Set Up Constraint Rules Engine
Set up the Constraint Rules Engine rule engine by creating the ConstraintEngineNodeStatus custom field on Quote Line Item object, updating the InsuranceContext context definition to map the field, and adjusting your procedure plan definition so that Insurance quotes use Constraint Rules Engine.
Required Editions
| Available in: Lightning Experience |
| Available in: Developer, Enterprise, and Unlimited Editions of Revenue Cloud where Product Configurator is enabled |
| Permission Set Name | Description |
|---|---|
| Product Configuration Constraints Designer | Create and manage constraint types and rules in Configurator with Constraint Rules Engine. |
Create the ConstraintEngineNodeStatus Custom Field
Before your rule designers can create advanced configuration rules and sales reps can use them, you must create the ConstraintEngineNodeStatus custom field on the Quote Line Item object. Constraint Rules Engine uses the fields to store data for internal processing.
- From the object management settings for Quote Line Item, go to Fields & Relationships.
- Click New.
- Select Text Area (Long), and then click Next.
- Enter Constraint Engine Node Status as the field label.
- Enter 5000 as the length.
- Enter ConstraintEngineNodeStatus as the field name.
- Click Next.
-
For the profiles whose users use Constraint Rules Engine, make sure that the Read-Only
option is deselected.
 Note For Customer Community and Partner Community users to run constraints, give these profiles also access to this field. Select the Visible option and deselect the Read-Only option for the profiles.
 - Click Next.
- Deselect the page layouts, and save your changes.
Update the InsuranceContext Context Definition
After you create the ConstraintEngineNodeStatus field, update your extended InsuranceContext context definition to use the field. If you don’t have the extended context definition, extend InsuranceContext before you add the attribute.
- From Setup, in the Quick Find box, enter Context Service, and then select Context Definitions.
- Edit your extended InsuranceContext context definition.
- Select the SalesTransactionItem node under SalesTransaction.
- Add the ConstraintEngineNodeStatus attribute to the InsuranceItem node with INPUTOUTPUT as the type and STRING as the data type.
- Click Next.
- Select the SalesTransactionItem node under SalesTransaction.
- Add a new tag ConstraintEngineNodeStatus__c for ConstraintEngineNodeStatus__c.
- Save your changes.
-
Adjust the InsuranceContext context definition mapping to include the custom field.
- Select the Map Data tab and then edit QuoteEntitiesMapping.
-
In the Map Data tab, make these updates.
- Edit QuoteEntitiesMapping and then map the ConstraintEngineNodeStatus attribute under SalesTransactionItem to the ConstraintEngineNodeStatus__c field on the QuoteLineItem object.
- In QuoteEntitiesMapping, review the context mappings and make sure that the TransactionType attribute on the SalesTransaction node is mapped to the TransactionType field on the Quote object.
- Save your changes and activate your context definition.
Update Procedure Plan Definition
Define rule-based criteria for the Advanced Configurator transaction processing type in your existing procedure plan definition for insurance.
Make sure you've already set up a procedure plan definition with:
- Process Type: Insurance
- Primary Object: Transaction Processing Type
- At least one Pricing Procedure section
- Rule-based resolution
- From Setup, in the Quick Find box, find and select Procedure Plan Definitions.
- Open the procedure plan definition you've configured for Insurance.
- In the Procedure Plan Sections area, locate the pricing procedure section.
- Confirm that the Resolution Type is set to Rule-Based.
-
Add a new condition to support the Advanced Configurator transaction processing
type:
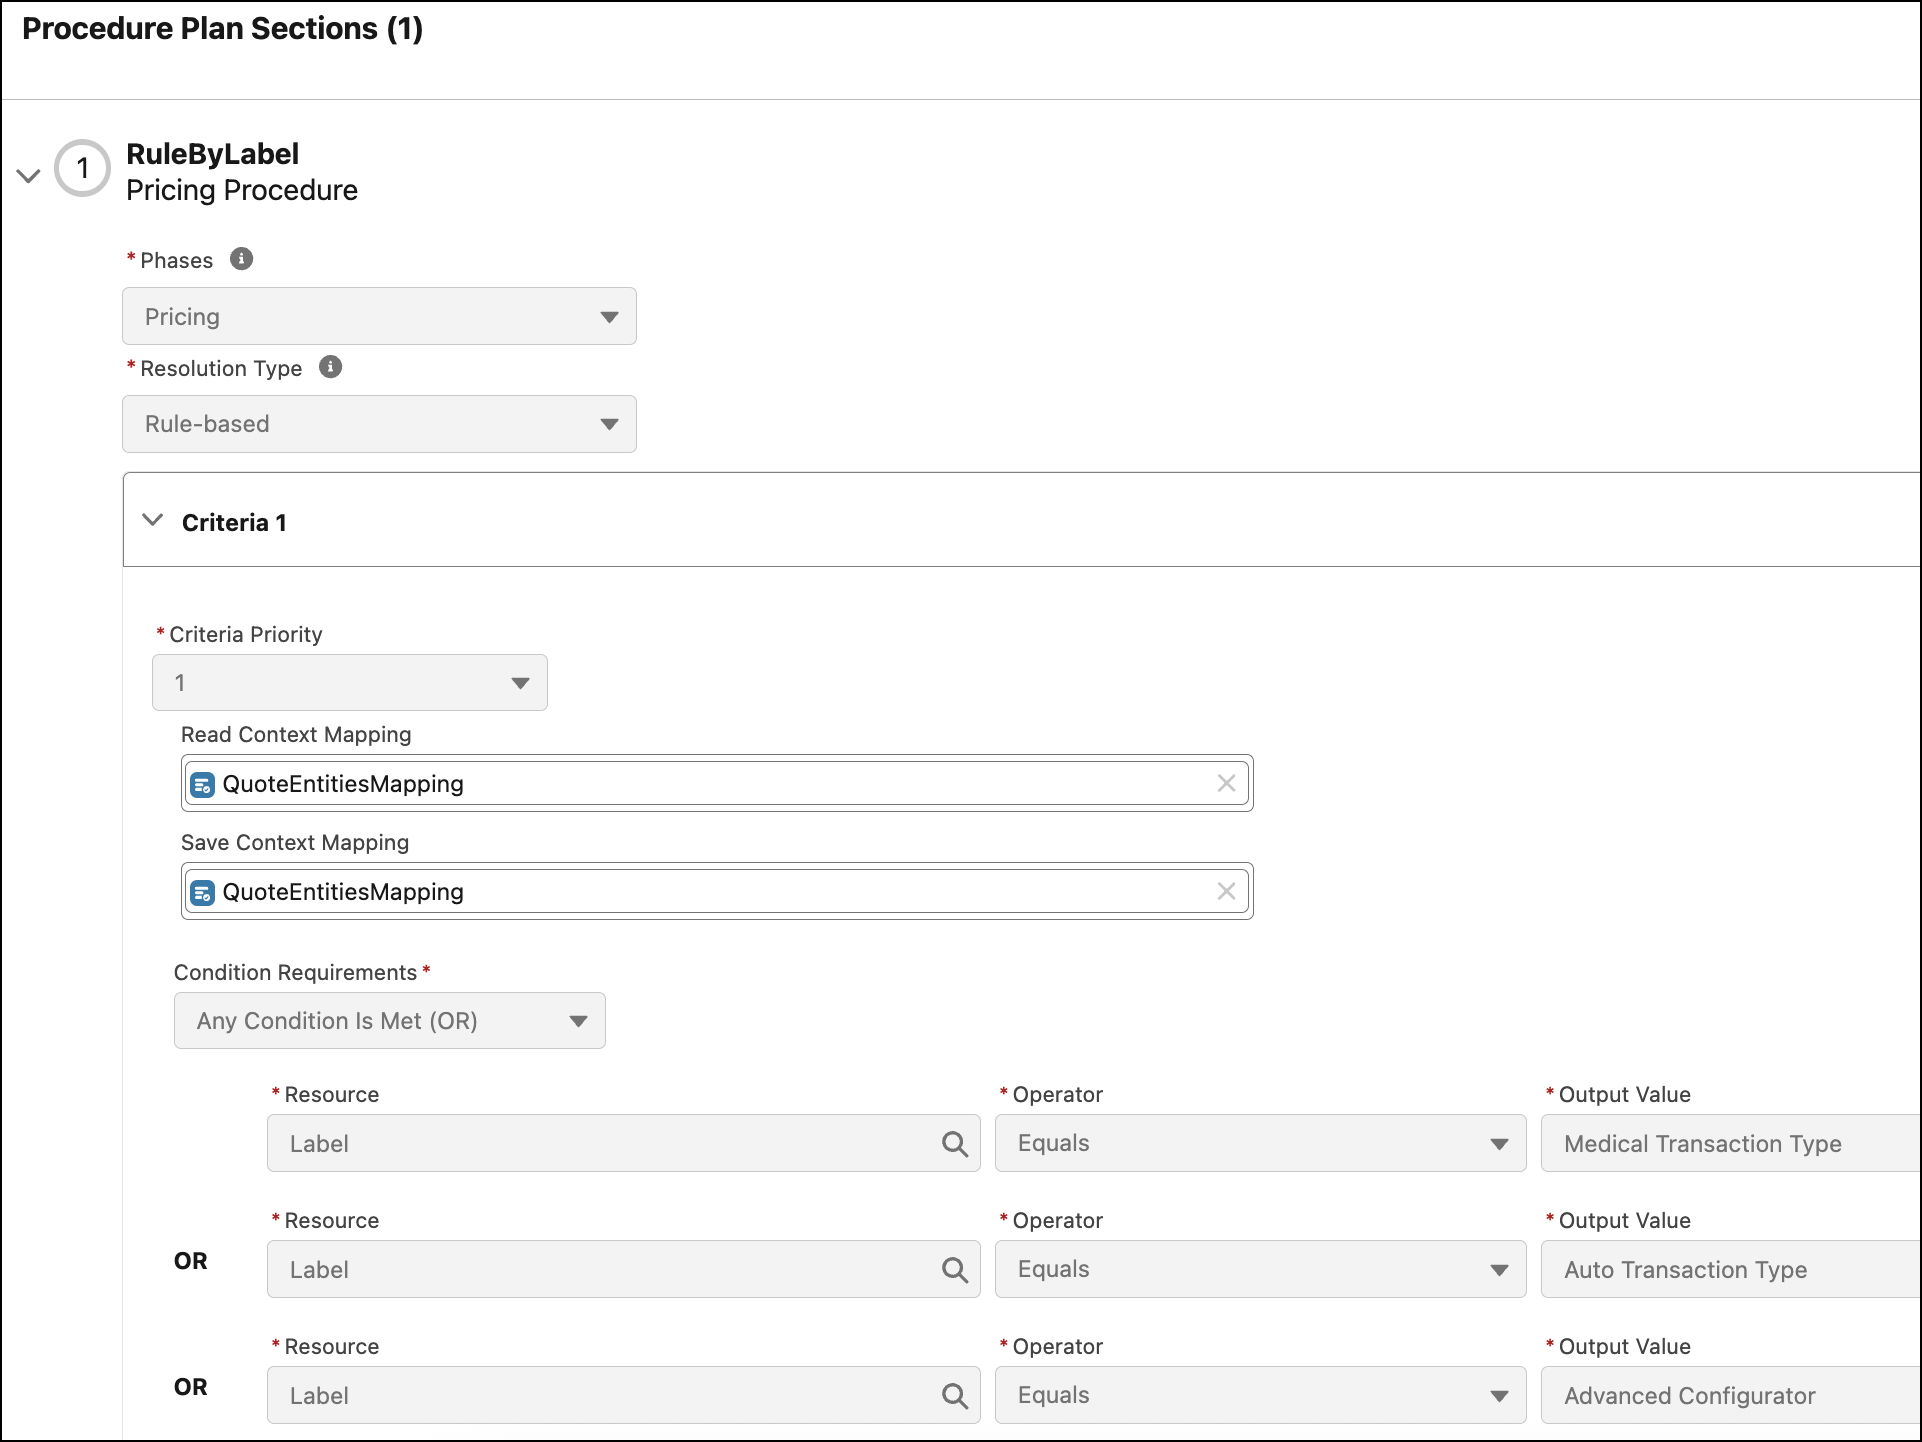
resource operator output value Label Equals Advanced Configurator In the condition, specify the DeveloperName of the Advanced Configurator TPT. - Save and activate your procedure plan definition.
Enable Constraint Rules Engine
Enable rule designers to create advanced configuration rules and constraints, and help sales reps run the rules for transactions (quotes).
- From Setup, in the Quick find box, enter Revenue Settings, and then select Revenue Settings.
-
Turn on Set Up Configuration Rules and Constraints with Constraint Rules Engine.
When you enable Constraint Rules Engine, AdvancedConfigurator is the default engine for transaction types in your org.
