
You are here:
Configure an Auth Provider for Salesforce Contracts Using Guided Setup
Set up an Auth Provider in Salesforce to establish a secure connection with Microsoft 365 and Azure. This process includes creating or selecting an auth provider, configuring the callback URL, managing email notificatinos, and testing the connection to ensure successful integration.
Required Editions
| Available in: Lightning Experience |
| Available in: Professional, Enterprise, Unlimited, and Developer editions. |
| User Permissions Needed | |
|---|---|
| To access the Microsoft 365 and Azure Integration Guided Setup | CLM Admin User |
Note Avoid refreshing your browser during the guided setup, as doing so may disrupt the Auth
Provider configuration.
-
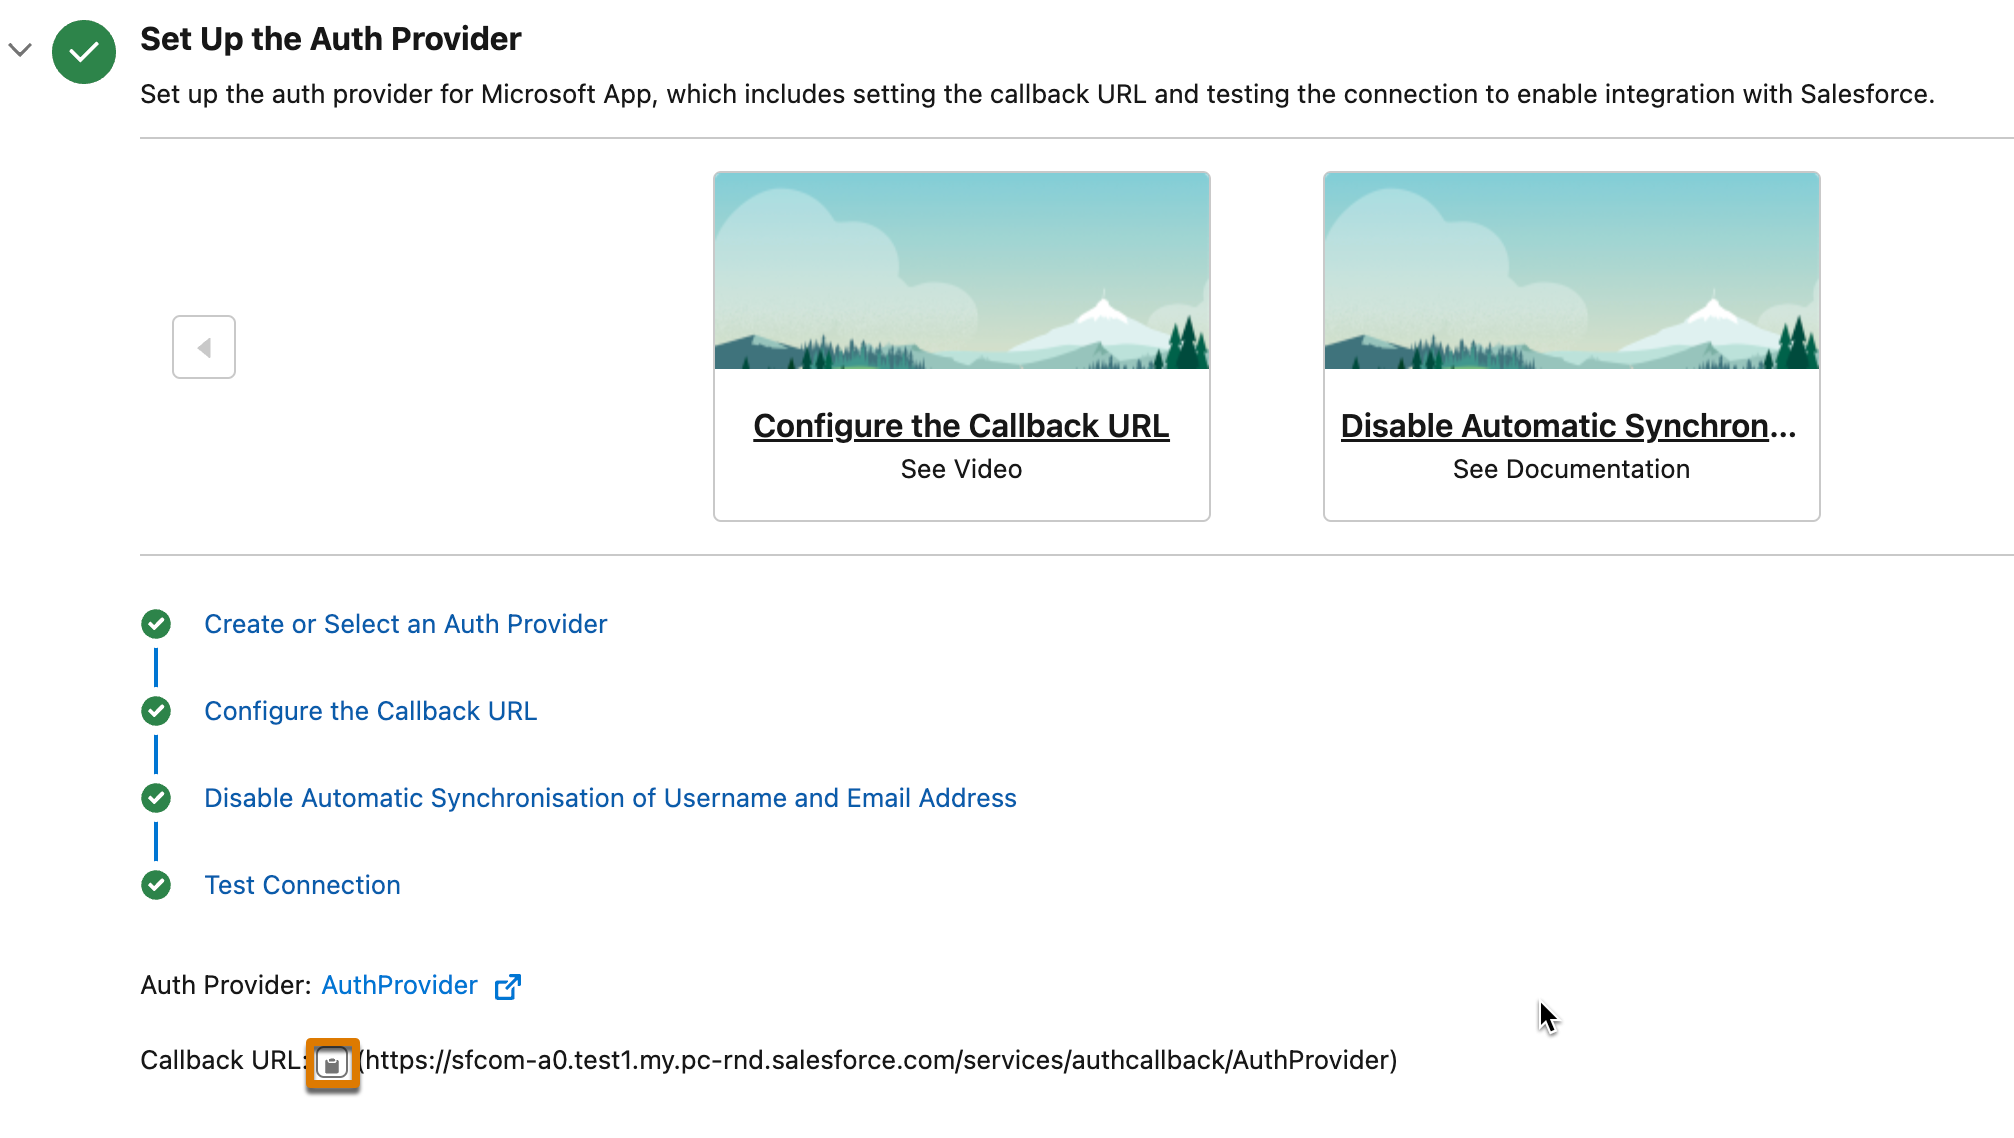
In the
guided
setup, access the Auth Provider Setup by expanding Set Up the
Auth Provider.

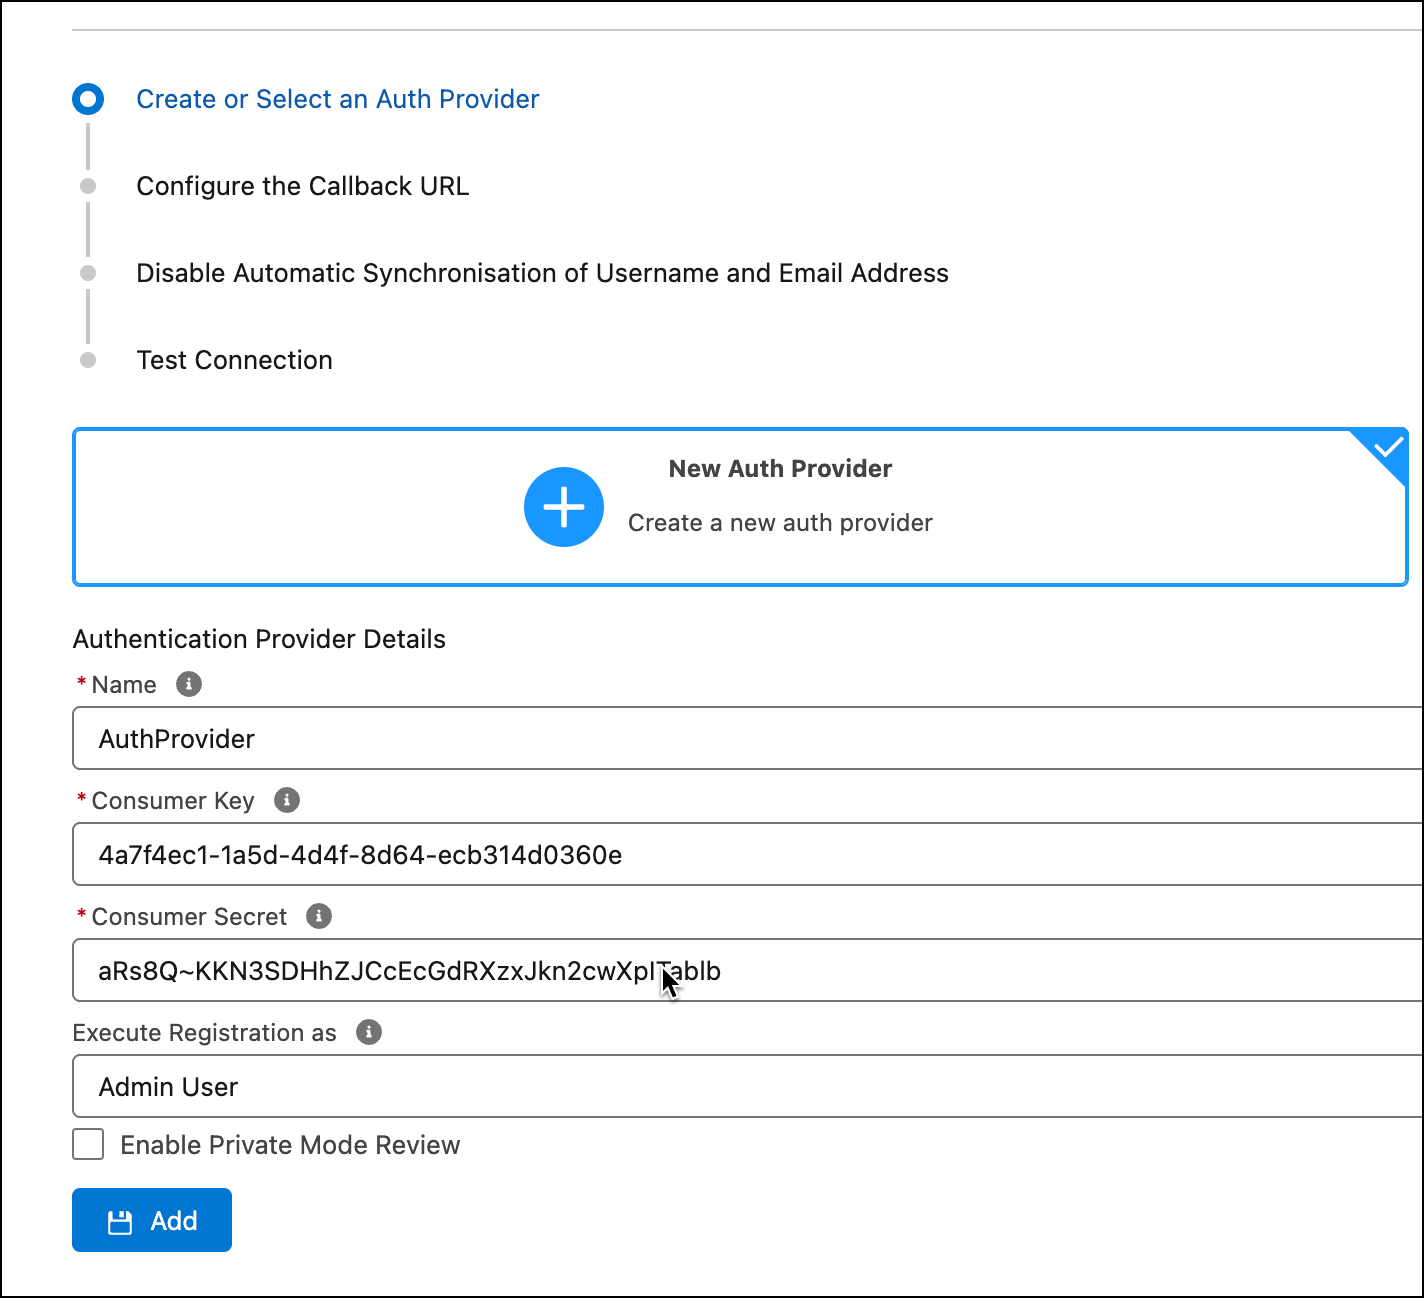
- Create or select an Auth Provided:
-
Configure
the
callback URL:
-
In the Guided Setup, click the copy icon to copy the callback
URL.
- Open your Microsoft Azure account, and click Overview.
- Click Add a Redirect URL next to Redirect URLs.
- Select Add a platform > Web.
- Paste the callback URL in Redirect URIs.
- Select Access tokens (used for implicit flows) and ID tokens (used for implicit and hybrid flows)
- Click Configure.
- If you have set up a partner community, go to the Auth Provider in Salesforce org.
- From the Experience Cloud Sites section, copy the callback URL.
- Open your Microsoft Azure account, and click Authentication.
- Go to Web > Redirect URLs, and click Add URL.
- Enter the Experience Cloud Site callback URL (copied previously), and save your changes.
-
In the Guided Setup, click the copy icon to copy the callback
URL.
-
Test the Connection:
When testing the connection, you'll be prompted to provide a business justification and must request consent from a Global Administrator. The Global Administrator will receive an email with the request details and can grant the required consent. If you continue to set up a Named Credential without obtaining consent, you'll see the same consent prompt again during the Named Credential authentication step, where you'll need to provide the business justification once more.
-
Click Test Connection to verify the configuration.
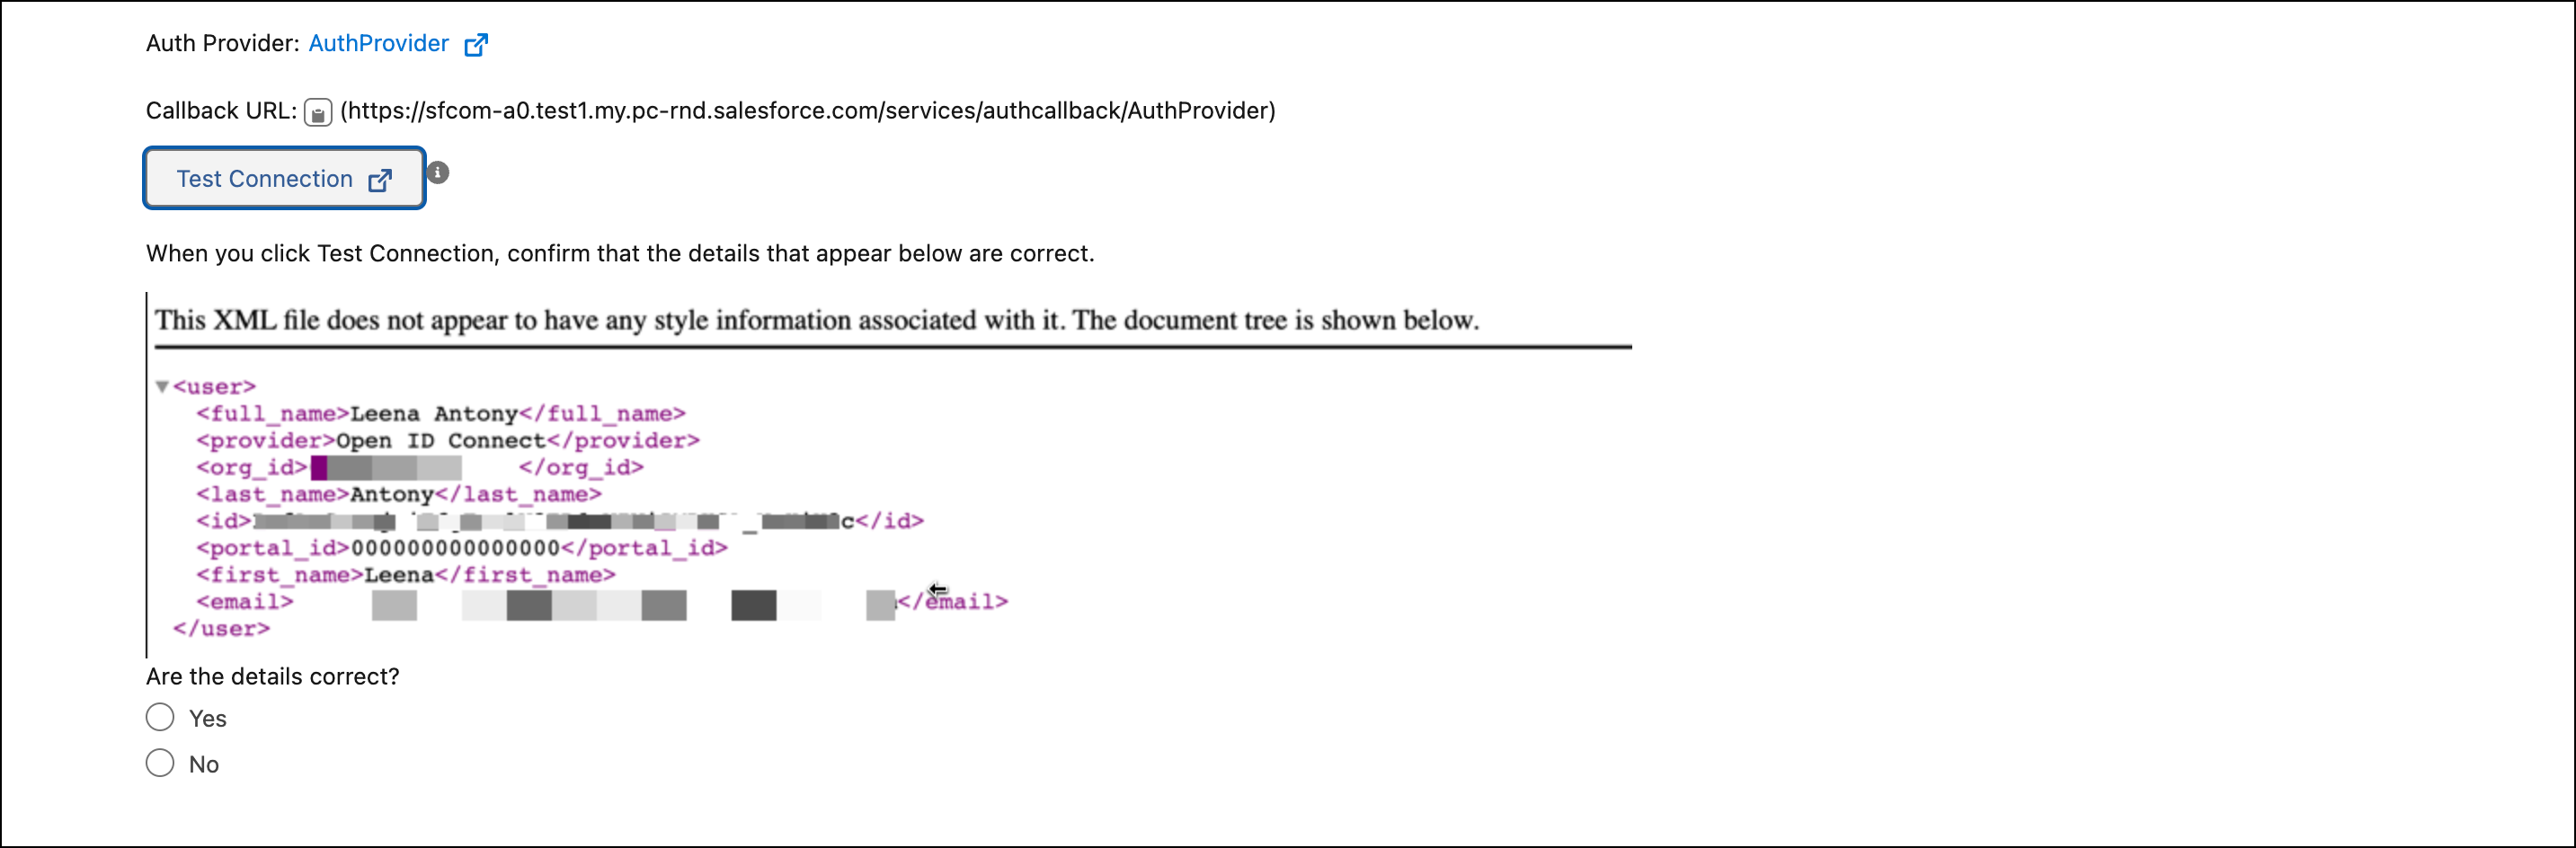
- Confirm that all details, such as name, provider, and ID, are correctly populated. If the details that appear are similar to the following image, select Yes.
-
If you encounter an error, select No. Check the error messages and
follow the steps mentioned in the Guided Setup to resolve each issue.
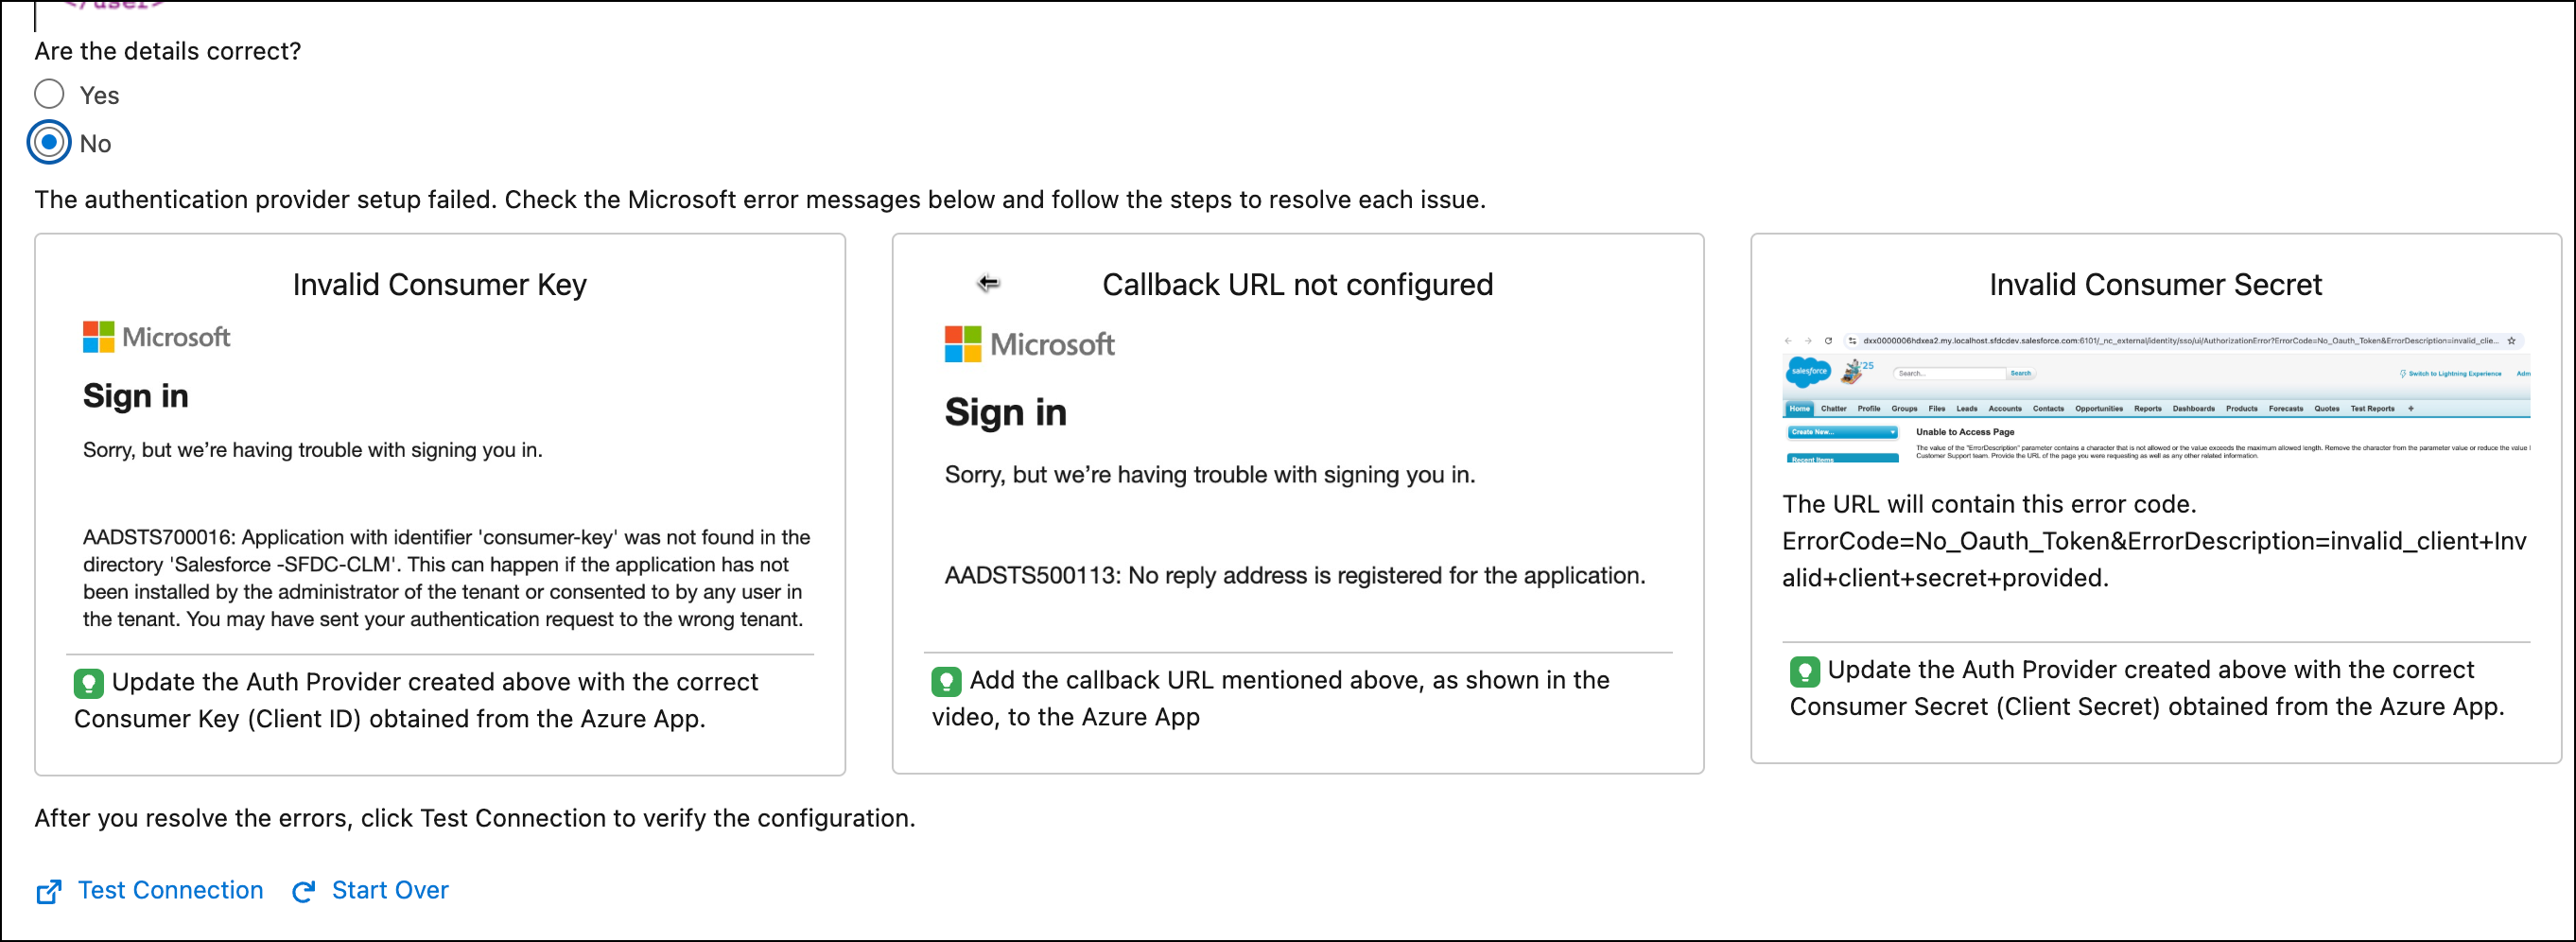
- To test the connection after you fix the errors, click Test Connection. To reset Auth Provider details, click Start Over.
- Test the connection and, when the connection is successful, click Mark as Done.
-
Click Test Connection to verify the configuration.
- Disable Automatic Synchronization of Username and Email Address Using Guided Setup
By default, when you link Salesforce to Microsoft Azure, Salesforce automatically updates your Salesforce username and email address with your Microsoft Azure account details. You can turn off this automatic update to retain the username and email address that you have used in Salesforce.
Did this article solve your issue?
Let us know so we can improve!