Create a SharePoint Site Manually Through Minimum Privilege Setup
Create a SharePoint site to store document templates and contract documents. When you
create a SharePoint site, use the same user details that you used for creating the Azure app. To
use an existing site, make sure you’re following it in SharePoint so it appears in the site
list.
To add members, search for and select the admin user.
Users added to the site have access to all the folders and documents saved on the site.
Salesforce recommends only the Microsoft Admin to be a member to preserve the integrity of
the documents.
Click Finish.
Extract the drive ID.
Go to Graph
Explorer and log in with your Microsoft credentials.
When retrieving the site ID in Microsoft Graph Explorer, sign in with the same
least-privilege integration user.
In the Request body, select GET, v1.0, and
to retrieve your site details, paste
https://graph.microsoft.com/v1.0/me/followedSites.
Click Run query.
From the Response, copy and save the site ID for the SharePoint site that you created
earlier.
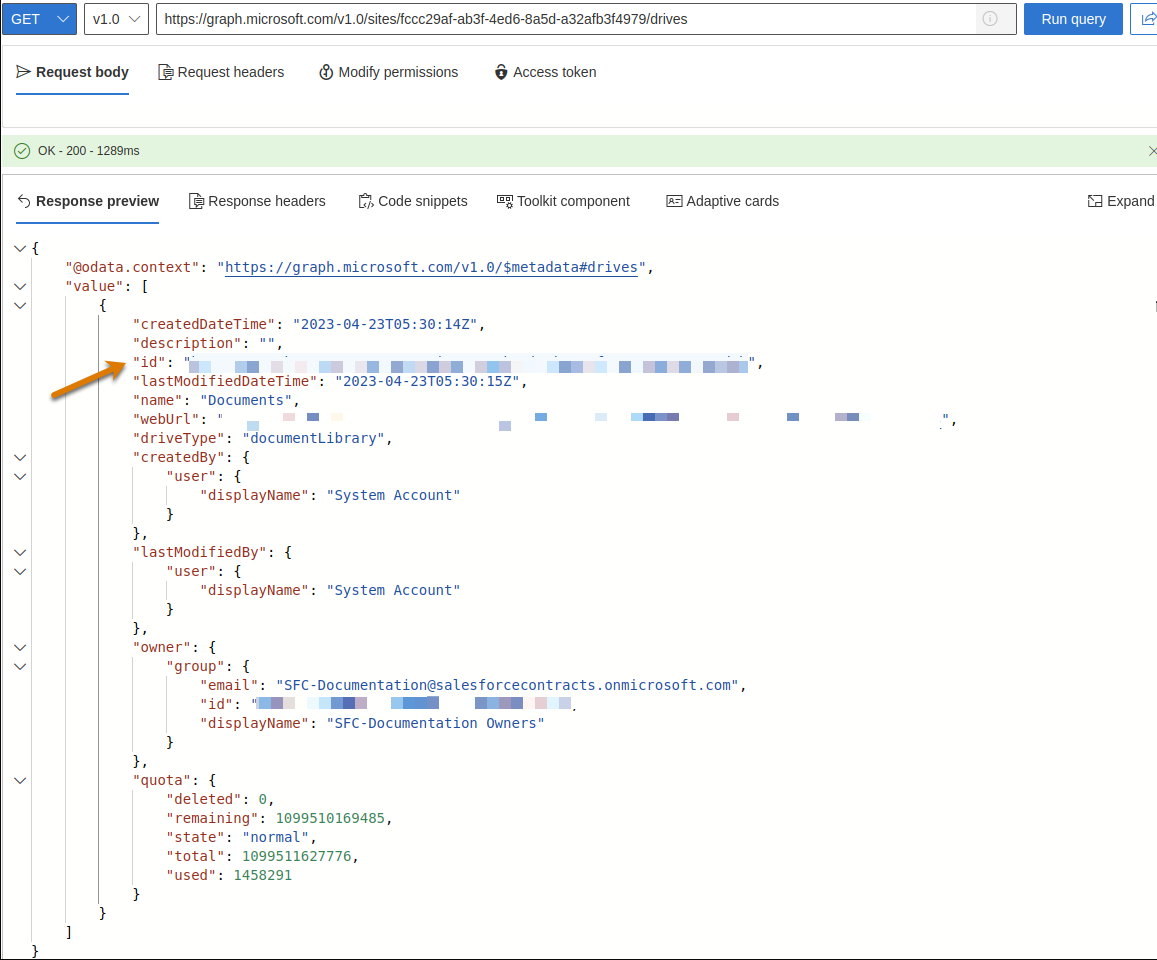
In the graph-explorer, select GET, v1.0, and paste
https://graph.microsoft.com/v1.0/sites/<SITE ID>/drives.
Replace the <Site ID> placeholder with the site ID that you copied in step
2d.
Click Run query.
From the Response, copy and save the drive ID. Use the drive ID while configuring the
external document storage.
Did this article solve your issue?
Let us know so we can improve!
Loading
Salesforce Help | Article
Cookie Consent Manager
General Information
Required Cookies
Functional Cookies
Advertising Cookies
General Information
We use three kinds of cookies on our websites: required, functional, and advertising. You can choose whether functional and advertising cookies apply. Click on the different cookie categories to find out more about each category and to change the default settings.
Privacy Statement
Required Cookies
Always Active
Required cookies are necessary for basic website functionality. Some examples include: session cookies needed to transmit the website, authentication cookies, and security cookies.
Functional Cookies
Functional cookies enhance functions, performance, and services on the website. Some examples include: cookies used to analyze site traffic, cookies used for market research, and cookies used to display advertising that is not directed to a particular individual.
Advertising Cookies
Advertising cookies track activity across websites in order to understand a viewer’s interests, and direct them specific marketing. Some examples include: cookies used for remarketing, or interest-based advertising.