You are here:
Show All Displays on a New Page
To launch a new screen that shows a scrollable list of all the display record, add a button with icon to the Display cockpit card and assign action to the button. The section of the screen that shows the compilation of displays is the master list or parent list.
Required Editions
| Available in: Enterprise and Unlimited Editions where Consumer Goods Cloud is enabled |
| User Permissions Needed | |
|---|---|
| To add and configure a master-detail page | Customizer, Developer |
Add the Show All Displays Button
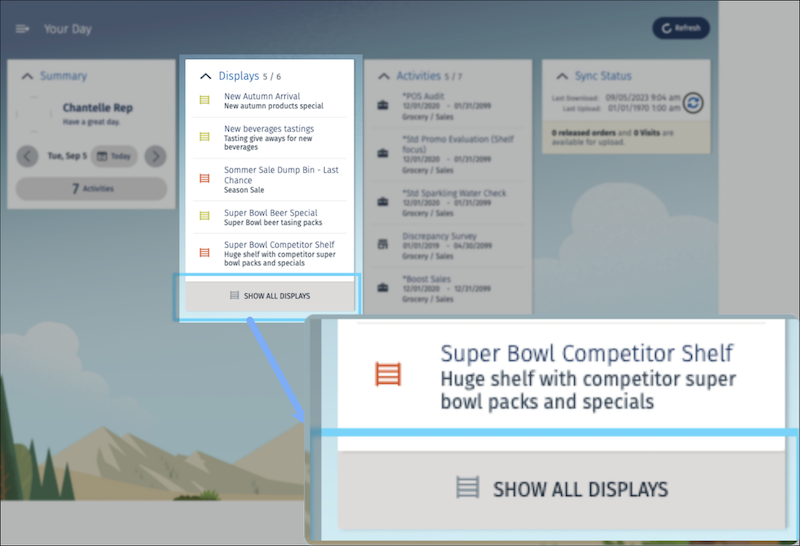
To launch a new page, add and configure the Show All button on the Display cockpit card.
- Add a LinkBar section to the card container in $workspace/src/Application/PR/Application_Cockpit/Application_CockpitUI.userinterface.xml.
-
Add an image button with a label binding and an image binding to the link bar. Use these
details:
Button label SHOW ALL DISPLAYS ID of the icon to use in button Shelf.png Button pressed event name for the button CardDisplay_showAllDisplays </CockpitList> <LinkBar> <ImageButton name="ShowAllDisplaysButton"> <Bindings> <Resource target="Text" type="Label" id="ShowAllDisplaysLink" defaultLabel="SHOW ALL DISPLAYS" bindingMode="ONE_WAY" /> <Resource target="Image" type="Image" id="Shelf" defaultImage="Shelf" /> </Bindings> <Events> <ButtonPressedEvent event="CardDisplay_showAllDisplays" /> </Events> </ImageButton> </LinkBar> </CardContainer> <!-- Display Card END--> - Save your changes.
-
To test the changes, build the contracts by running this command.
sf modeler workspace build -
To view the changes in the simulation app, start the server by running this command.
sf modeler workspace server start -
Register the event in the VIEW action in
$workspace/src/Application/PR/Application_Cockpit/Application_CockpitProcess.processflow.xml.
<!- Card: Display -> <Event name="CardDisplay_loadData" action="CardDisplay_loadData" /> <Event name="CardDisplay_showAllDisplays" action="CardDisplay_loadD -
Use an action of action type PROCESS to call another process. To launch the master
detail page, add a process action by using these details.
action name CardDisplay_loadDisplayDetails actionType PROCESS process MyDisplay::DisplayDetailsProcess <Action name="CardDisplay_loadDisplayDetails" actionType="PROCESS" process="MyDisplay::DisplayDetailsProcess"> </Action> <!- Card: Display End-->
You can use an action of PROCESS action type to call another process with a VIEW action to show another Ul page. When you click the Back button in the new Ul page, the system navigates you back to the caller process.
Create the Master Page
Define the master or parent and detail page pattern on the new page and then configure the master section.
-
To define the UI contract of the new page, add the
MyDisplay_DisplayDetailsUI.userinterface.xml contract at
$workspace/src/MyDisplay/PR/MyDisplay_DisplayDetails by running the
command
sf modeler workspace add -
Configure the master-detail page pattern in the page header by using these details.
-
pagePattern:
MasterDetailSectionPageto use master (master list) detail (detail section) pattern - masterSectionFlex: Specify the value of the page reserved for the master list in percent. For example, 40.
- detailSectionFlex: Specify the value of the page reserved for the detail section in percent. For example, 60.
- title: Specify a static title for the master page header. For example, Display Details
<UIDescription name="MyDisplay::DisplayDetailsUI" schemaVersion="0.0.0.5"; <Page pagePattern="MasterDetailSectionPage" masterSectionFlex="40" detailSectionFlex="60"> <PageHeader> <Bindings> <Resource target="title" type="Label" id="DisplayDetailsTitle" defaultLabel="Display Details"/> </Bindings> </PageHeader> -
pagePattern:
-
To show the list of displays, define the master section by using this code.
-
Define a data source that points to the display list and use the GroupedList element to
specify the master list.
<Section sectionName="masterSection" sectionPattern="SingleAreaSection"> <Area areaName="mainArea" areaPattern="SingleElementArea"> <GroupedList name="displayList" master="true" dataSource="ProcessContext::DisplayList.items []"> <Items name="Items" itemPattern="displayDetailsDisplayListItems"> <ItemListLayout> <Tablet> <Default> <Col width="1em" layoutType="Image" bindingId="Icon" /> <Col flex="1"> <Row layoutType="itemIdentifierCockpit" bindingId="Row_Name" /> <Row layoutType="itemSecondaryCockpit" bindingId="Row_Description" /> </Col> </Default> </Tablet> <Phone> <Default> <Col width="lem" layoutType="Image" bindingId="Icon" /> <Col flex="1"> <Row layoutType="itemIdentifierCockpit" bindingId="Row_Name" /> </Col> </Default> </Phone> </ItemListLayout> <Bindings> <Binding target="Row_Name" type="Text" binding=".name" bindingMode="ONE_WAY" /> <Binding target="Row_Description" type="Text" binding=".description" bindingMode="ONE_WAY" /> <Binding target="Icon" type="Image" binding=".iconId" bindingMode="ONE_WAY" /> </Bindings> </Items> </GroupedList> </Area> </Section> - Create an empty area element as a placeholder for the detail section.
<Section sectionName="detailSection" sectionPattern="SingleAreaSection"> <Area areaName="mainArea" areaPattern="GroupedElementsArea"> </Area> </Section> -
Define a data source that points to the display list and use the GroupedList element to
specify the master list.
-
To load the display list and render the new UI page, configure the
MyDisplay_DisplayDetailsProcess.processflow.xml process contract at
$workspace/src/MyDisplay/PR/MyDisplay_DisplayDetails.
-
In
defaultAction, enterShowDisplayDetails.When the process to render the UI starts, the system first calls thedefaultAction. -
To store the display list, enter
DisplayListinnameandLoMyDisplaysintype.
<Process name="MyDisplay::DisplayDetailsProcess” defaultAction="ShowDisplayDetails" schemaVersion="0.0.0.5"› <Entry> <ProcessContext> <Declarations> <Declaration name="DisplayList" type="LoMyDisplays" /> </Declarations> <Parameters> </Parameters> </ProcessContext> -
In
-
To load the display list in ProcessContext::DisplayList, use an entry action.
Entry actions are called when the process starts and are independent of any conditions or events. You can define multiple entry actions.
- Reuse the display list LoMyDisplay and store it in the process variable.
- Define a Return subnode for the entry action.
</ProcessContext> <EntryActions> <Action name="loadDisplayList" actionType="LOAD" type="LoMyDisplays" <Return name="ProcessContext::DisplayList" /> </Action> </EntryActions> </Entry> -
To link the process with the UI definition, define the VIEW action.
The UI is referenced via the name we used in the UI contract.
<Body> <Actions> <!-- View Action --> <Action name="ShowDisplayDetails" actionType="VIEW"> <UIDescription>MyDisplay::DisplayDetailsUI</UIDescription> <Events> </Events> </Action> </Actions> </Body> </Process> - Save your changes.
-
To test the changes, build the contracts by running this command.
sf modeler workspace build - Refresh the simulator app.
- On the Display card, click SHOW ALL DISPLAYS.
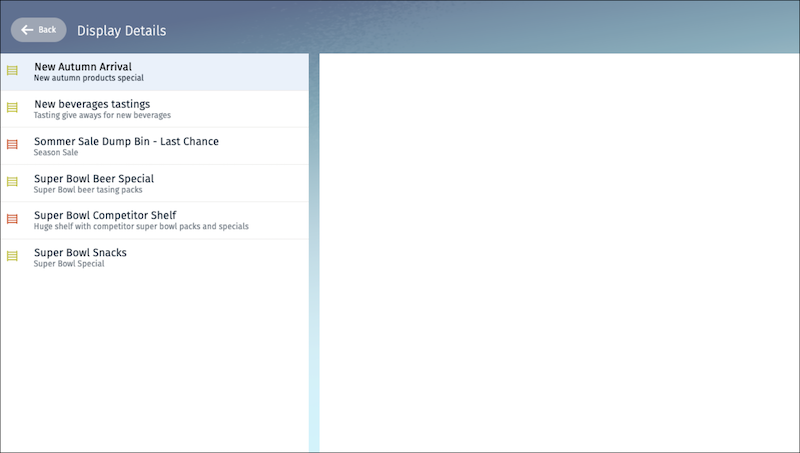
The new UI page opens as shown.