
You are here:
Track Activity on Marketing Landing Pages
To track visitor activities on your marketing landing pages, install the required integration on the default Marketing Landing Pages site. To protect the privacy of your landing page visitors, collect their consent to track with a custom consent banner that you design in Salesforce CMS. You’re responsible for complying with privacy laws and regulations applicable to your business.
Required Editions
| Available in: Salesforce Enterprise and Unlimited Editions with Marketing Cloud Next Growth or Advanced Edition |
| User Permissions Needed | |
|---|---|
| To configure external tracking: | Marketing Cloud Admin permission set |
| To create and publish a consent banner: | Marketing Cloud Manager permission set AND a CMS workspace contributor role of content admin or content manager |
Track Activity with a Consent Banner
First, design a banner in Salesforce CMS to use on all marketing landing pages. Then,
select the banner in Setup and add the required integrations to your Marketing Landing Pages
site. To track activity on a landing page that uses a custom domain, add a custom URL for
that domain in Setup and define the path as /lp.
- Create and publish a consent banner in Salesforce CMS.
-
Select the consent banner to use on landing pages.
- From Setup, in the Quick Find box, enter Landing Pages, and select Landing Page Tracking.
- In the banner section, click Select Banner.
- Select a banner and save your work.
-
Add the required integrations to your Marketing Landing Pages site in Digital
Experiences.
- From Setup, in the Quick Find box, enter All Sites, and select All Sites under Digital Experiences.
-
Next to Marketing Landing Pages, select Builder.
Marketing landing pages use the Experience Cloud Sites framework. This site operates behind the scenes. Don’t add content to it.
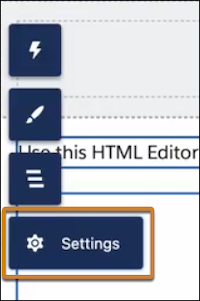
- Click Settings and select Integrations.
- On the Data Cloud integration, click Add to Site, and enable it.
- On the Data Cloud Web Tracking Consent Banner integration, click Add to Site, and enable it.
- To apply the banner you selected to your landing pages, click Publish.
Any time you make changes to the banner, publish the Marketing Landing Pages site again in Experience Cloud. To test the banner on a real page, create a landing page and view it in a web browser.
Enable Tracking Without a Consent Banner
To track activity without collecting consent, you can publish a code snippet to your landing pages.
- From Setup, in the Quick Find box, enter All Sites, and then select All Sites under Digital Experiences.
- Next to Marketing Landing Pages, select Builder from the Action column.
-
Set the Experience Builder security level to Relaxed CSP.
- Click Settings, and then select Security & Privacy.
- Click the Security Level dropdown menu and select Relaxed CSP: Permit Access to Inline Scripts and Allowed Hosts.
- Click Settings, and then select Integrations.
-
Find the Data Cloud integration, click Add to Site, and enable
it.
Don’t install the Web Tracking Consent Banner for Data Cloud integration.
- Click Settings, and then click Advanced.
- Click Edit Head Markup. Copy this code and paste it into the Head Markup code block:
- Save your work.
- To begin tracking activity, click Publish.
