
You are here:
Email Contacts that a User Selects on a Screen Example
This example uses an automatically triggered screen action to let users select an account and instantly view or select related contacts—all within a single screen. Then, it sends the selected contacts an email.
See Also
Create the Associated Autolaunched Flow to Get Records
Create the autolaunched flow that gets the contact records for the selected account.
- From the Automation app, click New.
- Click Autolaunched.
- Click Autolaunched Flow (No Trigger).
-
Click Create.
The new autolaunched flow opens in Flow Builder
-
Create a text input variable to store the account ID that's passed into the flow.
- Open Toolbox.
- Click New Resource.
- Select Variable.
- For API Name, enter inputAccountId.
- For Data Type, select Text.
- For Availability Outside the Flow, select Available for input.
- Click Done.
-
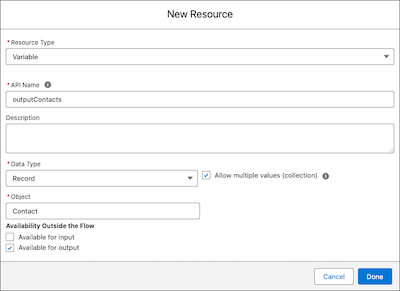
Create a record collection output variable to store the contact records to send back to
the screen flow.
- Open Toolbox.
- Click New Resource.
- Select Variable.
- For API Name, enter outputContacts.
- For Data Type, select Record.
- Select Allow multiple values (collection).
- For Object, select Contact.
- For Availability Outside the Flow, select Available for output.
- Click Done.
-
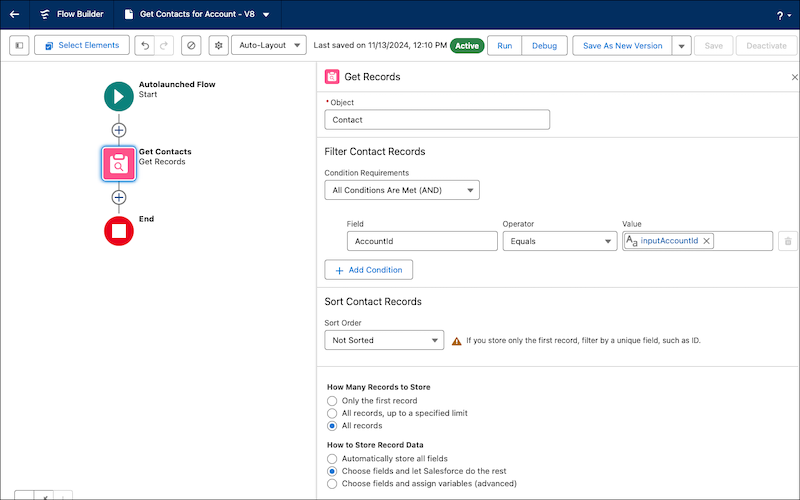
Add a Get Records element.
- Click the plus icon and select Get Records.
- For Label enter Get Contacts.
- For API Name, enter Get_Contacts.
- For Object, select Contact.
- In the Filter Contact Records section, for Field, clickAccountId, for Operator, click Equals, and for Value, click inputAccountId.
- For How Many Records to Store, select Only the first record.
-
For How to Store Record Data, select Choose fields and let Salesforce do the
rest, and then add the First Name, Last
Name, and Email fields.
We're storing only these fields because they're the ones that we want shown in the Data Table component. Only storing the fields that you need reduces loading times for your running user and makes your data safer. For more information about data safety in screen flows, see Data Safety When Running Screen and Autolaunched Flows in System Context.
-
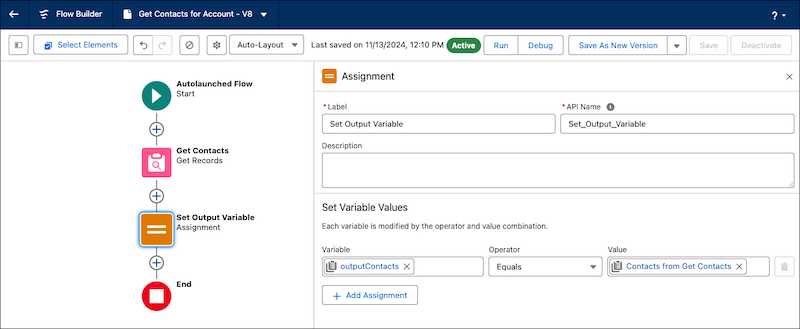
Add an Assignment element.
- Click the plus icon and select Assignment.
- For Label, enter Set Output Variable.
- For API Name, enter Set_Output_Variable.
- In the Set Variable Values section, for Variable, click outputContacts, for Operator, click Equals, and for Value, click Contacts from Get Contacts.
- Save the flow.
- For Label enter Get Contacts for Account, and for API Name, enter Get_Contacts_for_Account.
- Test and activate your flow.

Create an Input for the Screen Action to Send to the Autolaunched Flow
Create a screen flow that has a screen with a Lookup component on it to allow the running user to find and select an Account.
- From the Automation app, click New.
- Click Screen.
- Click Screen Flow.
-
Click Create.
The new screen flow opens in Flow Builder
-
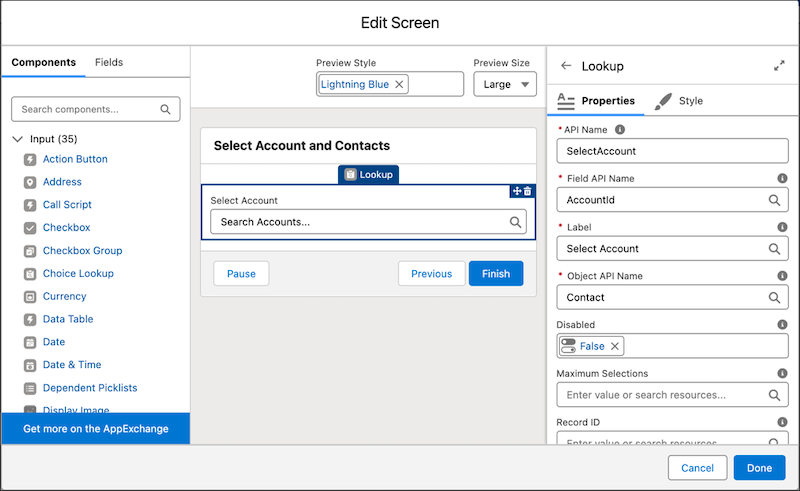
Add a Screen element.
- Click the plus icon and then select Screen
- For Label, enter Select Account and Contacts and let the API name autofill.
- In the Components menu, click Lookup.
- For API Name, enter Set Output Variable.
- For API name, enter SelectAccount.
-
For Field API Name enter AccountId.
AccountId is the API name of the Account Name lookup field on the Contact object that we want to copy functionality from
- For Label, enter Select Account.
-
For Object API Name, enter Contact.
Contact is the API name of the object that has the lookup field that we want to copy functionality from.
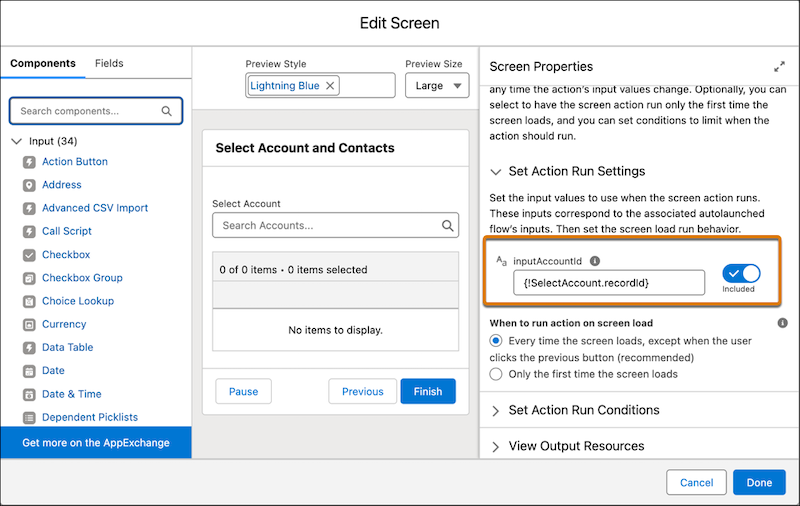
Set Up the Screen Action
Set up the screen action to get contacts for the selected account. You decide you want to trigger the screen action automatically as soon as the running user selects an account.
- Click the screen element header to open Screen Properties.
- Click Configure Screen Actions
- For Flow, select Get Contacts for Account
- For Label, enter Get Contacts for Account.
- For API Name, enter Get_Contacts_for_Account_Action.
-
In the Set Action Run Settings section, for inputAccountId, click the
switch to include the input. Then select the account that was selected in the Lookup
component. Select the SelectAccount screen component, and then click
recordId.
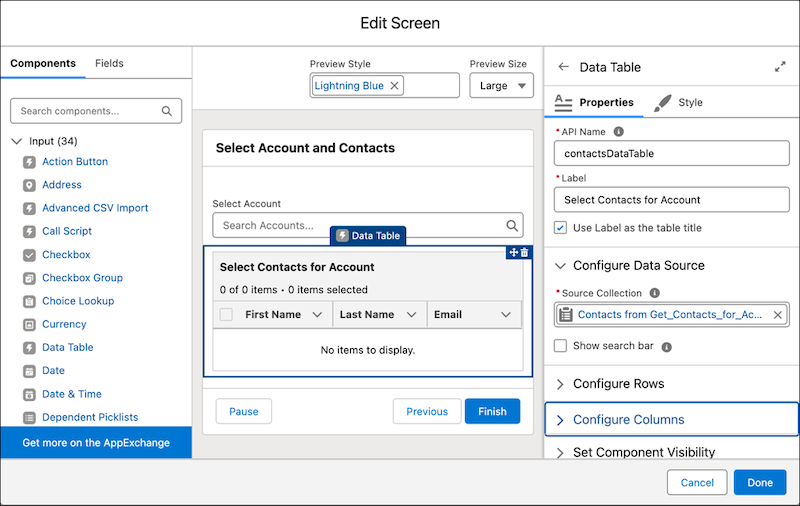
Use the Autolaunched Flow's Data in the Screen Flow
Use the contacts retrieved from the autolaunched flow to populate a Data Table component. Show the first name, last name, and email address of the contacts in the Data Table component.
- From the Components menu, click Data Table.
- For API Name, enter ContactsDataTable.
- For Label, enter Select Contacts for Account.
- For Source Collection, click Get_Contacts_for_Account_Action, then click Results, and then click outputContacts.
- For Configure Columns, add the First Name, Last Name, and Email fields.
- Save your work.
Use the Collected Data Later in the Flow
Take the contacts selected in the Data Table component and send them an email using the Send Email action.
-
Create a collection variable.
This variable holds the email addresses of the contacts that you want to email.
- In the Toolbox, click New Resource and then select Variable.
- For API Name, enter EmailAddresses and for Data Type, select Text.
- Select Allow multiple values (collection) and save your work.
-
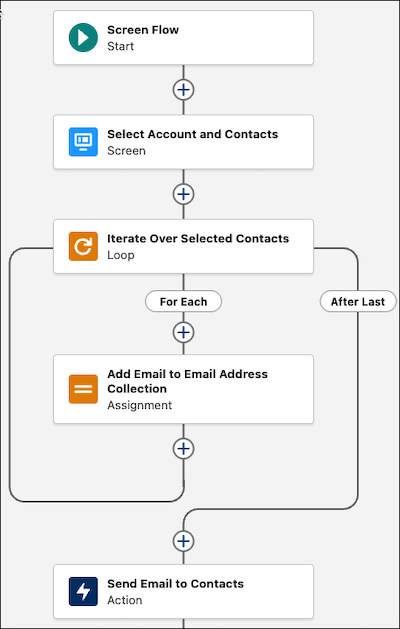
Add a Loop element.
This step tells the flow to go through the selected contacts
- On the canvas, click the plus icon and then select Loop
- For Label, enter Iterate Over Selected Contacts and let the API name autofill.
-
For the Collection Variable, select .
This step tells the flow that we are going to go through the list of selected contacts and do something with them.
-
Add an Assignment element.
This step takes the email address of each selected contact as it goes through the loop and adds it to the collection variable we created.
- After For Each, click the plus icon and then select Assignment
- For Label, enter Add Email to Email Addresses Collection and let the API name autofill.
- For Variable, select the EmailAddresses collection variable you created.
- For Operator, select Add.
-
For Value, select Current Item from Loop and then select
Email.
This takes the email of the current contact you're on, and adds the email of that contact to the EmailAddresses collection variable.
-
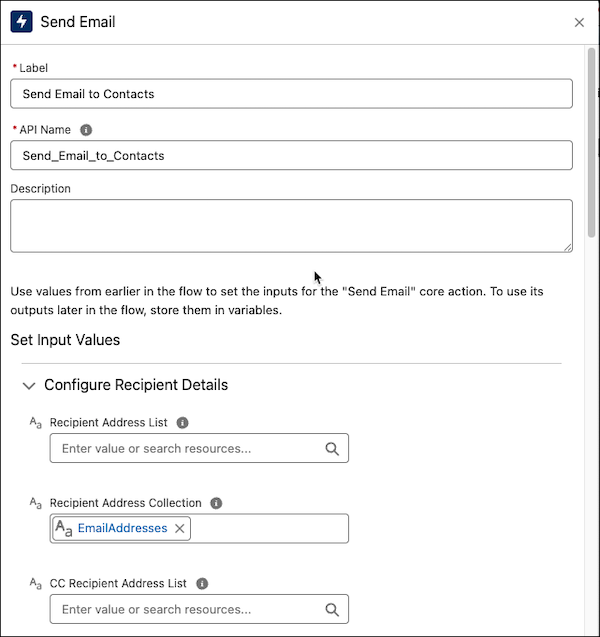
Add a Send Email action.
This step configures the email to send to the selected contacts.
- For Recipient Address Collection, select the EmailAddresses collection variable.
- In the Configure Email Content section, for Subject, enter Welcome to Our Community!.
- For Body, enter We're excited to welcome you as a new contact. If you have any questions, feel free to reach out!.
-
For Rich-Text-Formatted Body, select True.
This step makes the email look nicer by using the selected font and any other formatting you're configured.
- Save your work.
Now the flow is configured to send the email to the contacts selected on the screen.
- Test your flow using sample data and different scenarios and then activate it.