
You are here:
Create a Custom Object to Store Course Information
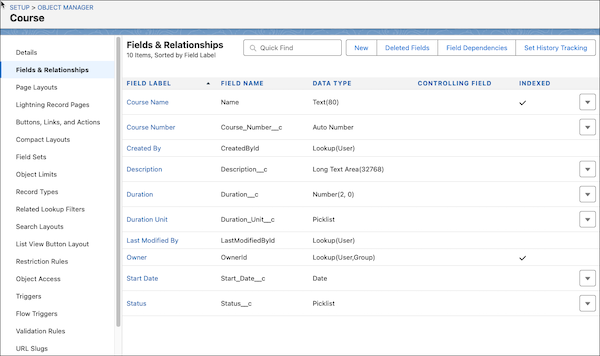
Create an object that stores information about a course like the description, start date, and whether it can be scheduled.
Required Editions
| Available in: both Salesforce Classic and Lightning Experience |
Available in: Contact Manager, Group, Professional, Enterprise, Performance, Unlimited, Developer, and Database.com editions Managed Packages aren’t available in Database.com. |
| User Permissions Needed | |
|---|---|
| To create and edit custom objects: | Customize Application |
This custom object works in conjunction with Automate a Course Management Process Project.
-
Open Object Manager
- From Setup, click Object Manager.
- From a record or home page, click
 , select Setup, and then select Object
Manager.
, select Setup, and then select Object
Manager.
-
Create a custom object named Course.
- Click Create, and then click Custom Object.
- For Label, enter Course and for Plural Label, enter Courses.
- Before saving the custom object, under Object Creation Options , select Launch New Custom Tab Wizard after saving this custom object.
-
Click Save.
The Tabs screen opens.
- For Tab Style, click the magnifying glass and then select a style.
- Use default settings and click Next until you can save the new object.
-
Click Save.
The object opens in Object Manager.
-
Add an auto number field to the Course object named Course Number.
- Select Fields and Relationships, and then click New.
- Select Auto Number, and then click Next.
- For Field Label, enter Course Number.
- For Display Format, enter CC-{000000}.
- For Starting Number, enter 1001.
- Use the default settings and click Next until you can save the field.
-
Click Save & New.
A new custom field window opens.
-
Add a text field to the Course object named Description.
- Select Text Area (Long), and then click Next.
- For Field Label, enter Description.
- Use the default settings and click Next until you can save the field.
-
Click Save & New.
A new custom field window opens.
-
Add a number field to the Course object named Duration.
- Select Number, and then click Next.
- For Field Label, enter Duration.
- For Length, enter 2.
- Use the default settings and click Next until you can save the field.
-
Click Save & New.
A new custom field window opens.
-
Add a picklist field to the Course object named Duration Unit.
- Select Picklist, and then click Next.
- For Field Label, enter Duration Unit.
- For Values, select Enter values, with each value separated by a new line.
-
In the text box, enter these values on separate lines: Hours and
Days.
If the statuses are different for your company, change the names, and add or remove durations in this step.
- Use the default settings and click Next until you can save the field.
-
Click Save & New.
A new custom field window opens.
-
Add a date field to the Course object named Start Date.
- Select Date and then click Next.
- For Field Label, enter Start Date.
- Use the default settings and click Next until you can save the field.
-
Click Save & New.
A new custom field window opens.
-
Add another picklist field to the Course object named Status.
- Select Picklist and then click Next.
- For Field Label, enter Status.
- For Values, select Enter values, with each value separated by a new line.
-
In the text box, enter these values on separate lines: New,
Draft, Pending, and Ready to
Schedule.
If the statuses are different for your company, change the names, and add or remove statuses in this step.
- Use the default settings and click Next until you can save the field.
-
Click Save.
Previous Step: Create Your Data Model
Next Step: Create a Custom Object to Store Course Delivery Information
See Also
- Automate a Course Management Process Project
- Create Your Data Model
- Create a Custom Object to Store Course Delivery Information
- Create a Custom Object to Store Course Attendee Information
- Create a Before-Save Flow for Better Data Quality
- Create After-Save Record-Triggered Flows
- Create an After-Save Record-Triggered Flow for Course Attendee
- Create an After-Save Record-Triggered Flow for Changed Course Attendees
- Create a Screen Flow to Register Course Attendees
- Test and Activate All Course Management Flows
- Create a Button to Launch the Screen Flow
Did this article solve your issue?
Let us know so we can improve!