You are here:
Calculate and Display a Discount on One Screen Example
This example creates a single screen flow that uses reactive screen components to let sales reps instantly calculate and view product discounts.
Required Editions
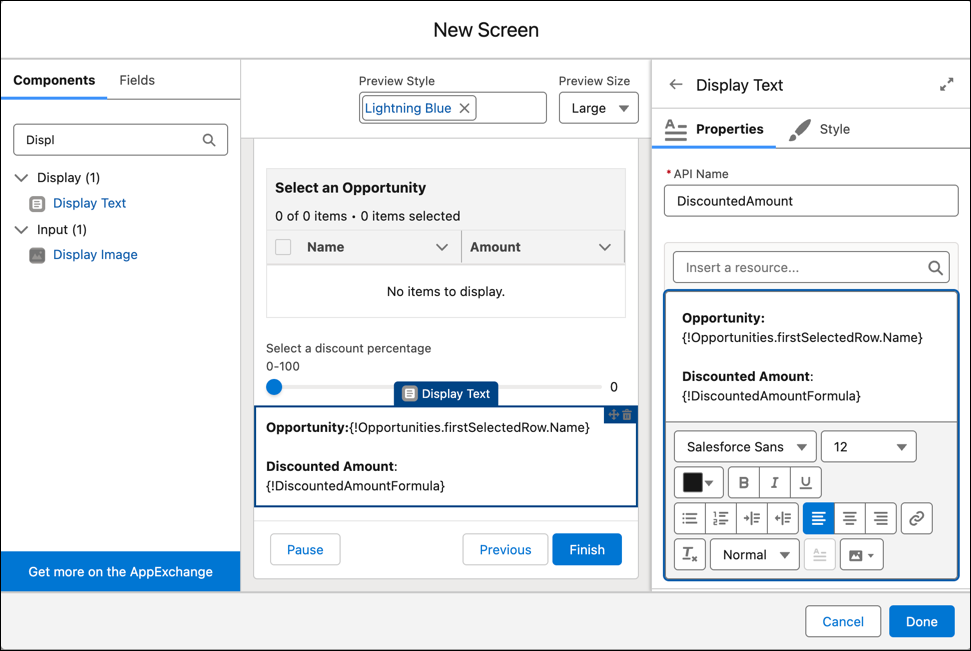
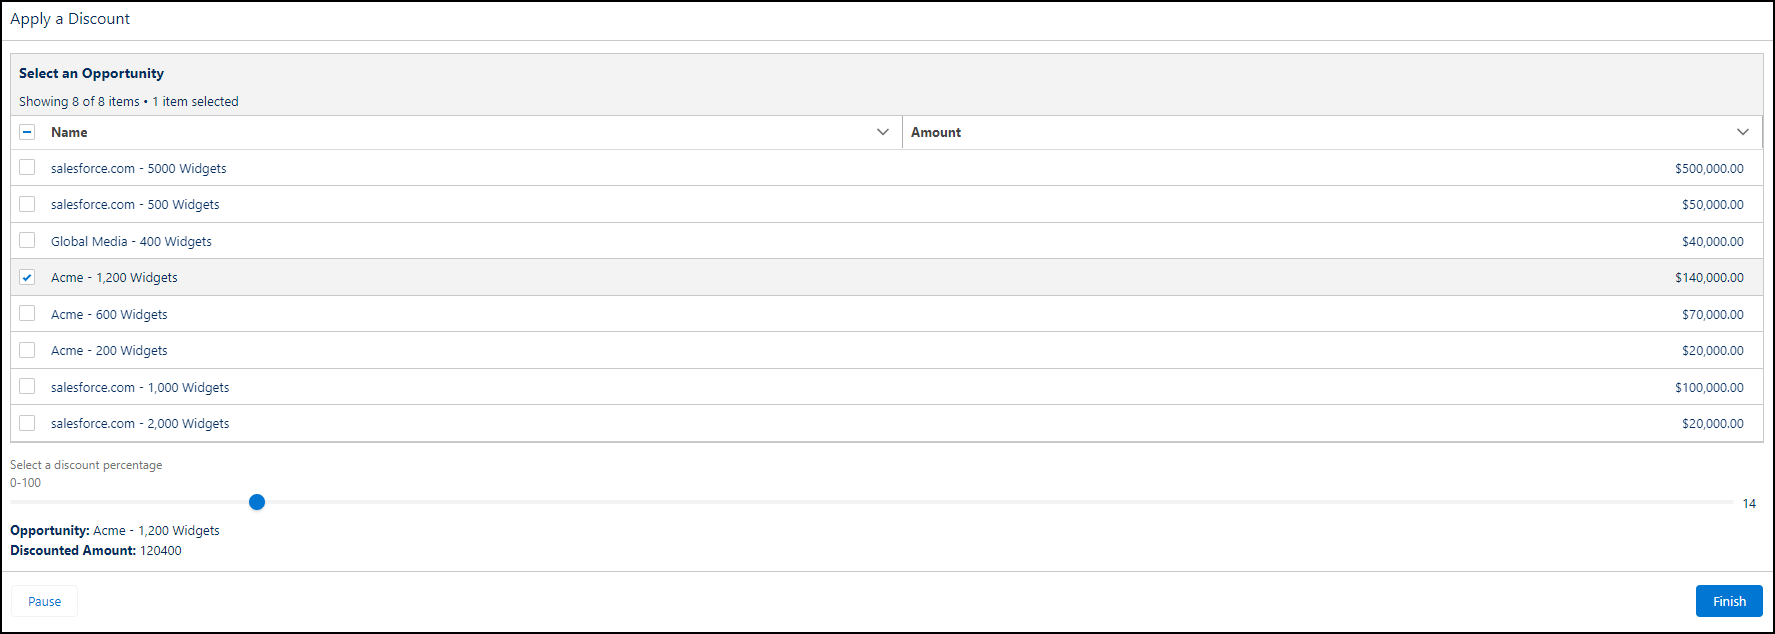
In this example, the screen includes a Data Table component with a list of opportunities that the sales rep can select from. The screen also includes a Slider component that represents the discount percentage. Finally, the screen includes a Display Text component that displays the discounted amount of the Opportunity.
-
Create a Screen flow.
- In the Automation app, click New.
- Click Screen.
- Click Screen Flow.
- Click Create.
The new screen flow opens in Flow Builder. -
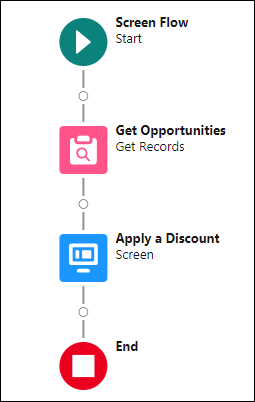
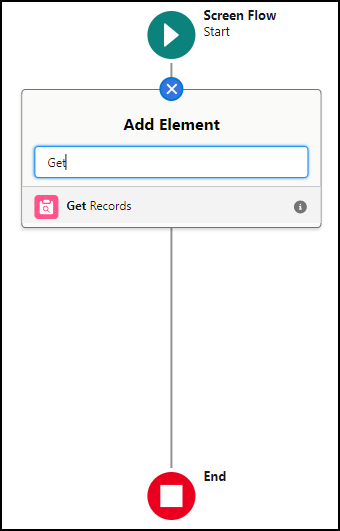
Add a Get Records element to the flow.
- Click the plus icon.
-
Click the Get Records element.
-
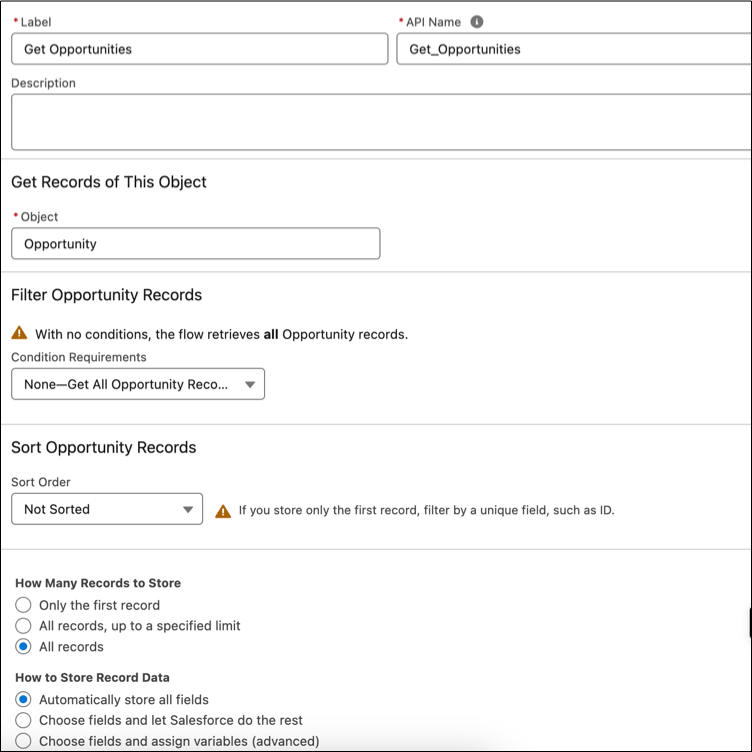
Configure the Get Records element to retrieve and store a collection of
Opportunities.
-
Add a screen to the flow.
- Click the plus icon.
-
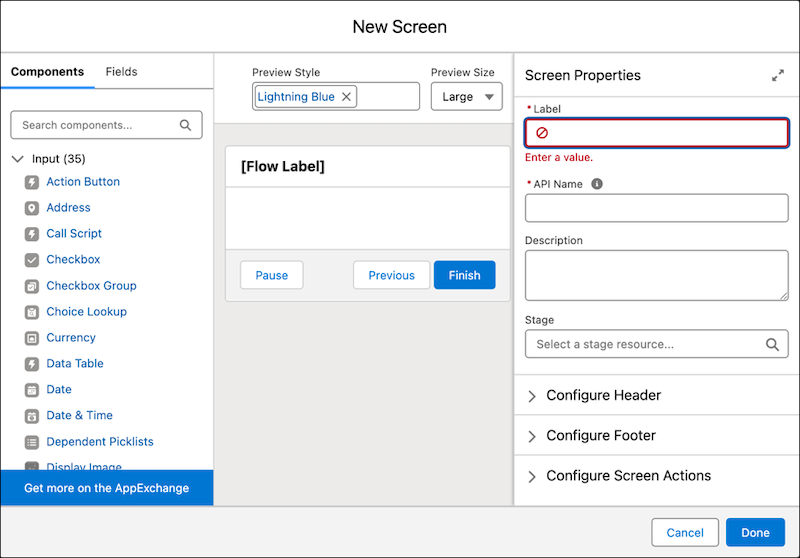
Click the Screen element.
The new screen element opens.
-
To show a list of opportunities that a sales rep can select from, add a Data Table
component to the screen.
- In the Components panel, click Data Table.
-
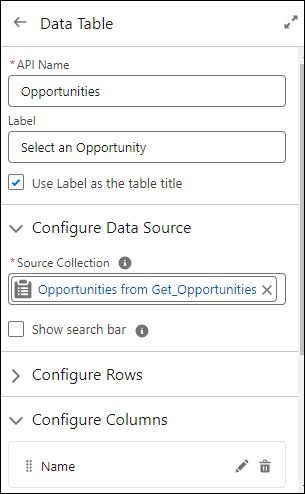
Configure the component with these values.
API Name—Opportunities
Label—Select an Opportunity
Use Label as the table title—Select the checkbox
Source Collection—The collection of opportunities that you retrieved from the Get Records element in step 2, Opportunities from Get_Opportunites.
Configure Columns—Specify the opportunity Name and Amount as two separate columns
-
To enable a sales rep to select a discount, add a Slider component to the screen.
- In the Components pane, click Slider.
-
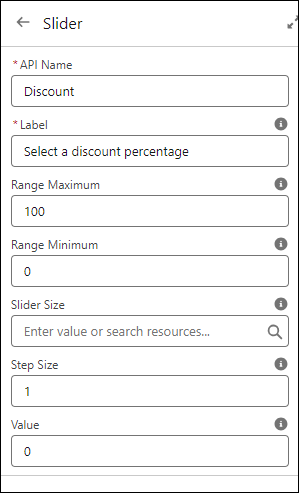
Configure the component with these values.
API Name—Discount
Label—Select a discount percentage
-
To display the discounted amount of the opportunity, add a Display Text component to
the screen.
- In the Components panel, click Display Text.
-
In the configuration panel for the Display Text component, create a formula
resource to calculate the discounted amount. For example:
{!Opportunities.firstSelectedRow.Amount}-({!Opportunities.firstSelectedRow.Amount}*({!Discount.value}/100)).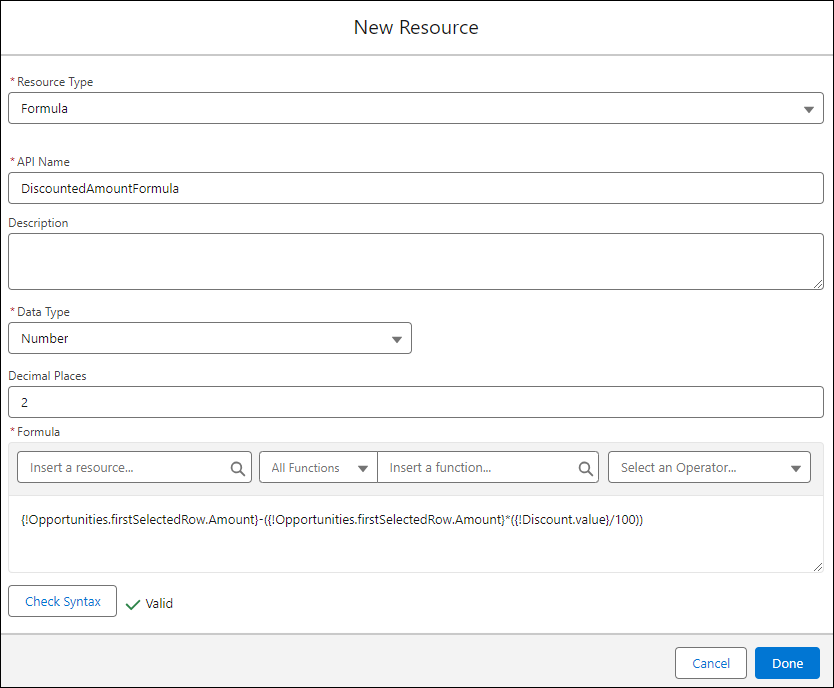
-
Configure the component with these values.
API Name—DiscountedAmount
Text Box—Opportunity: {!Opportunities.firstSelectedRow.Name}
Discounted
                  Amount: {!DiscountedAmountFormula}
This code displays the name of the first opportunity that the user selects in the Data Table component and calculates the discounted amount based on the Slider component value.