
You are here:
Set Up the Data 360 Managed Package for Salesforce Spiff
Set up Salesforce Spiff to sync with Data 360.
Required Editions
| Available in: both Salesforce Classic (not available in all orgs) and Lightning Experience |
| Available in: Enterprise, Unlimited, and Developer Editions |
| Available for an additional cost in: Professional Edition with Web Services API Enabled |
| User Permissions Needed | |
|---|---|
| To sync Spiff with Data 360: | A Spiff user role with this permission turned on. Company Settings: Manage |
| To manage a data stream in Data 360: | (Salesforce) Data Cloud Architect permission set |
-
Enable Data 360 in Salesforce. If Data 360 has already been installed, proceed to step 2.
- From Setup, in the Quick Find box, enter Data Cloud Setup, and then click Get Started.
- Follow the instructions. The setup takes at least 15 minutes to complete.
- Authenticate the Data 360 connection.
This step must be completed even if you have previously authenticated a Salesforce connector.
- From the Admin menu, select Settings.
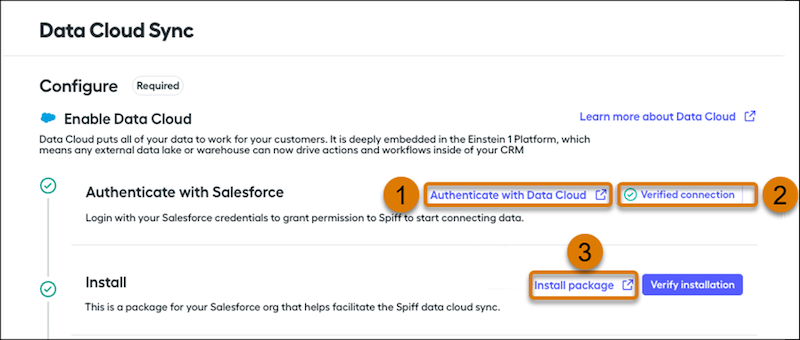
- In Reporting, go to Data Cloud Sync and click Authenticate with Data Cloud (1).
- In the Allow Access? window, click Allow.
- When authentication is successful, click Verify connection (2).
After the connection is verified, you can continue.
-
Install the managed package.
-
Click Install package (3).
- In the Salesforce login window enter your Salesforce credentials and click Log In.
-
Select Install for Admins Only and click
Install.
An Install in Progress message is displayed. Sometimes a timeout error is displayed. However, the installation continues. After installation is completed, a confirmation email is sent notifying you if the installation was successful.
-
Click Install package (3).
-
Create a data stream in Data 360.
- From the App Launcher in Salesforce, go to Data Cloud.
- On the Data Streams Tab, click New.
- Click Installed Data Kits and Packages, and then click Next.
-
Select the Data Stream acon-commission_statement_value, where
aconis an abbreviation for Analytics Connector, and then click Next.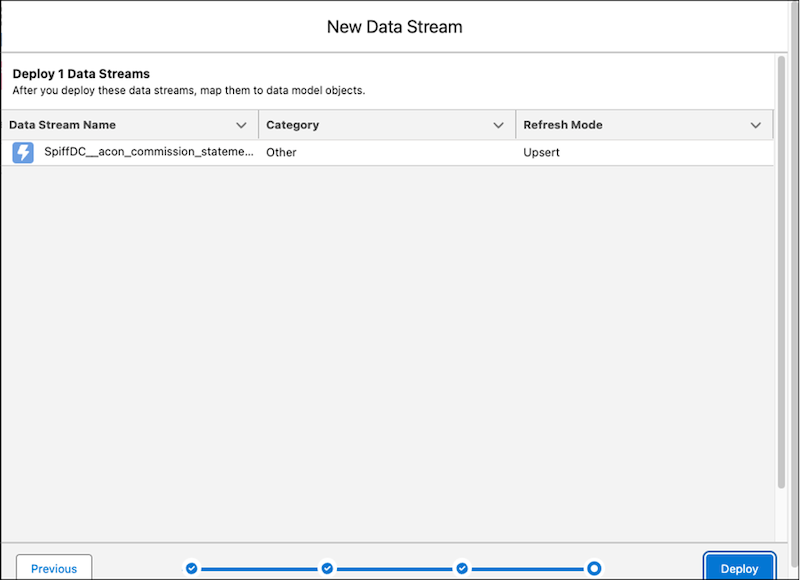
- Click New Connector.
-
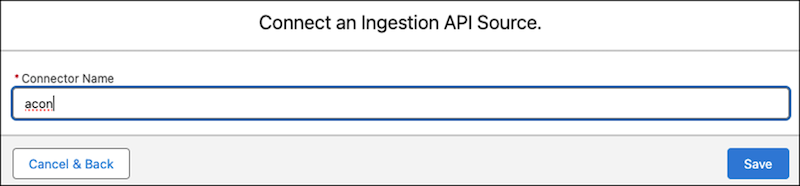
Create a connector with the name acon.
-
Click Save and then click Next.
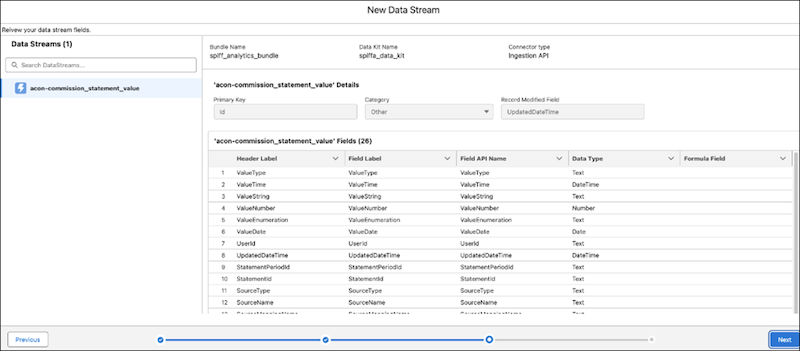
-
Click Next.
-
Click Deploy.
The newly created connector appears in External Integrations in Data Cloud Setup under Ingestion API.
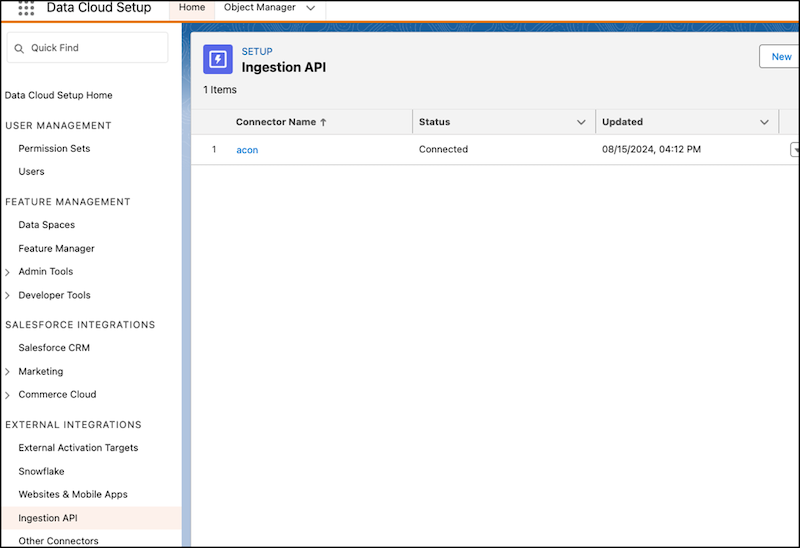
The newly created data kit appears in Developer Tools in Data Cloud Setup under Data Kits.
A new data stream, a new Data Lake Object (DLO), and a new Data Model Object (DMO) also appear.
- Click Verify Installation. If no error is displayed, the data stream has been configured correctly.
-
Turn on Reporting Data Sync to Data Cloud.
- From the Admin menu, select Settings.
-
In Reporting, go to Data Cloud Sync and turn on Enable Reporting Data Sync to
Data Cloud.
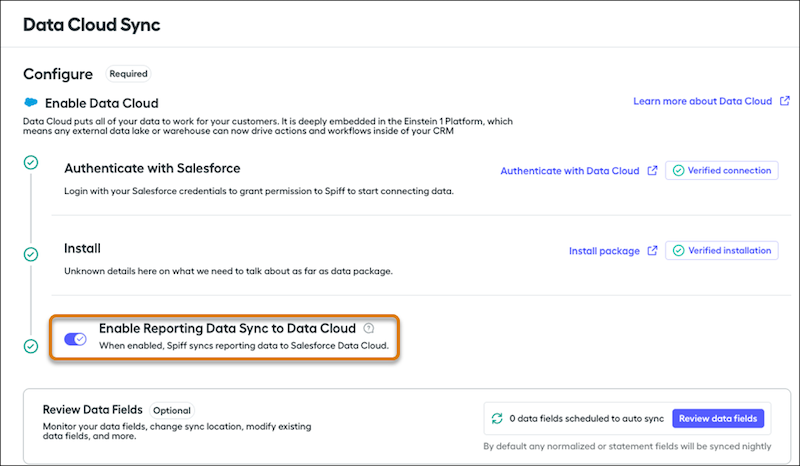
Choose fields to connect to Data 360 by clicking Review data fields or by going to Configuration in the Reporting tab.
After you set up the Data 360 connection, visualize data in Tableau or CRM Analytics by creating statement and obligation reports in those tools. See Create Tableau Reports with Salesforce Spiff Data in Data 360 and Create CRM Analytics Pivot Tables with Salesforce Spiff Data in Data 360.
