
You are here:
Set Up a Data Relationship in Salesforce Spiff
To set up a relationship between two object data tables in Salesforce Spiff, select a field with a common value for both objects.
Required Editions
| Available in: both Salesforce Classic (not available in all orgs) and Lightning Experience |
| Available in: Enterprise, Unlimited, and Developer Editions |
| Available for an additional cost in: Professional Edition with Web Services API Enabled |
| User Permissions Needed | |
|---|---|
| To create a data relationship: | A Spiff user role with this permission turned on. Designer Configuration: Manage |
- From the Data tab in Designer, click Data Relationships.
-
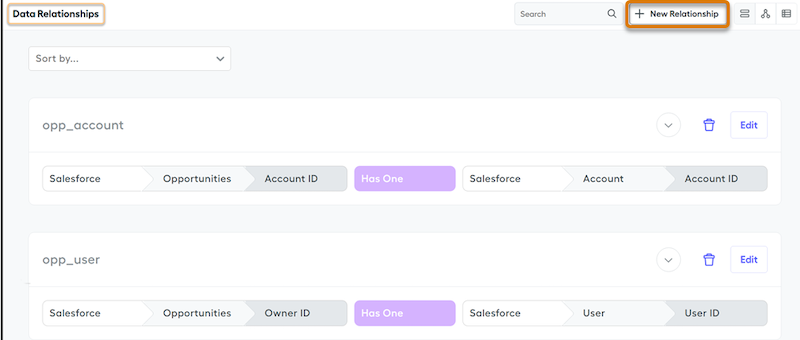
Click New Relationship.
If you haven't specified any relationships yet, the button is Create Relationship.
-
Add details for the relationship.
Name (1) A name for the relationship. Follow the pattern SourceObjectToTargetObject. The name gives the direction of the relationship and specifies what tables you’re connecting. For example, if you're creating a relationship from Deal to Account, use DealToAccount. Use singular or plural names based on the one-to-one, one-to-many, or many-to-many type of the relationship. For example, DealToAccount is a one-to-one relationship, but AccountToDeals is a one-to-many relationship because one account can have multiple deals. Source connector (2), object (3), and field (4) The source of the relationship. For example, if you ant to use the CustomerAccount field on imported Deal data for the relationship, select the Data Imports connector, select the Deal object, and select the CustomerAccount field. Type (5) The type of relationship from the source object to the target object. - For one-to-one, select Has One.
- For one-to-many, select Has Many.
For example, because DealToAccount is a one-to-one relationship, select Has One.
Target connector, object, and field (6) The target of the relationship. For example, if DealToAccount relates to the external_id field of imported Account data, select the Data Imports connector, select the Account object, and select the Id field. - Save your changes.
Did this article solve your issue?
Let us know so we can improve!
