
You are here:
Unarchive a User Account in Salesforce Spiff
An archived account is hidden from display in Spiff. To unarchive a user account, you must first unhide the User object.
Required Editions
| Available in: both Salesforce Classic (not available in all orgs) and Lightning Experience |
| Available in: Enterprise, Unlimited, and Developer Editions |
| Available for an additional cost in: Professional Edition with Web Services API Enabled |
| User Permissions Needed | |
|---|---|
| To unarchive a user: | A Spiff user role with these permissions turned on.
|
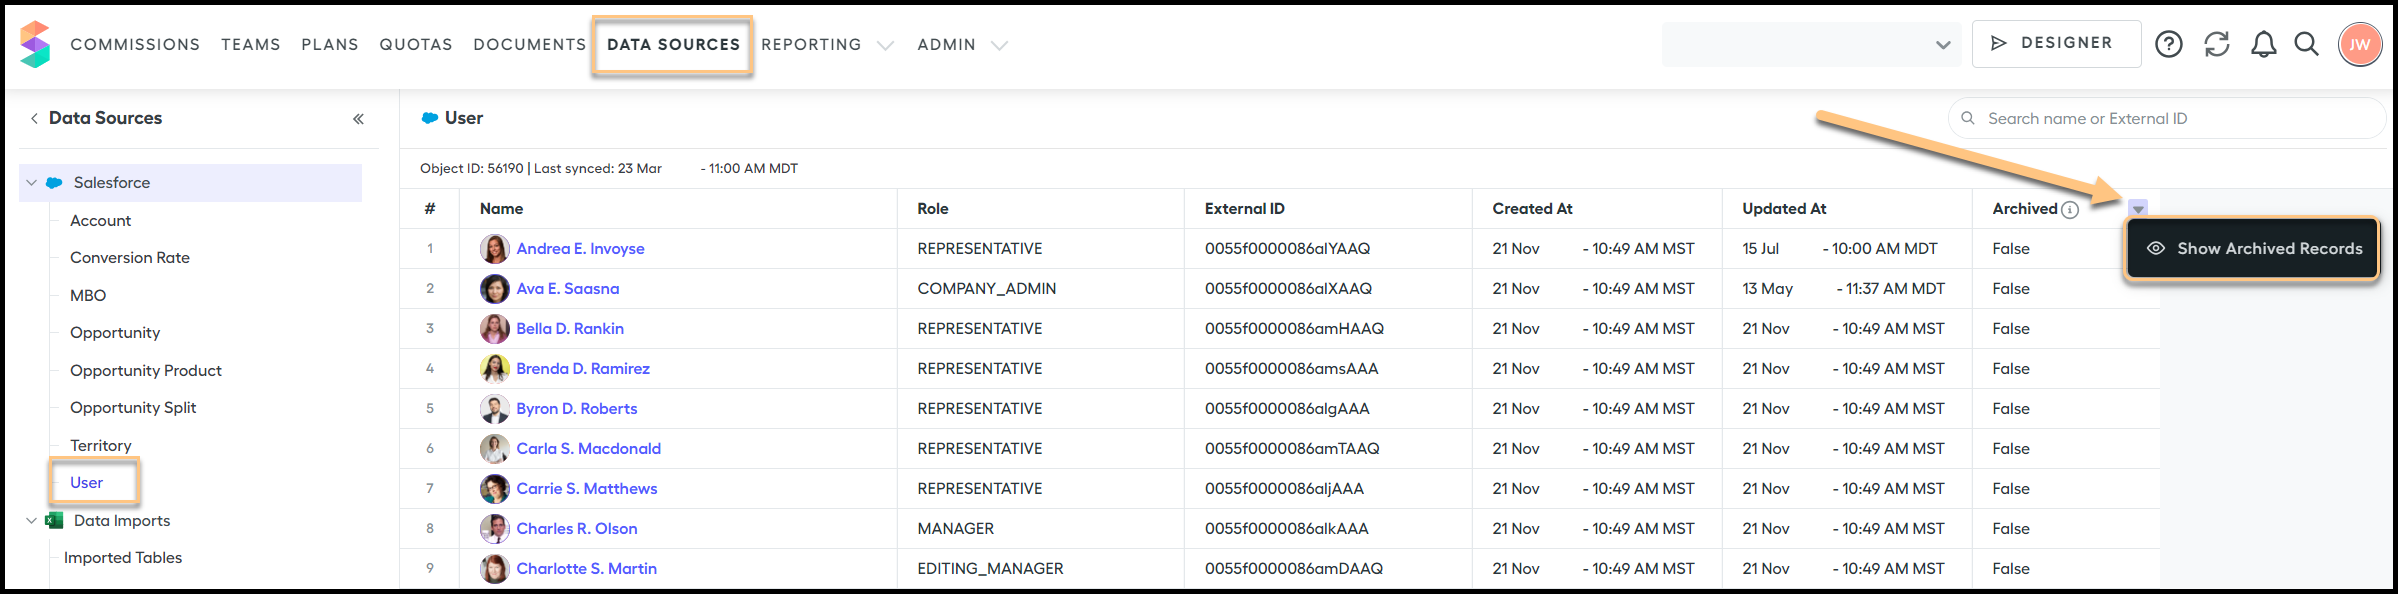
- Click Data Sources to bring up all the synced objects in the Spiff instance.
-
On the left, click the User object where all user
accounts are created.
This shows all current user accounts that aren’t archived.
-
Scroll over to the Archived column, click the menu arrow in the column header,
and select Show Archived Records.
All archived user accounts will now be visible.
- Scroll down or search to find the user account that must be unarchived.
- Click the name of the user account to display the user profile page for this account.
- Turn on Edit.
-
Turn on Make this user visible.
A popup prompts you to confirm account activation. The Keep this user's data synced option is turned on automatically.
-
Click Archive User to confirm.
The Keep this user's data synced option is turned on automatically.
- Click Save.
Data syncing is turned on.
Did this article solve your issue?
Let us know so we can improve!
