
You are here:
Create Alignments from External Territory Model Data
Account for compelling events in proprietary and third-party territory management systems when you import their model data into Territory Planning. Refine and optimize models from the map, then publish them to CSV files. Use the CSV files when you update those territory management systems later.
Required Editions
| Available in: both Salesforce Classic (not available in all orgs) and Lightning Experience |
| Available in: Professional, Enterprise, Performance, Unlimited, and Developer Editions with Web Services API enabled |
| User Permissions Needed | |
|---|---|
| To create alignments: | Sales Planning Ops Analyst permission set AND Query for Datapipelines User for Sales Planning permission set AND SF Maps Territory Planning for Sales Planning permission set |
- Before you import a CSV file, ensure that the parent value is blank for your top-level territories.
-
Click Alignments, click Create,
and specify options in the Create Alignment window.
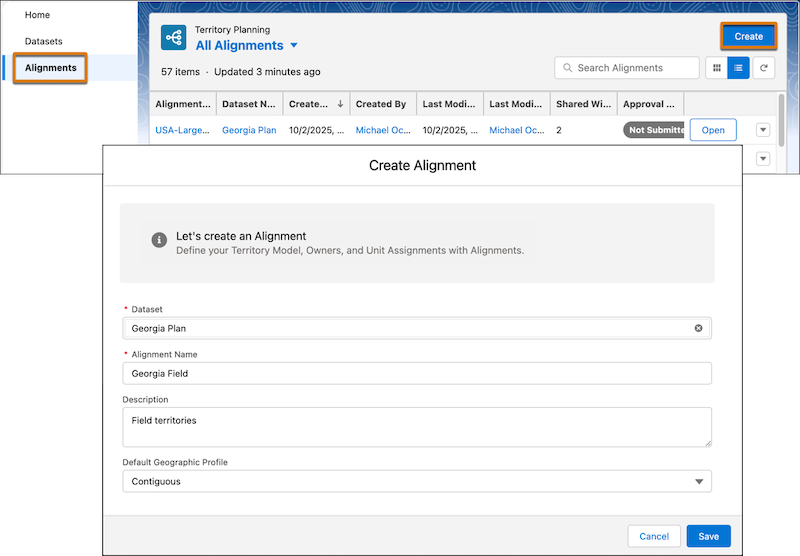
- Select a dataset.
- Enter a name for the alignment.
-
Select a default geographic profile.
When you create an alignment, the default geographic profile that you select at the alignment level updates its subsequently created areas. When you edit an alignment, the profile you select doesn’t update the alignment’s areas.
-
Save your changes.
- If you selected live data, the Create Alignment window closes
and the alignment builder opens. To continue, click the Legend
tab, and click Edit territory model
(
 ).
). - If you selected copied data, click Next and continue working in the Create Alignment window.
- If you selected live data, the Create Alignment window closes
and the alignment builder opens. To continue, click the Legend
tab, and click Edit territory model
(
-
Click Import Model, select CSV,
and click Next.
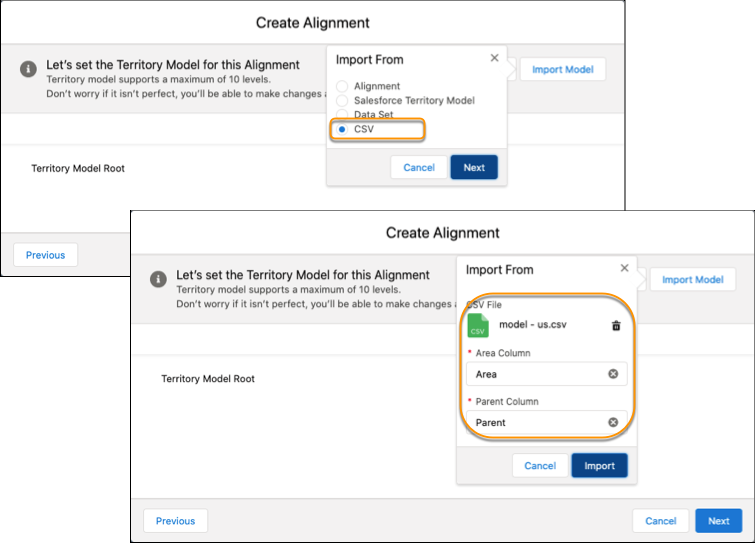
- Upload a CSV file that includes the territory model data that you want to import.
- Specify the area and parent columns.
- Click Import.
If any records fail to import, download the log file from the data import summary, fix the errors, and import the CSV file again. If all records import, no data import summary appears. -
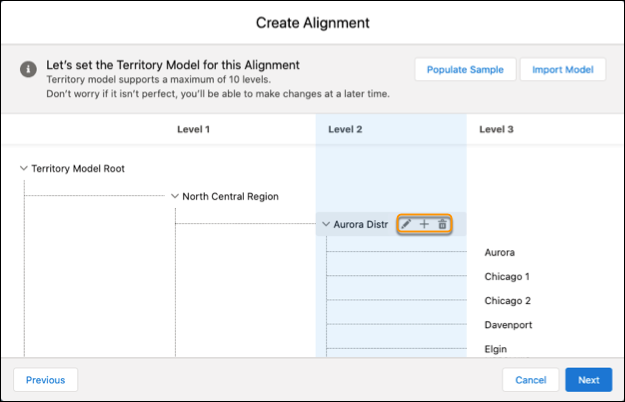
To change area names so that they reflect current areas, hover over each one and rename
them. Add or remove areas so that they represent your updated sales and service
structure.
-
Click Next.
- If you selected live data, review the alignment updates and save your changes.
- If you selected copied data, continue to the final step.
-
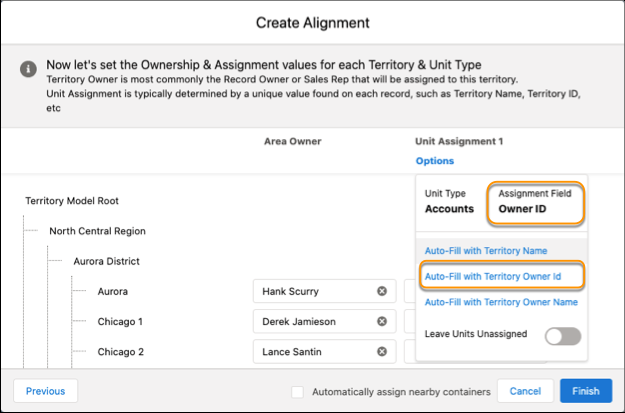
(Copied data only) Add area owners, then select an option for unit assignments
that corresponds with the assignment field from the dataset. Click
Finish.
Did this article solve your issue?
Let us know so we can improve!
