You are here:
Configure Call Escalation for WhatsApp Voice Channel
Use an Omni-Channel flow to configure automatic escalation from your messaging session to the same service rep in the WhatsApp voice channel.
Required Editions
This article applies to:
Salesforce Voice (Native Telephony)
| View supported editions. |
| User Permissions Needed | |
|---|---|
| To set up call escalation for WhatsApp voice: | Agentforce Contact Center Admin (Salesforce Voice) permission set Learn how to view permissions in this permission set. |
- Step 1: Create a Call Escalation Template on Meta
You need a template to make sure all information is captured before the call is escalated. - Step 2: Import the Template to Your Salesforce Org
Create a messaging component to hold the call escalation template. - Step 3: Make the Messaging Channel Interruptible
Make sure that messaging conversations can be interrupted and callers can make escalation calls to the same agent that they're interacting with in the messaging conversation. - Step 4: Create Custom Fields
Optionally, define custom fields to link voice and messaging objects. - Step 5: Route Calls with an Omni-Channel Flow
Edit the out-of-the-box template flow template to add your routing information. - Step 6: Update Page Layout for Reps
Add a messaging session component to the voice call page so that reps can easily navigate to see the messaging session details. - Step 7: Update WhatsApp Channel Settings
Update routing for your WhatsApp channel to point to the new Omni-Channel flow.
Step 1: Create a Call Escalation Template on Meta
You need a template to make sure all information is captured before the call is escalated.
- Create a Call Us escalation template on Meta with Marketing as the Category and then select Custom.
- In the body, enter the message that you want to show your customers.
- Click Add a button and select Call Phone Number.
- Set Call on WhatsApp as the action type and enter the button text.
- Click Submit.
- Click Confirm.
Step 2: Import the Template to Your Salesforce Org
Create a messaging component to hold the call escalation template.
- From Setup, use Quick Find to open Messaging Components, and click New Component.
- Select Notification and click Next.
- Enter the plain text version of your automated message in Plain Text Formula, upload a relevant image, then click Next.
- Enter a name and description for your component. Keep the default developer name as is.
- Click Done. The Messaging Component Builder opens.
- In Components Formats, click Add Format.
- Select External Template and click Done.
- Select your WhatsApp Business Account and click Done.
- In the properties pane, under Components Format, click External Template.
- Click Select Template. Only Meta-approved templates appear in the list.
- Select the call escalation template that you created and save your changes.
The call escalation template component becomes available to reps in the Messaging Components list. Reps can send this template to customers in their WhatsApp conversations. Use service channel settings to set work items as interruptible.
Step 3: Make the Messaging Channel Interruptible
Make sure that messaging conversations can be interrupted and callers can make escalation calls to the same agent that they're interacting with in the messaging conversation.
- In Setup, under Omni-Channel, open Service Channels.
- For Messaging, click Edit.
- Select Is Interruptible and save your changes.
Step 4: Create Custom Fields
Optionally, define custom fields to link voice and messaging objects.
- From the Object Manager, open Voice Call.
- Click Fields & Relationships.
- Click New.
- Select Lookup Relationship and click Next.
- Select Messaging Session and click Next.
- Enter a label and description and click Next.
- Click Next and save your changes.
Step 5: Route Calls with an Omni-Channel Flow
Edit the out-of-the-box template flow template to add your routing information.
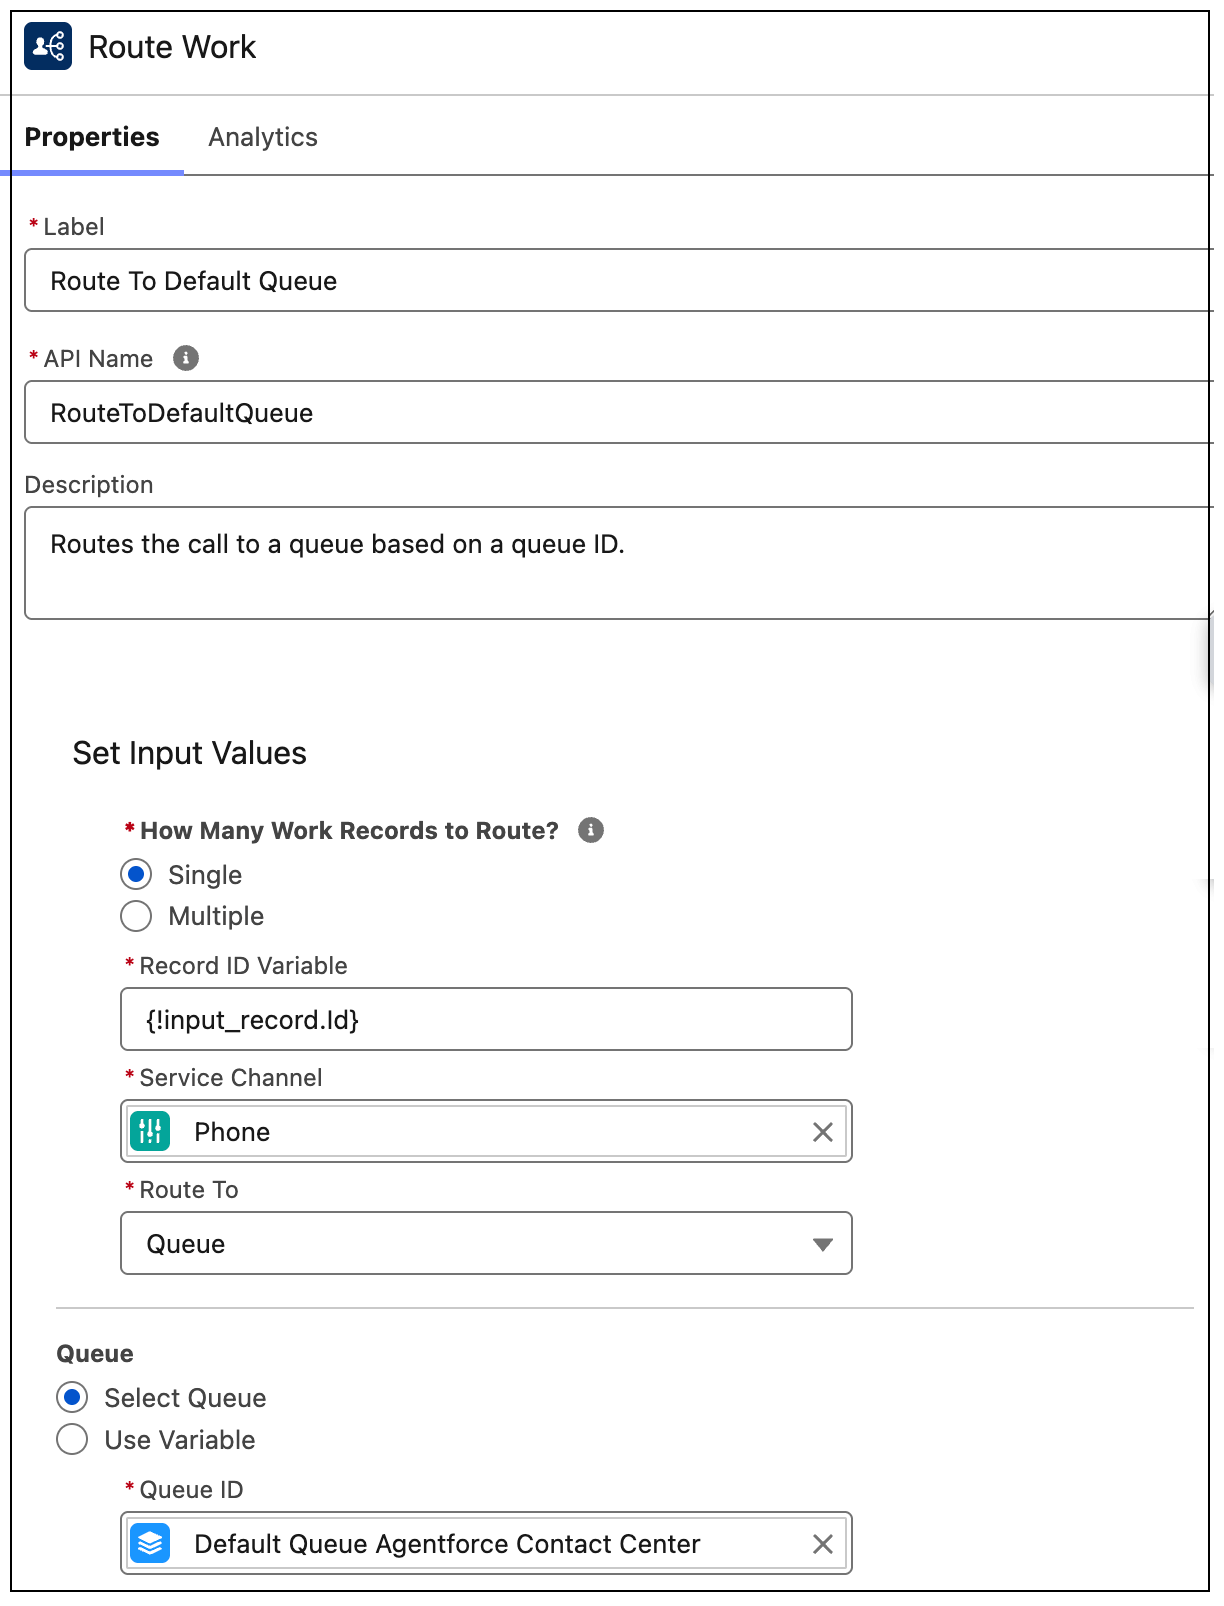
- From Setup, open Flows and click Escalate WhatsApp Message to Call.
- From the Route to Default Queue element, select the queue you want to route the call to.
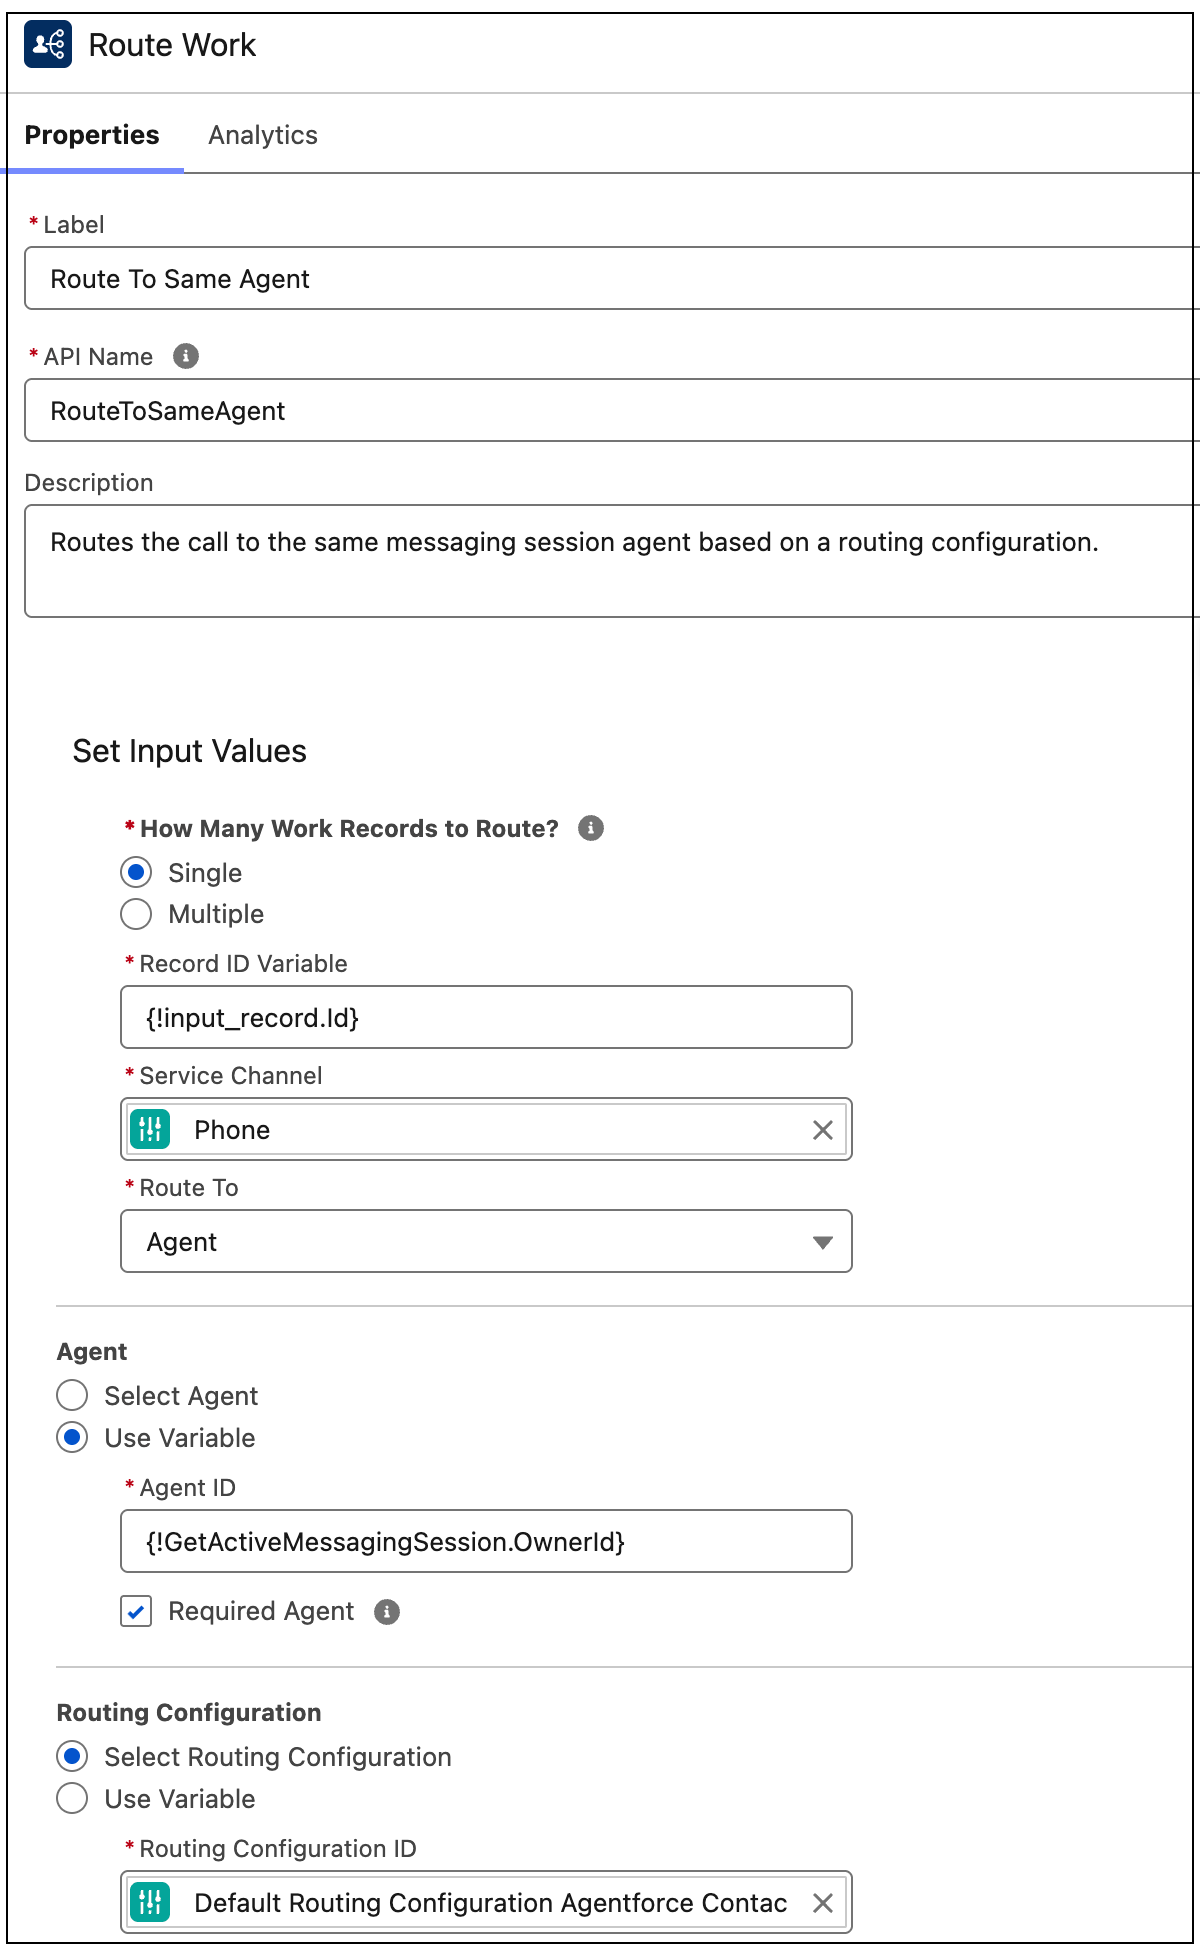
- From Route to Same Agent, select the rep you want to route to.
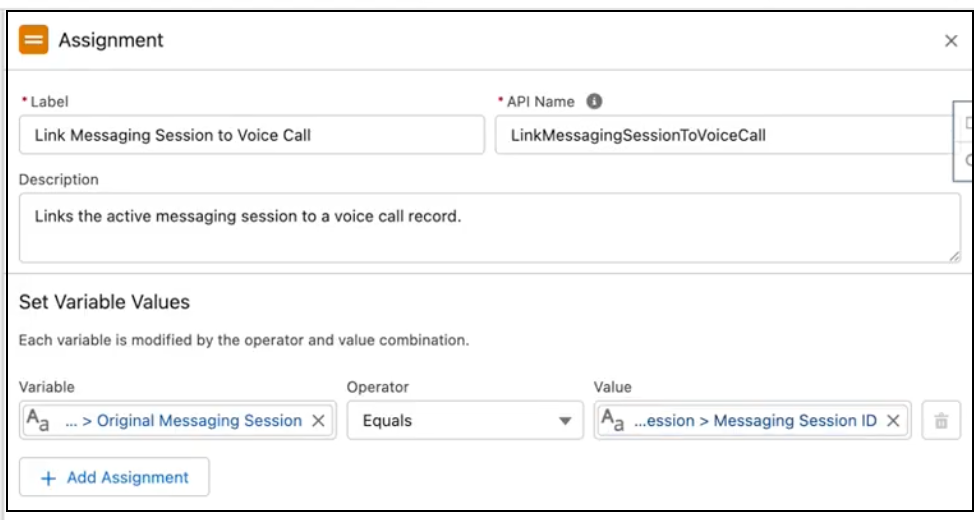
- To link voice and messaging objects, from the Link Messaging Session to Voice Call assignment element, use the variable to link the messaging session with the voice call record.
- Save your changes as a new flow and then activate it.
Step 6: Update Page Layout for Reps
Add a messaging session component to the voice call page so that reps can easily navigate to see the messaging session details.
- From the Object Manager, open Voice Call.
- Click Page Layouts.
- Click Voice Call Layout.
- Drag the Messaging Session field to the Details section.
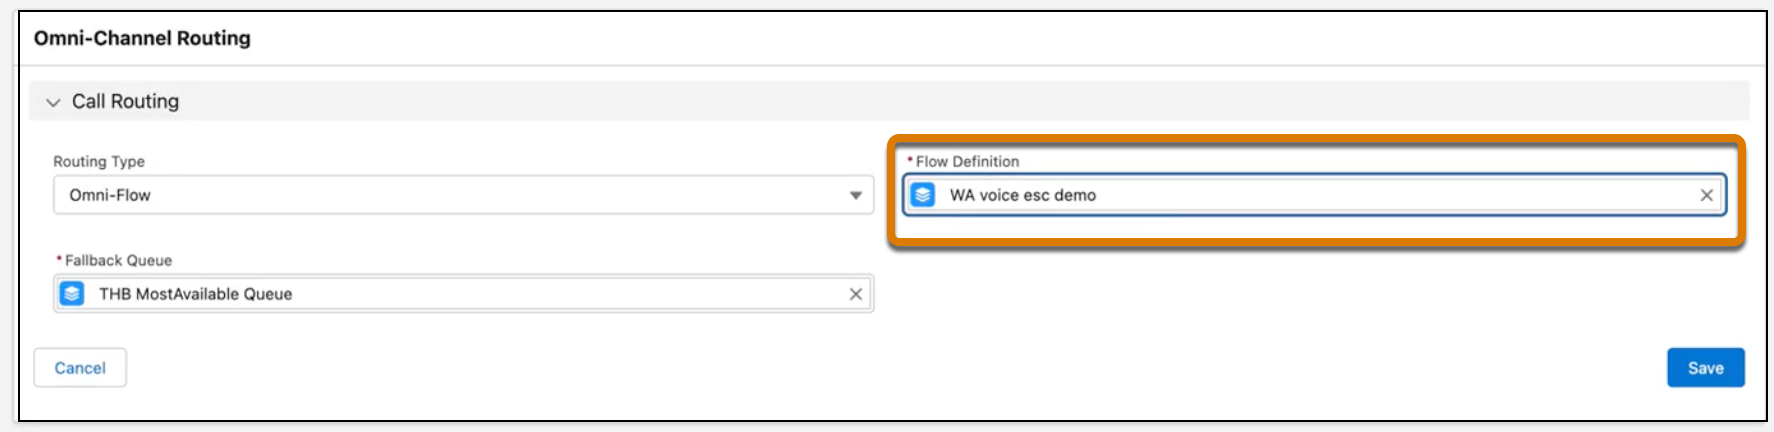
Step 7: Update WhatsApp Channel Settings
Update routing for your WhatsApp channel to point to the new Omni-Channel flow.
- From Communications Channels, under All Channels, click your WhatsApp voice channel to open it.
- From the Voice tab, in Omni-Channel Routing, update the Flow Definition to point to your new flow.