
You are here:
Make and Answer a Call in Agentforce Contact Center
Call customers by dialing their phone number in the Omni-Channel utility. The Phone tab in the Omni-Channel utility and the Phone component provide common call functions such as mute, hold, transfer, and more.
Required Editions
This article applies to:
Salesforce Voice (Native Telephony)
| View supported editions. |
| User Permissions Needed | |
|---|---|
| To make and answer calls: | Agentforce Contact Center Rep (Salesforce Voice) permission set. Learn how to view permissions in this permission set. |
Make sure that you have a phone number with outbound voice capability and set the number as your default Caller Line Identifier (CLI).
-
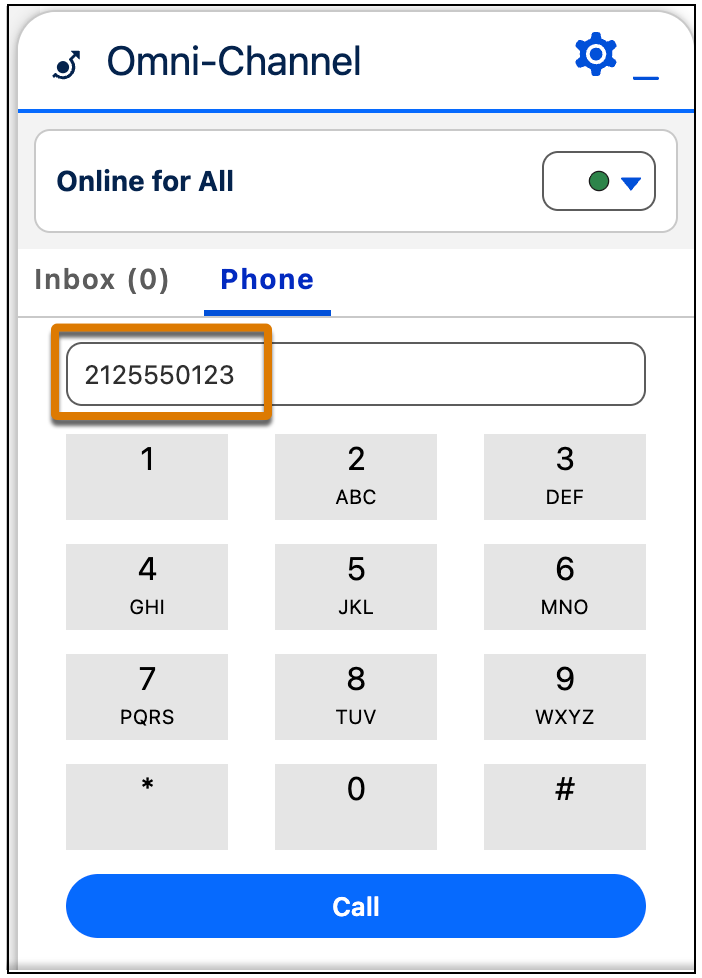
To dial out, first set your status to either Online for All or Voice Online.
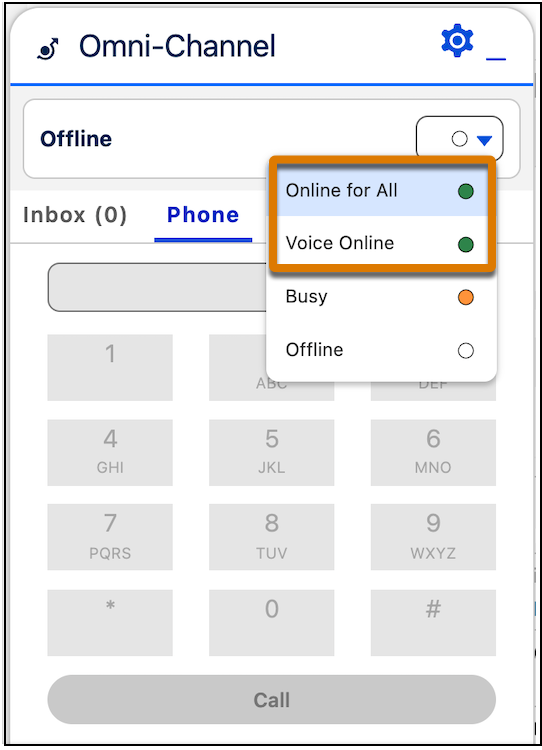
- There are a few ways to dial out to connect with users. From the Omni-Channel widget, use the keypad to dial a number manually and then click Call.Copy and paste a number into the dial pad, and click Call.
-
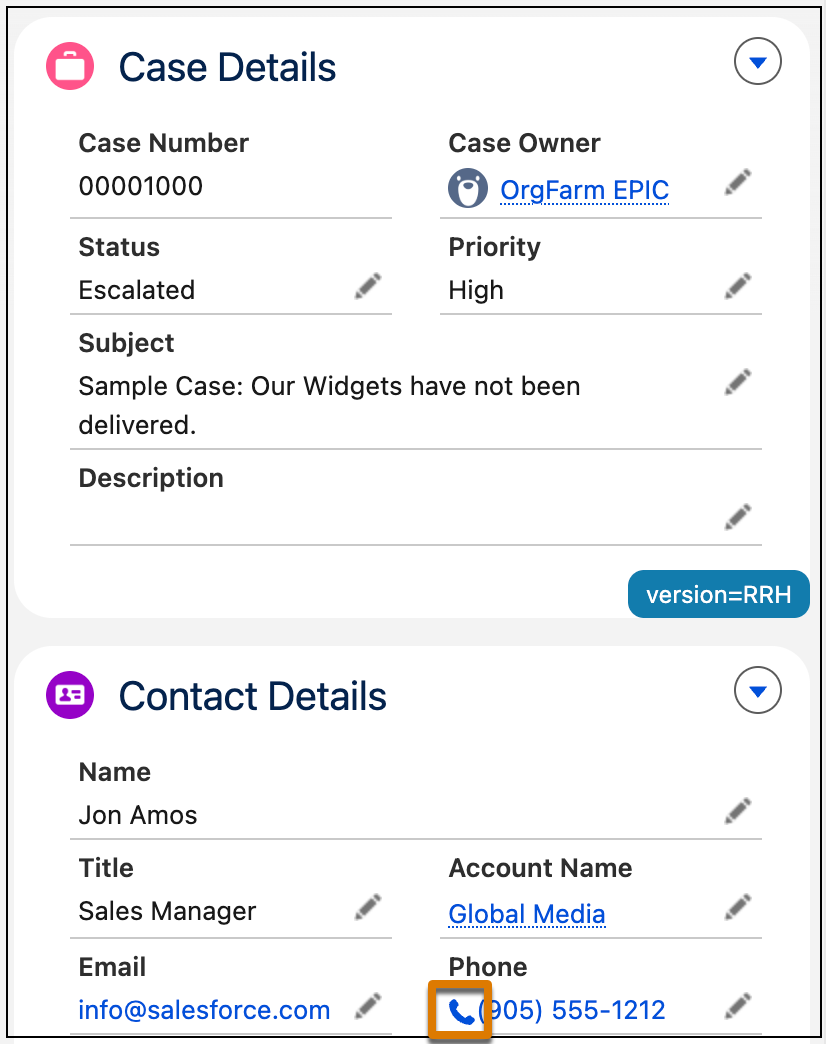
Click the phone number in a phone field of a contact, lead, activity, or account. Not all
numbers are enabled for click-to-call. To check if a number is enabled for click-to-call, look
for the phone icon at the beginning of the number.
-
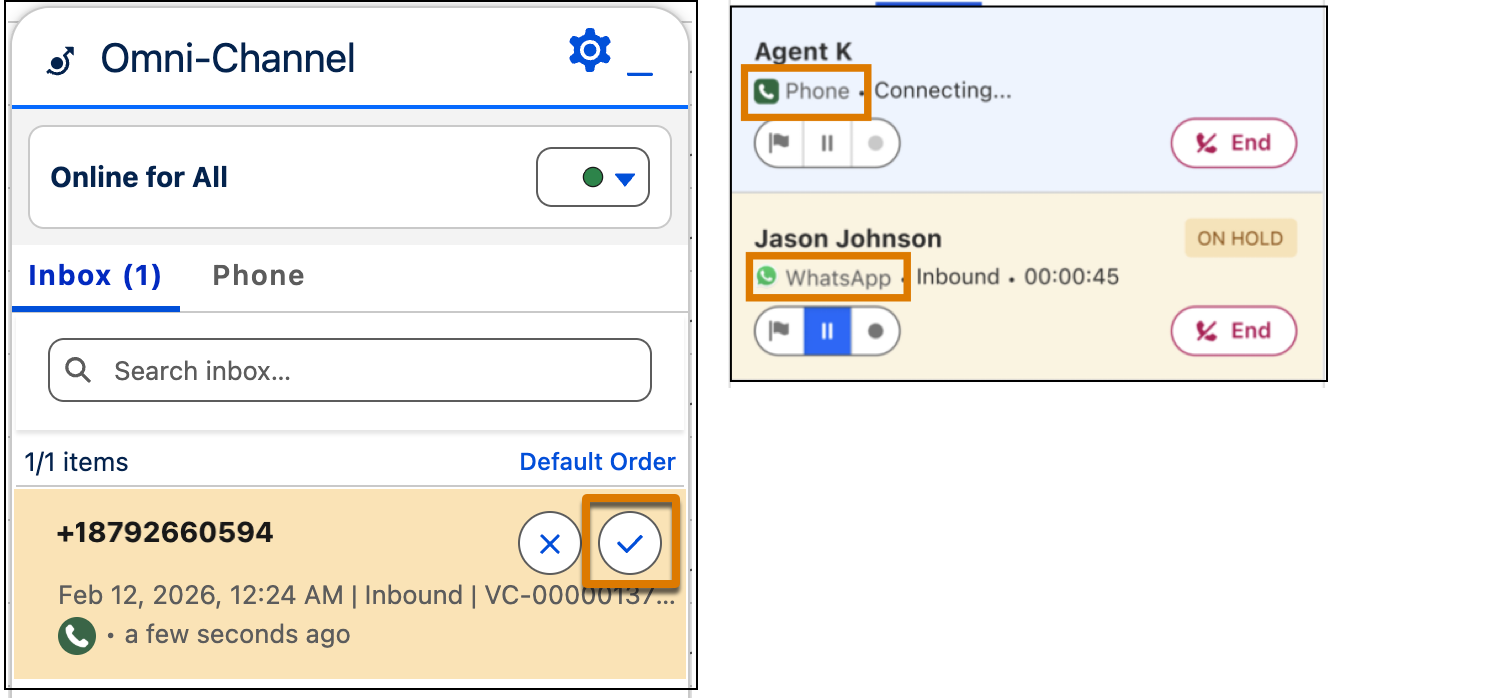
You can answer calls coming from a PSTN number or WhatsApp. From the Omni-Channel widget,
go to Inbox and click the checkmark to answer the call. To know which channel the call is
coming from, see the icon in the call message.
-
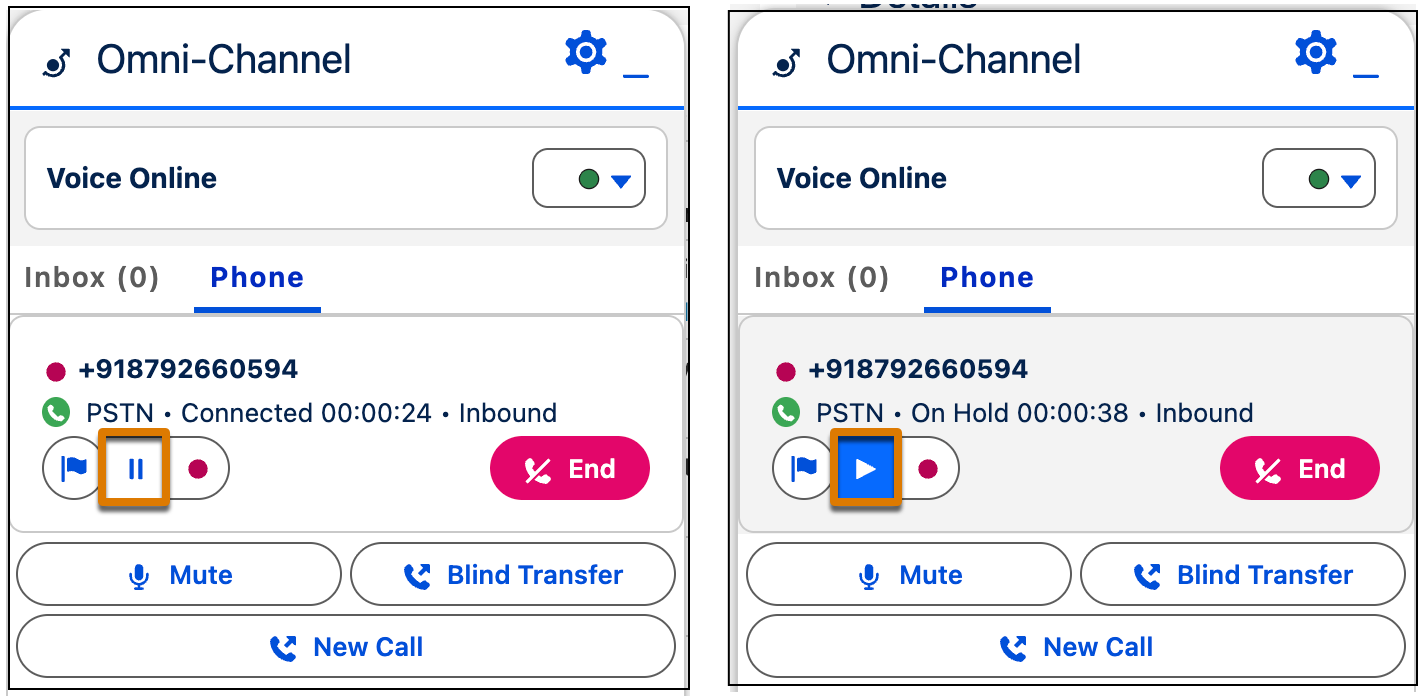
To put a caller on hold, click the Pause button. When you’re ready to resume the call,
click the Play button.
-
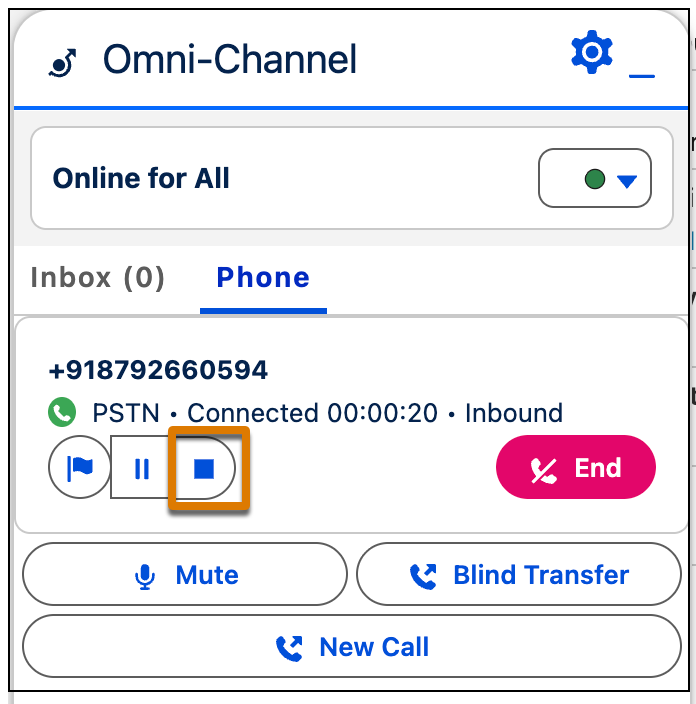
Call recording begins when the call is connected to a rep or based on what you’ve
configured in your org settings. To configure call recording, see Enable Recording and
Transcription. To pause the recording, click the recording button. Recording is paused
across all segments of the call, and remains paused till it is manually resumed. Recording
remains paused even if the call is transferred or merged with another call. To resume
recording, click the Resume button. When you pause or resume recording, transcription is also
paused or resumed.
-
To notify your supervisor of a call, click the flag button. Enter a message for the
supervisor and click Raise.
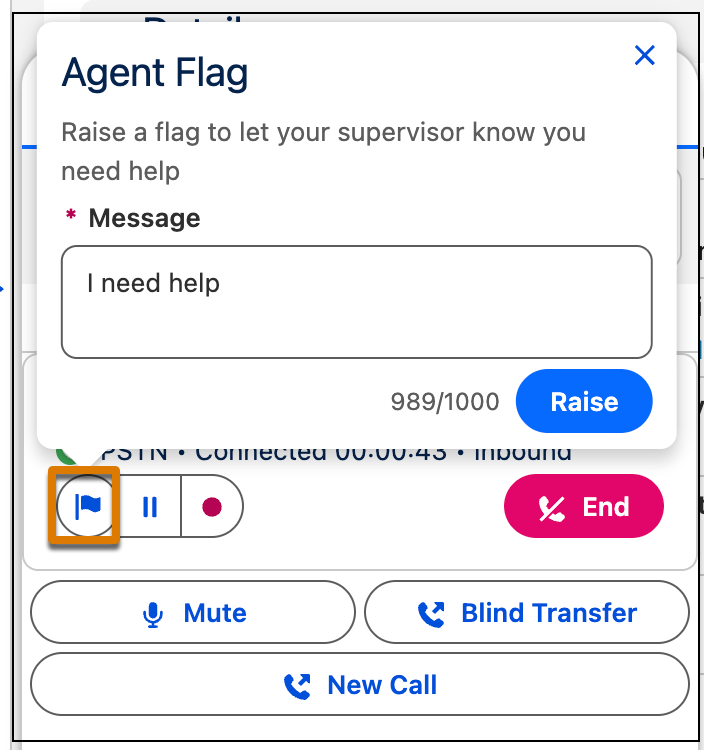 Your supervisor is alerted in Command Center for Service, and your flag is added to the Raised Flags widget in their supervisor wallboard. If you no longer need help, you or the supervisor can lower the flag.
 -
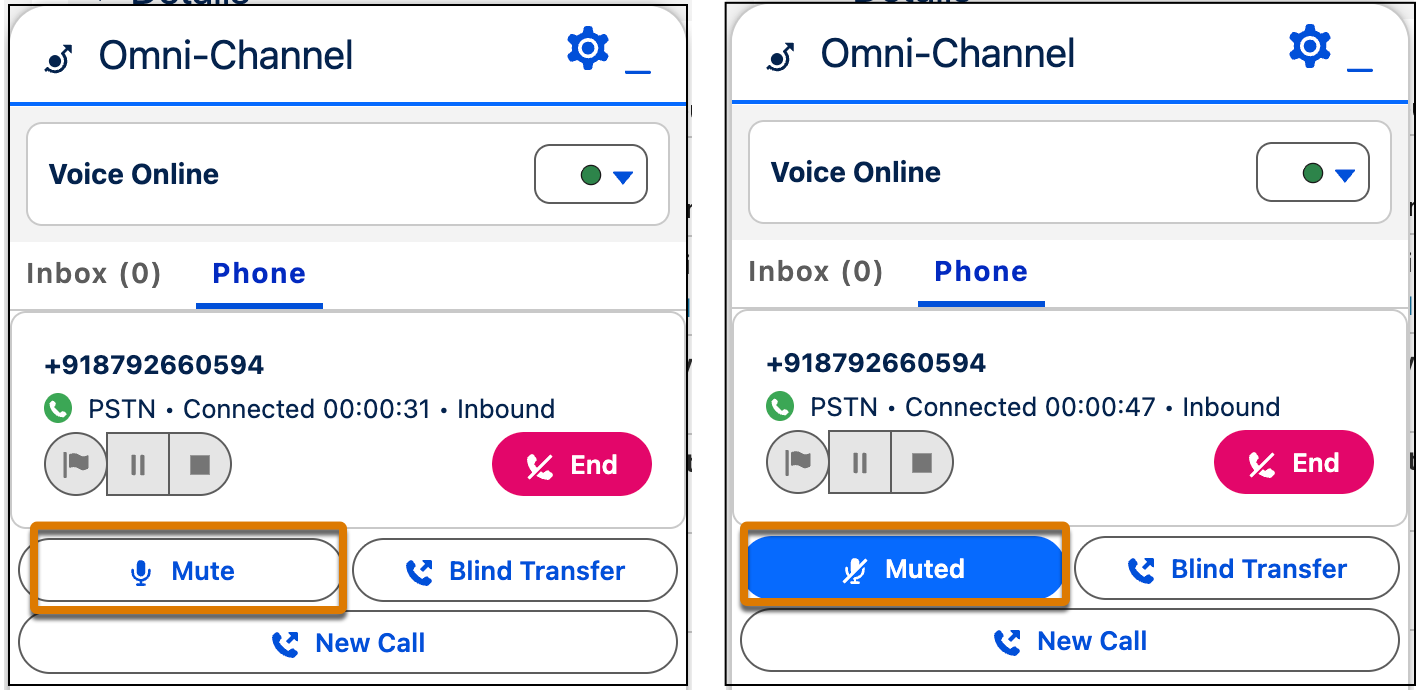
To mute a call, click Mute. To unmute the call, click
Muted.
Note When you initiate an outbound call using click-to-dial, Salesforce Voice automatically
links the voice call to the source record. This automatic linking supports custom objects and
standard objects such as Account, Case, Contact, Lead, CollectionPlan, ContactRequest,
WorkOrder, and Opportunity. Also, for calls initiated from a Case contact role or Opportunity
contact role, the related record field is automatically linked to the parent Case or Opportunity
record.
Did this article solve your issue?
Let us know so we can improve!