The Case Timeline is a new, intelligent component that replaces the existing fragmented
feeds and related lists with a single, unified, and curated view of all case-related events. It
provides reps with instant context by intelligently organizing customer conversations, internal
collaboration, and critical case lifecycle milestones.
To learn more about the Timeline feature, see Timeline.
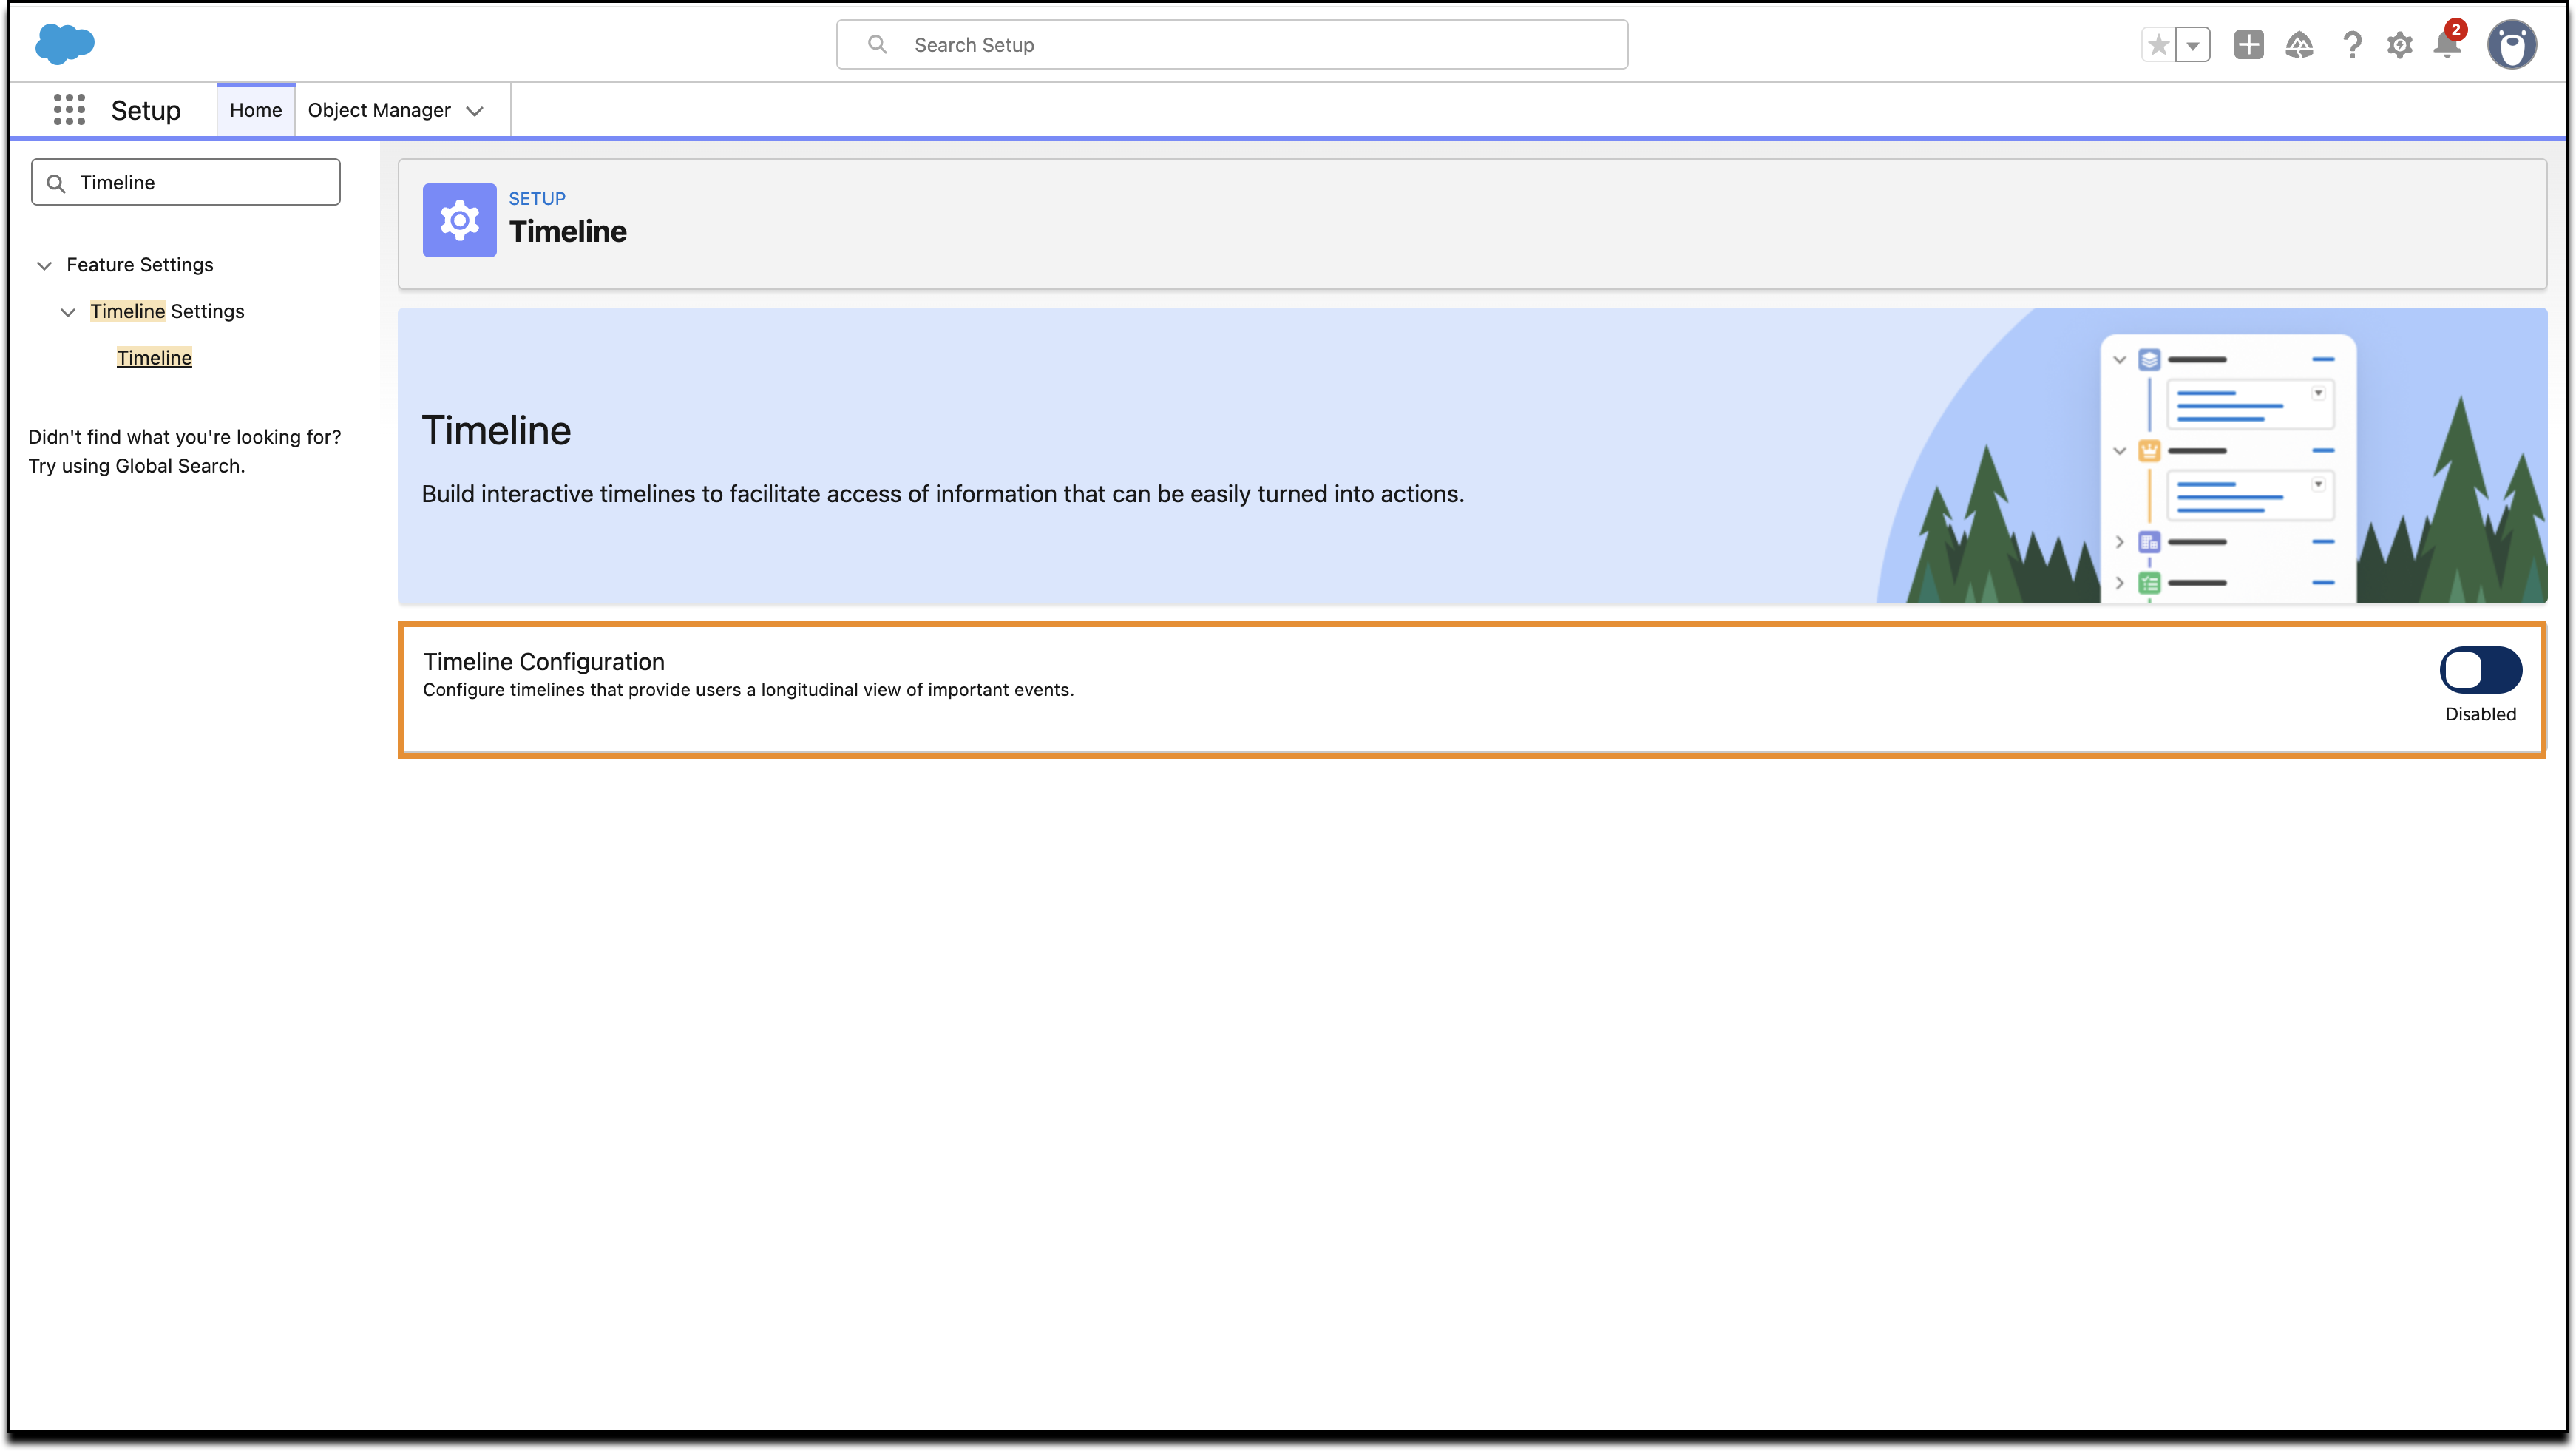
Turn on Case Timeline
1) In Setup, search and select
Timeline. In the Timeline window, toggle the Timeline Configuration
to Enabled.
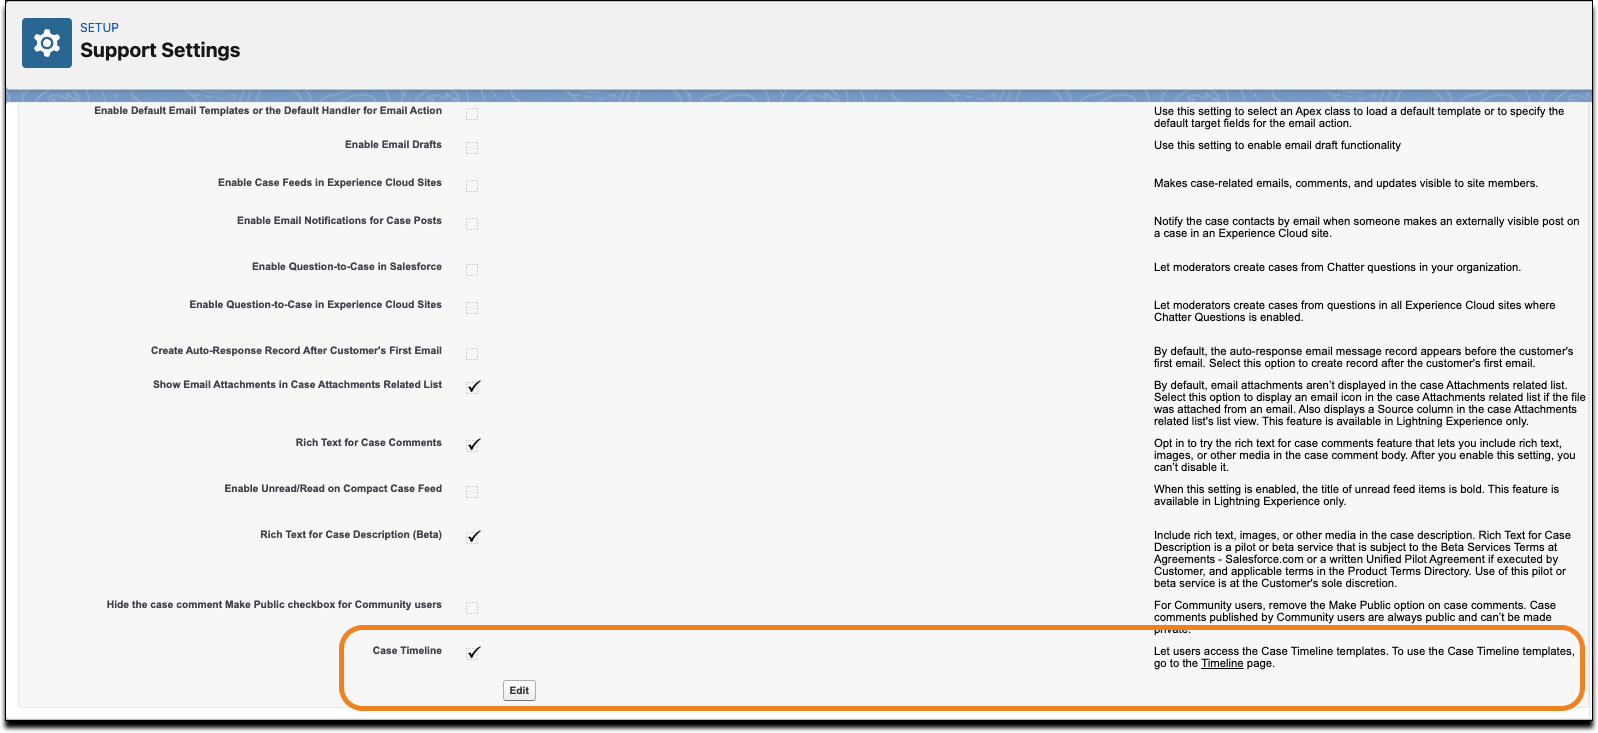
2) In Setup, in the Quick Find Box, search for
Support Settings and select Support Settings. In the Support Settings
window, select Case Timeline.
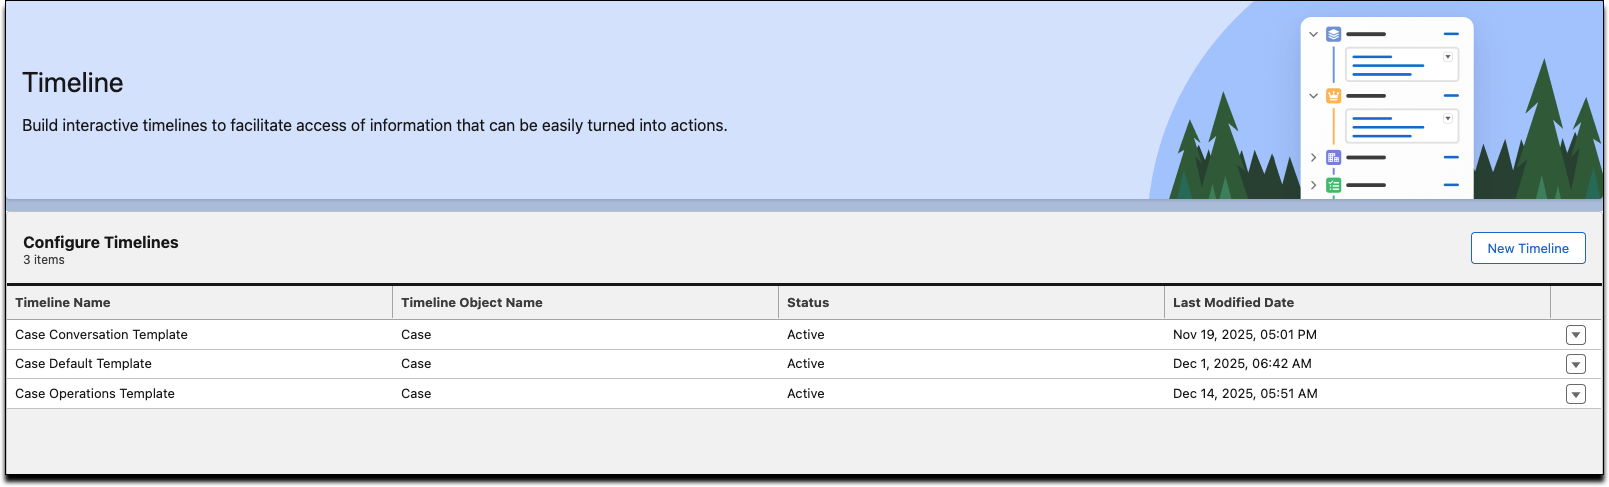
Timeline templates help you create case timelines with minimal setup. When you turn
on Timeline, three standard templates are available to help you get started.
Case Conversation Template: Use this template to filter out the case related
updates from all the conversations related to the case. It is pre-configured with events
important for conversations, such as: Email Message, Case Comment, Content Document Link,
Swarm, and Voice Call.
Case Default Template: This template gives you context into the history of the
case. It is pre-configured with events important for case history, such as: Case History,
Case Milestone, Case Team Member, Case Comment, and Case (EntitlementId).
Case Operations Template: Use this template to view all the critical highlights
of the case such as case history and milestones. It includes pre-configured events that
show completed milestones, such as: Case Milestone, Task, Topic Assignment, Survey
Subject, and Case Article.
Preview a Timeline
Preview each Timeline on a case you are working on
to decide which layout is the most appropriate for your needs. The Timeline templates can be
customized.
In the Timeline window, click the dropdown button next to a
Template and select View.
Click Preview Timeline.
Search for the specific case in the View Timeline On search
bar.
Once you know which Timeline you want to use, click the dropdown button next to that
Template and select Activate.
Add the Case Timeline component to the Case Page Layout
To be able to
see Case Timeline in the case feed, add the Case Timeline component to the Case Page
Layout.
In Setup, in the Object Manager, search for Case and select
Case.
In the Case window, select Case Page Layout.
In the Case Layout panel, select Mobile and Lightning Actions.
Drag the Timeline button from the Mobile and Lightning Actions to
the Salesforce Mobile and Lightning Experience Actions. Click Save
in the Case Layout panel.
Did this article solve your issue?
Let us know so we can improve!
Loading
Salesforce Help | Article
Cookie Consent Manager
General Information
Required Cookies
Functional Cookies
Advertising Cookies
General Information
We use three kinds of cookies on our websites: required, functional, and advertising. You can choose whether functional and advertising cookies apply. Click on the different cookie categories to find out more about each category and to change the default settings.
Privacy Statement
Required Cookies
Always Active
Required cookies are necessary for basic website functionality. Some examples include: session cookies needed to transmit the website, authentication cookies, and security cookies.
Functional Cookies
Functional cookies enhance functions, performance, and services on the website. Some examples include: cookies used to analyze site traffic, cookies used for market research, and cookies used to display advertising that is not directed to a particular individual.
Advertising Cookies
Advertising cookies track activity across websites in order to understand a viewer’s interests, and direct them specific marketing. Some examples include: cookies used for remarketing, or interest-based advertising.