
You are here:
Shared Steps for Open CTI Migration
If you're migrating from Open CTI to another Voice solution from Salesforce, complete these steps regardless of your migration path.
Before you get started, review Choose Your Open CTI Migration Path and review the steps specific to your chosen migration path.
Depending on the migration path, the connector and telephony backend are installed via a package, AWS account setup, or Salesforce provisioning. Specifically:
- Paths 1, 2, and 3 involve the same Salesforce reconfiguration and data model, so all shared steps apply. Every call creates a VoiceCall record, routing happens through Omni-Channel, screen pops run in Omni flows, and post-call automation runs in record-triggered flows.
- Path 4 involves a different setup experience and the data model differs, so some shared steps don't apply.
Step 1: Create a Salesforce Voice Contact Center
This step is required for migration paths 1, 2, and 3. It isn't required for Salesforce Voice with Native Telephony (path 4). To configure path 4, use the one-time setup from Salesforce Go that creates a basic contact center, or see Set Up Salesforce Voice for detailed instructions.
The Salesforce Voice contact center replaces your Open CTI call center. For a clean migration, create a new contact center. An Open CTI call center includes a CTI Adapter URL. In contrast, a Salesforce Voice contact center has no URL. The connector is loaded as a Lightning component from the installed package, or in the case of native Voice, is built into the Salesforce platform.

callCenterType and vendorInfoApiName fields. See
your telephony vendor's documentation for the correct field values.- From Setup, enter Contact Centers into the Quick Find box.
- Depending on your telephony model, select Partner Telephony Contact Centers or Amazon Contact Centers.
-
Click New.
The Create Contact Center wizard opens.
-
Enter a clear name, such as Voice - Your vendor name -
Production.
Don't assign users to your contact center yet.
For detailed instructions based on your telephony model, follow these guides:
- Salesforce Voice with Partner Telephony: Create Your Partner Telephony Contact Center
- Salesforce Voice with Amazon Connect: Create Your Amazon Connect Contact Center
- Salesforce Voice with Partner Telephony from Amazon Connect: Create a Partner Amazon Contact Center
Step 2: Configure Omni-Channel for Voice
This step is required for migration paths 1, 2, 3, and 4.
If you already use Omni-Channel for cases, Messaging, or Enhanced Chat, add a Voice service channel. If you're new to Omni-Channel, set it up from scratch.
Create a Voice service channel.
- From Setup, in the Quick Find box, enter Service Channels, then select Service Channels.
- Enter Voice as the label, and select VoiceCall as the object.
- In the channel settings, set the After Conversation Work timeout to match your current ACW policy, if you have one.
Create or update a routing configuration.
- From Setup, in the Quick Find box, enter Routing Configurations, then select Routing Configurations.
- Click New or edit an existing routing configuration.
-
Select a routing model.
For Voice, Most Available is recommended.
-
Enter 1 as the units of capacity.
Because Voice is exclusive, one call fully occupies a rep.
Create or update an Omni-Channel queue.
- From Setup, in the Quick Find box, enter Queues, then select Queues.
- Click New or edit an existing queue.
- Add VoiceCall as a supported object.
- Assign your routing configuration to the queue.
- Add reps as queue members, or use public groups to assign members.
Create presence statuses.
- From Setup, in the Quick Find box, enter Presence Statuses, then select Presence Statuses.
- Create at least three statuses: Available for Voice, Busy, and Break.
- Assign the Voice service channel to the Available for Voice status.
-
From the Profiles page in Setup, assign the new presence
statuses to user profiles.
In each profile's settings, navigate to Enabled Service Presences.

Step 3: Build an Omni-Channel Flow to Replace Screen Pop
This step is required for migration paths 1, 2, 3, and 4.
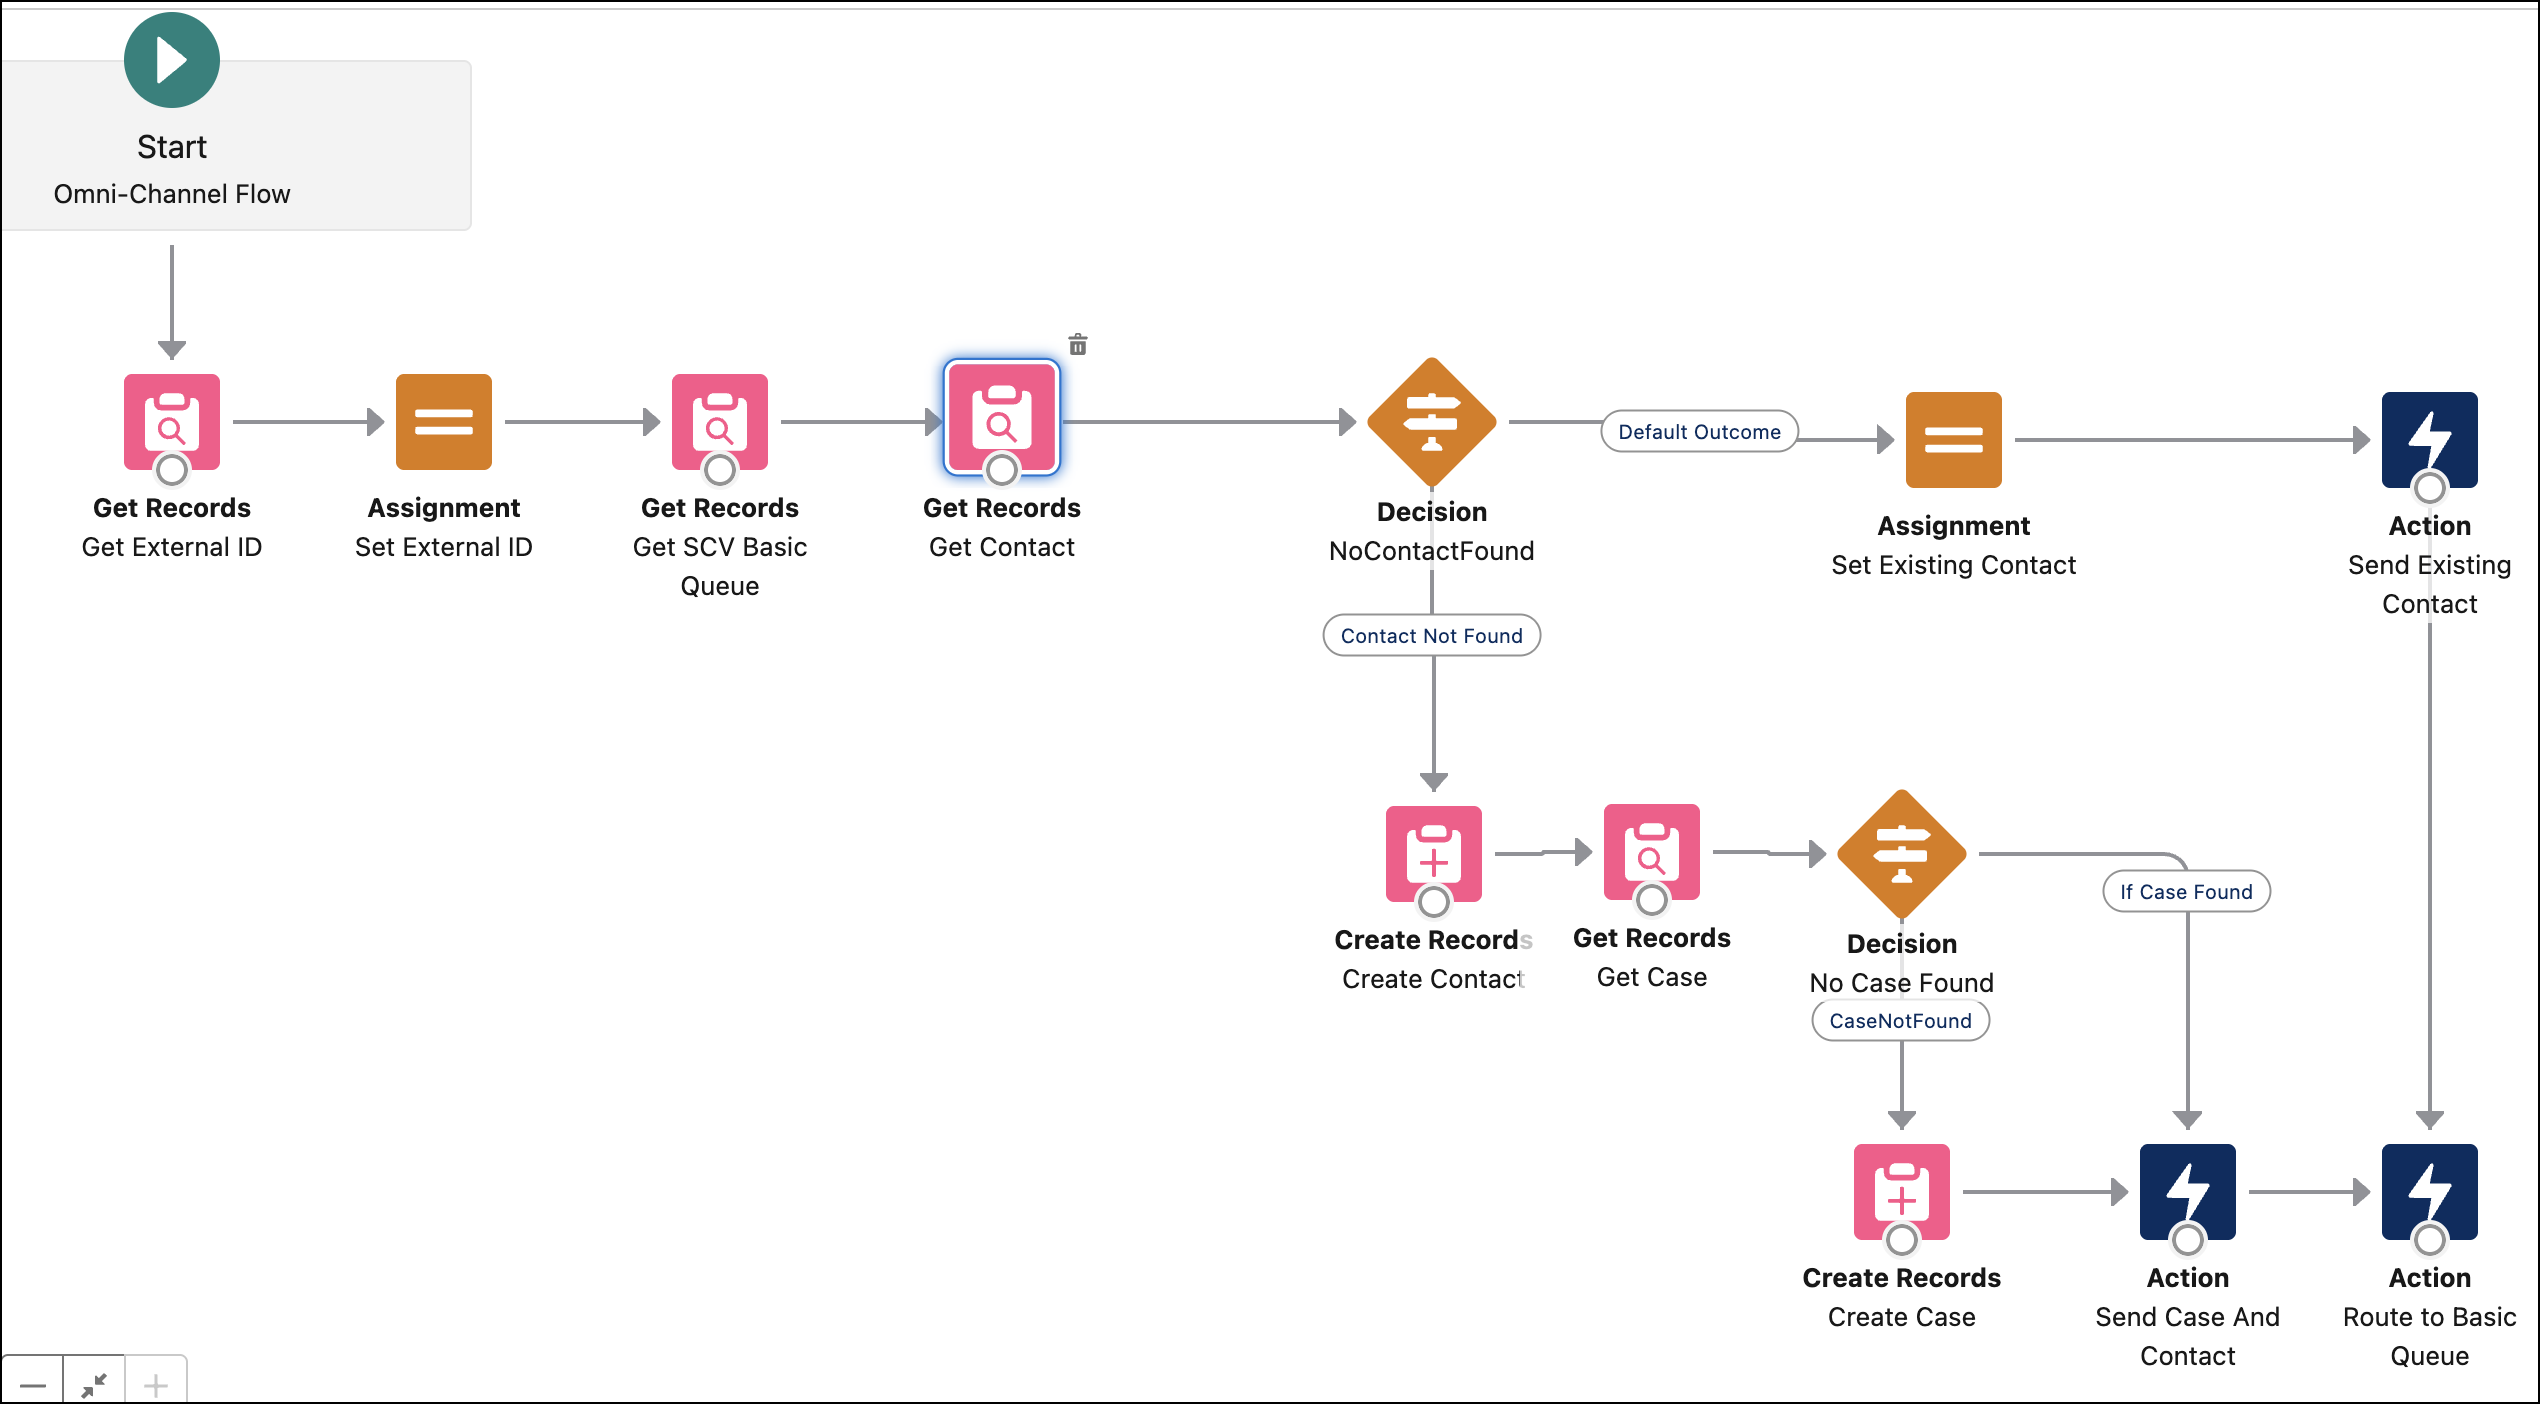
In Open CTI, the screen pop is JavaScript built into the Open CTI adapter, and it can't be reused. You can rebuild it declaratively in Flow Builder.
- In Setup, enter Flows in the Quick Find box, then select Flows.
- Click New Flow, then search for and select Omni-Channel Flow.
-
Configure the flow by adding elements and actions.
Your flow will be unique to your business logic. Here's a general example:
- Save and activate your flow.
-
Assign the flow.
- For Salesforce Voice with Native Telephony, from Setup, use Quick Find to go to Communication Channels. From the All Channels tab, select the channel. Edit the channel to update routing details.
- For all other Voice telephony models, from Setup, use Quick Find to go to Amazon Contact Centers or Partner Telephony Contact Centers. Select your contact center. In the Contact Center Channels section, edit a channel to specify your flow under Call Routing.
- Save your changes.
See also:
Step 4: Assign Reps and Customize Layouts
This step is required for migration paths 1, 2, 3, and 4.
Associate your reps to the new Salesforce Voice contact center and retire your Open CTI softphone layouts. For most telephony models, admins assign reps to a contact center through the contact center's member list, not through the Manage Call Center Users page. For Salesforce Voice with Native Telephony, admins assign permission sets only; there's no need to assign reps to a contact center.

Assign reps to the new contact center. This step isn't required for Salesforce Voice with Native Telephony.
- From Setup, enter Contact Centers in the Quick Find box, then select Partner Telephony Contact Centers or Amazon Contact Centers, depending on your telephony model.
- Click the name of your contact center.
- In the Contact Center Users section, click Add.
- Select the users to add to this contact center.
Assign permission sets to reps.
-
Assign the Salesforce Voice permission sets included with your package.
Salesforce-provided Amazon Connect or Partner Telephony packages typically include these permission sets: Salesforce Voice Contact Center Rep, Salesforce Voice Contact Center Rep (Partner Telephony), Salesforce Voice Contact Center Admin, Salesforce Voice Contact Center Admin (Partner Telephony), Salesforce Voice Contact Center Supervisor, and Salesforce Voice Contact Center Supervisor (Partner Telephony).
For vendor-specific Partner Telephony packages, check the vendor's installation guide for permission set names.
Salesforce Voice with Native Telephony uses a different licensing model with its own permission sets. For names, see Assign Permission Sets for Agentforce Contact Center.
Configure the app and layouts.
-
Add the Omni-Channel component to the app.
The voice softphone panel is embedded in the Omni-Channel component, so there's no separate softphone panel to add.
-
Retire Open CTI softphone layouts.
In Salesforce Voice, the call controls, screen pop, and related-records panel are controlled by the Omni-Channel flow and Voice Extension settings in the contact center. Softphone layouts are not used.
