
You are here:
Set Branding for the Channel Menu
After you create a channel menu for your Salesforce site or Experience Cloud site, customize the button colors, header background, and font to reflect your company’s brand.
Required Editions
| View supported editions. |
| User Permissions Needed | |
|---|---|
| To set up a channel menu: | Customize Application AND Modify Metadata |
Before you start, get your company’s brand color codes from the team that maintains your website. Select colors by providing the hey code or RGB value, or by selecting from the color picklist.
Here’s a side-by-side comparison of a channel menu before and after light branding. The
button and header background colors were changed in Branding. The Header text was changed in
Labels.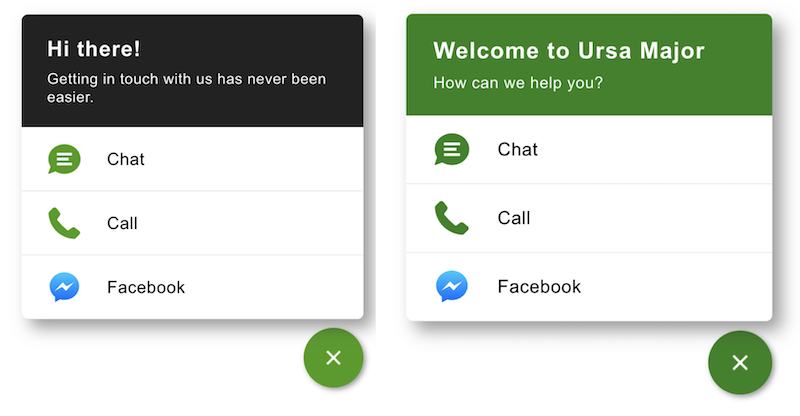

From the Channel Menu Settings page, select Edit for Branding. Follow the steps to customize your buttons:
- From Setup, enter Channel Menu in the Quick Find box and select Channel Menu.
- Click the name of the channel menu you want to edit.
- In the Branding section, click Edit.
- Select Button and Button Icon colors. Add your hex code or RGB code, or select a color.
- Use the default button and close icons, or add custom URLs to replace them.
- Expand the Channel Menu Header and Background section and indicate whether to show a header.
- Select colors for the header background and text, and set your Header Text Alignment.
- Add an optional Header Background Image URL or leave blank for a solid color.
- Customize the main panel with a Menu Background Color, Menu Text Color, Menu Text Hover Color, and Menu Background Hover Color.
- Select Show lines between items to show horizontal lines between your menu items, and select a Horizontal Line Color.
- Select a preferred font for your menu and choose a base font size. If you select a custom font, the font must be hosted on your web server.
- Check your branding selections in the Preview window. Custom fonts and custom buttons don’t appear. If your Preview window is empty or missing a channel, check your menu item settings.
- Save your changes.
Keep these considerations in mind when customizing your fonts, font size, and background image:
- Some fonts aren’t supported on mobile browsers. If you select a font that isn’t available for a mobile user, the browser’s default font is displayed.
- The header height can’t exceed 75 pixels.
