
You are here:
Add Items to the Channel Menu
Select and customize the customer channels that will appear in the channel menu on your Salesforce site or Experience Cloud site.
Required Editions
| View supported editions. |
| User Permissions Needed | |
|---|---|
| To set up a channel menu: | Customize Application AND Modify Metadata |
Before adding menu items, create a channel menu deployment on the Channel Menu page in Setup.
- From Setup, enter Channel Menu in the Quick Find box and select Channel Menu.
- Click the name of the channel menu you want to edit.
-
In the Menu Setup section, click Edit.
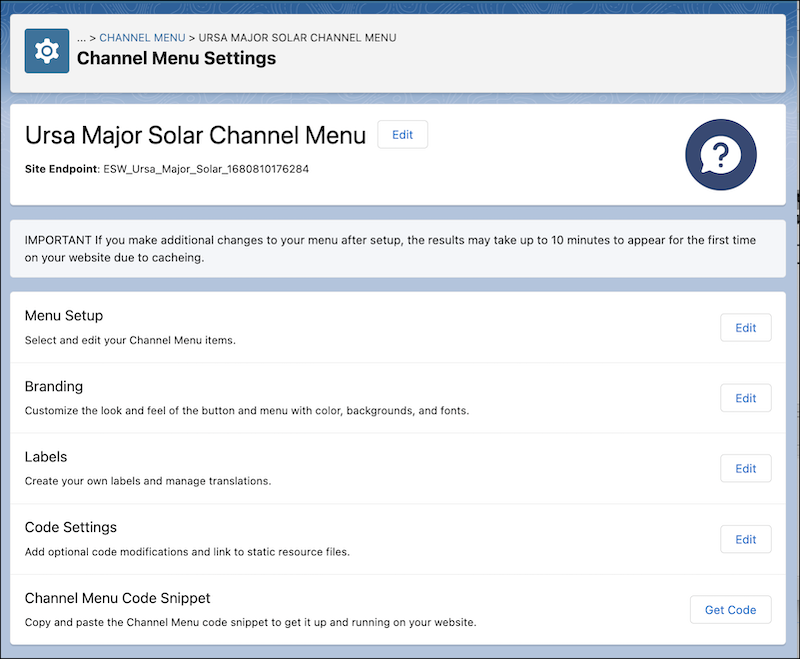
-
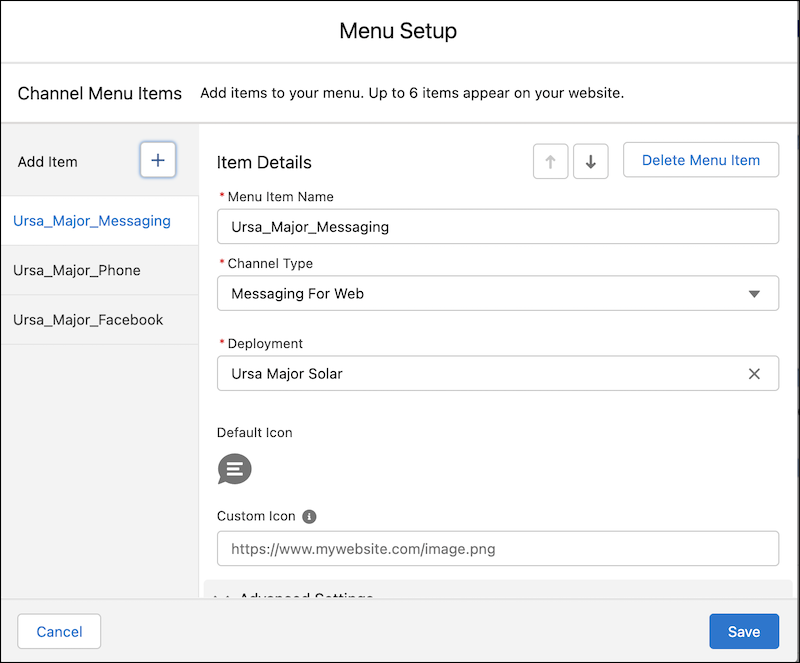
Click the Add Item button to add up to six channels for your website. As you add each
item, enter details:
- Add a menu item name, which isn’t visible to customers.
- Select a channel type: Call, SMS, Apple Messages for Business, Enhanced Web Chat, Facebook, WhatsApp, or Web URL.
- Provide the phone number, URL, or active messaging channel to link the menu item to. If you have international customers, use the + symbol with a country code for your number when adding a phone channel.
- Optionally, add a custom icon.
- Under Advanced Settings, if you're using the Channel Menu Reordering API, deselect Show this menu item. Otherwise, leave it selected.
- Optionally, hide the menu item for specific user operating systems. For example, hide Enhanced Web Chat for the mobile platform to encourage the use of mobile-friendly channels such as WhatsApp or SMS.
- Change the order of the menu items with the up and down arrow buttons.
- Click Save when all your channels have been added to the menu.
You can edit your menu items at any time.
Did this article solve your issue?
Let us know so we can improve!
