
Set Up the Scheduling Console
Set up the Scheduling Console using Salesforce Go or by completing the steps manually. Salesforce enables the Scheduling Console for you.
Required Editions
| Available in: Lightning Experience |
| The Field Service core features, managed package, and mobile app are available in Enterprise, Unlimited, and Developer Editions. |
 This is a Field Service managed package feature.

To provide continuity for users, any customizations that were applied to the Classic Dispatch Console continue to function in the Scheduling Console. All current user settings are fully supported in the Scheduling Console, and the existing Gantt transfers without any changes.

You can set up the Scheduling Console in two ways.
Option 1: Salesforce Go
Use Salesforce Go for a guided setup experience that automates key configuration steps.
- Select Salesforce Go from the gear menu or from the main Setup menu.
- Select Scheduling Console.
-
Follow the steps on the page.
 Note For the Migrate Service Appointment Lists step, see Migrate Service Appointment Lists.
Option 2: Manual Setup
If you're not using Salesforce Go, complete these setup steps manually before your users can access the Scheduling Console.
Step 1: Enable the Scheduling Console Tab
Use permission sets to enable the Scheduling Console tab.
- From Setup, enter Permission Sets in the Quick Find box, then select Permission Sets.
- Select Field Service Dispatcher Permissions or create a permission set for your users.
- Within the permission set, go to Object Settings | Scheduling Console.
- Click Edit and set the tab to Available and Visible.
- Click Manage Assignments and add the relevant users to the permission set.
Step 2: Create the Service Appointment List View
Create the service appointment list view using standard Salesforce list views.
Service appointment list views are generated from the list views created for service appointment records. Create standard list views in the Service Appointment tab and share them with all users or with a specific user group.
Step 3: Assign Map Permission Sets
Assign map-related permission sets to your users.
-
To let users view the map, assign the following app permissions.
- From Setup, enter Users in the Quick Find box, then select Users.
- Click Permission Sets, then click Field Service Dispatcher Permissions.
- Under Apps, select App Permissions and click Edit.
- Under Scheduling Console, select the Access Scheduling Console Map permission set to let users view the map. This permission set also provides access to the Show on Map action on service appointments.
- Under Scheduling Console, select the Show Planned Route permission set to let users view routes.
- Save your changes.
-
To enable map polygons, assign the following custom permissions.
- From Setup, enter Permission Sets in the Quick Find box, then select Permission Sets under Users.
- Click Field Service Dispatcher Permissions.
- In the Apps section, click Custom Permissions.
- Click Edit.
-
Add the following available custom permissions to the enabled custom permissions.
- FSL.Polygons - create\update
- FSL.Polygons - view
-
Click Save.
Note To give access to a selection of your users, create custom permission sets and assign these permissions to those users.
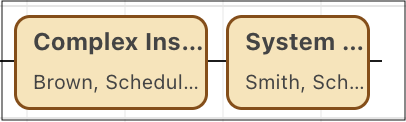
Step 4: Populate the Gantt Label Details Field
Create a flow or another type of automation to populate the Gantt Label Details field subtext.
This field allows users to view additional information right below the Gantt label on the service appointment tile and in the service appointment and service resource popovers.
Step 5: Update the Resource Absence Page Layout
Update the layout so that only relevant fields are visible when users create a resource absence record.
Customize the fields shown in the Create Resource Absence side panel from the Resource Absence page layout in Setup.
Step 6: Configure Global Search
Configure the fields that users can search by when using the global search in the service appointment list.
Select up to 10 fields that users can search by when using the service appointment list’s global search. If users need to search by fields on related records such as Work Order, Account, and Assigned Resource, expose those fields on the Service Appointment object and include them in the global search configuration.
- Search by lookup fields
- Comma-separated search for multiple values
- From Setup, go to the Object Manager.
- Click Service Appointment.
- Click Search Layouts and then edit the relevant layout.
- Select the relevant fields and save your changes.
Step 7: Assign the Find Candidates User Permission
Assign users the Show Explanations for Candidate Results user permission for the Find Candidates AI Reasoning feature.
This feature shows a Why? action next to candidates which, when clicked, shows an AI explanation for each suggestion and helps users understand why one option is superior or inferior to others.
- From Setup, enter Permission Sets in the Quick Find box, then select Permission Sets.
- Click Einstein Field Service User, then click System Permissions.
- Select the Show Explanations for Candidate Results permission.
- Return to the Permission Sets page.
- Click Einstein Field Service User, then click Manage Assignments.
- Assign the permission to the relevant user.
Step 8: Assign Optimization Permission Sets
Assign optimization-related permission sets so that users can run resource schedule optimization, In-Day, and Global optimizations and use advanced optimization settings.
- From Setup, enter Users in the Quick Find box, then select Users.
- Click Permission Sets, then click Field Service Dispatcher Permissions.
- Under Apps, select App Permissions and click Edit.
-
Under Scheduling Console, select the relevant permission
sets.
- Run Resource Schedule Optimization to optimize a service resource's schedule.
- Run In-Day Optimization to resolve last-minute schedule changes for one or more service territories on the day of service.
- Run Global Optimization to optimize the schedule overnight for one or more service territories within a specific date range.
- Set Advanced Optimization Filters to set advanced filters in resource schedule optimization, in-day, and global optimization. With these filters, dispatchers can filter the scheduling policy, the optimization scope, and appointments to keep scheduled.
- Save your changes.
Step 9: Customize the Service Appointment Side Panel (Optional)
Edit the default Lightning page for the Service Appointment side panel or create one using the Lightning App Builder.
The Scheduling Console includes a default Lightning page for the Service Appointment side panel that shows a default arrangement of tabs and fields. Edit this page to change the default arrangement, or create a new one. You can add, remove, or reorder tabs to customize what information appears in the side panel, including tabs for related objects.
- From Setup, enter Lightning App Builder in the Quick Find box, then select Lightning App Builder.
- Click New to create a Lightning page, or click Edit next to the Service Appointment Side Panel Lightning page to edit the default page. See Lightning Pages.
See Also
- Discover and Set Up Features with Salesforce Go
- Features of the Scheduling Console
- Actions in the Scheduling Console
- Service Appointment List in the Scheduling Console
- Map Views and Routes in the Scheduling Console
- Popovers in the Scheduling Console
- Optimization in the Scheduling Console
- Get Help for Lightning App Builder
