
You are here:
Automate the Approval Process for Knowledge Article Relationships
If needed, you can automate the process for reviewing and approving knowledge article relationships. Knowledge Managers can review, approve, or reject the hierarchy of knowledge articles before they’re published.
Required Editions
| Available in Lightning Experience. View supported editions. |
| User Permissions Needed | |
|---|---|
| To view Enhanced Knowledge Settings in Setup: | Knowledge User license |
| To set up Knowledge Maps | Customize Application AND Read, Create, and Edit access for Knowledge Article Relationships. |
Step 1: Create an approval process.
- From Setup, in the Quick Find box, enter Approval Processes, and then select Approval Processes.
- In the Manage Approval Processes For field, select Knowledge Article Relationship.
- Click Create New Approval Process, and then select Use Standard Setup Wizard.
- Enter a name for the approval process and press tab to autofill the Unique Name field.
- Enter a description and click Next.
-
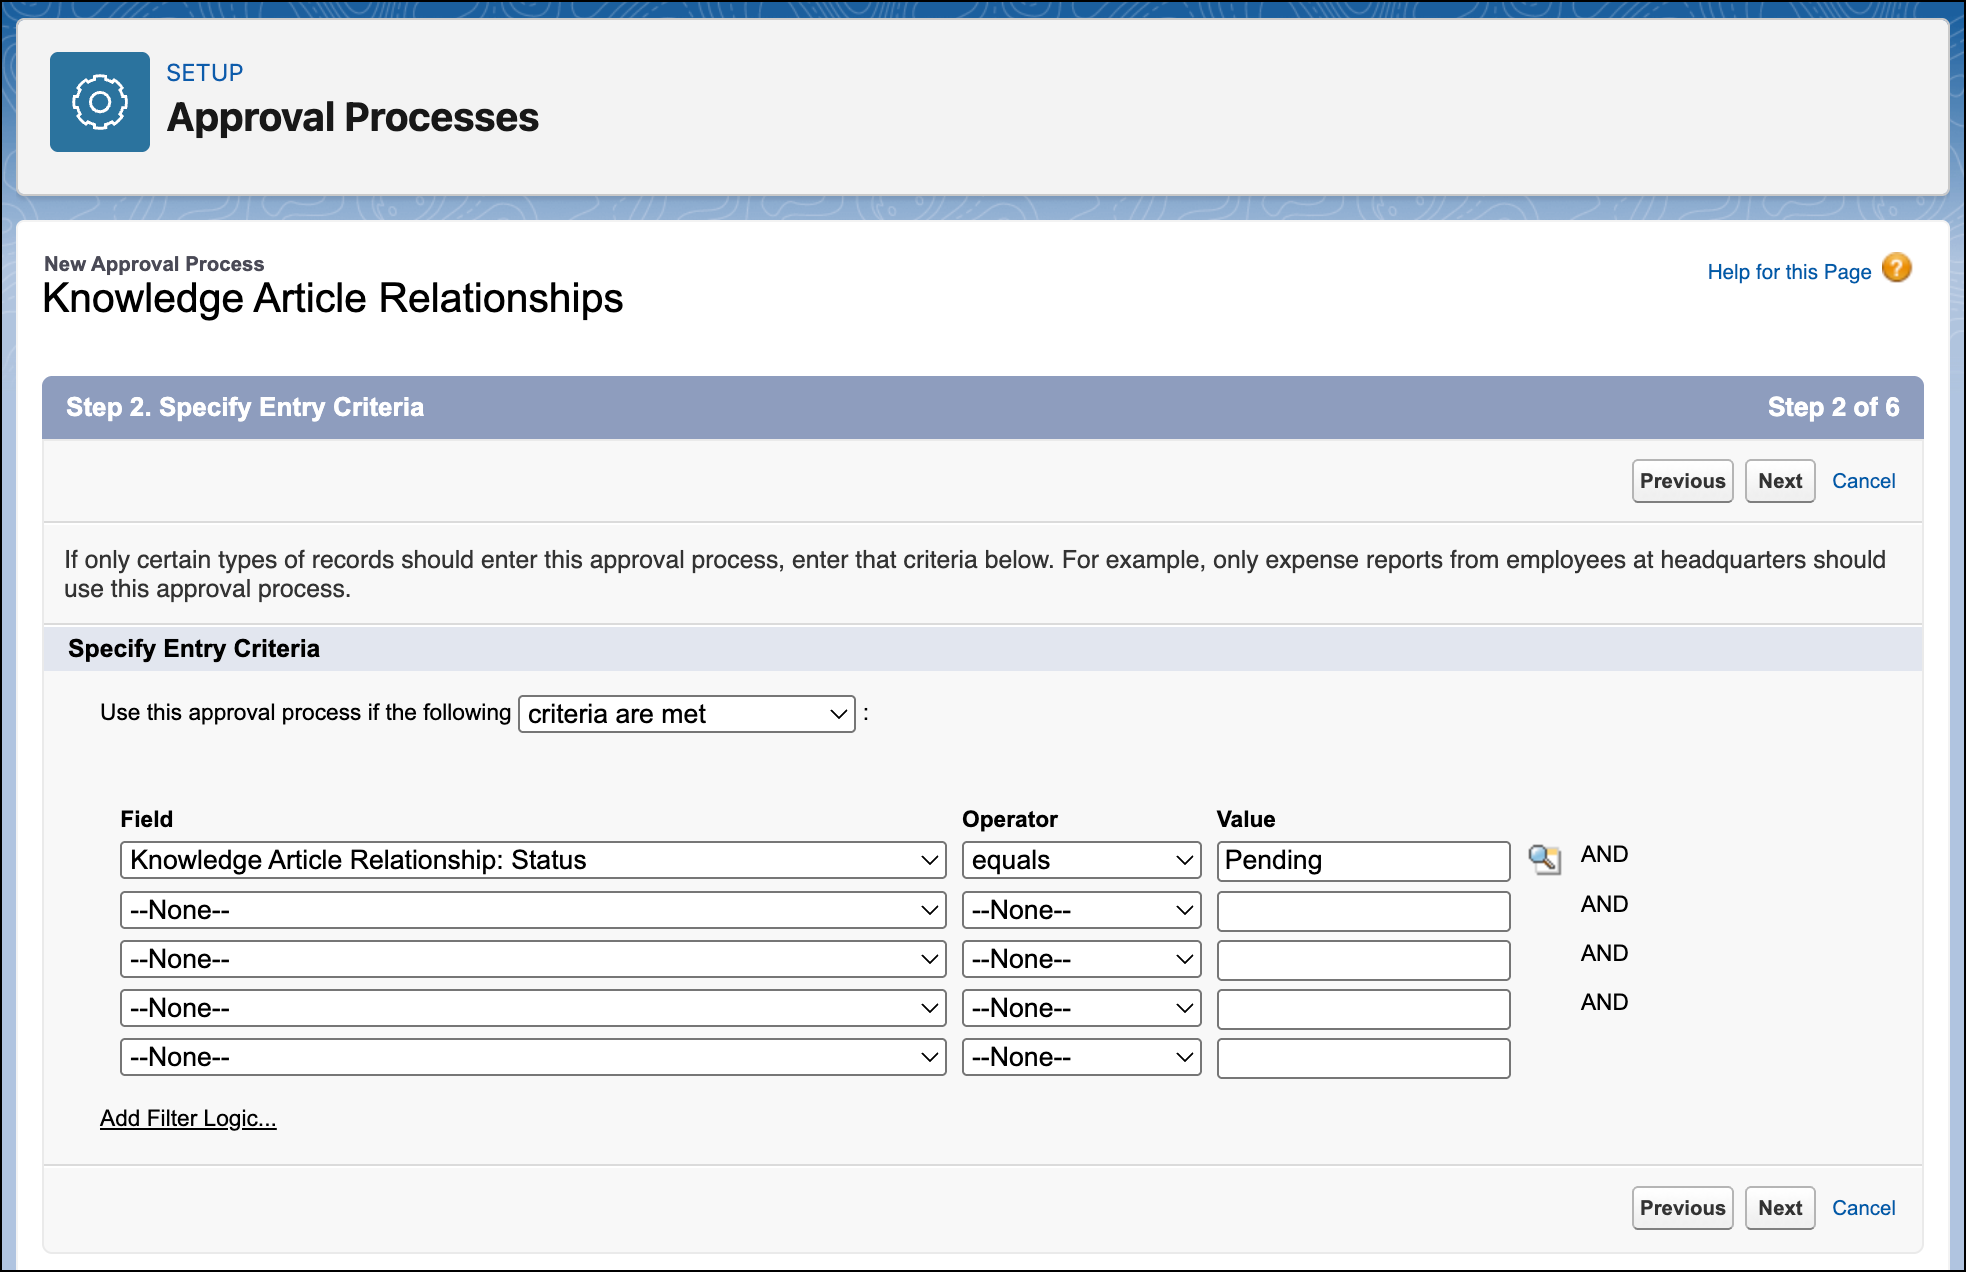
In the Specify Entry Criteria section, specify the criteria a knowledge article
relationship record must meet to be submitted for review and approval.
- Select Knowledge Article Relationship: Status from Field.
- Select equals from the Operator field.
- Enter Pending as the Value.
- Click Next.
- Optionally, you can add automated approvals by selecting a value from Next Automated Approver Determined By.
- Select the Record Editability Properties. For example, select Administrators ONLY can edit records during the approval process to lock the record from edits outside admins.
- Click Next.
- In the Approval Assignment Email Template field, search and select an email template. This notifies an approver that an approval request is assigned to them.
-
Click Next and configure the approval page layout by adding or
removing Available Fields to Selected Fields. Fields added to the Selected Fields list display
to the approver.
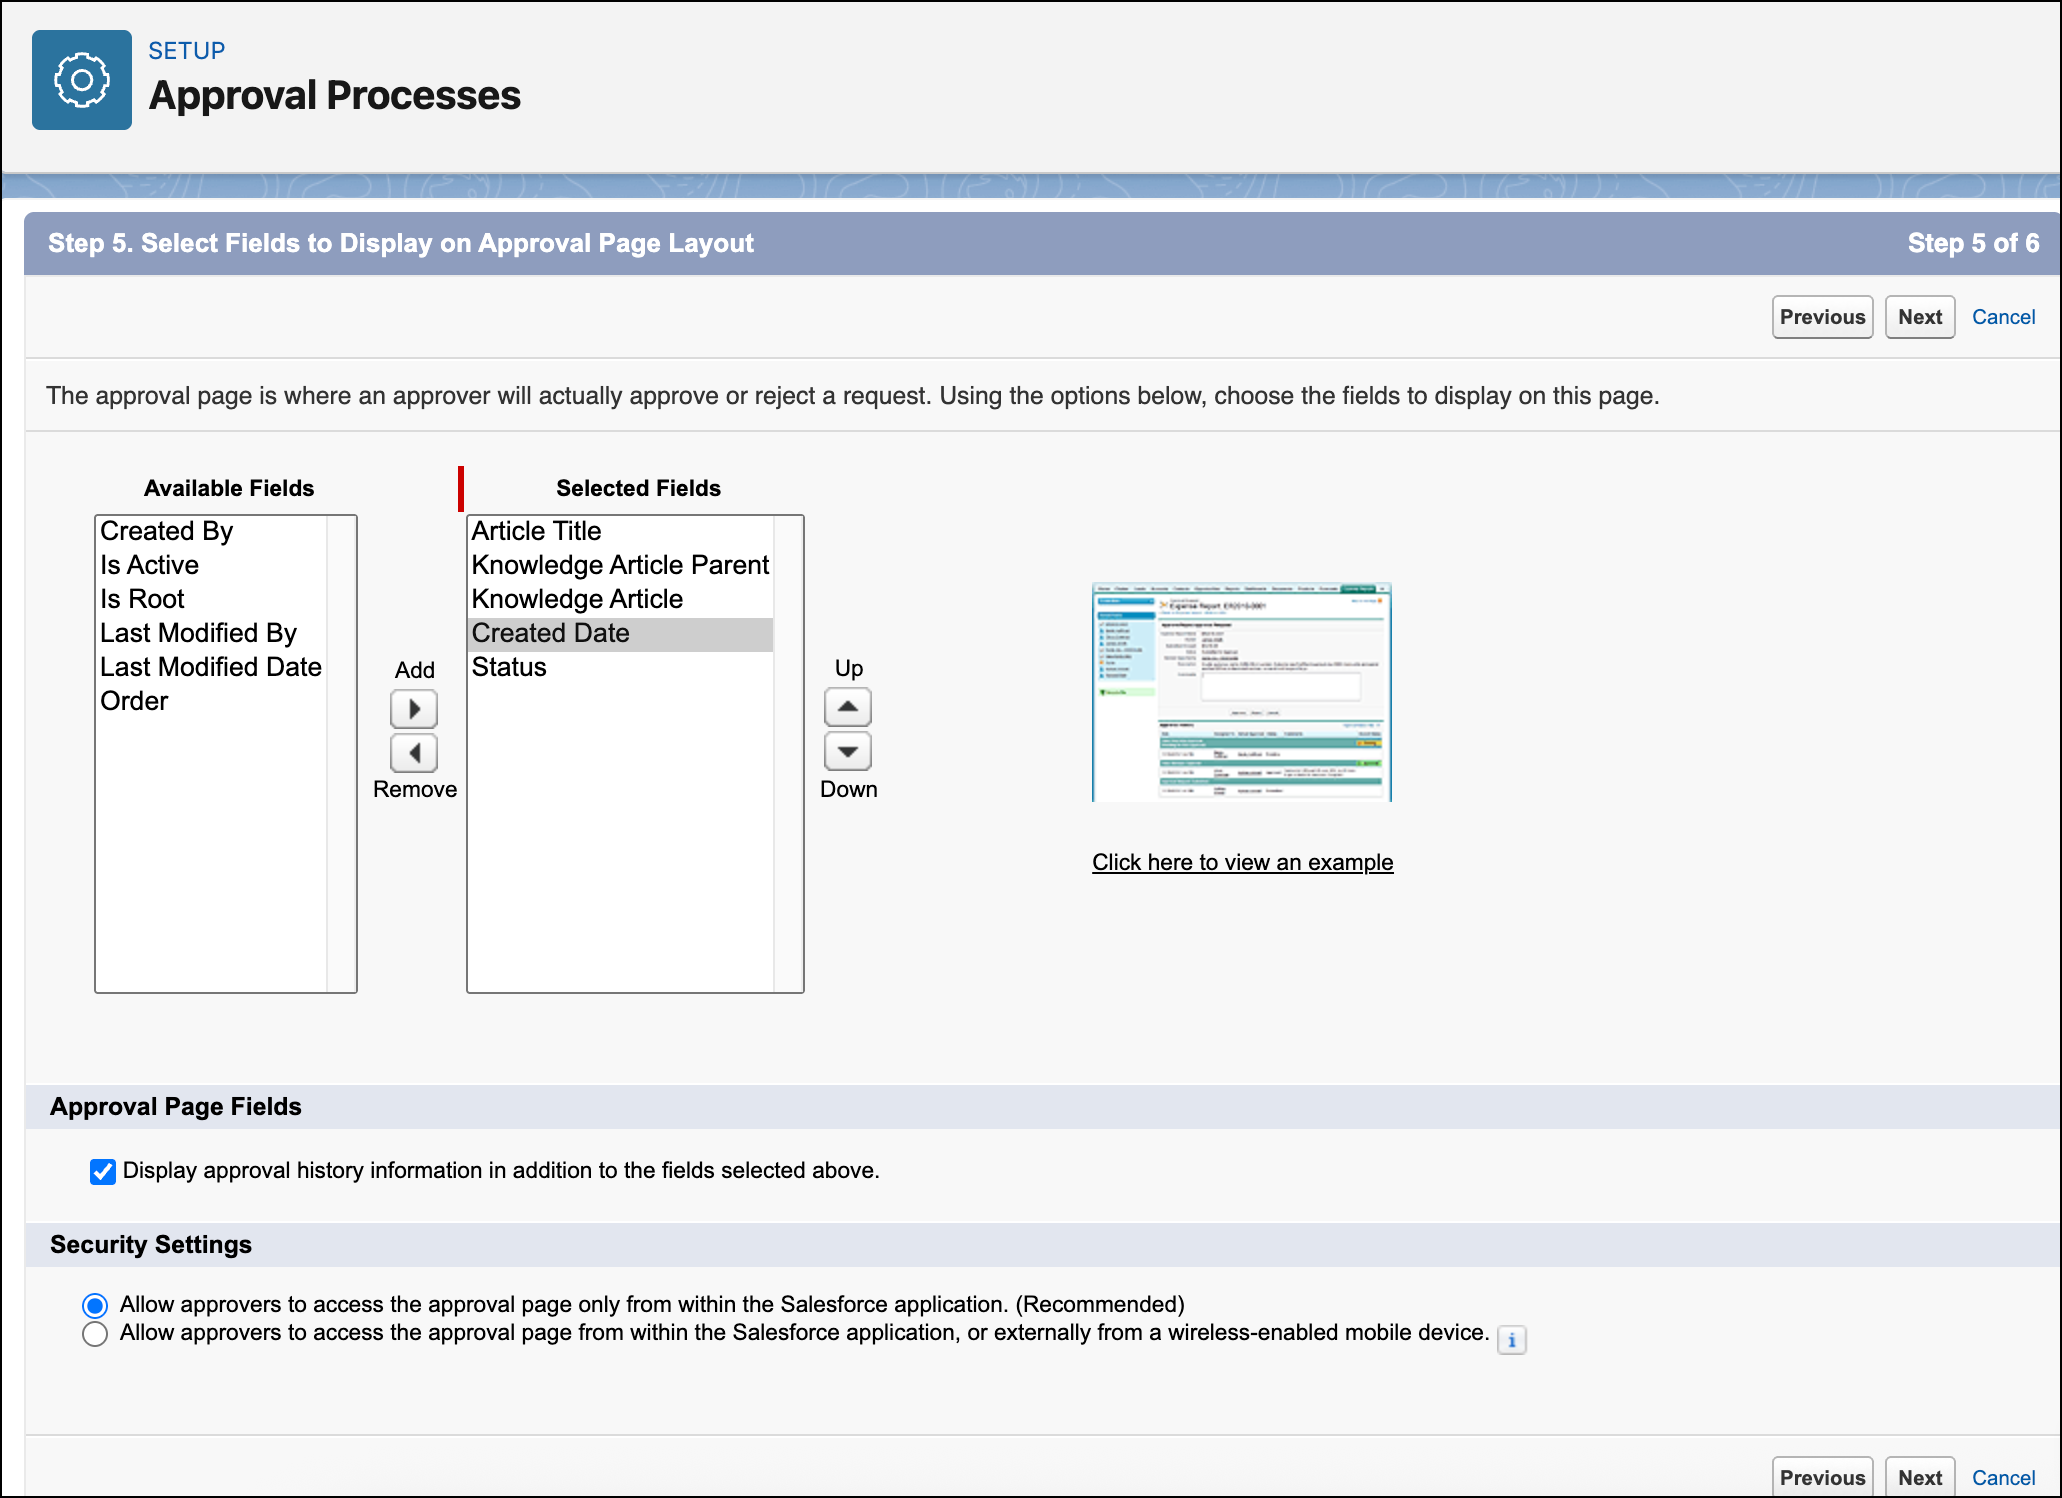
- To display the approval history, select Display approval history information in addition to the fields selected above, and click Next.
- Select Add the Submit for Approval button and Approval History related list to all Knowledge Article Relationship page layouts and Allow submitters to recall approval requests.
- Save your changes.
- Next, to add approval steps, select Yes, I’d like to create an approval step and click Go! to continue.
Step 2: Add approval steps.
Approval steps are milestones within your process that determine where the record moves next.
- Enter a name for the approval step and press tab to autofill the Unique Name field.
- Enter a description.
- Enter a step number if you have more than one step in your process, and click Next.
- Specify the criteria for the record to enter this approval step. For example, “All records should enter this step” submits every record for approval. If there are exceptions, select Enter this step if the following and specify the criteria.
- Click Next.
- Select Automatically assign to approver(s) and then search for and select a specific user to be the approver.
- Save your changes.
- Select No, I'll do this later. Take me to the approval process detail page to review what I've just created and click Go!.
Step 3: Add approval actions
The last step in creating an approval process is to add an approval action. Create an action for both approval and rejection.
-
On the Approval Processes page, in the Final Approval Actions section, click
Add New, and select Field Update.

- On the New Field Update page, enter a name for the approval action and press tab to autofill the Unique Name field.
- Enter a description.
- In the Field to Update field, select Status.
- In the Specify New Field Value section, select A specific value and then select Approved.
- Save your changes.
- Next, in the Final Rejection Actions section, click Add New, and select Field Update.
- On the New Field Update page, enter a name for the rejection action and press tab to autofill the Unique Name field.
- Enter a description.
- In the Field to Update field, select Status.
- In the Specify New Field Value section, select A specific value and then select Rejected.
- Save your changes.
Step 4: Activate the approval process
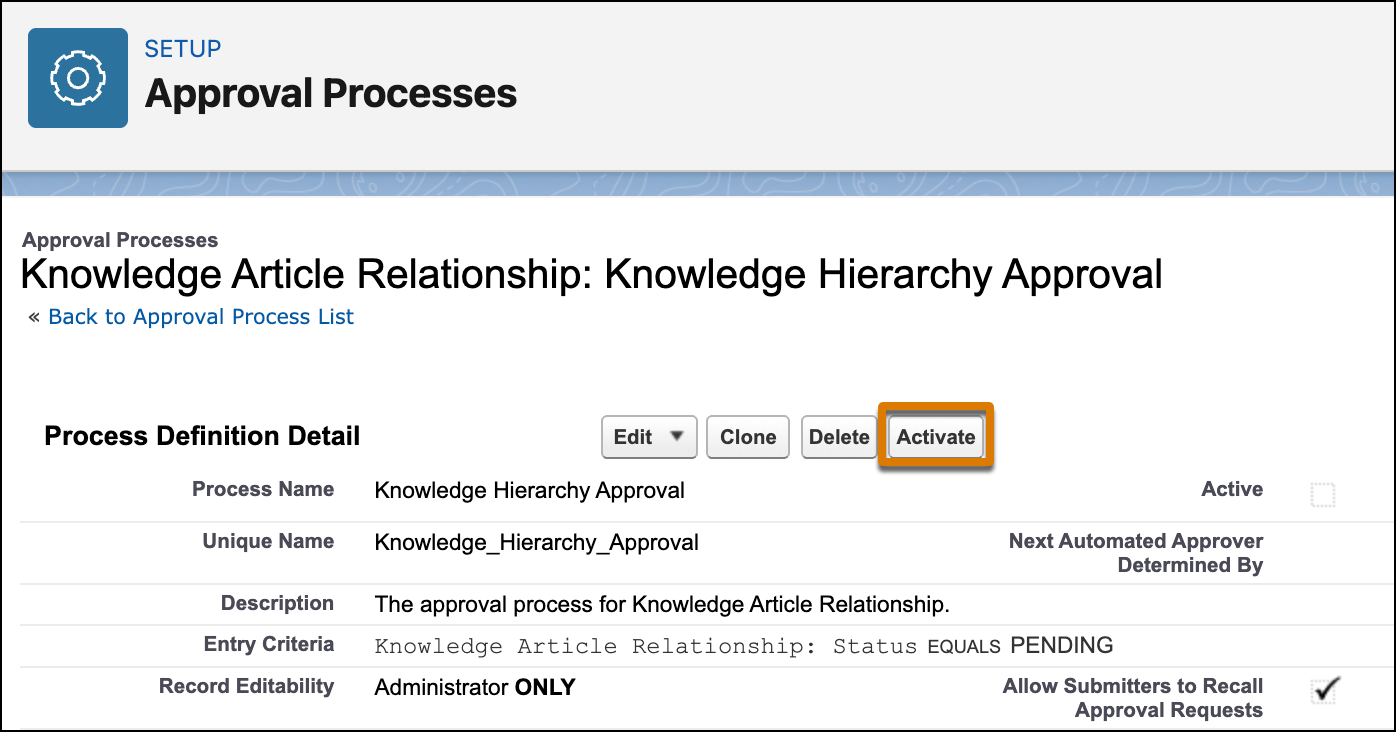
When you're ready to activate the approval process, on the Approval Processes page, click Activate. Only one active version of each approval process can exist at a time. To change an approval process, first deactivate it, and then make your changes.
Step 4: Add the Approval Action to Page Layout
Add a quick action to the Knowledge Article Relationship layout to submit the Knowledge Article Relationship records for approval.
- From Setup, go to the Object Manager tab, and click Knowledge Article Relationship.
- On the Knowledge Article Relationship page, go to Page Layouts, and click Knowledge Map Layout.
-
Click Mobile & Lightning Actions, and add Submit for
Approval if it’s not already available.
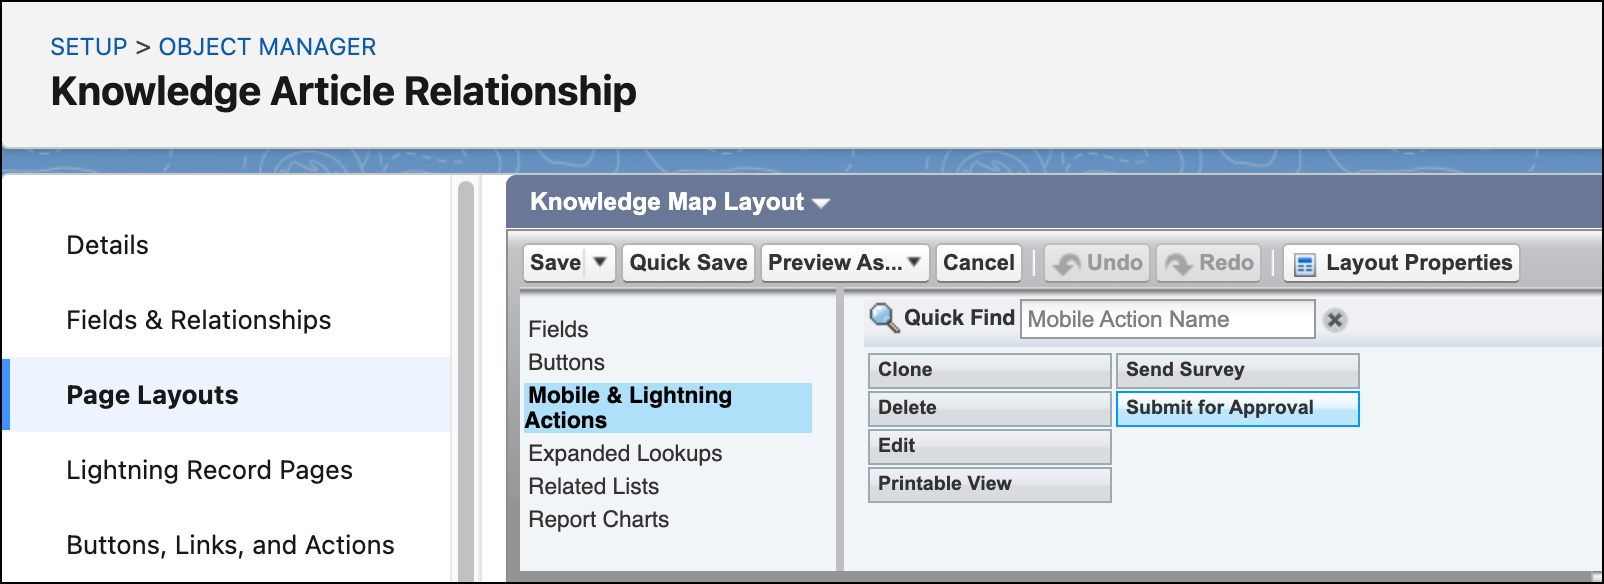
- Click Related Lists, and add Approval History if it’s not already available.
- Save your changes.
