
You are here:
Send a Message to a Customer in an Enhanced Channel
To start a messaging session with a customer in an enhanced Messaging channel or Enhanced In-App Chat, use the Send a Message action.
Required Editions
| View supported editions. | |
 This article applies to:
|
Messaging for In-App, enhanced WhatsApp, enhanced Facebook Messenger, enhanced SMS, enhanced Apple Messages for Business, enhanced LINE, and Bring Your Own Channel |
 This article doesn’t apply to:
|
Messaging for Web, standard WhatsApp, standard Facebook Messenger, and standard SMS channels |
| User Permissions Needed | |
|---|---|
| To initiate messaging sessions in enhanced channels and Enhanced In-App Chat: | Initiate Messaging Sessions AND Messaging Agent |
| To auto-create messaging user records when initiating enhanced SMS messaging sessions: | Send Initial SMS Message to Individual |
In an enhanced channel, you can send a message even when you're offline.
-
From any Salesforce page, select Send a Message in the global
action menu.
 Alternatively, from a lead, person account, contact, or messaging user record detail page, select Send a Message in the record action menu or on the activity timeline. The action location can vary depending on where your admin added it.
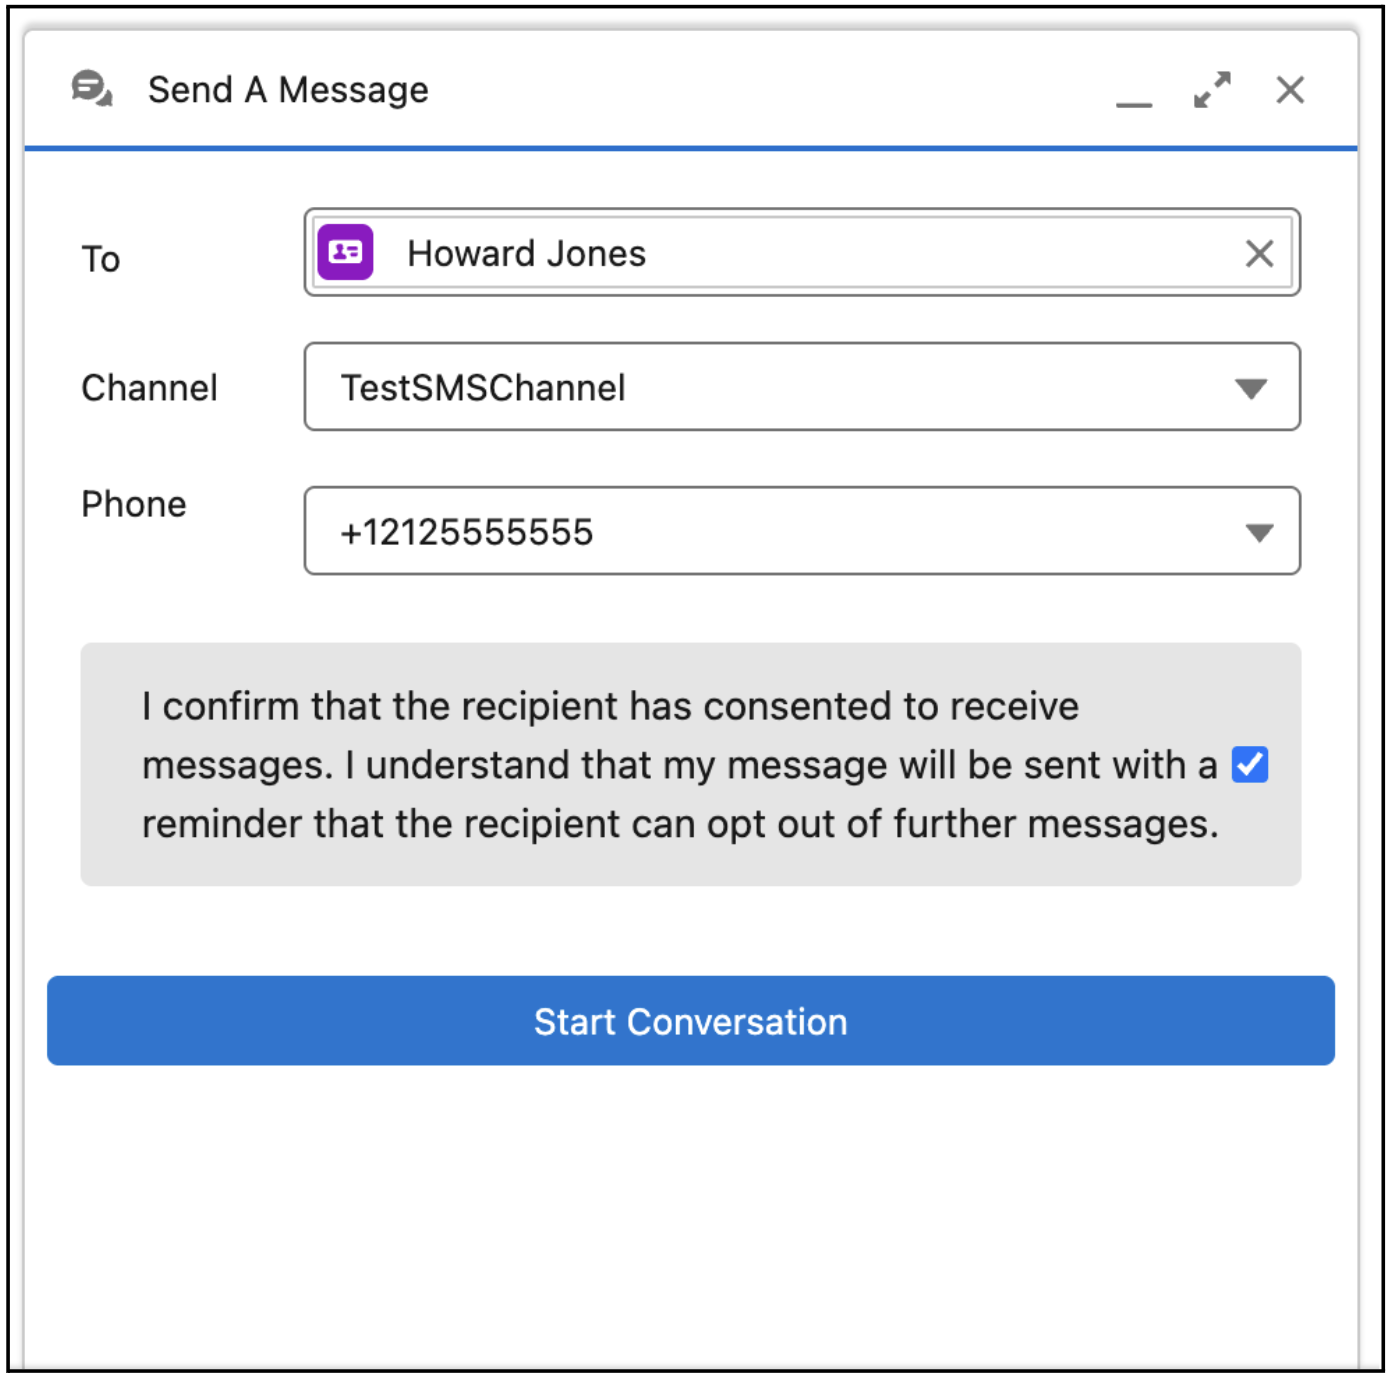
 - Select a recipient. You can click the icon to look up an account, lead, contact, or messaging user. This field may already be completed, depending on which record you’re viewing.
- Select a messaging channel. Only messaging channels associated with the select recipient are shown. If you’re the designated user on any channels whose Routing Type is set to User, those channels are shown first. Channels with a different designated user aren’t shown.
- If you selected an SMS channel and this is your business’s first SMS message to the customer, select the box verifying that the customer consented to receive SMS messages from your business. If they didn’t, don’t send a message.
-
Click Start Conversation.
-
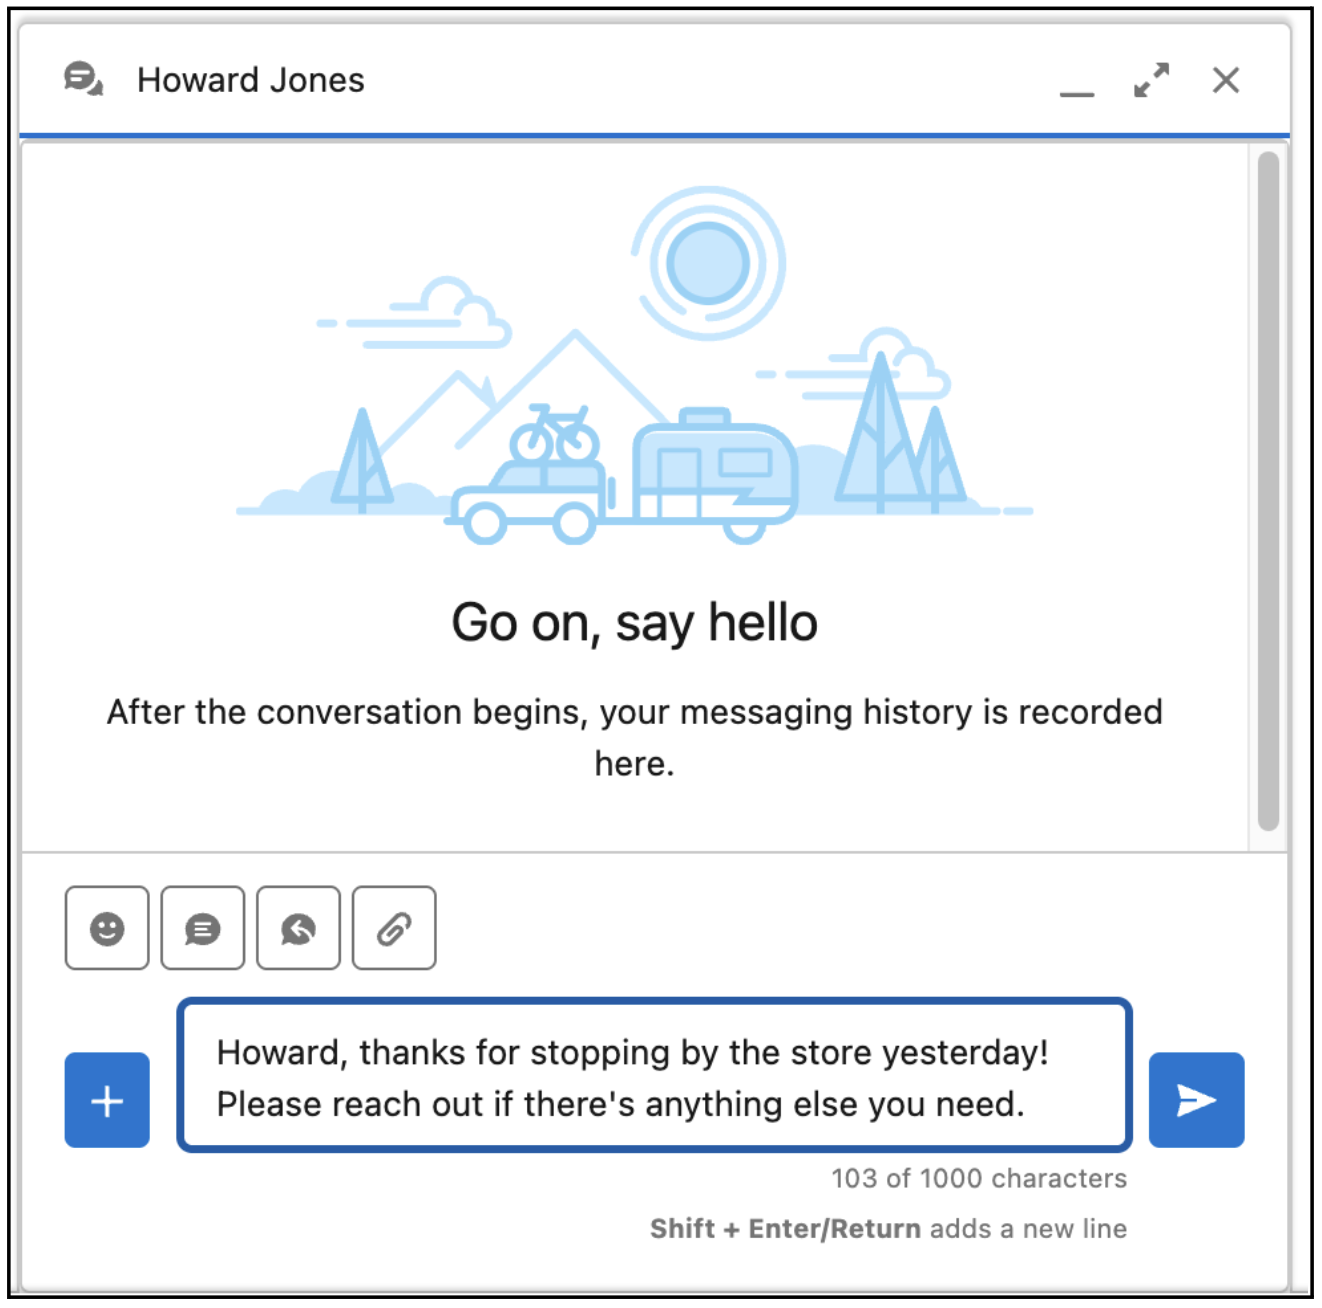
Enter your message. Above the message field, you can see any previous messages
exchanged with the customer in the channel.
- If your channel supports non-text formats, click the microphone icon to record a voice message.
- Click the plus icon to view other messaging actions, including inserting quick text, adding emoji, sending messaging components, and attaching files.
-
Click Send.
-
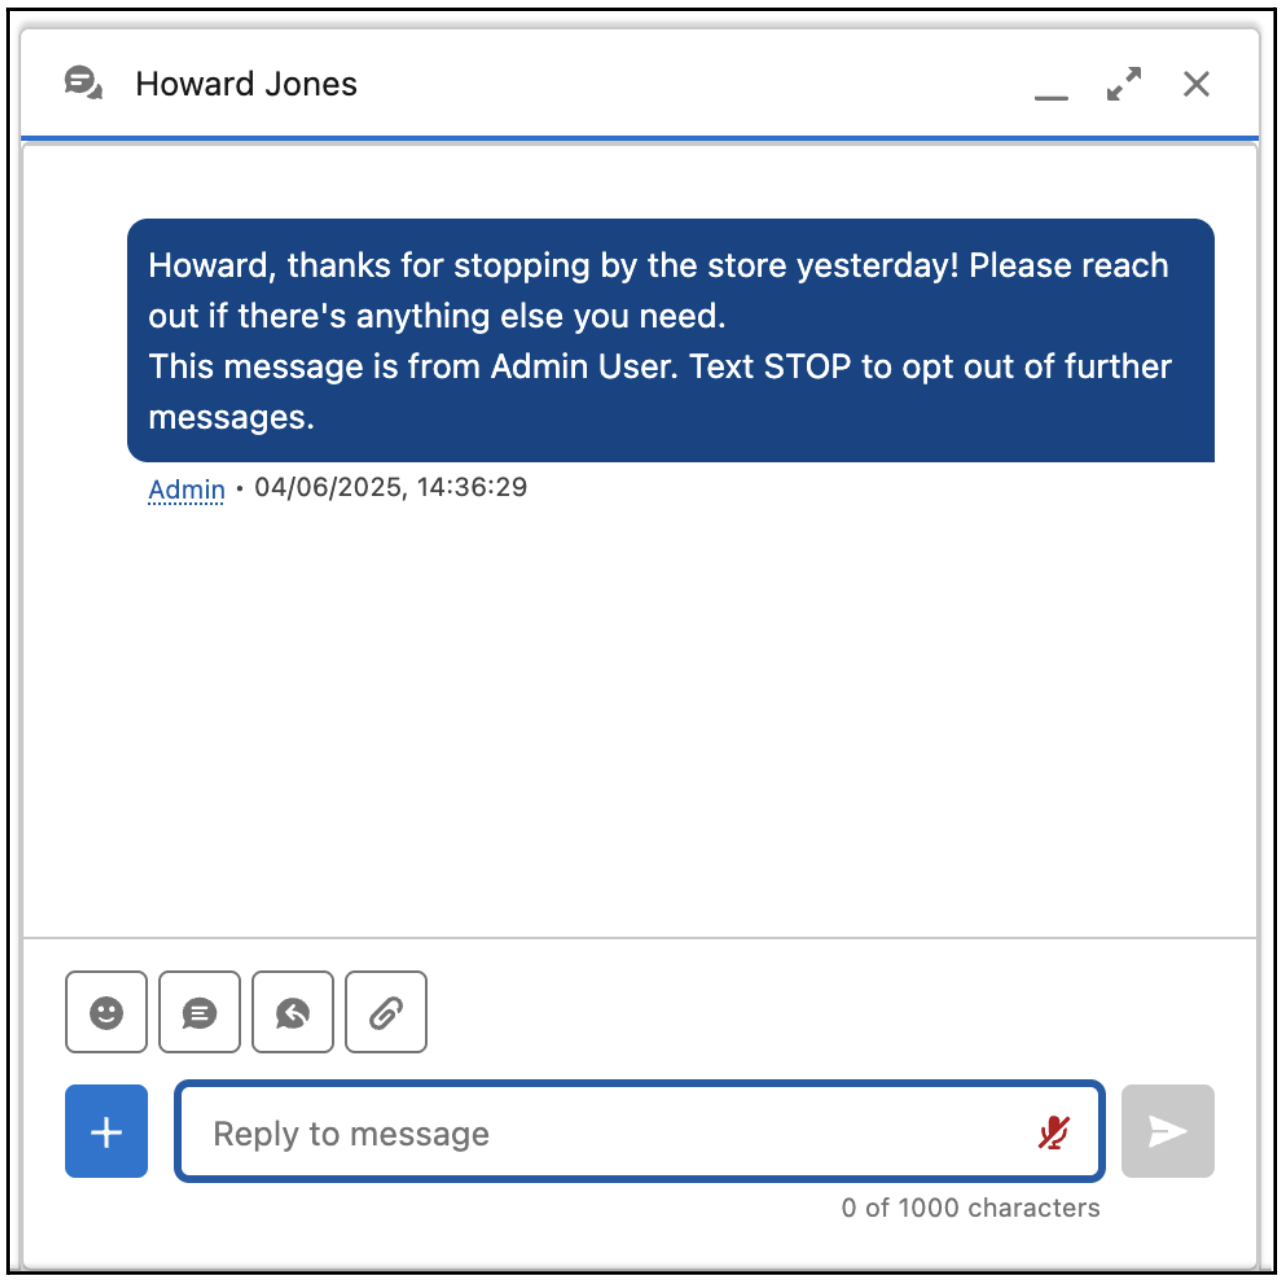
The message is sent. If it’s your business’s first message to the user, it also
includes this text: This message is from [first and last name of rep or
business name]. [Help Response auto-response for the channel].
Note When you use quick text with merge fields in the Send Message composer, the merge fields
will not populate until you send a message. The messaging session record doesn't exist until
a message is sent, so the merge fields can't resolve.
After you send your message or messages, you can close the composer. The Send a Message composer doesn’t update to show customer responses.
If the customer responds, the way it’s routed depends on your capacity model.
- If the service channel uses status-based capacity, the response is routed back to you and appears in your Omni-Channel inbox.
- If the service channel uses tab-based capacity, the response is routed as a new messaging session and a different rep may pick it up.
For details about customer responses, valid message recipients, and limits related to business-initiated messaging, see Considerations for Business-Initiated Messaging.
Did this article solve your issue?
Let us know so we can improve!