Loading
Salesforce now sends email only from verified domains. Read More
Agentforce Contact Center
Table of Contents
Select Filters

          No results
          No results
          Here are some search tips

          Check the spelling of your keywords.
          Use more general search terms.
          Select fewer filters to broaden your search.

          Search all of Salesforce Help
          Set Up an Agentforce Service Agent for Bring Your Own Channel

          Set Up an Agentforce Service Agent for Bring Your Own Channel

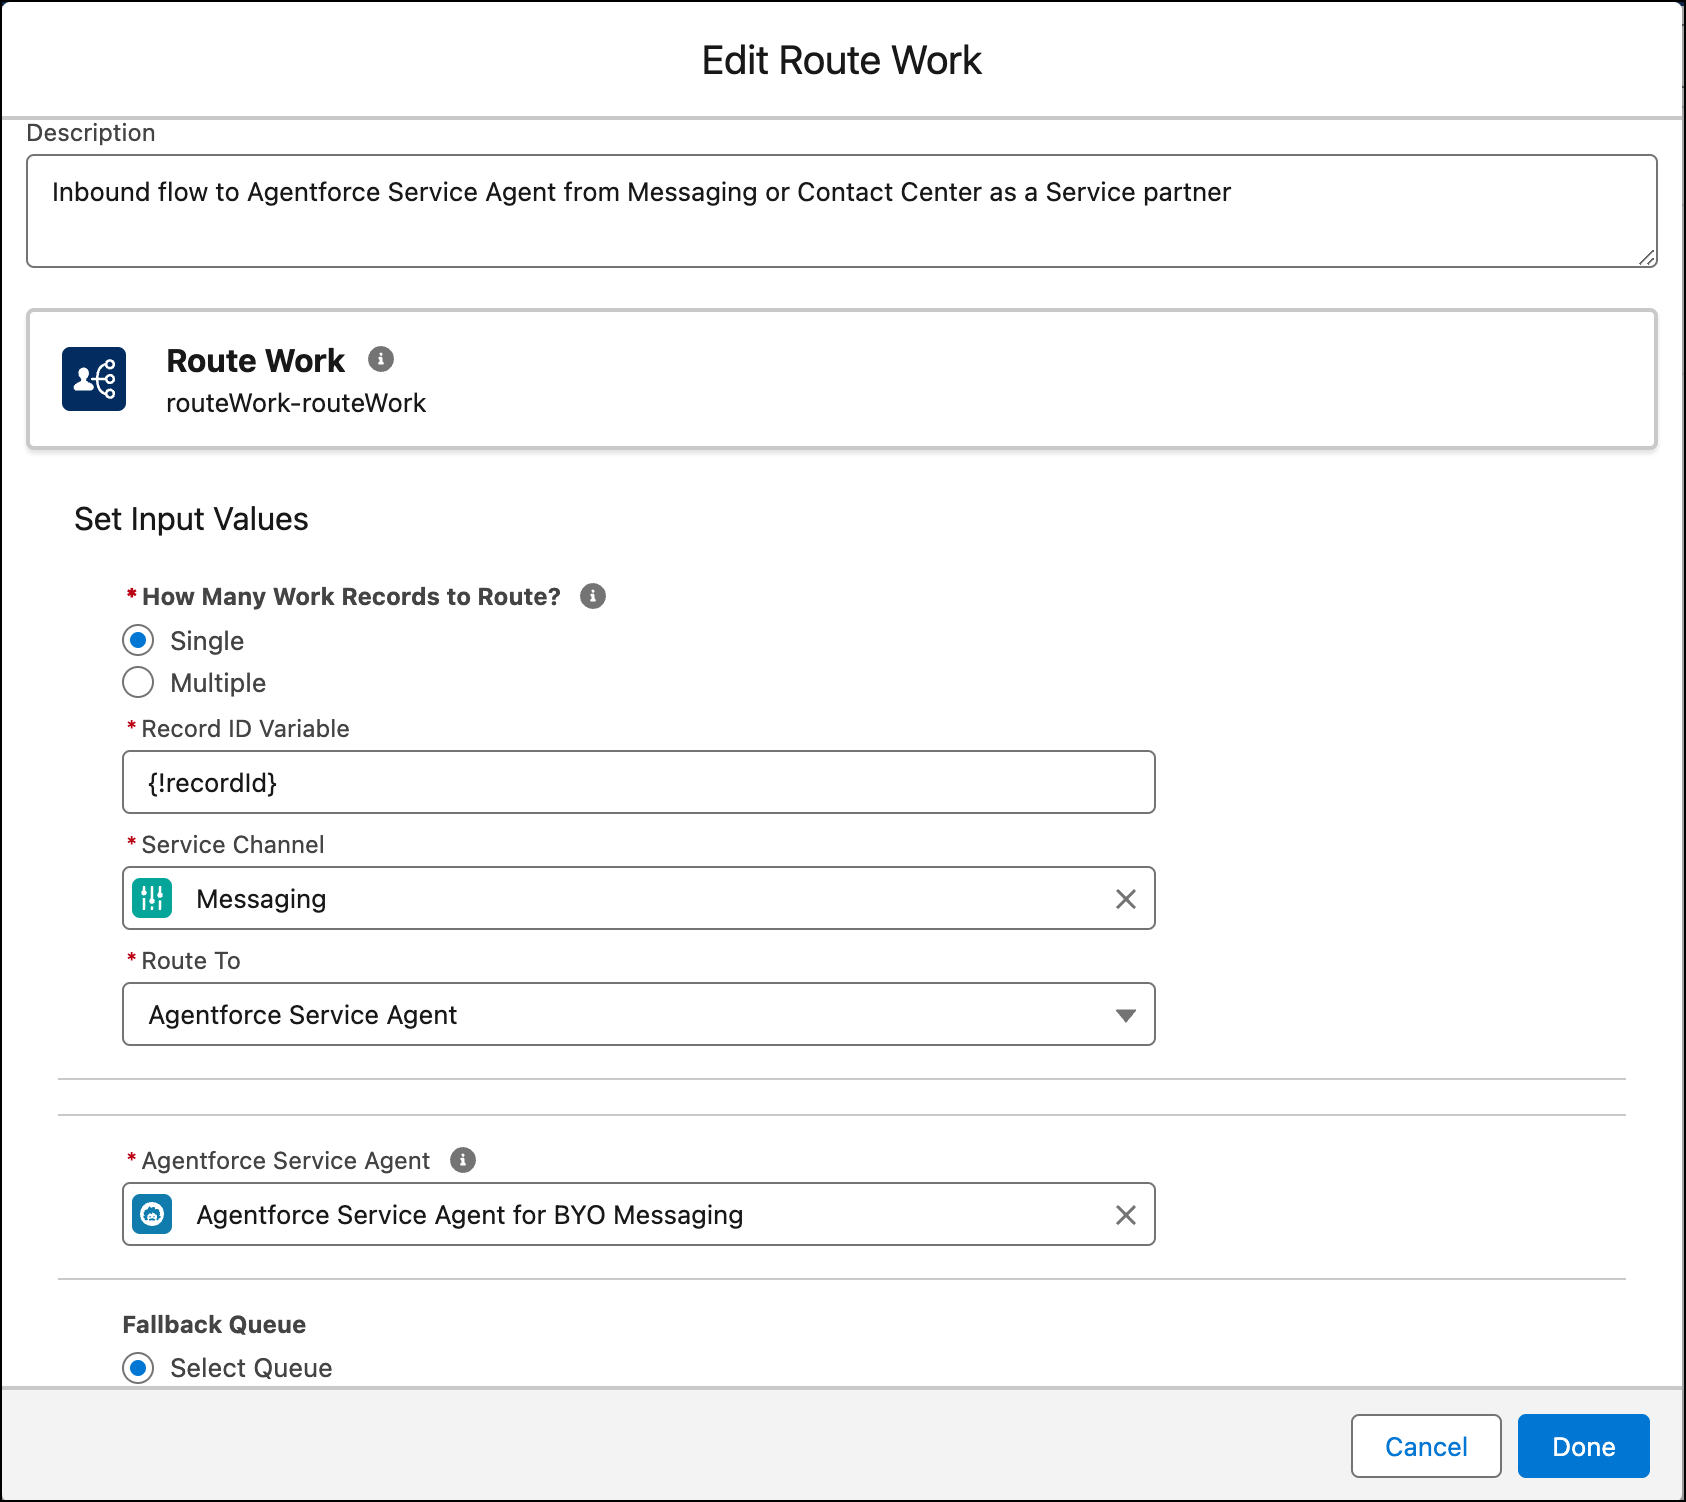
          When you install a managed package to set up Bring Your Own Channel for Messaging or Bring Your Own Channel for CCaaS, your Messaging or CCaaS partner vendor may include a sample outbound flow for an AI agent. Create your own AI agent and set up an inbound flow to fit your use case, for example, to route an inbound message to the agent. If your managed package doesn’t include a sample outbound flow, you can still create one and associate it with your AI agent.

          Required Editions

          View supported editions.
          Checkmark This article applies to: Bring Your Own Channel for Messaging and Bring Your Own Channel for CCaaS
          X icon This article doesn’t apply to: Enhanced In-App Chat, Enhanced Web Chat v1, Enhanced Web Chat v2, Enhanced WhatsApp, Standard and Enhanced Facebook Messenger, Standard and Enhanced SMS, Enhanced Apple Messages for Business, and Enhanced LINE channels
          User Permissions Needed
          To enable agents in Salesforce: Manage AI Agents OR Customize Application
          To build and manage Service Agents: Manage Agentforce Service Agents AND Manage AI Agents OR Customize Application
          1. Follow steps to Set up a Service Agent.
          2. Follow the steps in the "Create an Omni Flow" section of the Prepare Your Salesforce Org for Bring Your Own Channel for CCaaS or Prepare Your Salesforce Org for Bring Your Own Channel help topics to create an inbound Omni-Channel flow. When you specify the Route To value, select Agentforce Service Agent, and select your AI agent.
            Route Work action element that routes to a specific Agentforce Service Agent.
          3. Add the inbound flow to your Bring Your Own Channel for Messaging or Bring Your Own Channel for CCaaS messaging channel. For your Messaging channel, go to the Messaging Settings page in Setup. Then select Omni-Flow under Omni-Channel Routing and specify the inbound flow.
          4. The managed package may include an outbound Omni-Channel flow template for an AI agent. Edit the sample flow in Flow Builder to meet your needs, or create a different flow.
          5. To associate the outbound flow with the agent, in the Agents list, for the sample AI agent, select the agent name, and click the Connections tab. Choose your outbound flow under Outbound Omni-Channel Flow.
          6. For Bring Your Own Channel for CCaaS only, if your partner CCaaS vendor controls routing, contact the partner vendor to finish setting up routing for the flows associated with your AI agent. They will need the flow ID and fallback queue ID. If Salesforce controls routing, this step isn’t necessary.
           
          Loading
          Salesforce Help | Article