You are here:
Share External Apps in Messaging Sessions
Create a custom messaging component so service reps can embed an external mobile app in enhanced Apple Messages for Business messaging sessions. Customers can then access the app’s capabilities, such as search functionality, within their Apple Messages chat.
Required Editions
| View supported editions. | |
 This article applies to:
|
Enhanced Apple Messages for Business and Bring Your Own Channel |
 This article doesn’t apply to:
|
Enhanced In-App Chat, Enhanced Web Chat v1, Enhanced Web Chat v2, Enhanced WhatsApp, Standard and Enhanced Facebook Messenger, Standard and Enhanced SMS, and Enhanced LINE |
| User Permissions Needed | |
|---|---|
| To create messaging components: | Customize Application AND View Setup and Configuration OR System Administrator |
| To send and receive messages in Messaging: | Messaging Agent |
You can also use custom messaging components to share custom Lightning Web Components, custom iMessage extensions, or any URL that opens in a web view.
For example, suppose you want to let customers browse your products without navigating away from Apple Messages. Create a custom messaging component that’s linked to your business’s mobile app. When service reps send the component in a messaging session, customers can click it to open the app within Apple Messages. They can then use the app’s product search to find the product they’re looking for.
Step 1: Create a Custom Messaging Component
To get started, create your custom messaging component on the Messaging Components page in Setup.
- From Setup, enter Messaging Components in the Quick Find box, and then select Messaging Components.
- Click New Component, and then click Next.
- Click Custom, and then click Next.
-
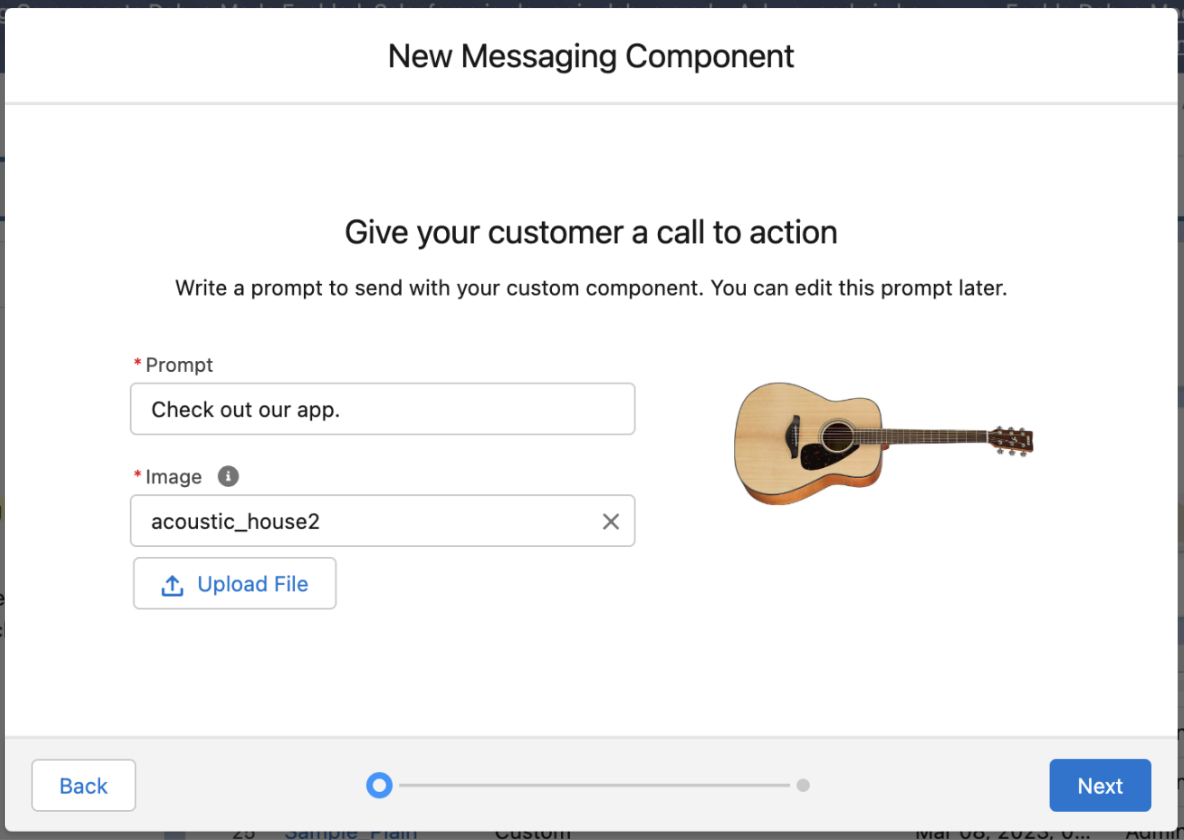
Enter a prompt and upload an image to show with the prompt.
-
Enter a name and description for your component.
These values aren’t visible to customers, but service reps see the name in the list of messaging components in the Service Console. Assign an informative name so reps know when to use the component.
-
Click Done.
The Messaging Component Builder opens.
-
In the Component Formats section, control the way your component appears in Apple Messages
for Business channels. Click Add Format, select External
Application, and then click Done.
 Note Each messaging component is available in one or more formats, such as External Application, and some formats work only in certain channels. For a list of formats that each channel supports, see Messaging Component Types and Formats. It’s a good idea to add at least one supported format for each channel where the component will be sent. If no formats are added, the component uses the default text format.
 -
In the left-hand sidebar, click the External Application format type to update its
properties.
- In the App Name Configuration section, select Literal and enter the public name of the external app that your component is associated with.
- In the Prompt Configuration section, provide the text prompt that’s shown with the component. To use the prompt that you entered when you created the component, select Constant and select the only available constant.
- In the Bundle ID Configuration section, select Literal and enter the bundle ID of the external app. To find the bundle ID, go to appstoreconnect.apple.com. Select your app and view its information.
- In the Team ID Configuration section, select Literal and enter the team ID associated with your Apple developer account. To find your team ID, log into developer.apple.com and view your membership details.
- In the Apple ID Configuration section, select Literal and enter the Apple ID associated with the external app. To find the Apple ID, go to appstoreconnect.apple.com. Select your app and view its information.
- In the Image Configuration section, provide the image shown with your custom component. To use the image that you uploaded when you created the component, select Constant and select the only available constant.
- Optionally, in the Arguments section, add arguments to pass information to the external app.
- After you’re finished updating the External Application format properties, click Save.
- In the left-hand sidebar, click the Text format type to customize the plain text version of your component, which is used if your preferred format isn’t available or won’t load.
- When you’re done editing your component, click Save.
- Your component is saved in a draft state. When you're ready to make it available to your support team, click Activate at the top of the page.
If you ever need to take the component offline—for example, to give you time to reconfigure it—open it in the Messaging Component Builder and click Deactivate. When you're ready, activate it again.
Step 2: Send a Custom Messaging Component in a Messaging Session
You can send custom messaging components to customers in enhanced Apple Messages for Business channels.
-
During an active messaging session, click the messaging component action in the messaging
window.
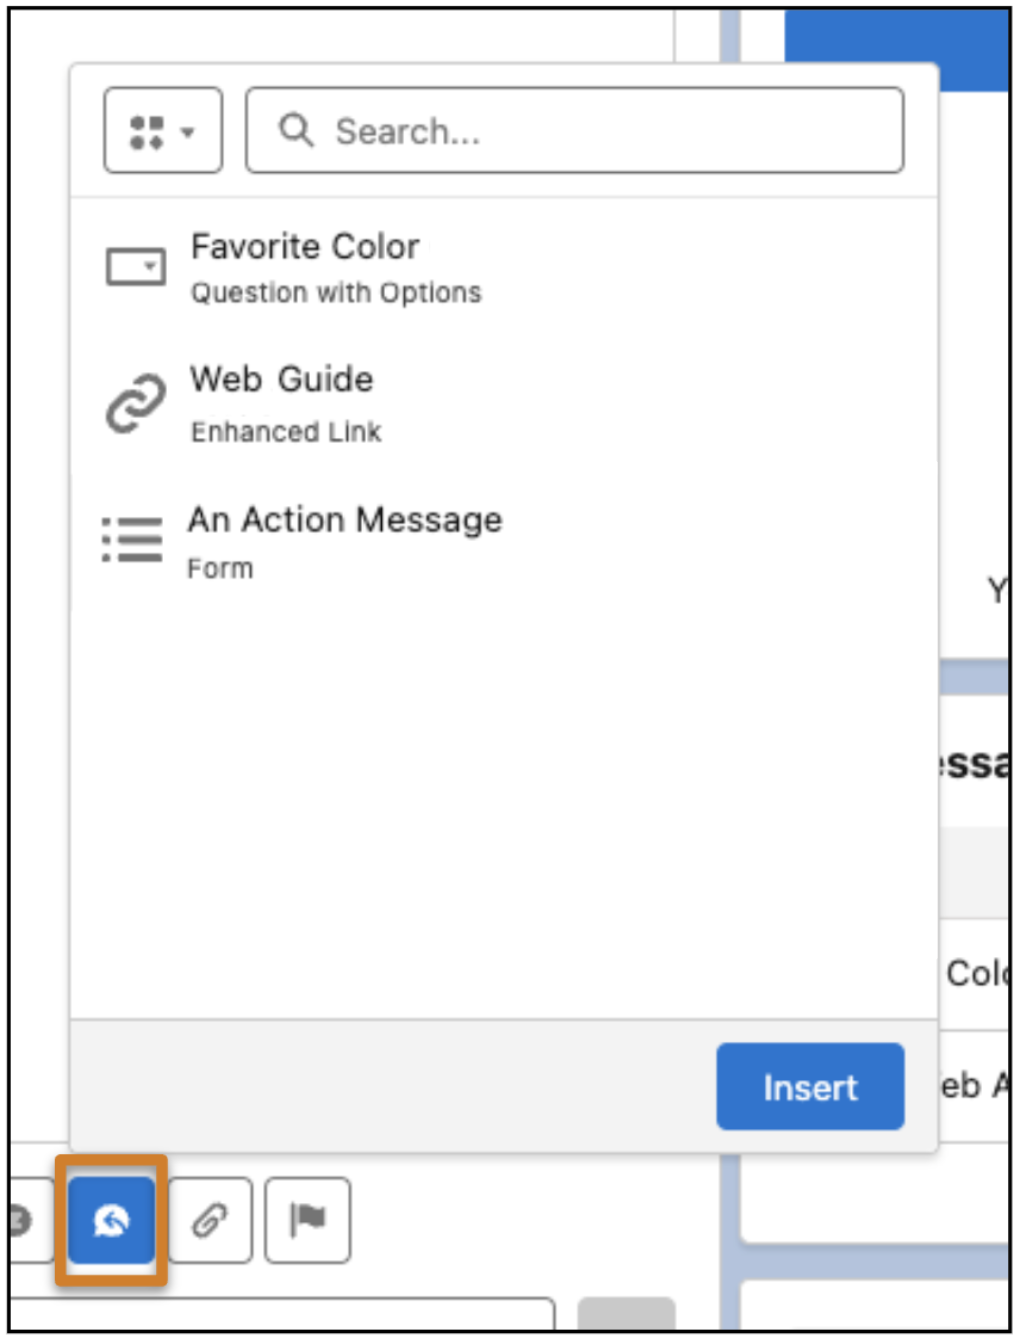
- Optionally, use the filter at the top to show only custom components.
-
Select the component that you want to share and click Insert.
A placeholder appears below the message field. No preview of the component is available.
- Click Send.
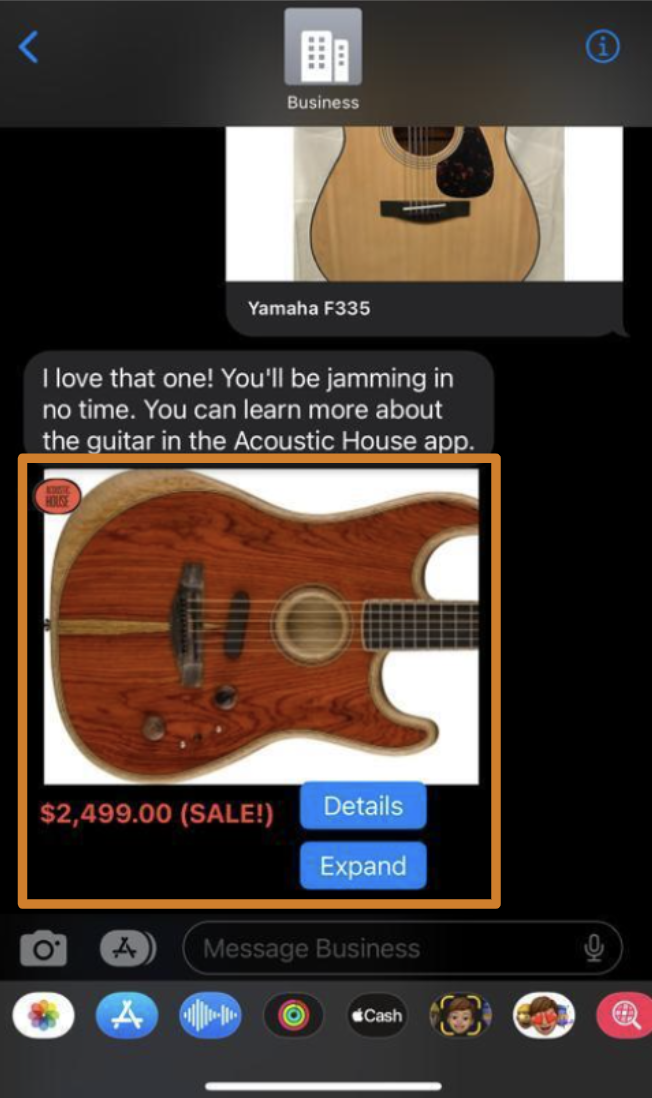
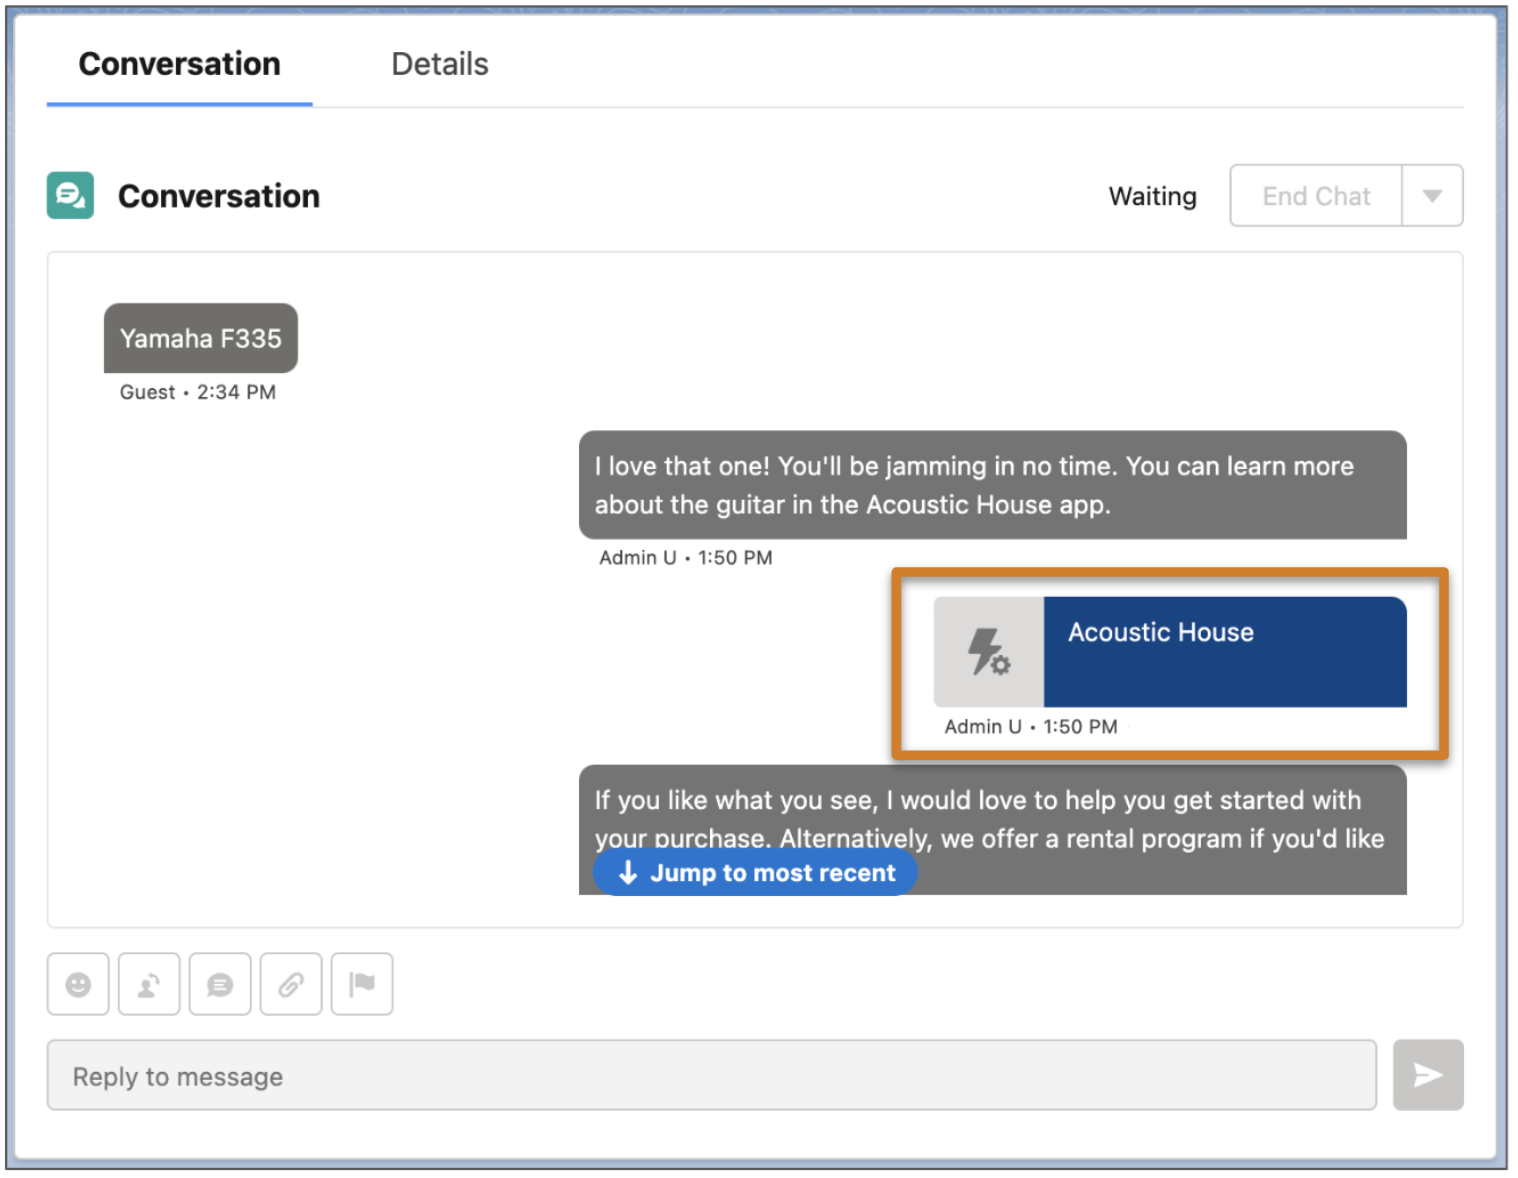
The service rep sees:
The customer sees: