
You are here:
Create and Send Secure Forms in Messaging Sessions
To let service reps send secure forms to customers in supported messaging channels, create a form messaging component. Forms let you quickly gather sensitive information from customers, such as network passwords or credit card information.
Required Editions
| View supported editions. | |
 This article applies to:
|
Enhanced In-App Chat, Enhanced Web Chat v1, Enhanced Apple Messages for Business, and Bring Your Own Channel |
 This article doesn’t apply to:
|
Enhanced Web Chat v2, Enhanced WhatsApp, Standard and Enhanced Facebook Messenger, Standard and Enhanced SMS, Enhanced LINE |
| User Permissions Needed | |
|---|---|
| To create messaging components: | Customize Application AND View Setup and Configuration OR System Administrator |
| To send and receive messages in Messaging: | Messaging Agent |
When a customer submits their form responses, Salesforce creates a record of them. Admins control whether service reps can see the responses. A customer can’t view their submitted responses.
You can create a form based on a global action or an Apex class. After you create the form, reps can send it in a messaging session. When a customer submits their form responses, Salesforce writes their responses to a new record, such as a contact record. The record’s visibility settings for each field determine which form responses are visible to service reps. A customer can’t view their submitted responses.
Create a Form Based on a Global Action
With a global action, create static messages that don’t change based on the user or input provided in the form. To get started, create a global action that creates a record, such as a contact record. Then, link it to a new form messaging component on the Messaging Components page in Setup.
-
Create a global action to link to your messaging component.
- Go to the Global Actions page in Setup.
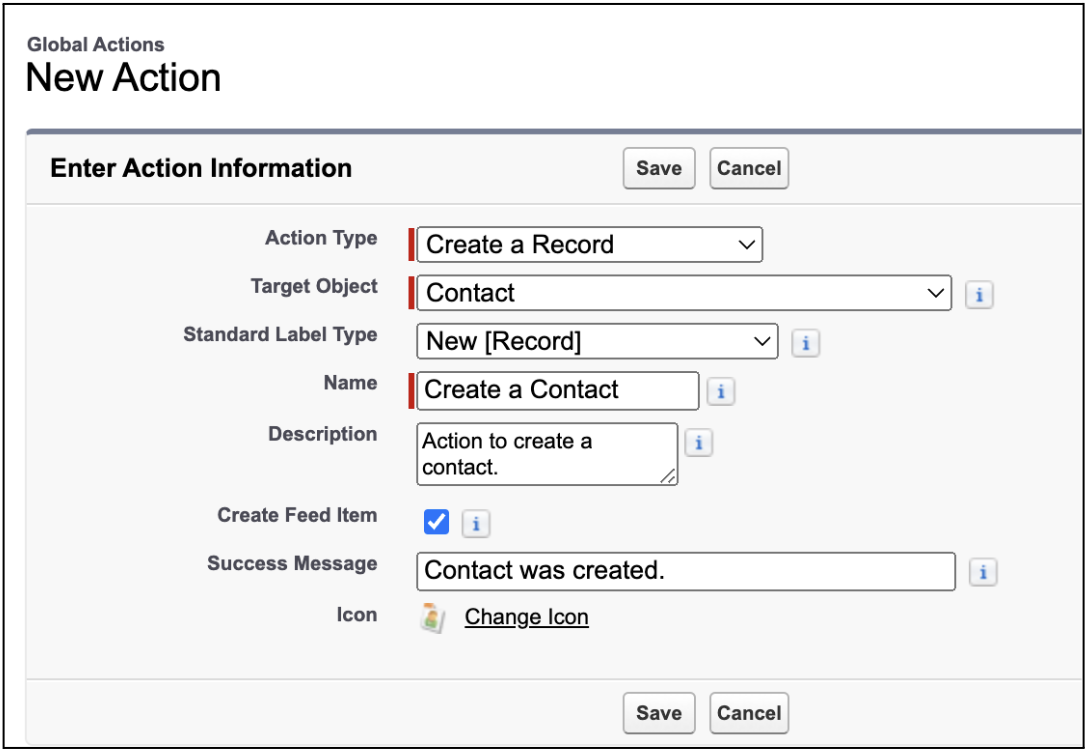
- Click New Action.
- For action type, select Create a Record.
- Select a target object, which is the type of record that the action will create. Any custom object and the following standard objects are supported: Case, Contact, Order, Product, and Asset.
-
Complete the remaining fields and click Save.
- Add fields from any object to the action layout, and customize their order. Global actions that are linked to a form messaging component can contain these types of fields: Text, Text Area, Text Area (Long), Email, Checkbox, Date, Date/Time, Number, Phone, Picklist, Picklist (Multi-Select), and URL. All other field types, including lookup fields, aren’t supported. If an unsupported field is added to the global action layout, it won't be visible in the form component and can cause an error. We recommend creating help text for any field that requires a specific format, such as a Phone field.
- Go to the Messaging Components page in Setup.
- Click New Component.
- Select Form, and then click Next.
- Click Global Action, and then click Next.
-
Enter a title and select a global action to link to your component. Only global actions
that create records appear in the dropdown list. The title appears in the messaging
session as a link to the form.
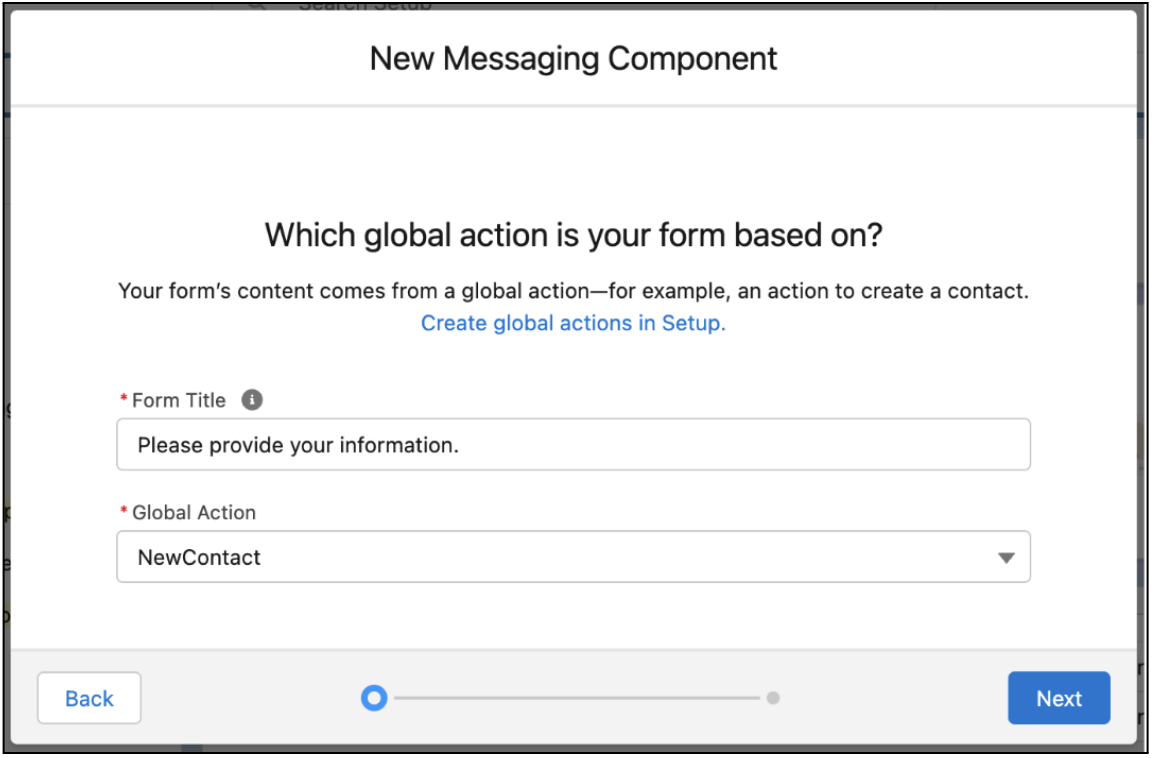
- Click Next.
-
Add a name and description for your component.
These values aren’t visible to customers, but agents see the name in the list of messaging components in the Service Console. Assign a name that indicates the component’s purpose so agents know when to use it.
-
Click Done.
The Messaging Component Builder opens.
-
In the Component Formats section, control how the component looks in messaging
sessions. Click Add Format, select Flow or
Form, and then click Done.
 Note Each messaging component is available in one or more formats, and some formats work only in certain channels. For a list of formats that each channel supports, see Messaging Component Types and Formats. It’s a good idea to add at least one supported format for each channel where the component will be sent. If no formats are added, the component uses the default text format.
 -
In the left-hand sidebar, click the format type to update its properties.
For example, if you selected the Form format, first, select the top field in the form preview to edit the form’s overall properties. Then, select one field at a time to configure the prompt, response, and keyboard shown for that field.
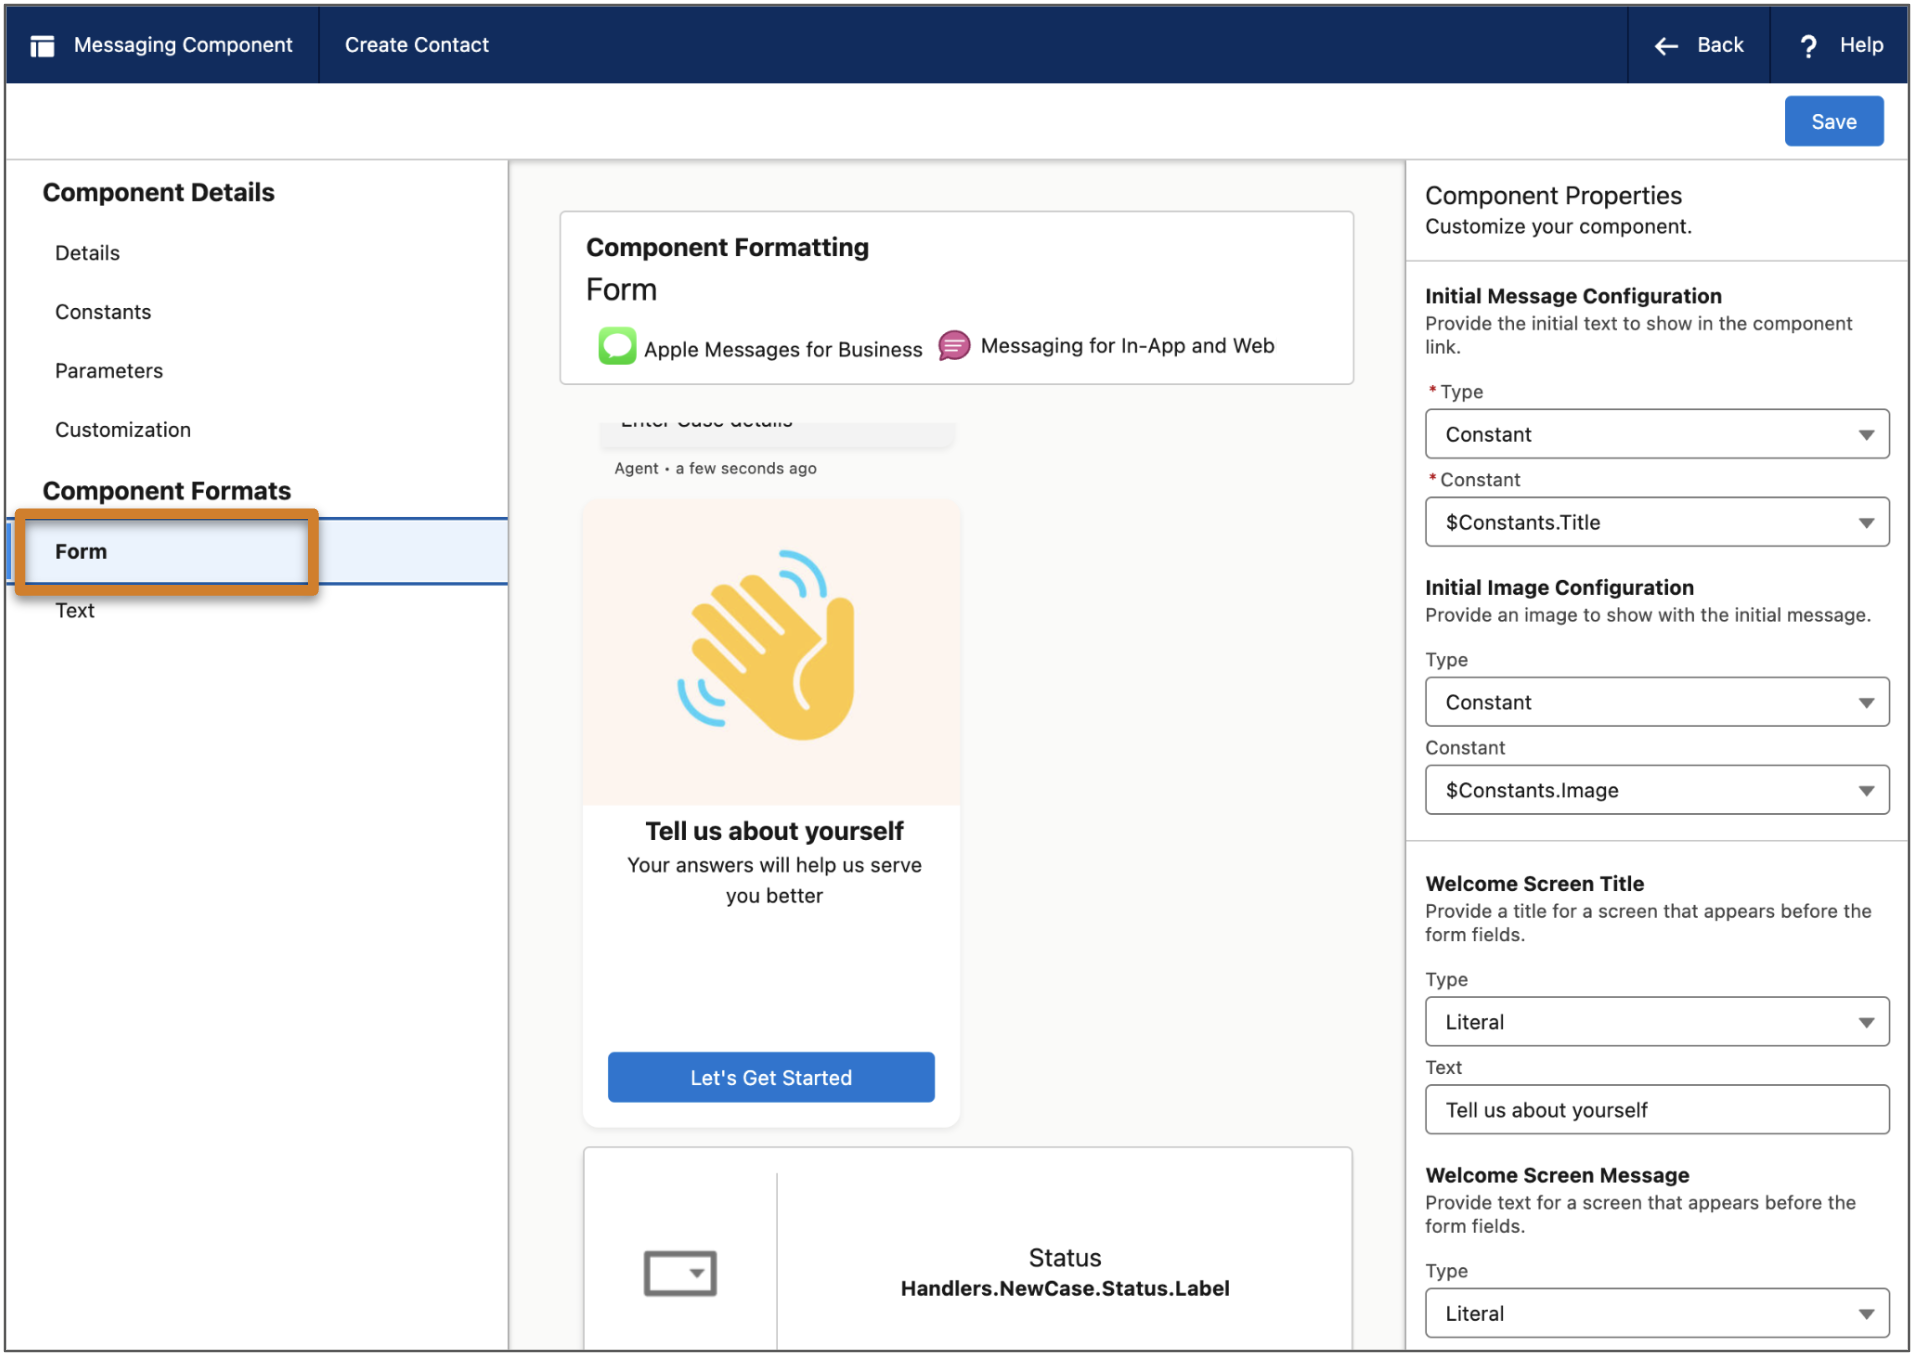 Note These properties apply only to Apple Messages for Business, and aren't used in Enhanced Chat: Initial Message, Initial Image, Welcome Screen Title, Welcome Screen Image, Welcome Screen Button, Welcome Screen Message, and Field Subtitle Configuration.
 - After you update the Flow or Form format properties, click Save.
-
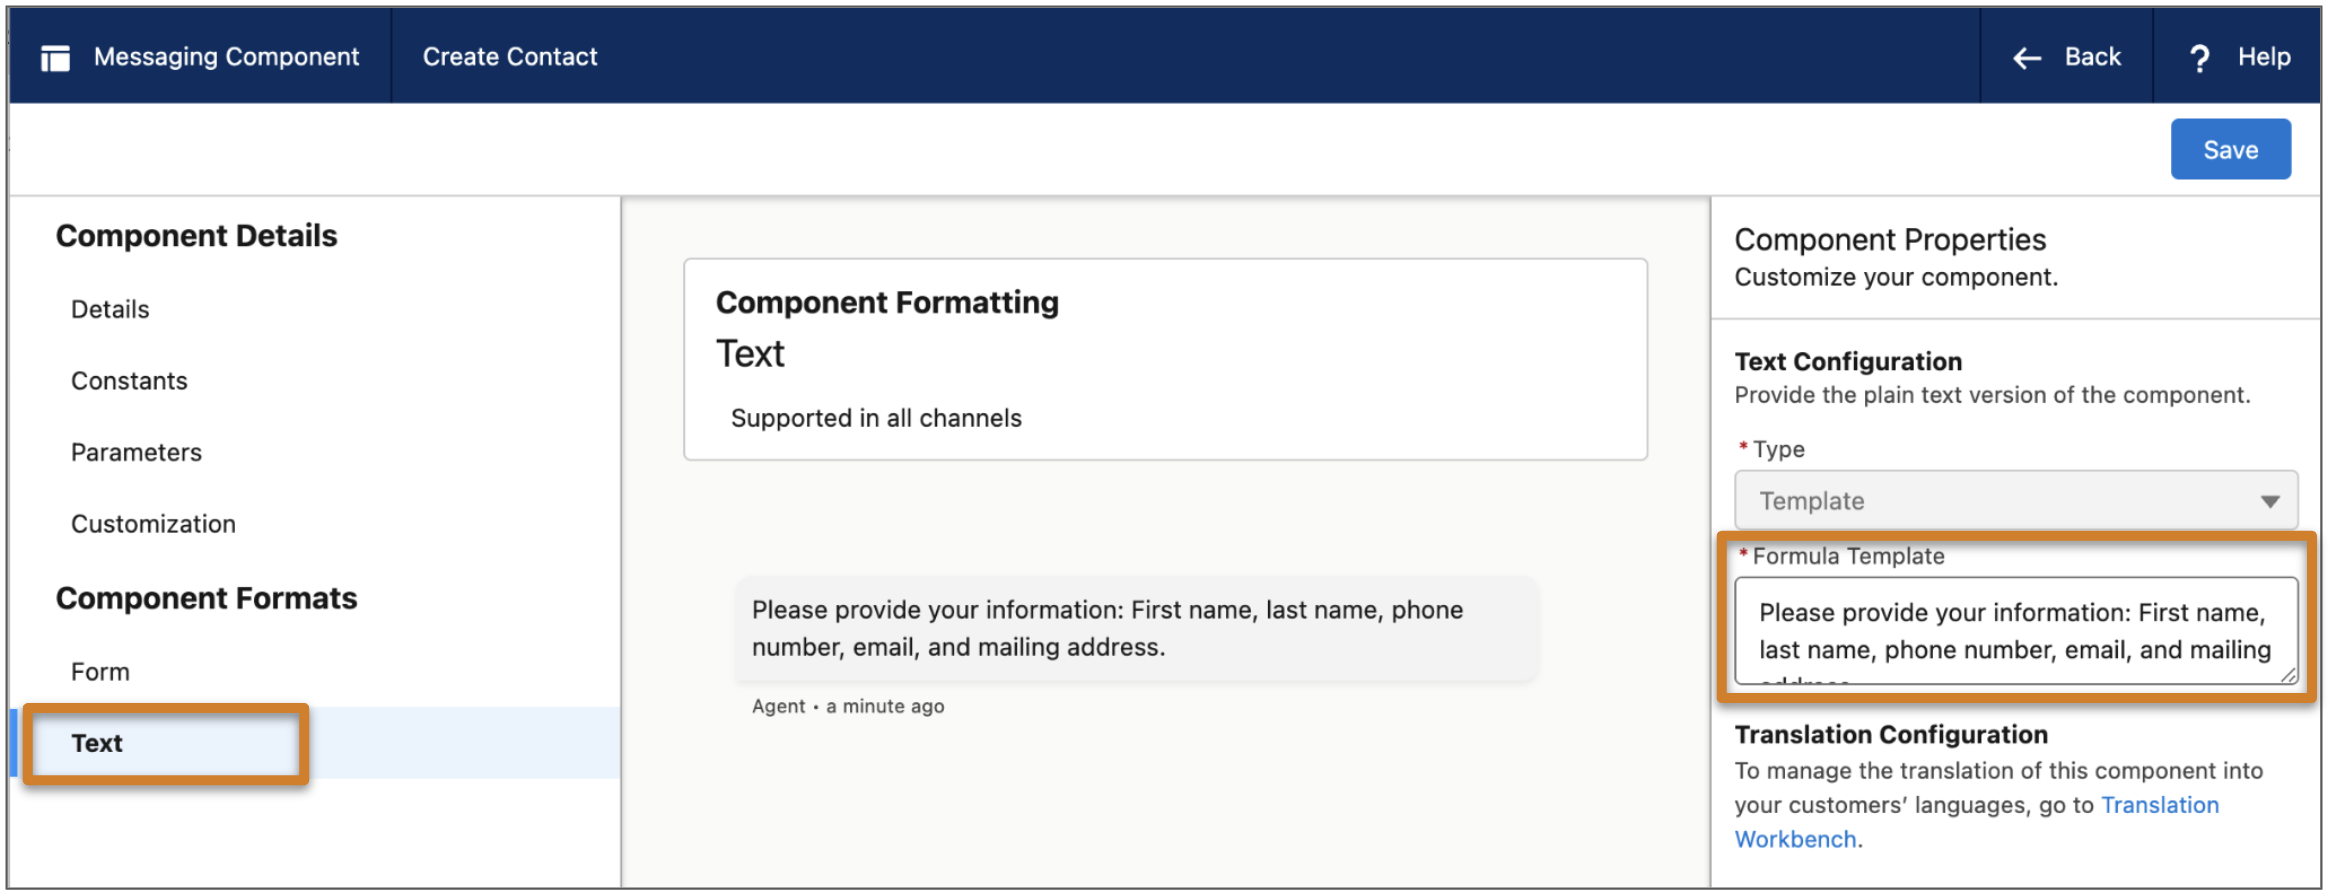
In the left-hand sidebar, click the Text format type to update its properties.
The plain text version is sent if your preferred format isn’t available or doesn’t load. While global action-based forms can’t be sent in plain text, you can edit your component’s plain text version so it contains a link to a public form or shows a text-only list of the questions that appear in your form.
- In the left-hand sidebar, click Customization. Optionally, change the expiration limit for the form. By default, when the form is sent in a messaging session, customers have 5 minutes to submit their responses before the link expires.
- When you’re done editing your component, click Save. Your component is saved in a draft state.
- When you're ready to make it available to your support team, click Activate at the top of the page.
- If you ever need to take the component offline—for example, to give you time to reconfigure it—open it in the Messaging Component Builder and click Deactivate. When you're ready, activate it again.
- If you want your form component to be used in an Enhanced Web Chat deployment for an Experience Builder or Commerce Cloud site, republish your deployment after creating or editing the component. Otherwise, messaging users can’t receive the form in messaging sessions.
Send a Form in a Messaging Session
You can send form messaging components to customers in enhanced Apple Messages for Business, enhanced WhatsApp, and Enhanced Chat channels.
-
During an active messaging session, click the messaging component action in the messaging
window of the Service Console.
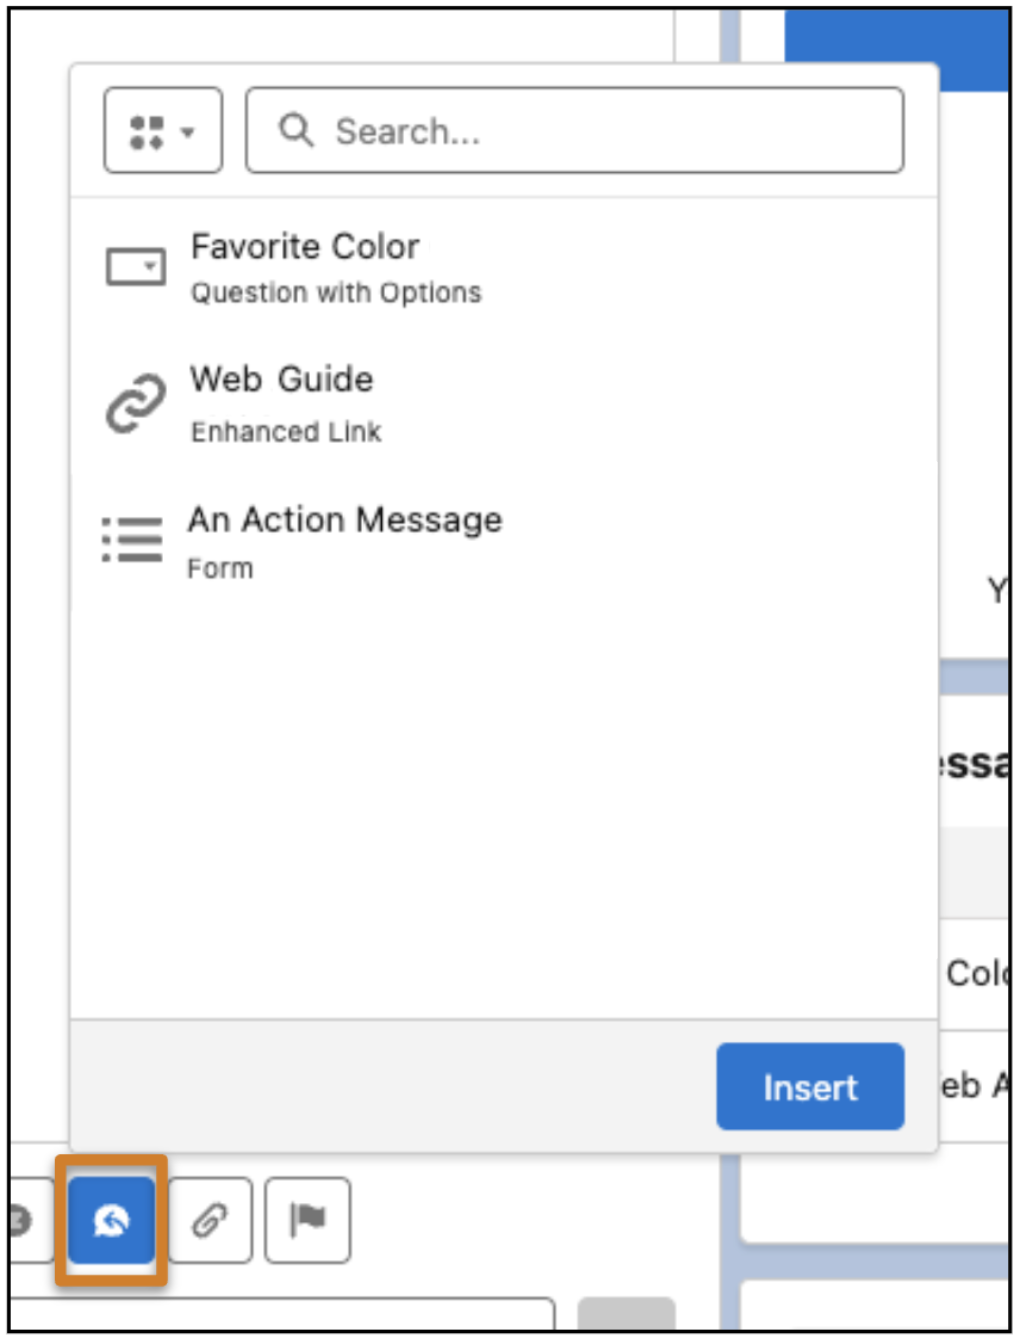
- Optionally, use the filter at the top to show only forms.
-
Select the form that you want to share and click Insert.
A placeholder appears below the message field. No preview of the component is available.
- Click Send.
When a service rep sends a form component in an Enhanced In-App Chat channel, the customer sees the form’s initial message and image (if you provided one) in a chat bubble. After opening the link, the customer proceeds through the welcome screen and form questions, which appear in separate screens.
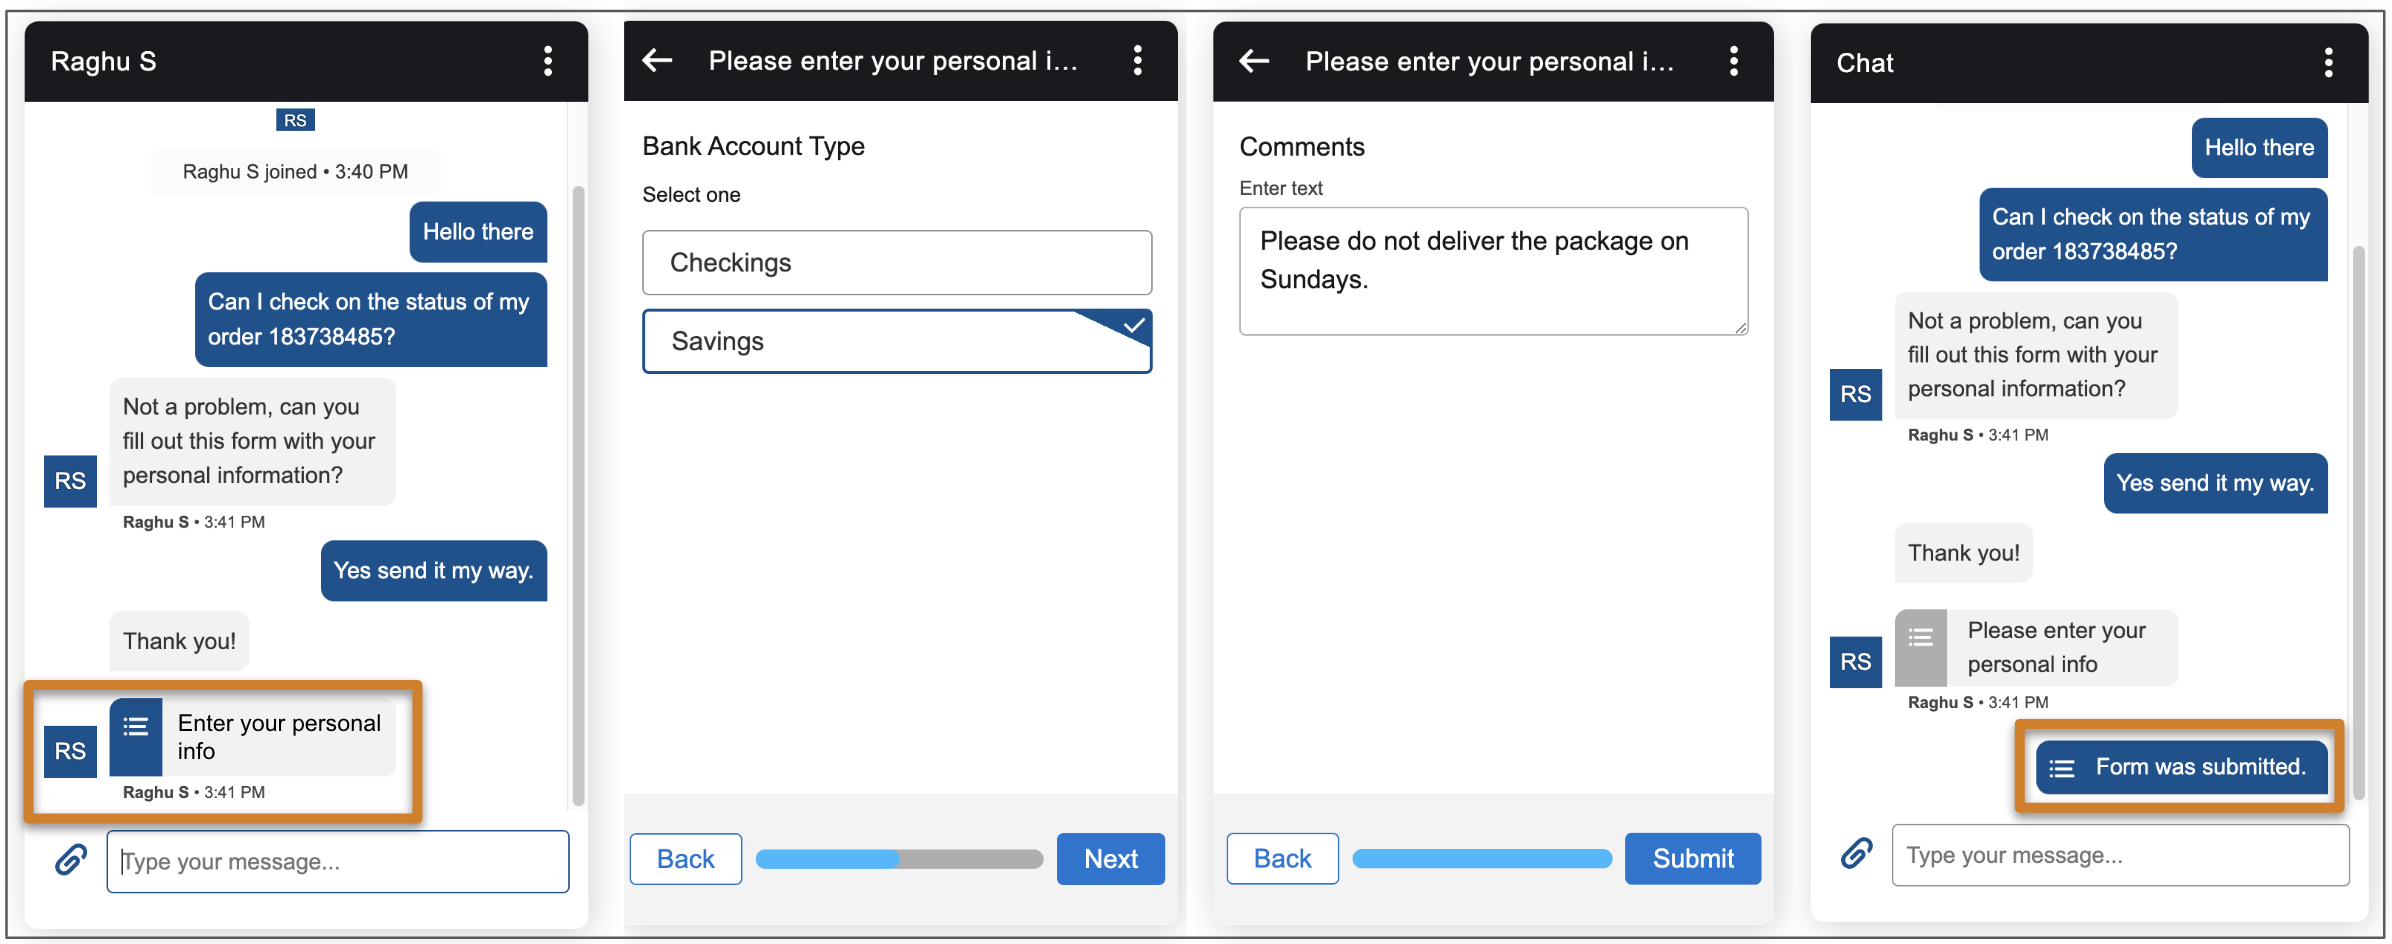
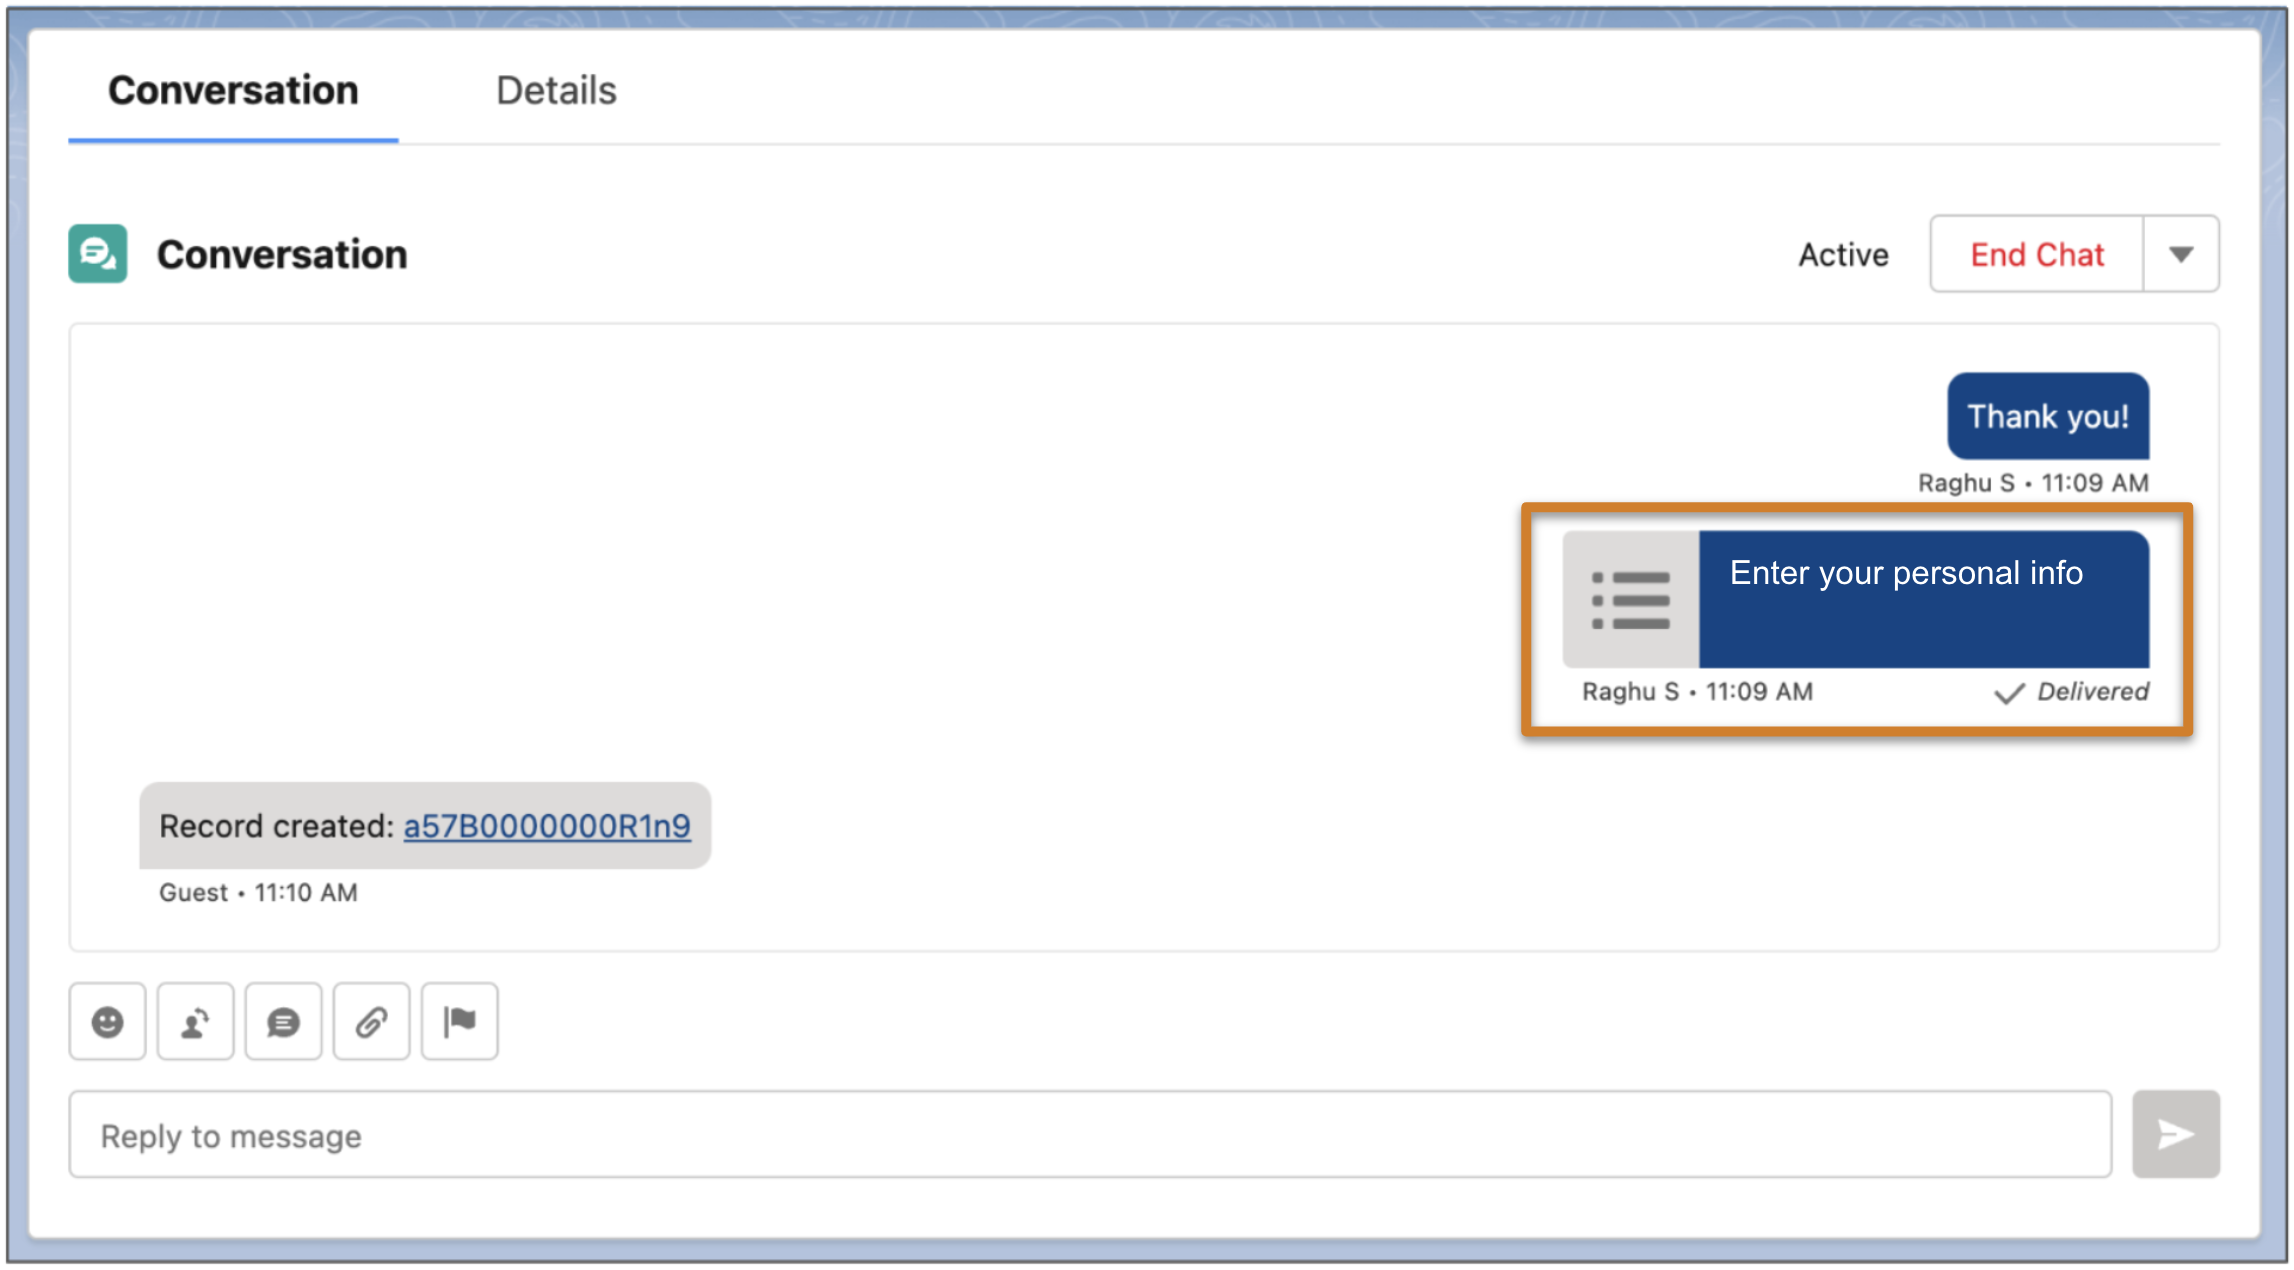
When the customer submits the form, the conversation transcript updates. The transcript shows the record that the form’s associated global action or Apex class created. The customer sees the form confirmation message and image in the chat bubble, but isn’t notified that a record was created.
If a customer refreshes their browser tab while filling out a form, their form responses are cleared for security reasons. After a customer submits a form, they can’t click the form link in their messaging session to submit new responses. If needed, the service rep can resend the form component to gather new responses.