
You are here:
Customizing Messaging Components with Formula Templates
When you create a messaging component, you can add and configure one or more formats to control the component’s appearance in different Messaging channels. The default format of messaging components is Text, which is a plain text version of the component.
Required Editions
| View supported editions. | |
 This article applies to:
|
Enhanced In-App Chat, Enhanced Web Chat v1, Enhanced Web Chat v2, Enhanced WhatsApp, Enhanced Facebook Messenger, Enhanced SMS, Enhanced Apple Messages for Business, Enhanced LINE, and Bring Your Own Channel |
 This article doesn’t apply to:
|
Standard Facebook Messenger and Standard SMS channels |
We generate the Text version of a component for you when you create the component. If you want to, you can use formula templates to modify the Text version and create a personalized message for your customers.
It’s possible to reference fields from the Messaging Session object or the Messaging User object (since it's linked to Messaging Session) in an auto-response formula template for Start Conversation, End Conversation, and Inactive Conversation. It’s not possible to reference fields from the Messaging Session or Messaging User objects in Conversation Acknowledgement because you'd also have to use a flow to populate the data, and the flow wouldn't run in time for Conversation Acknowledgement.
For some component types, you can provide the plain text version of your component during the New Component guided setup flow. To further edit the plain text version of a messaging component after it’s created, click the component name on the Messaging Components page in Setup. The component opens in the Messaging Component Builder. Then, click the Text format in the left-hand sidebar to customize it.
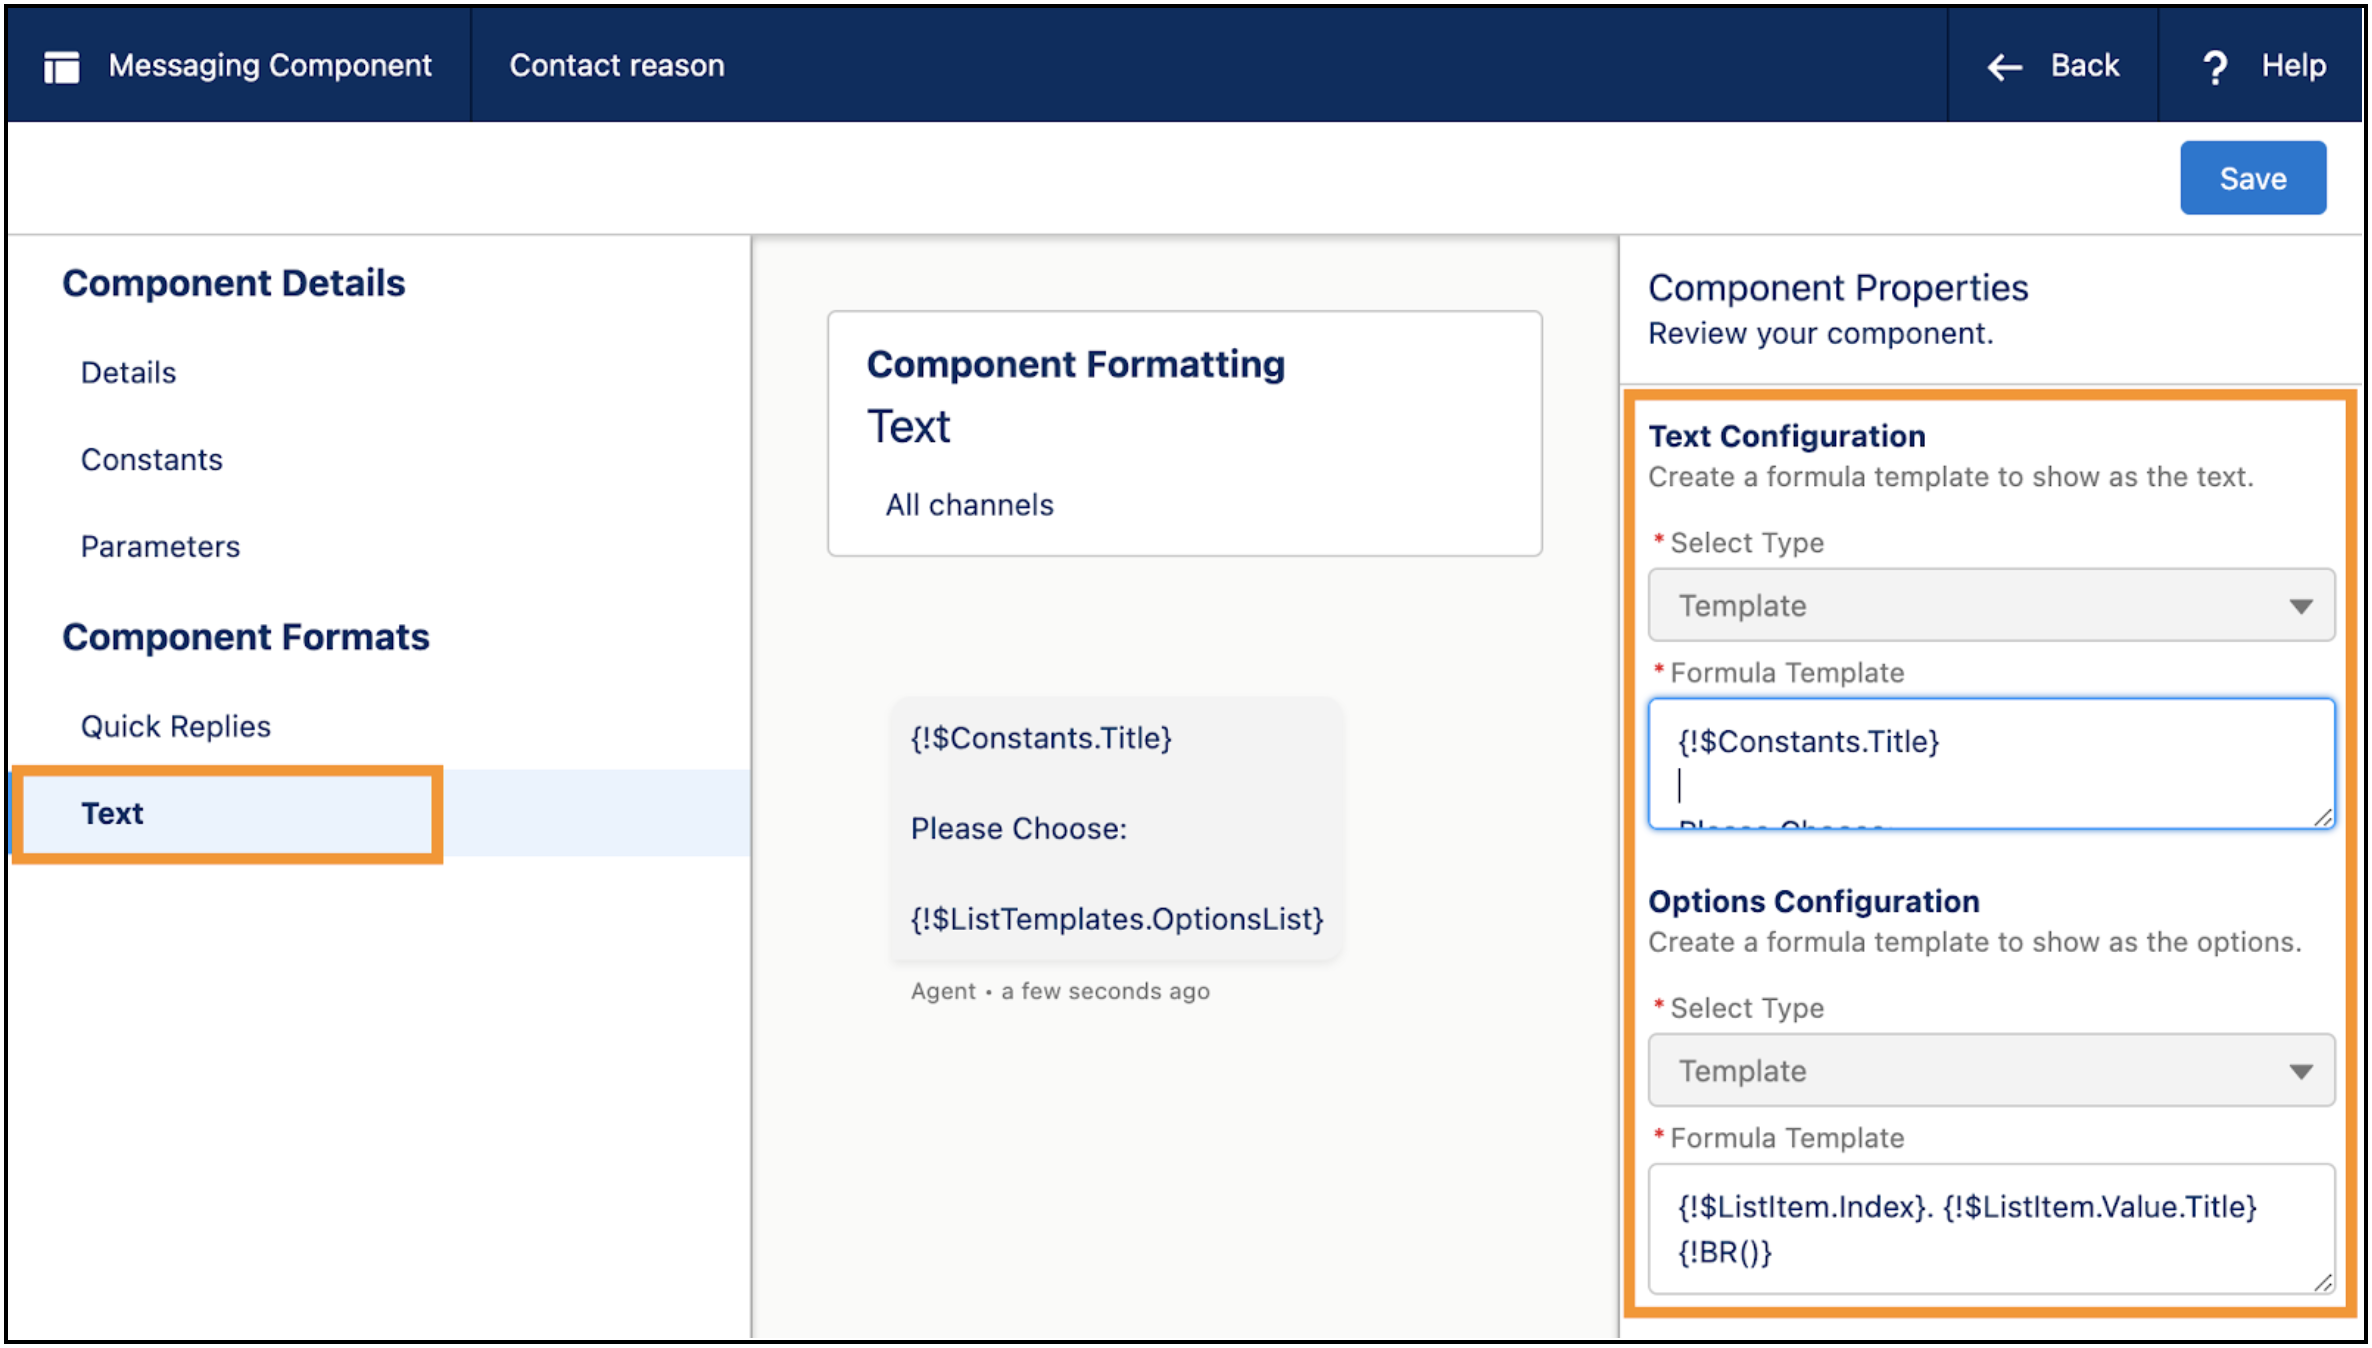
The center of the Messaging Component Builder shows a preview of the component in the selected format. In the properties panel on the right, you can edit the formula template for any fields with a type of Template.
Use Merge Fields to Show a Single Value
Your reference number for this case is:
 {$Parameters.MyCaseParam.CaseNumber}{!BR()}.
The subject of your case is: “{!$Parameters.MyCaseParam.Subject}”
Use Merge Fields to Show Multiple Values
Merge fields also let you present multiple values in a list. For example, for questions with options components, the options are provided by a list constant (for static options) or by a list parameter (for dynamic options).
To insert a list of values into the plain text version of a component, use a custom List Template merge field in the message definition. The definition of the merge field includes:
- A unique name
- The data source of type list that provides the list data to be generated at sending time
- A separate formula template that defines the content for each entry in the list
Use the List Template merge field in the formula template with this syntax:
$ListTemplates.<list_template_name>Replace <list_template_name> with the unique name
of the merge field.
The merge field’s formula template (used to generate list items) can reference any constant, parameter, and any of these merge fields related to the list item being generated.
- $ListItem.Index—the current index of the entry of the list being created.
- $ListItem.Value—the actual value of the current entry of the list being created.
- $ListItem.IsFirst—true when the first list item is being created, and false otherwise.
- $ListItem.IsLast—true when the final list item is being created, and false otherwise.
Use $ListItem.IsFirst and $ListItem.IsLast to apply special logic to the first or last list item.
{!$Constants.Title}{!BR()}
Select an option:{!BR()}
{!$ListTemplates.OptionsList}
The definition of the OptionsList merge field references the Options list constant and includes the following formula template to generate each list item:
{!$ListItem.Index}. {!$ListItem.Value.Name}{!IF(NOT($ListItem.IsLast),BR(),””)}
The definition is structured to insert a line break after all list items except the last one.
Each item in the list is a complex type with multiple fields (Name, Image, and Subtitle). In this example, only the Name field of the Option entry is used to create list values.
When the formula templates are evaluated and the list items are created, the plain text version of the messaging component appears as follows, depending on how the constants are set up:
What do you need help with?
Select an option:
1. Cancel my order
2. Change my shipping address
3. Change the delivery date- Send a Personalized Customer Greeting with a Formula Template
Send a personalized greeting to an end-user automatically when a service rep accepts their messaging session. Create a Start Conversation auto-response messaging component that contains a formula template.