
You are here:
Create and Send Payment Requests in Messaging Sessions
Request payments from customers during messaging sessions with a payment messaging component. Service reps can send the component to prompt the customer to make a payment with Apple Pay.
Required Editions
| View supported editions. | |
 This article applies to:
|
Enhanced Apple Messages for Business channels |
 This article doesn’t apply to:
|
Enhanced In-App Chat, Enhanced Web Chat v1, Enhanced Web Chat v2, Enhanced WhatsApp, Standard and Enhanced Facebook Messenger, Standard and Enhanced SMS, Enhanced LINE, and Bring Your Own Channel |
| User Permissions Needed | |
|---|---|
| To create messaging components: | Customize Application AND View Setup and Configuration OR System Administrator |
| To send and receive messages in Messaging: | Messaging Agent |
- Configure your Apple Pay settings and Messaging channel settings, and create a payment processing Apex class. For steps, see Add Apple Pay to a Messaging Channel.
- In Setup, go to the Messaging Components page.
- Click New Component.
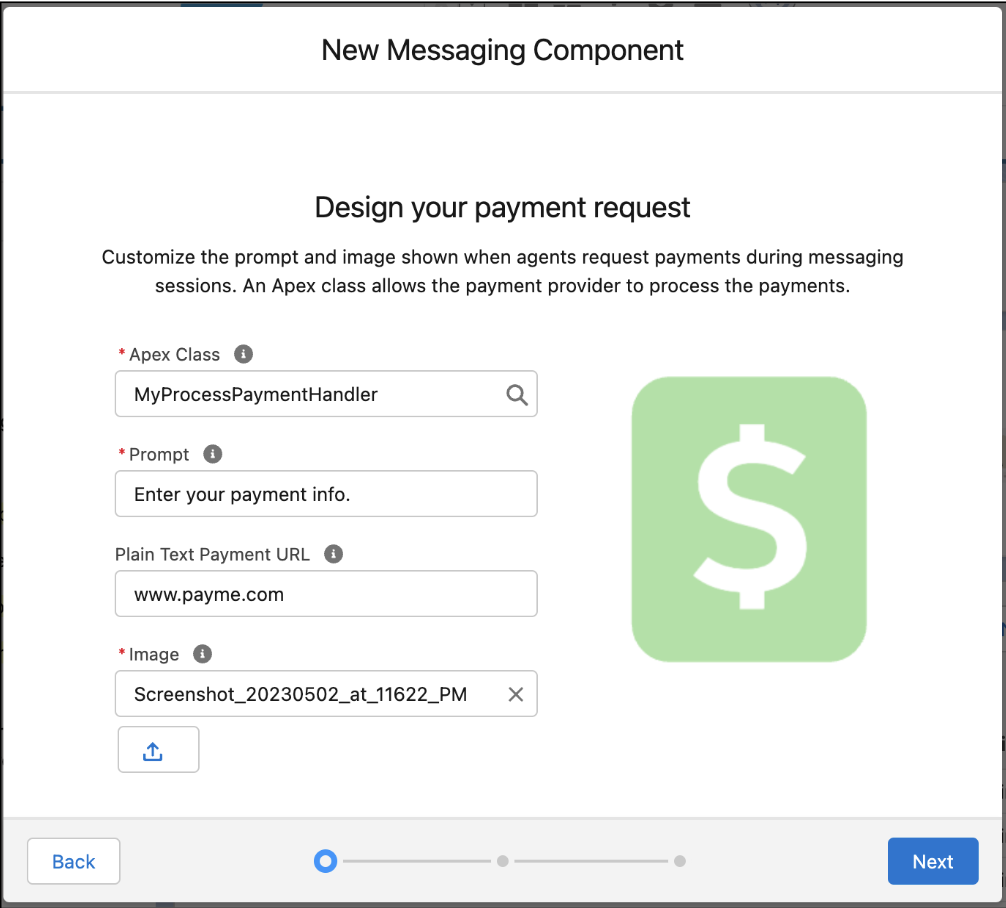
- Click Payment, and then click Next.
-
Select the ProcessPaymentHandler Apex class that you created, and enter a prompt. Provide a
URL that is sent if the component must be sent in plain text format, and select or upload an
image that appears with the payment request.
The prompt, plain text URL, and image are all saved as constants behind the scenes. You can reference those constants when you customize your component’s behavior and appearance in the Messaging Component Builder.
-
Edit the plain text version of your component to add text to accompany the URL you entered.
The URL is represented on this screen as
{!$Constants.Url}.The plain text format is used if the component is sent in a Messaging channel that’s not an enhanced Apple Messages for Business channel, or if the preferred format isn’t available.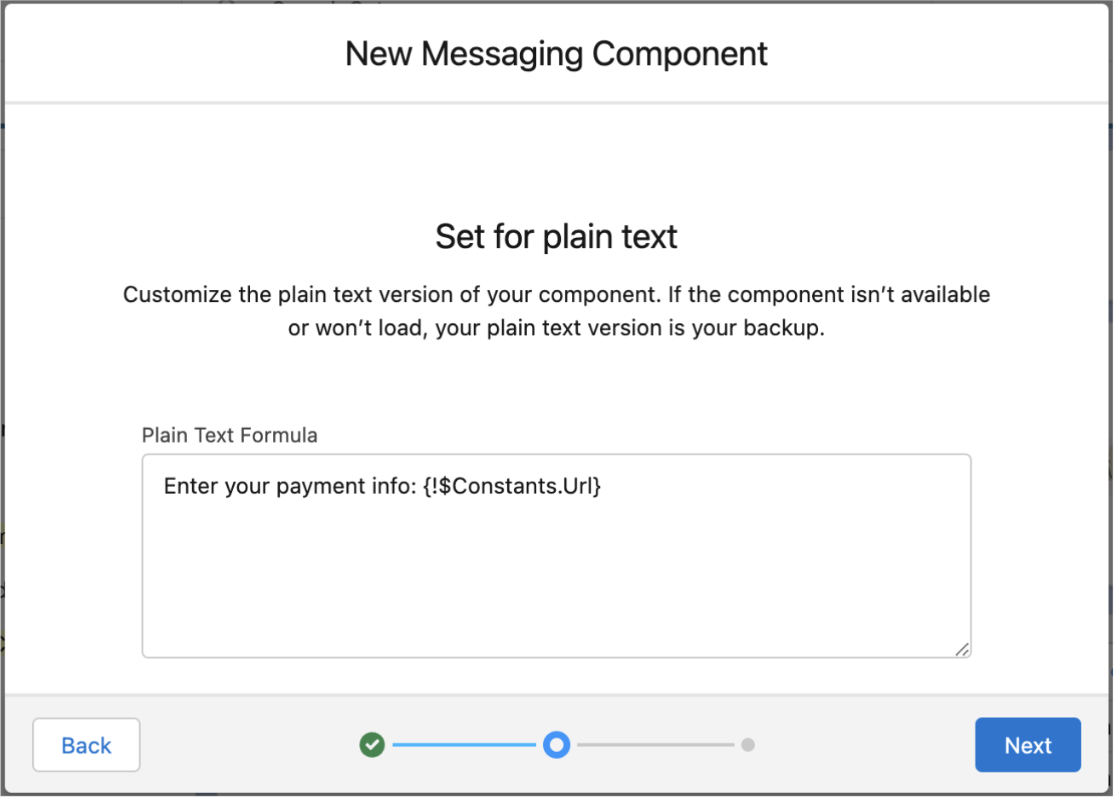
- Click Next and add a name and description for your component.
-
Click Done. The Messaging Component Builder opens.
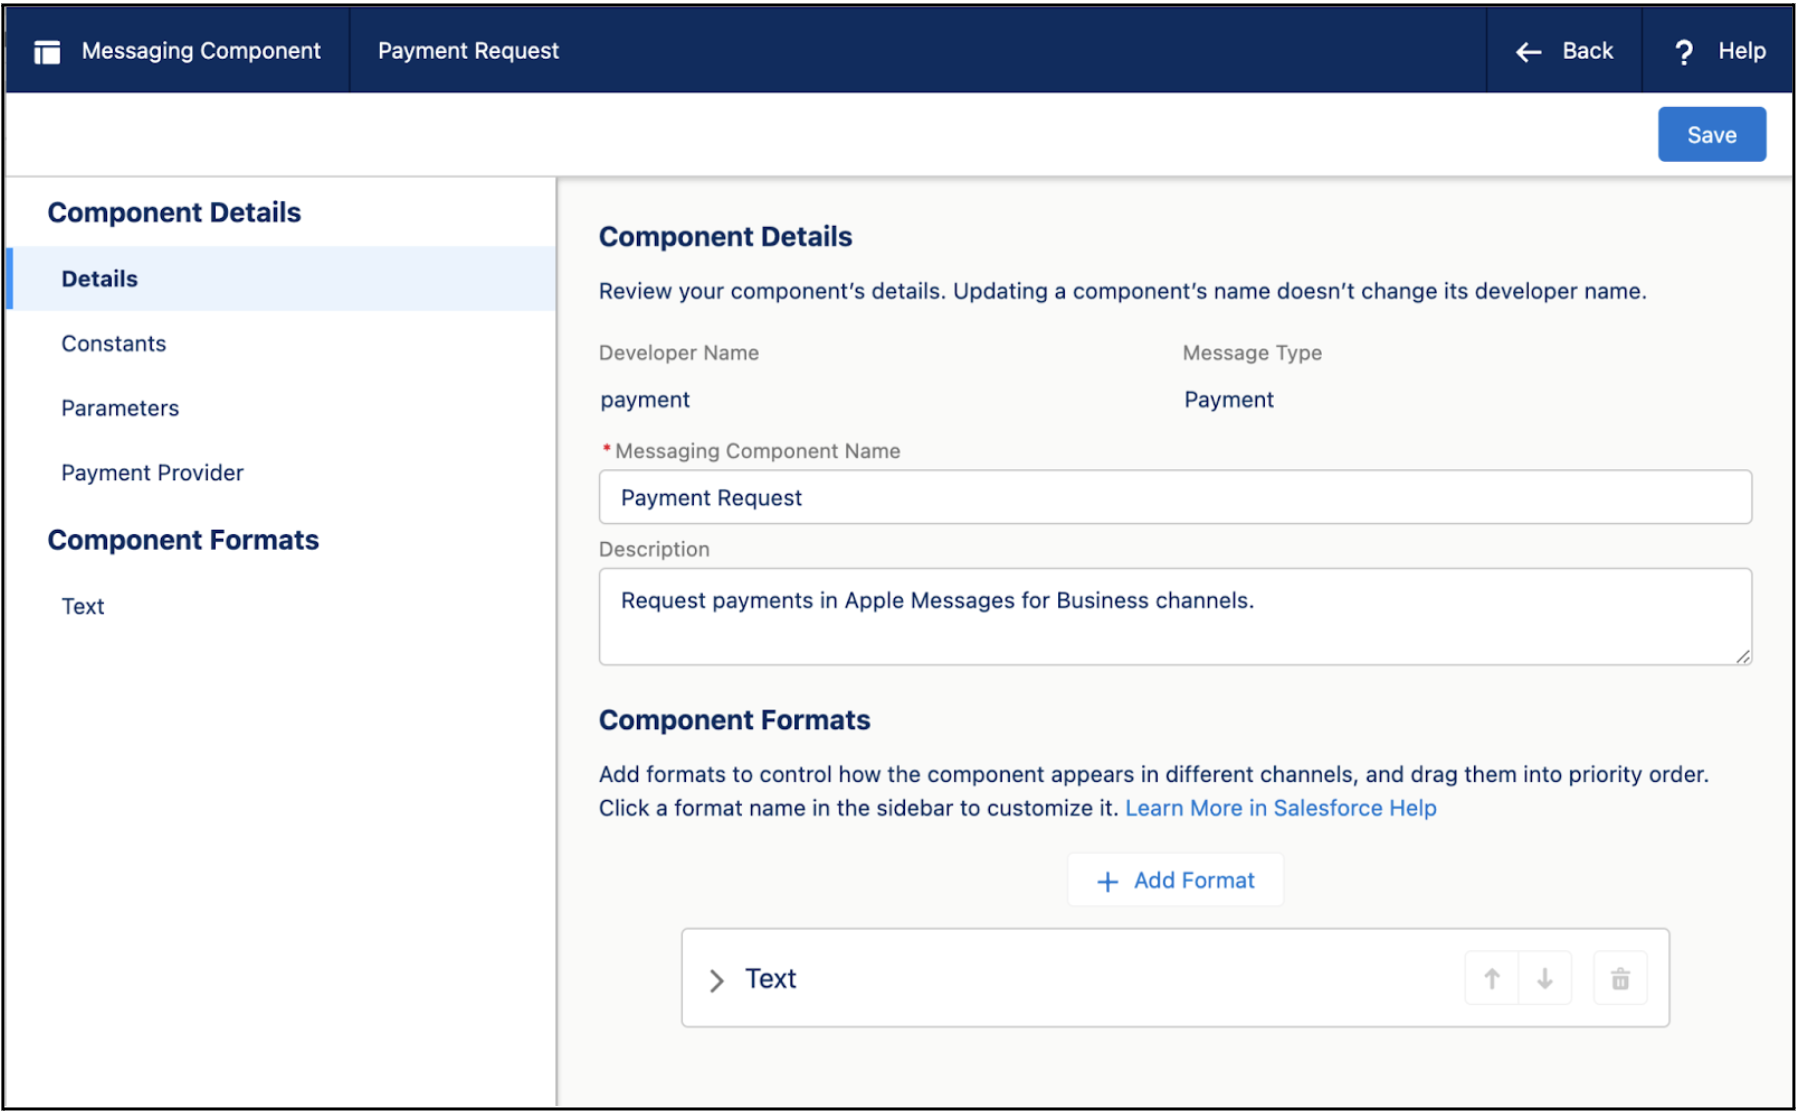
-
Add a format to customize how the component looks in messaging sessions. Click
Add Format, select Payment, and then click
Done.
 Note Each messaging component is available in one or more formats, such as Payment, and some formats work only in certain channels. For a list of formats that each channel supports, see Messaging Component Types and Formats. It’s a good idea to add at least one supported format for each channel where the component will be sent. If no formats are added, the component uses the default text format.
 -
In the left-hand sidebar, click the Payment format type to update its properties.
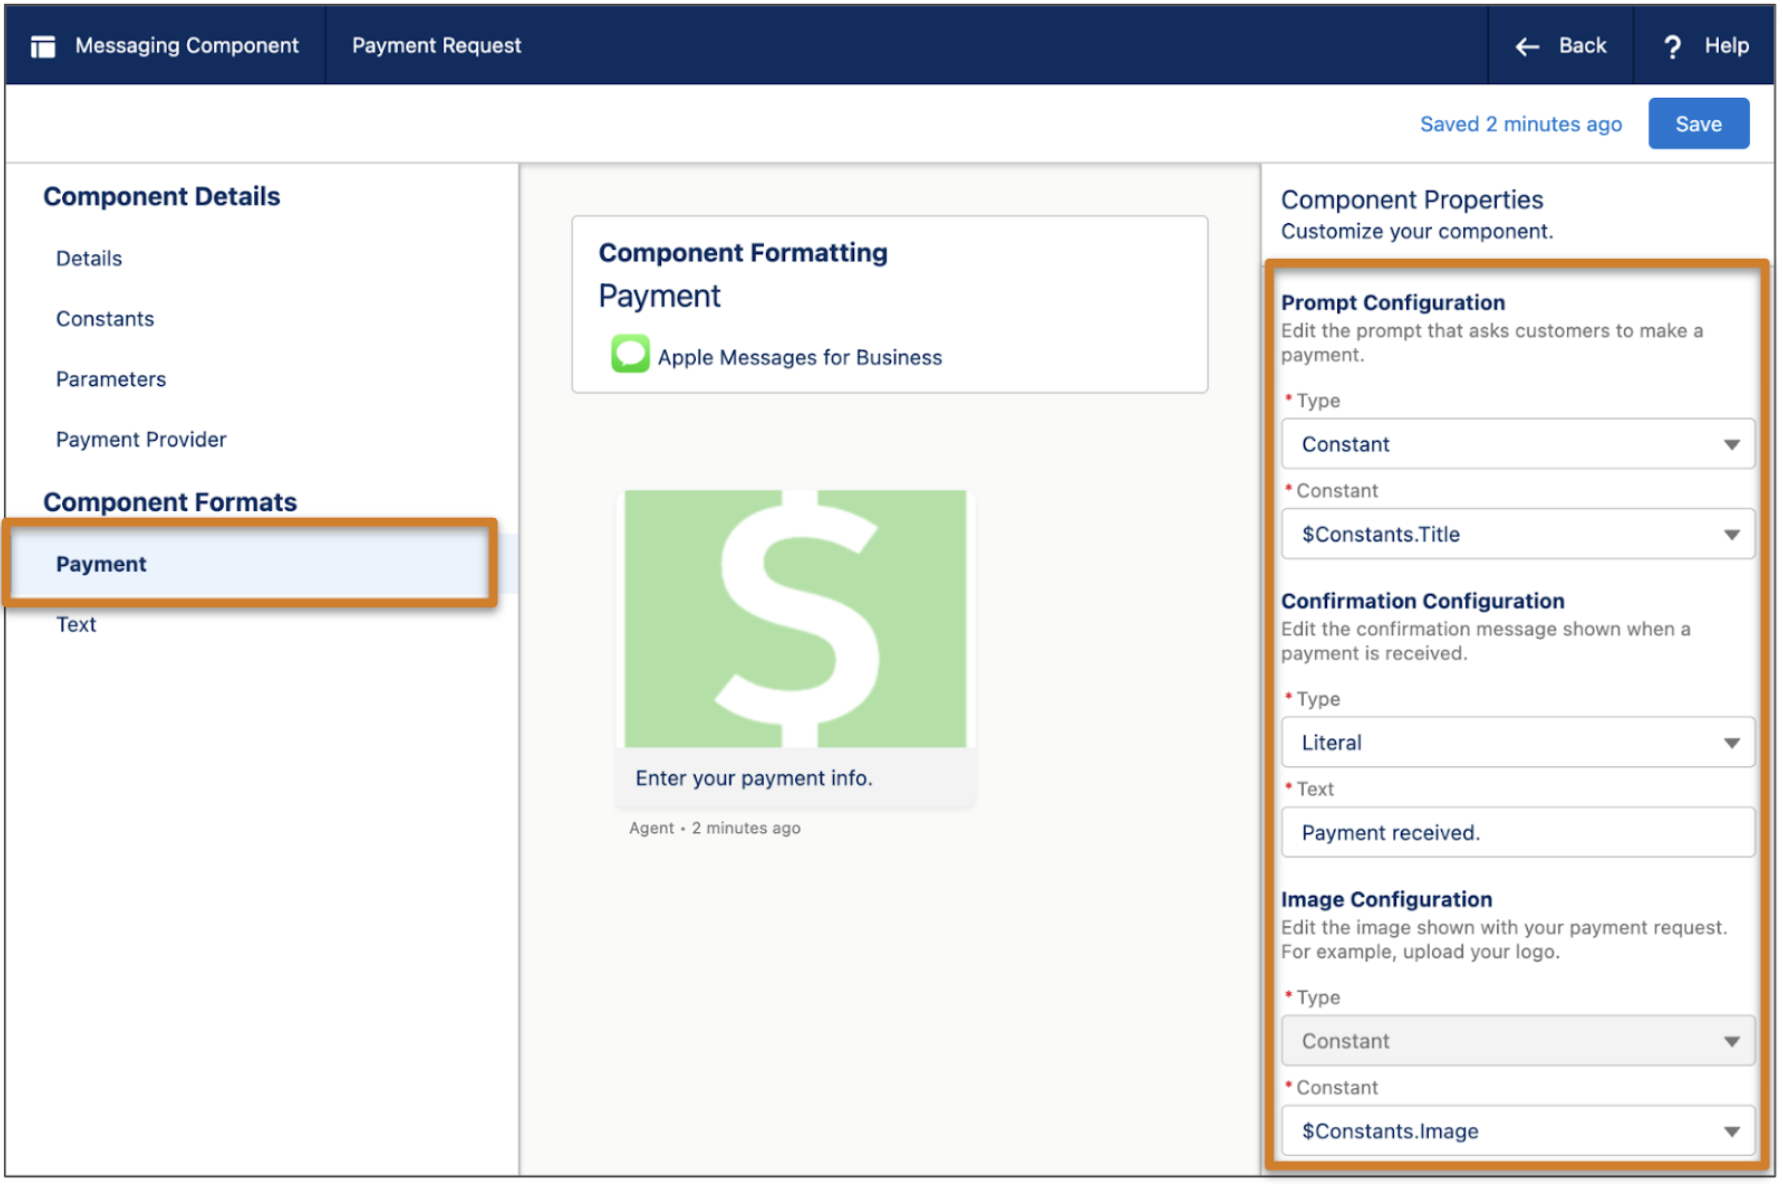
- To use the prompt and image you provided earlier, in the Prompt Configuration and Image Configuration sections, select Constant and select the only available constant.
- For currency, provide your three-letter ISO 4217 currency code for the currency used in your payment requests.
- For Merchant Domain, provide the domain that you saved when verifying your merchant domain while adding Apple Pay to your channel.
- After you update the remaining format properties, click Save.
-
Your component is saved in a draft state. When you're ready to make it available to
your support team, click Activate at the top of the page.
If you ever need to take the component offline—for example, to give you time to reconfigure it—open it in the Messaging Component Builder and click Deactivate. When you're ready, activate it again.
Next, create Apex classes and a flow that service reps can run to send the payment component to customers.
When you create a payment component, three standard parameters are also created. You can reference these parameters in flows, Apex, or the component properties.
- PaymentLineItems: The items for purchase that are listed in the payment request. When a payment request is sent, an Apex class populates the list of items.
- PaymentTotal: The total listed on the payment request. When a payment request is sent, an Apex class calculates the total.
- ShippingMethods: The shipping methods that you support. When a payment request is sent, an Apex class populates the shipping method information.
To view the parameters, open your messaging component in the Messaging Component Builder and click Parameters in the left-hand sidebar.
- Set Up a Flow to Send Payment Requests in Messaging Sessions
Create Apex classes and a screen flow that service reps can run to send payment messaging components to customers in messaging sessions. The flow executes the Apex classes and passes the transaction details into the payment messaging component.
Did this article solve your issue?
Let us know so we can improve!