
You are here:
Create and Send Time Selectors in Messaging Sessions
Prompt customers to select from a list of time slots during messaging sessions. For example, ask customers to select a time for a service visit or delivery. Create a time selector messaging component, and then link it to a flow and an Apex class. Service reps run the flow to send the time selector to a customer, and the Apex class provides the list of time slots.
Required Editions
| View supported editions. | |
 This article applies to:
|
Enhanced In-App Chat, Enhanced Web Chat v1, Enhanced WhatsApp, Enhanced Facebook Messenger, and Enhanced Apple Messages for Business, and Bring Your Own Channel |
 This article doesn’t apply to:
|
Enhanced Web Chat v2, Standard Facebook Messenger, Standard and Enhanced SMS, and Enhanced LINE |
| User Permissions Needed | |
|---|---|
| To create messaging components: | Customize Application AND View Setup and Configuration OR System Administrator |
| To send and receive messages in Messaging: | Messaging Agent |
- From Setup, in the Quick Find box, enter Messaging Components, and then select Messaging Components.
- Click New Component, and then click Next.
- Click Time Selector.
-
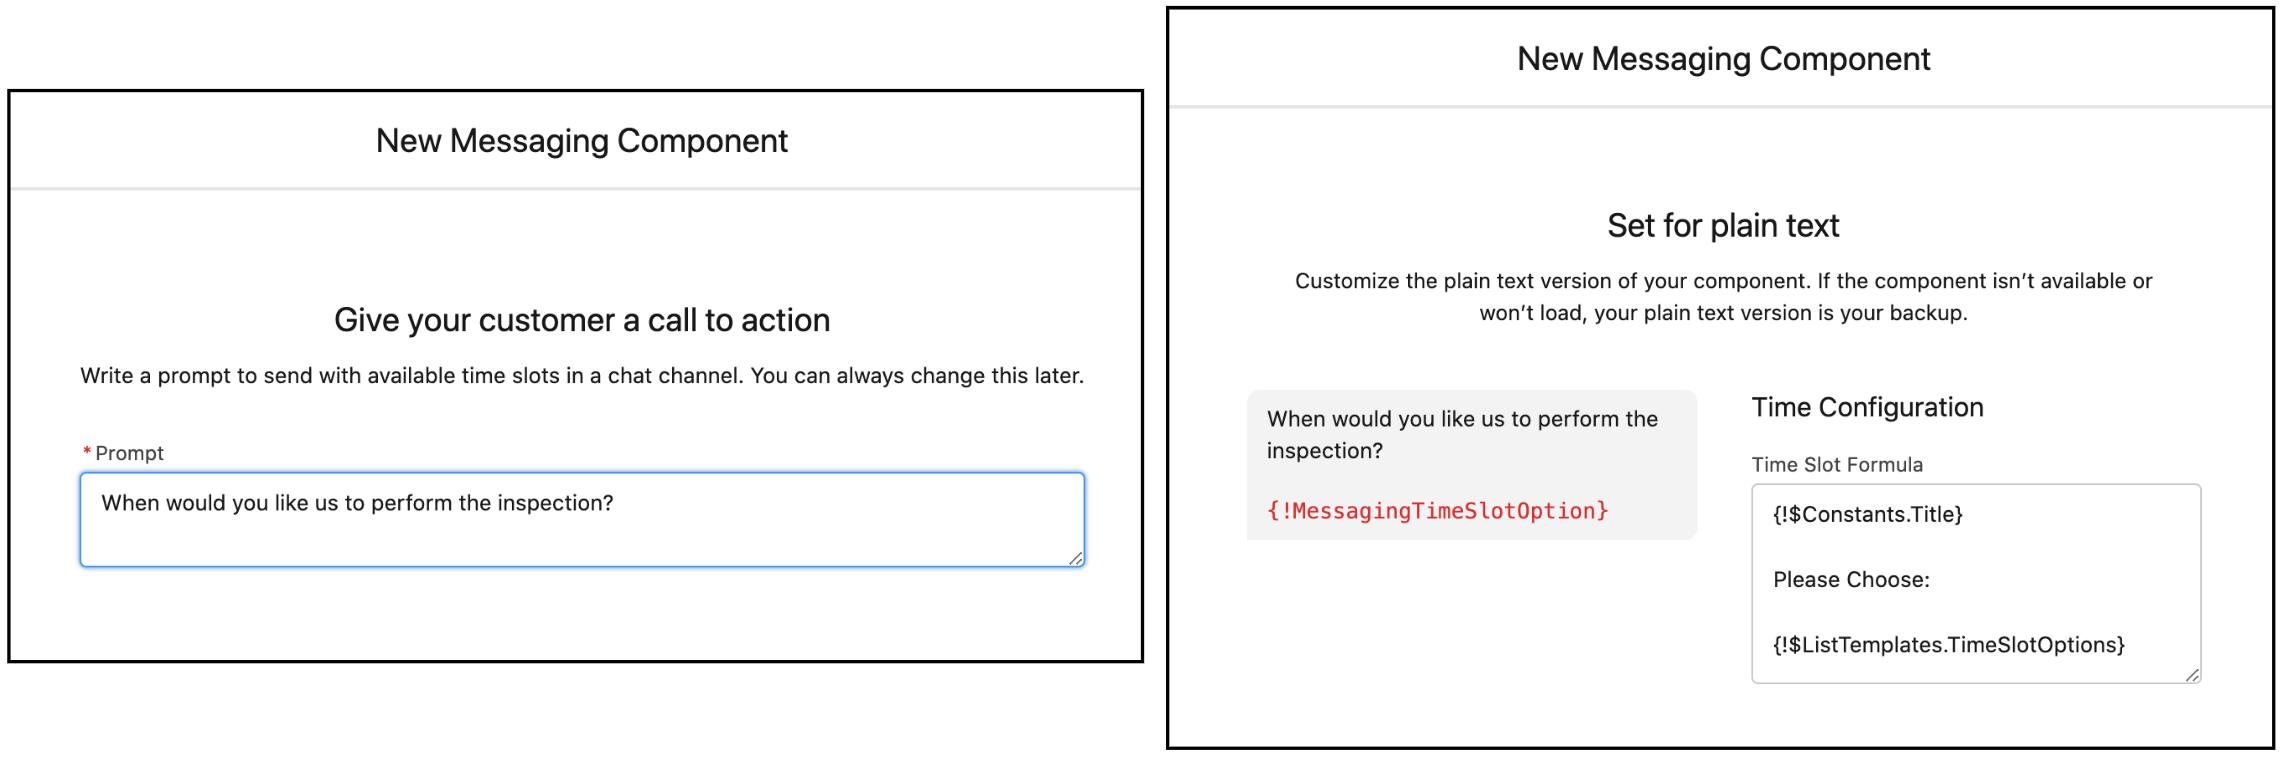
Enter a prompt and a plain text option, and then click Next. If you
plan to use your component in enhanced WhatsApp channels, keep your prompt under 20
characters.
-
Enter a name and description for your time selector component.
These values aren’t visible to customers, but service reps see the name in the Service Console.
-
Click Done.
The Messaging Component Builder opens.
-
On the Component Details page, further customize your component.
-
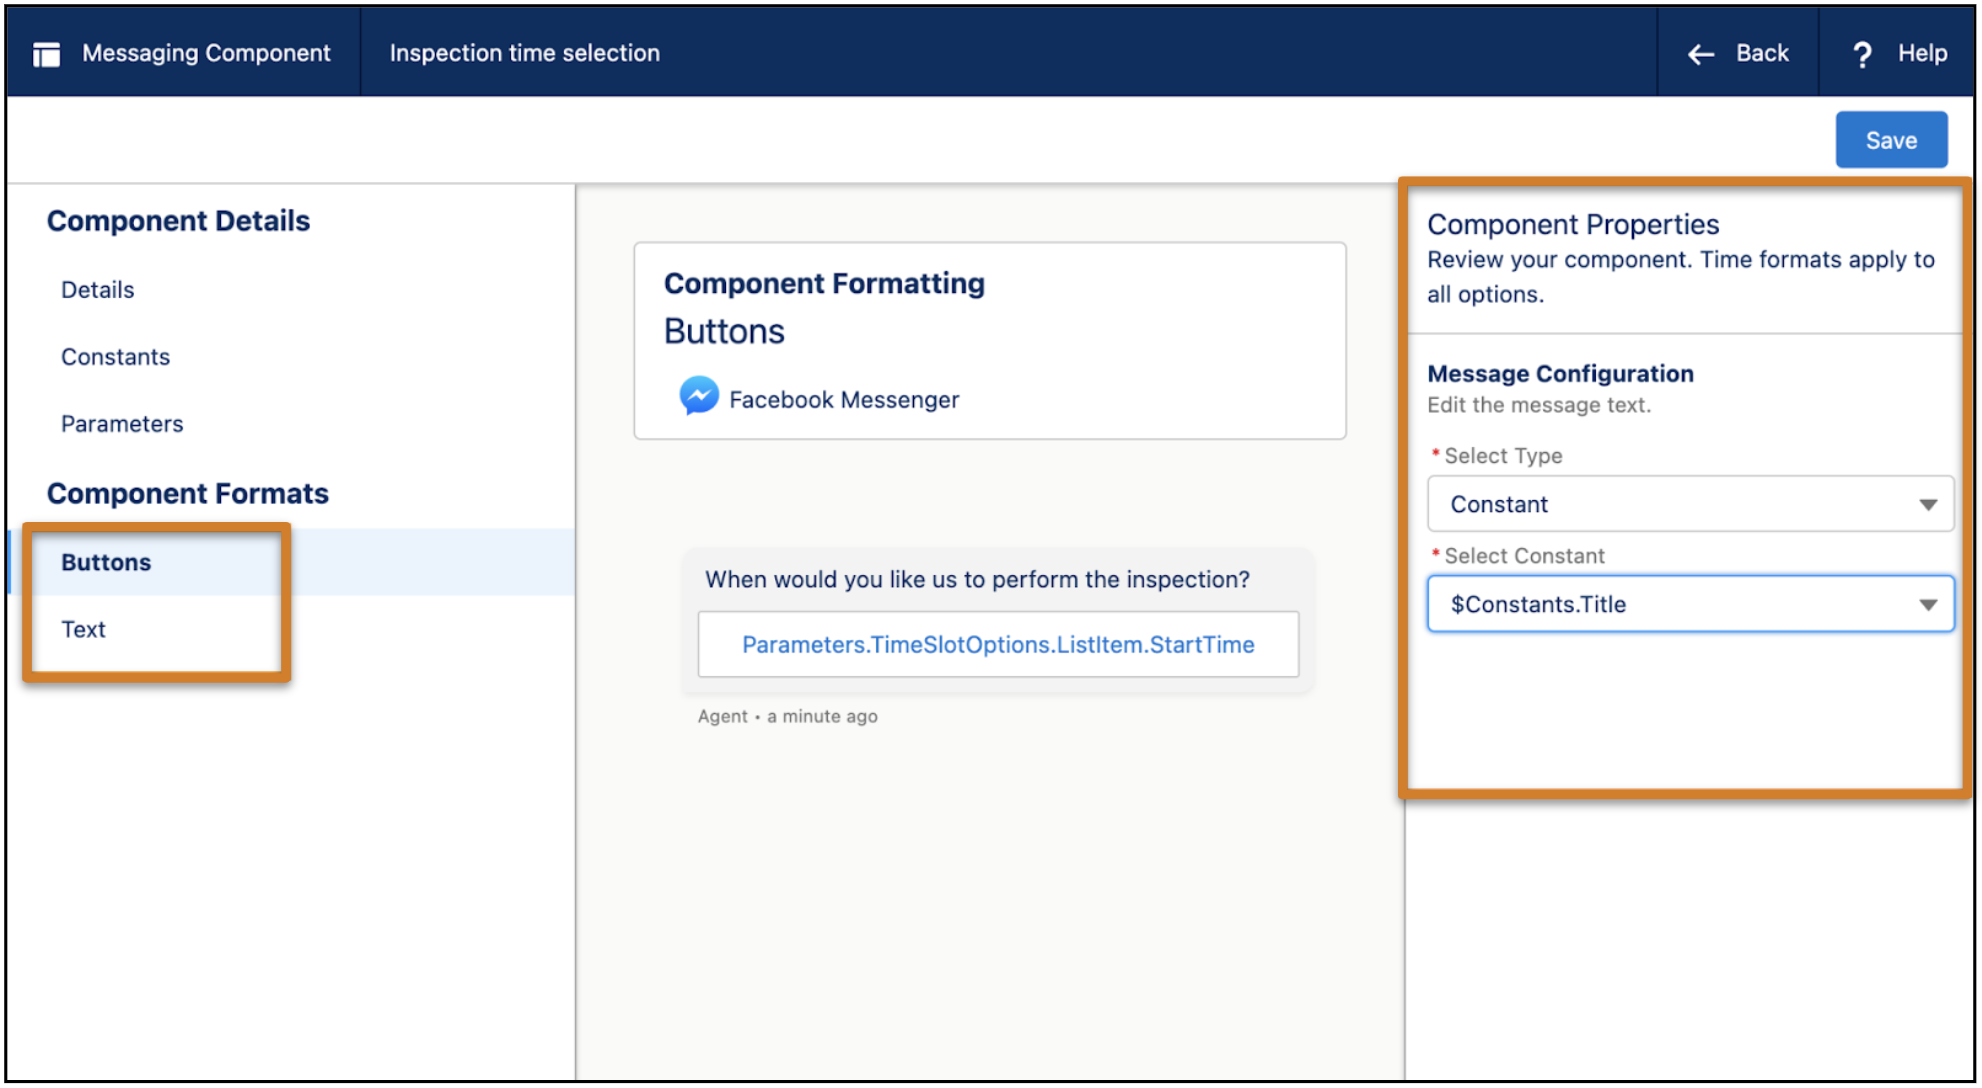
In the Component Formats section, control the way your component appears in each type of
Messaging channel. Click Add Format, select a format, and then click
Done.
 Note Each messaging component is available in one or more formats, such as Buttons, and some formats work only in certain channels. For a list of formats that each channel supports, see Messaging Component Types and Formats. It’s a good idea to add at least one supported format for each channel where the component will be sent. If no formats are added, the component uses the default text format.
 - In the left-hand sidebar, click a format type to customize its properties.
-
In the Component Properties pane, configure each format’s properties. To keep it simple,
use the auto-created constant for the question. Then, click Save.
- Arrange the formats you selected in priority order. If a component can’t be shown in the highest-priority format, the next format is used.
-
In the Component Formats section, control the way your component appears in each type of
Messaging channel. Click Add Format, select a format, and then click
Done.
- When you’re done editing your component, click Save.
-
Your component is saved in a draft state. When you're ready to make it available to
your support team, click Activate at the top of the page.
If you ever need to take the component offline—for example, to give you time to reconfigure it—open it in the Messaging Component Builder and click Deactivate. When you're ready, activate it again.
After you create your component, it’s time to link it to a flow that service reps can use to send it to a customer. The flow must also reference an Apex class that provides the list of available time slots. Then, add the flow to the Service Console and test it.
- Set Up a Flow to Send Time Selectors in Messaging Sessions
Let service reps send time selector components in supported enhanced Messaging channels and Enhanced Chat. Create a screen flow, associate it with a messaging component and an Apex class, and add it to the Service Console. - Example: Apex Class for Time Selector Messaging Components
Time selector messaging components send customers a prompt and a list of available time slots for them to choose from. To generate the list of time slots each time the component is sent, create an Apex class. The Apex class determines the time slot start time, duration, and time zone.