Loading
Salesforce now sends email only from verified domains. Read More
Help Agent Performance DegradationRead More
Agentforce Contact Center
Table of Contents
Select Filters

          No results
          No results
          Here are some search tips

          Check the spelling of your keywords.
          Use more general search terms.
          Select fewer filters to broaden your search.

          Search all of Salesforce Help
          Use Case: Use a Switch Element to Show Screens Based on Conditional Logic

          Use Case: Use a Switch Element to Show Screens Based on Conditional Logic

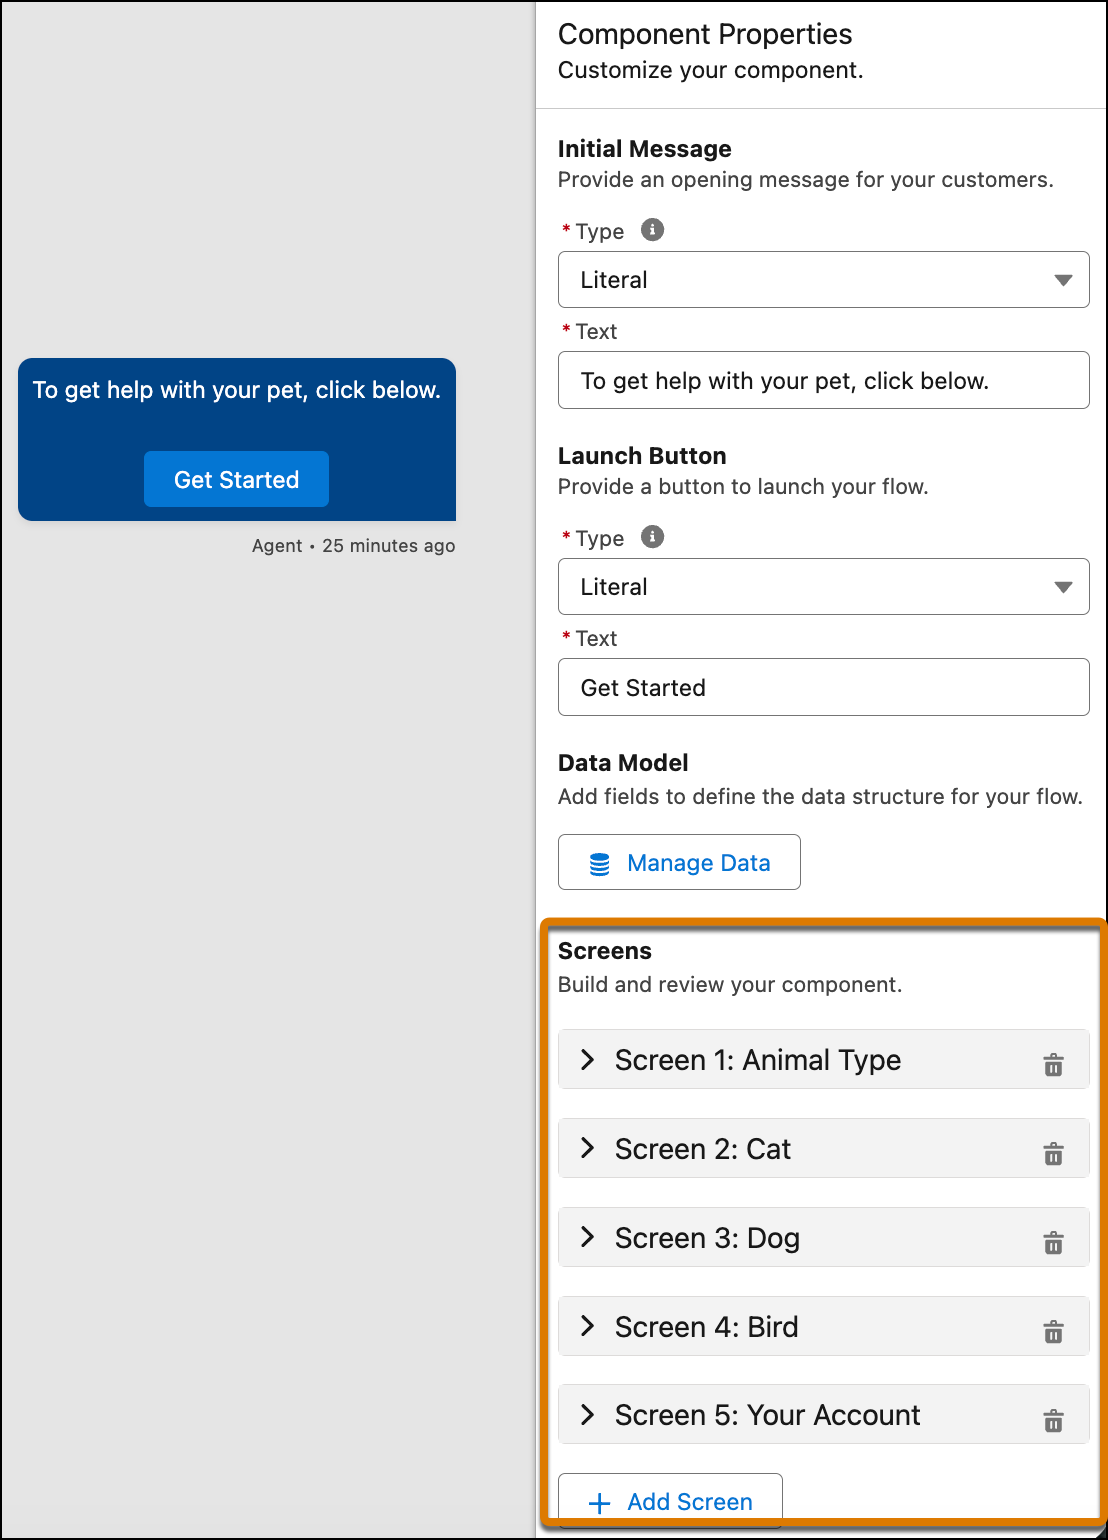
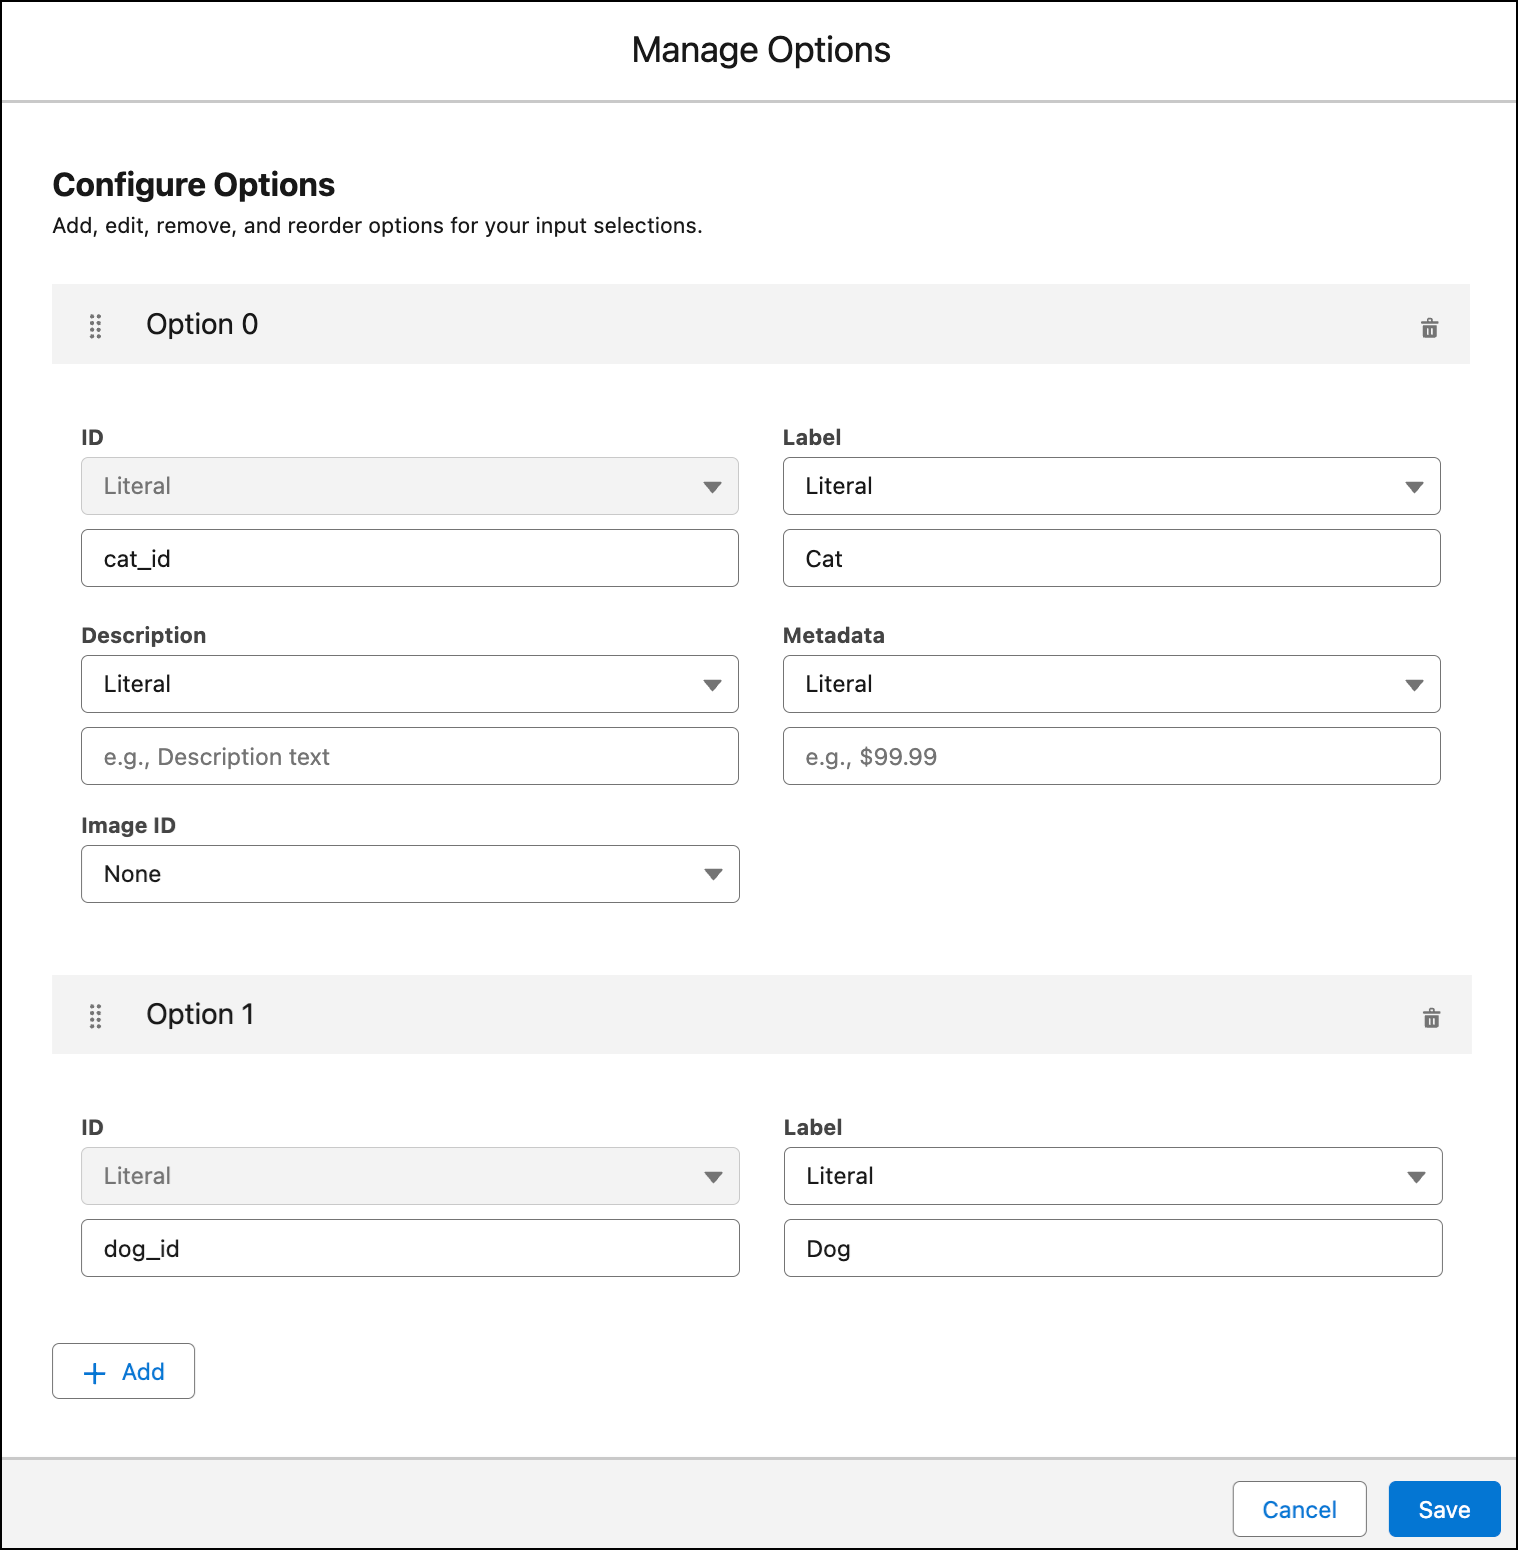
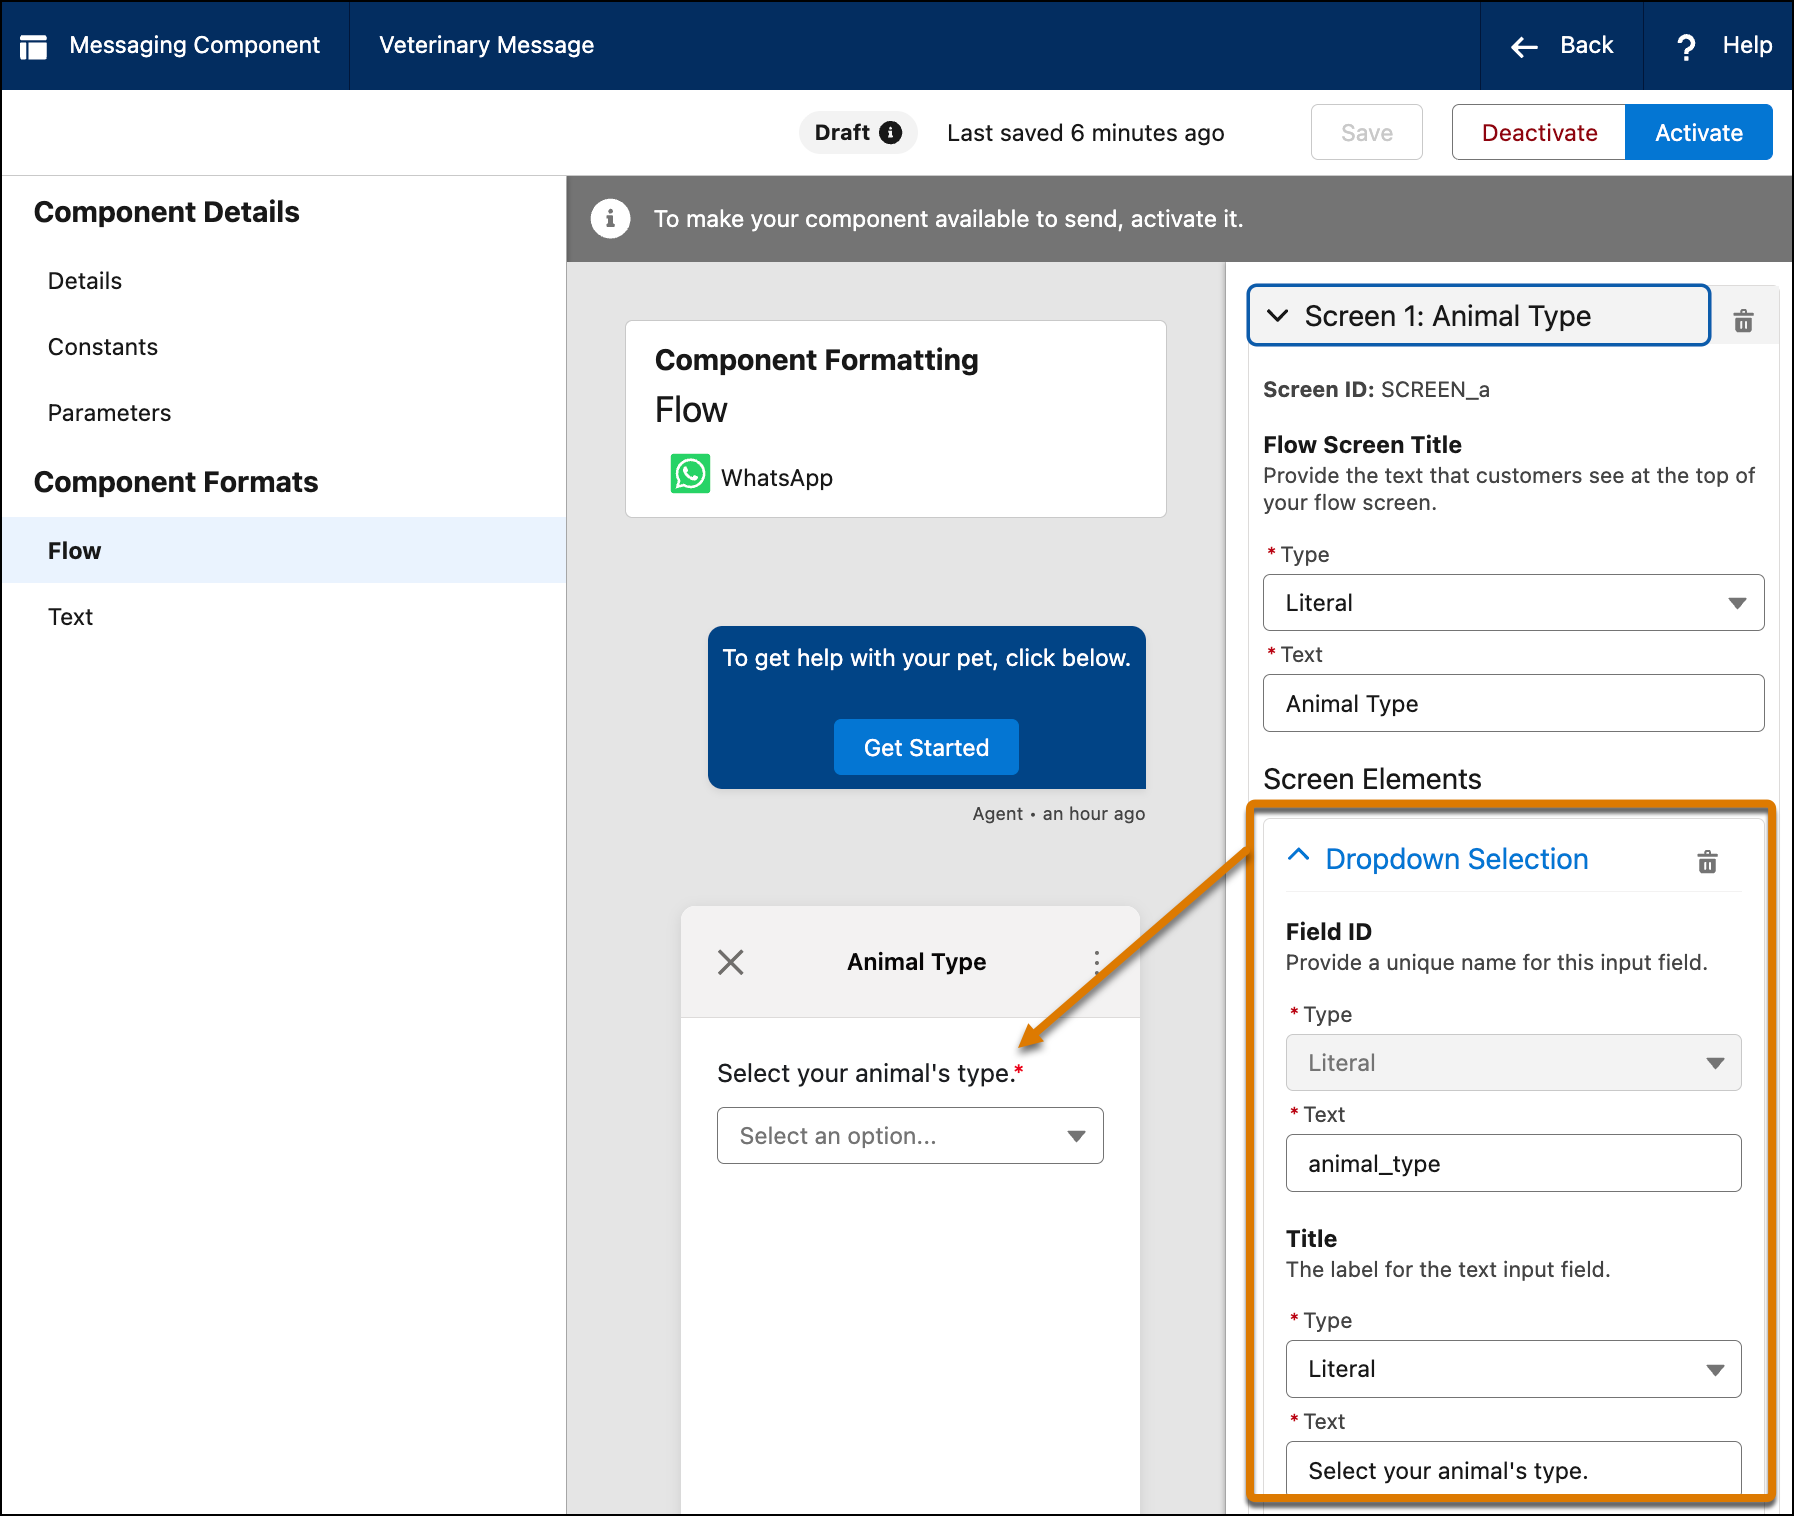
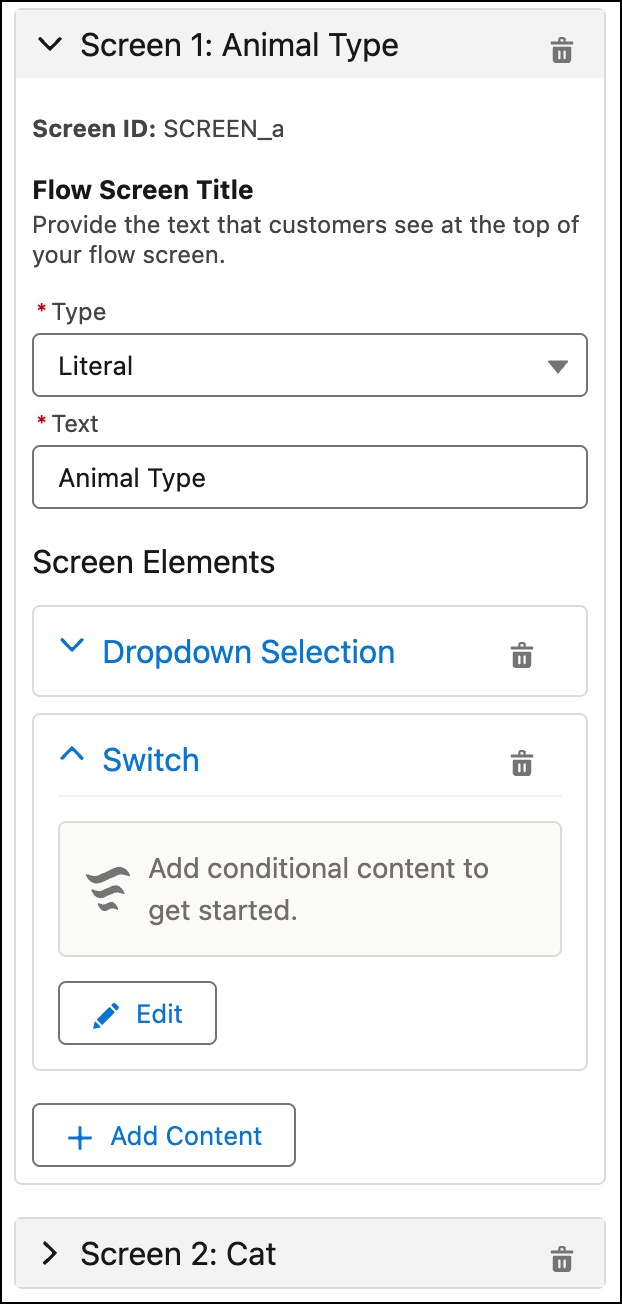
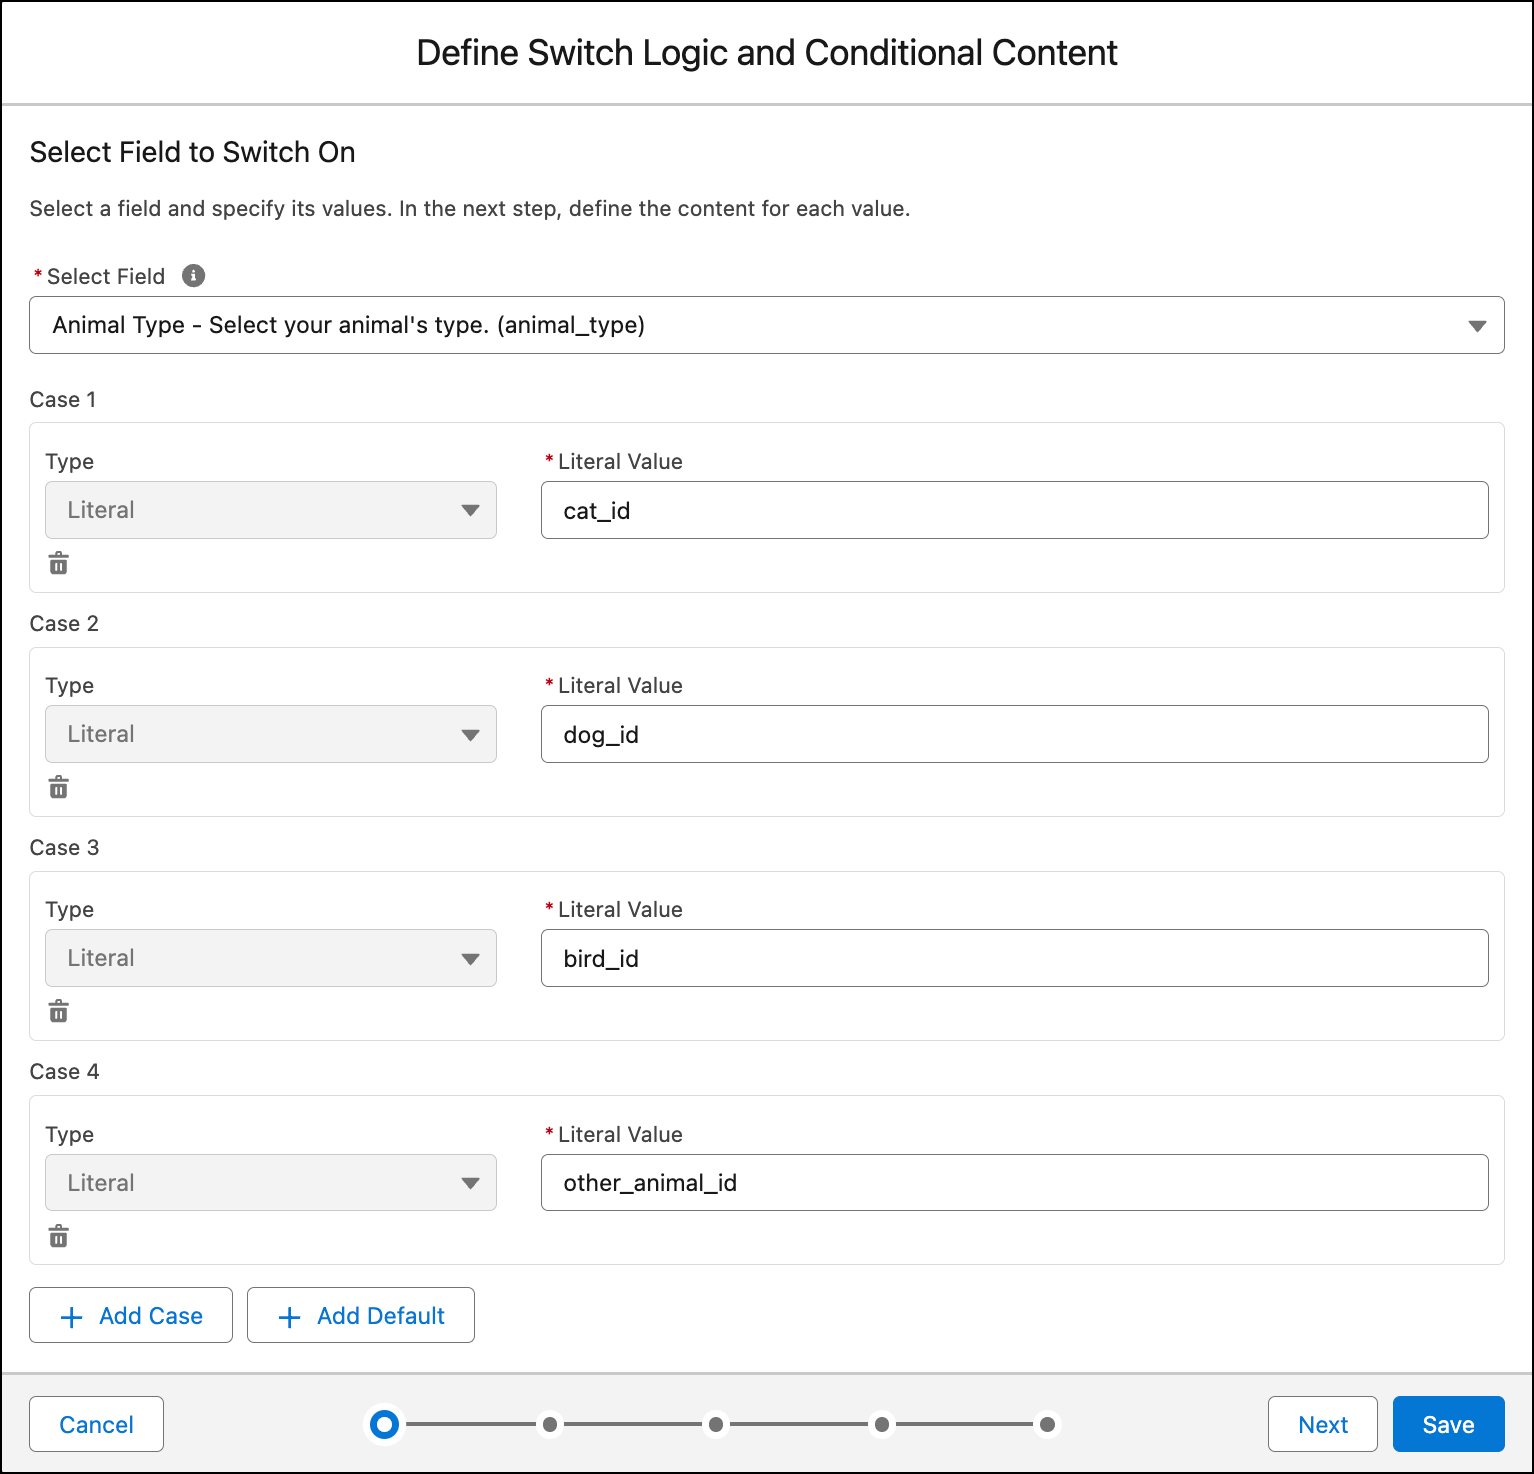
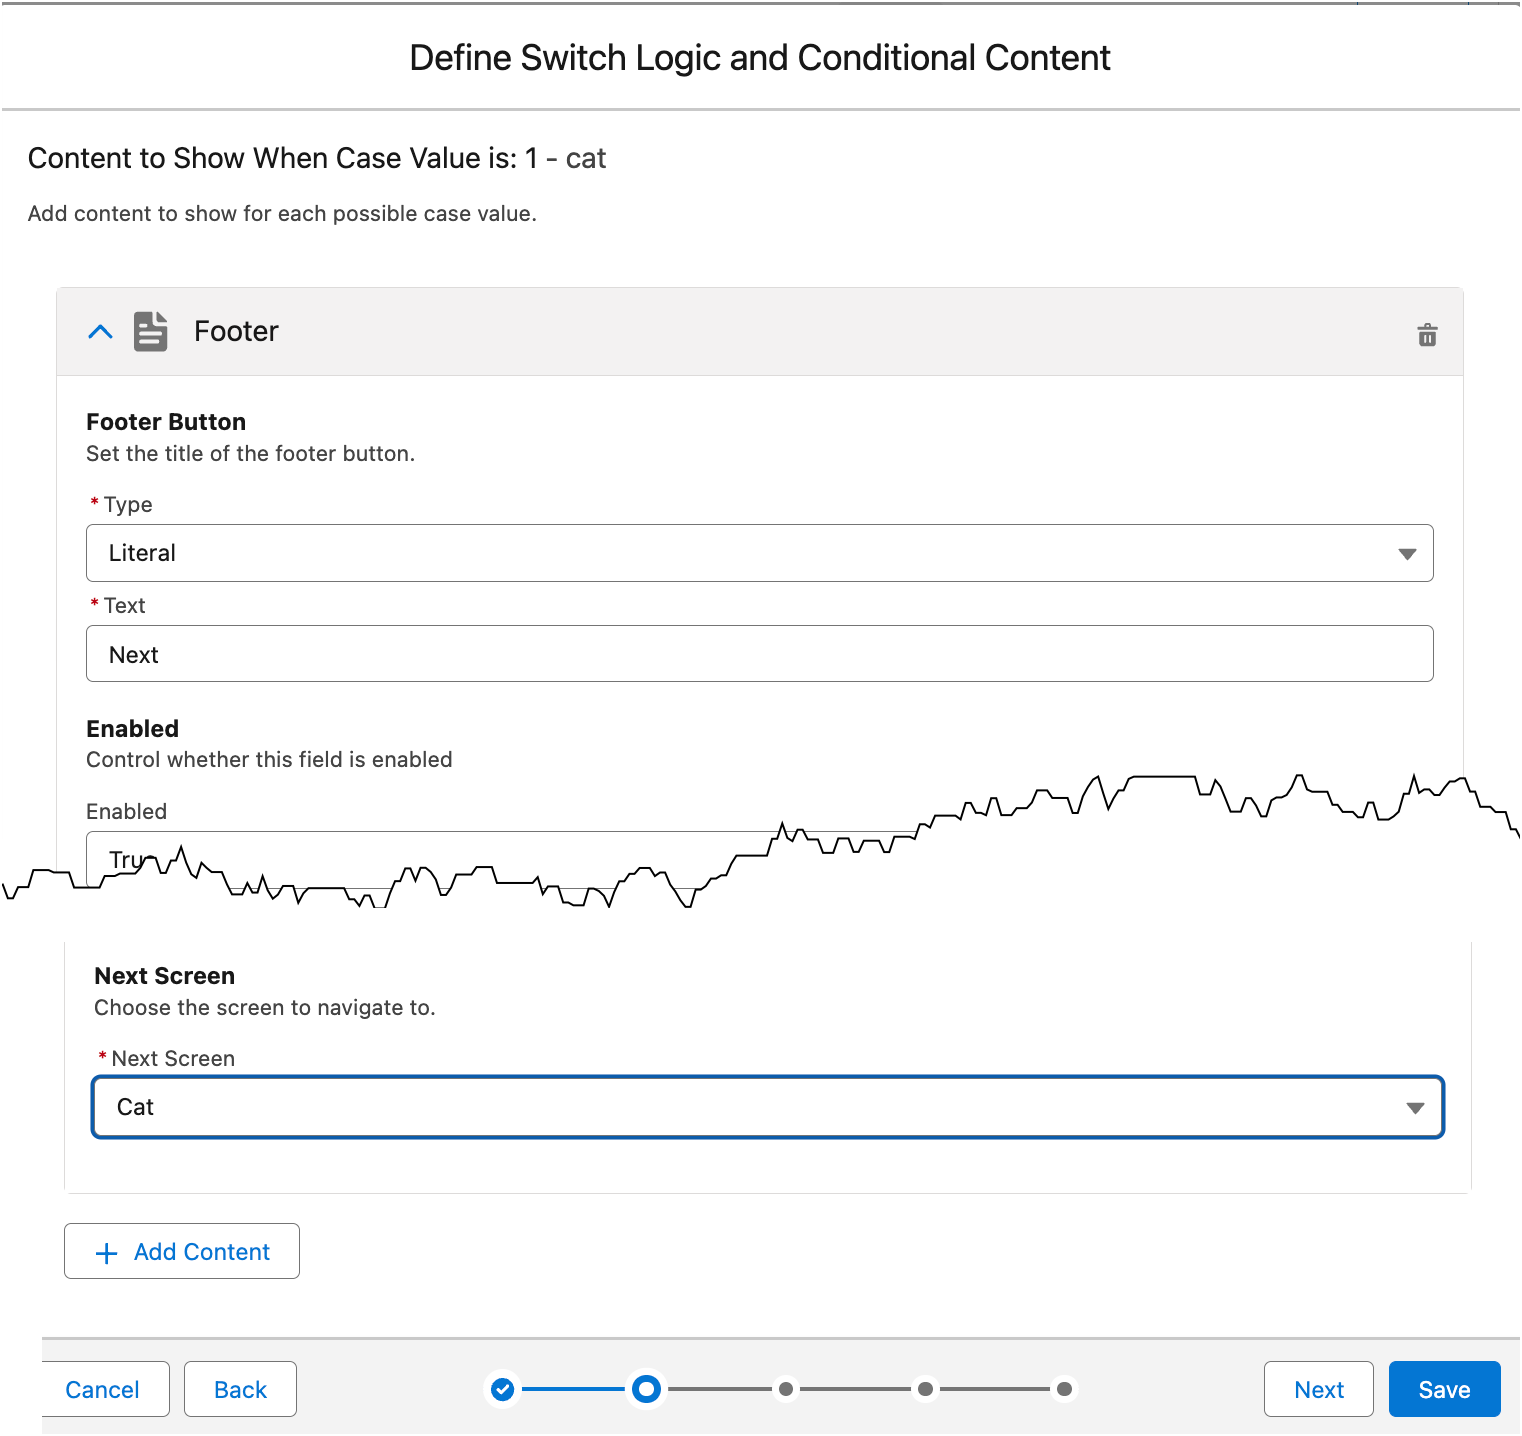
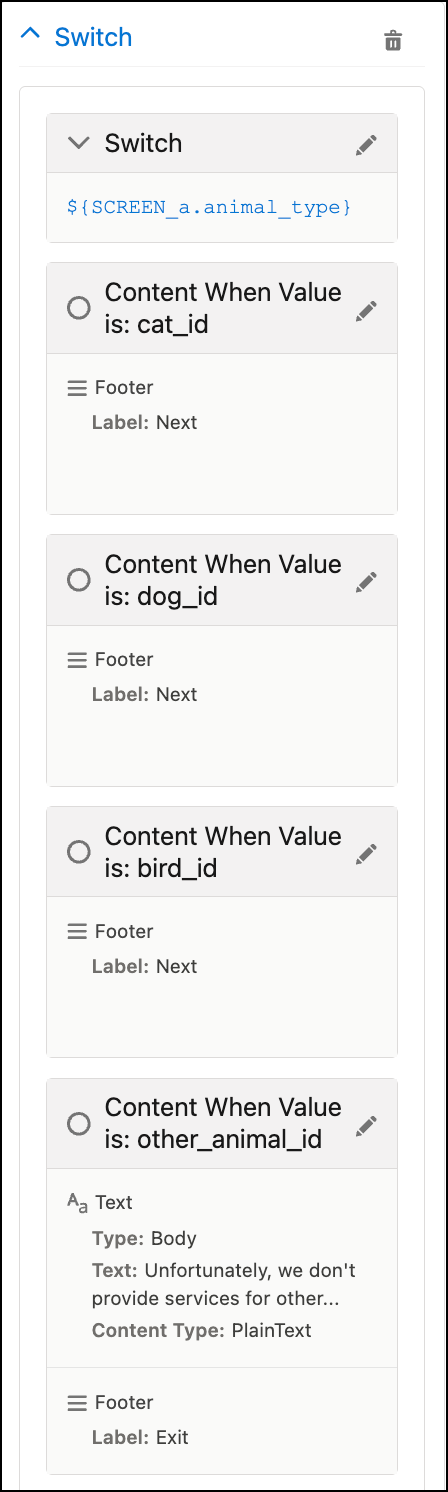
          Use the Switch screen element to dynamically show or hide content. It compares a single field value against one or more specified values, and then displays the content associated with the first value that is an exact match. If no match is found, it returns the preconfigured default value. Unlike the If element, Switch is limited to performing an exact match comparison on a single field and doesn’t support complex logical operators like AND or OR.

          Required Editions

          View supported editions.
          Checkmark This article applies to: Enhanced WhatsApp channels, Unified WhatsApp
          X icon This article doesn’t apply to: Enhanced In-App Chat, Enhanced Web Chat, Standard and Enhanced Facebook Messenger, Standard and Enhanced SMS, Enhanced Apple Messages for Business, Enhanced LINE, and Bring Your Own Channel
          User Permissions Needed
          To create messaging components:

          Customize Application AND View Setup and Configuration

          OR

          System Administrator

          To send and receive messages in Messaging: Messaging Agent

          To illustrate how to use Switch, consider this example. You are the admin for Healthy Pets, a veterinary hospital. Your job is to build a WhatsApp Flow, where the initial screen asks the customer for their animal type, and then sends them to a screen to provide details about the animal. To share specific details about each animal type, create a different screen for each type. For example, if the customer selects Cat, the Next button takes them to the Cat screen. After providing animal-specific information, the customer is then sent to the final screen, where they confirm their account information.

          This example assumes that you already created the WhatsApp Flow with these screens.

          The WhatsApp flow contains 5 screens with content.

          1. In the Component Formats section of the Form messaging component, select Flow.
          2. In the Screens section, expand the Animal Type screen and add a dropdown screen element that shows: Cat, Dog, Bird, and Other Animal.
            There are different options for each animal type, including cat and dog.
          3. To preview the Animal Type screen, in Component Properties in the right sidebar, select and expand the screen node.
            The previous shows the results of the dropdown selection configuration.
          4. To advance the user to the next screen based on their animal type selection in the Animal Type screen, add a Switch element.
          5. In the Component Properties of the Animal Type screen, click Add Content, select Switch under Conditional Logic, and click Done.
          6. To configure the Switch element, expand the Switch node and click Edit.
            The screen configuration shows different screen elements, including the Switch element.
          7. In Select Field, select the field that the customer uses to choose their animal type.
          8. Add a separate case for each animal type that can be selected.
            For the Literal Value field, enter the ID, not the display label, of every selection that you defined in the Dropdown Selection screen element in the Animal Type screen.
            The conditional logic defines a separate case for each animal type.
          9. Click Next.
          10. For each case, select the content to show when that condition is true.
            For example, add a Next button in the footer that takes the customer to the Cat page if they selected Cat as the animal type.
            1. To add a button that advances to the animal type screen, click Add Content, expand Other Content Types, and select Footer.
            2. Enter the footer details, including entering “Next” as the button label and selecting the animal type screen in the Next Screen field.
              The configuration shows a Next button that navigates to the Cat page if cat is selected as the animal type.
            3. Click Next.
              The Define Switch Logic and Conditional Content modal walks you through every case so that you can configure what content to show. For all of them, add the Next button that takes them to the animal type’s page.
            4. When you’re done, click Save.
              In the Component Properties, the Switch node shows the cases and the resulting content for each case.
              The Component Properties shows the results when different animal types are selected.
           
          Loading
          Salesforce Help | Article