
You are here:
Create a LINE Messaging Channel
Create an enhanced Messaging channel in Salesforce that's connected to the LINE messaging app, widely used in Japan. With a LINE channel, your support team can address inquiries sent over LINE directly from the Service Console.
Required Editions
| View supported editions. | |
 This article applies to:
|
Enhanced LINE channels |
 This article doesn’t apply to:
|
Enhanced In-App Chat, Enhanced Web Chat v1, Enhanced Web Chat v2, Enhanced WhatsApp, Standard and Enhanced Facebook Messenger, Standard and Enhanced SMS, Enhanced Apple Messages for Business, and Bring Your Own Channel |
| User Permissions Needed | |
|---|---|
| To set up Messaging: | Configure Messaging |
| To view Messaging channels: | View Setup and Configuration |
| To create Messaging channels: | System Administrator AND Configure Messaging OR Configure Messaging AND Customize Application AND Manage Auth. Providers AND View Setup and Configuration AND Modify All Data |
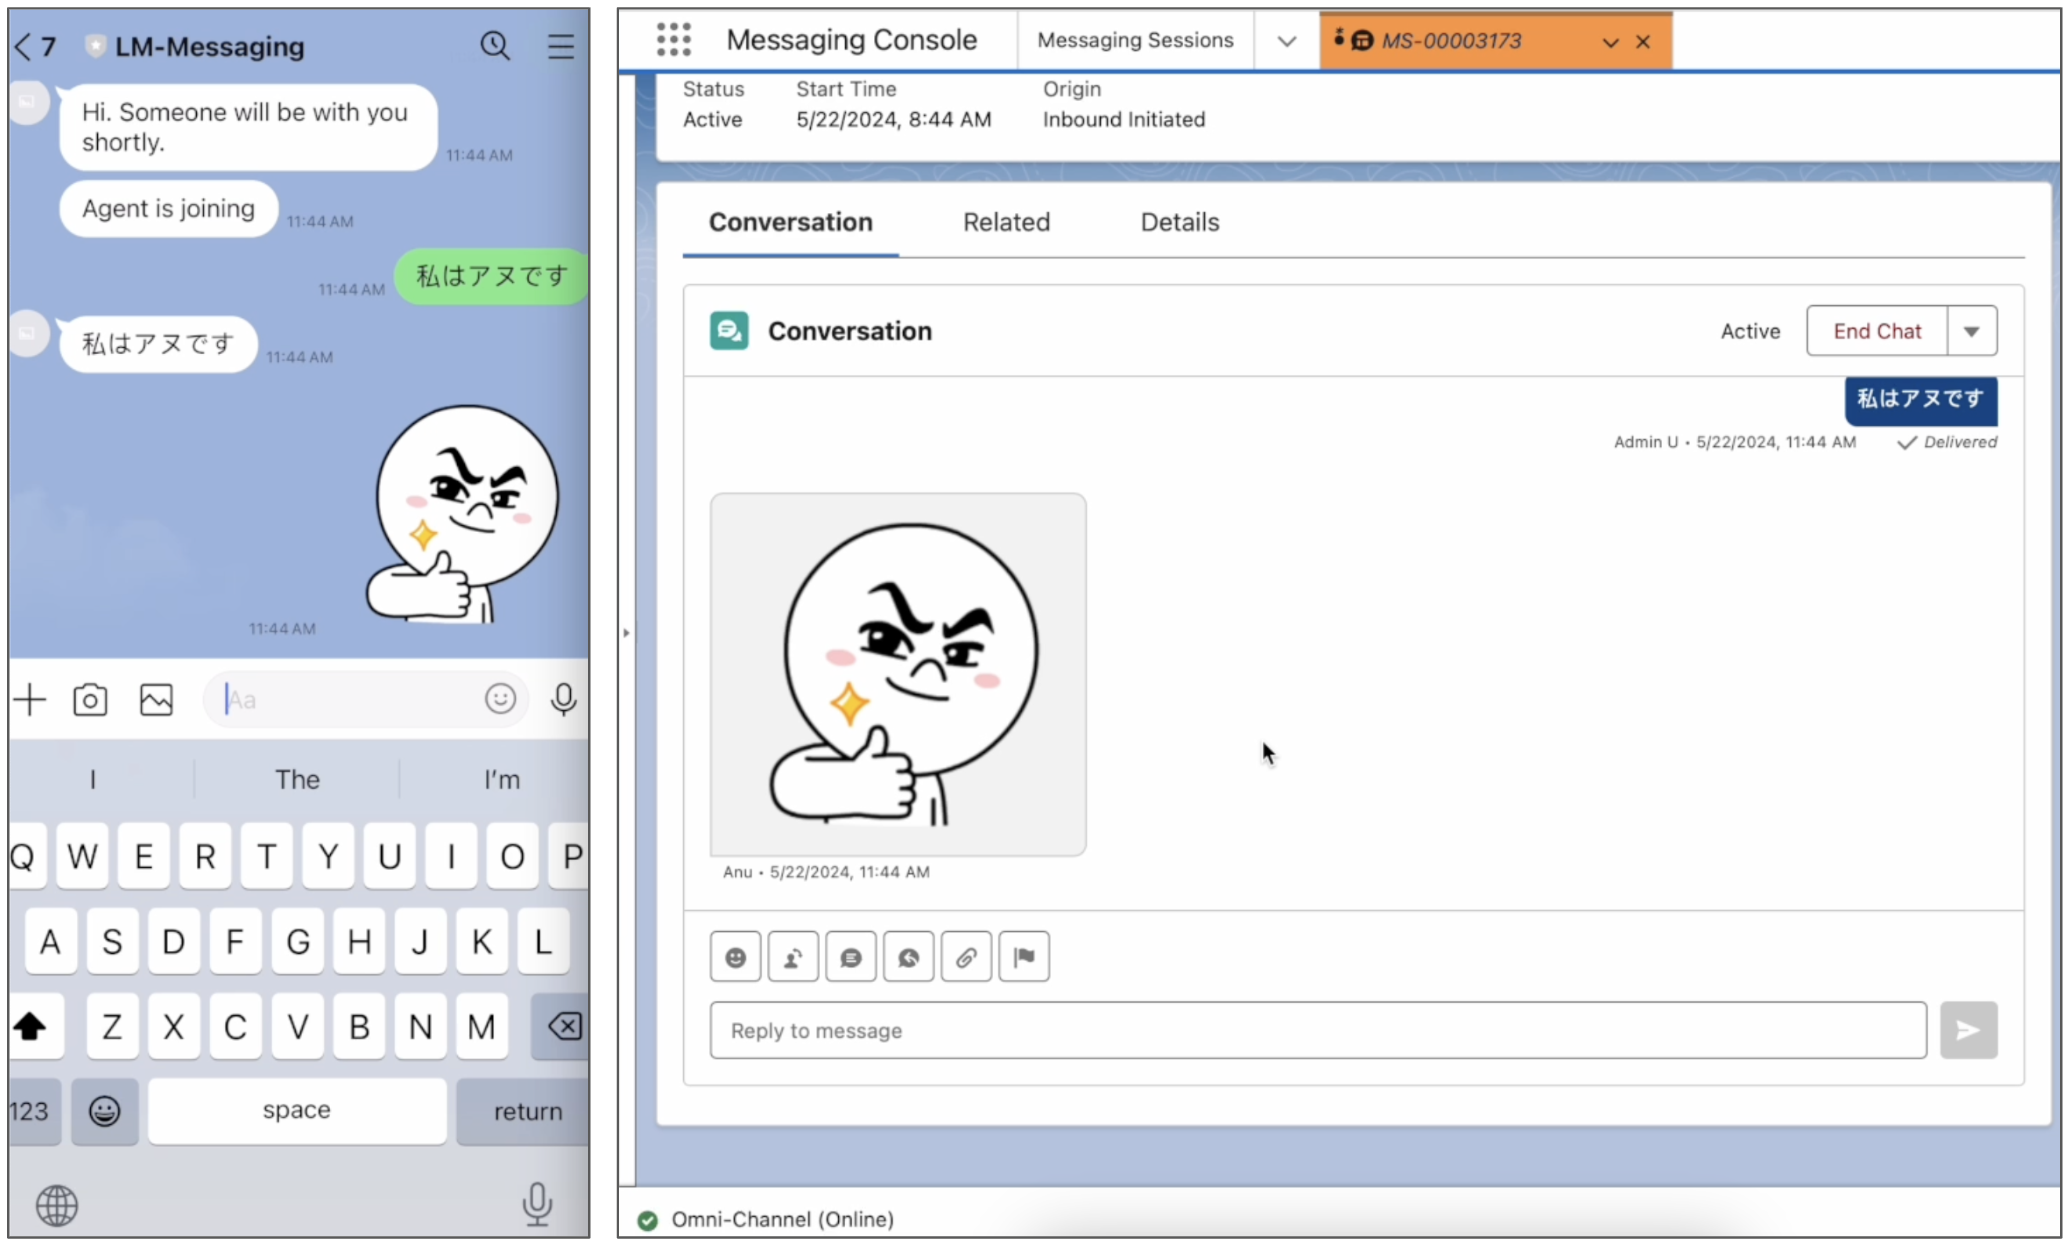
When an end user sends your business a message in LINE, Omni-Channel routes the message to a bot or service rep in Omni-Channel according to your preferences. Reps can send and receive images, emoji, stickers, links, videos, and questions with clickable options. And admins can easily move LINE channels between Salesforce orgs, such as from a sandbox to production.
- Considerations for LINE Messaging Channels
LINE lets businesses communicate with users of the LINE messaging app. Review important considerations for creating and managing LINE channels in Agentforce Service (formerly Service Cloud).
Step 1: Set Up a LINE Official Account
To help your customers over LINE, you need a LINE Official Account. You must also add yourself as a provider in your LINE settings. After completing these tasks, you can connect your LINE account to Salesforce.
- Create a LINE Official Account. For steps, see the LINE documentation.
-
In the LINE Official Account Manager, enable the Messaging API and create a provider.
- In your account settings, go to the Messaging API section and enable the Messaging API.
- When prompted, create a provider to represent your business.
-
In your account settings, copy the following values. You’ll need them when you set up your
channel in Salesforce.
- Channel Name: Equivalent to your Account Name in the LINE Official Account Manager
- Channel ID: Found in the Messaging API section
- Channel Secret: Found in the Messaging API section
-
Issue a channel access token in the LINE Developers Console. The token is used to verify
that Salesforce has permission to use the channel.
- In the LINE Official Account Manager, go to the Messaging API section of your account settings.
- Click the link to open the LINE Developers Console, and click the Messaging API tab.
- In the Channel Access Token field, issue your token and then copy it. You’ll need it when you set up your channel in Salesforce.
Step 2: Prepare for Messaging in Salesforce
If LINE is your first Messaging channel in Salesforce, complete these key tasks to get started with Messaging.
Step 3: Connect LINE to Salesforce
To send and receive LINE messages in Salesforce, create a LINE Messaging channel.
- From Setup, enter Messaging in the Quick Find box, and then select Messaging Settings.
- Click New Channel, then click Next.
- Select LINE, then click Next.
- Accept the terms and conditions, and click Next.
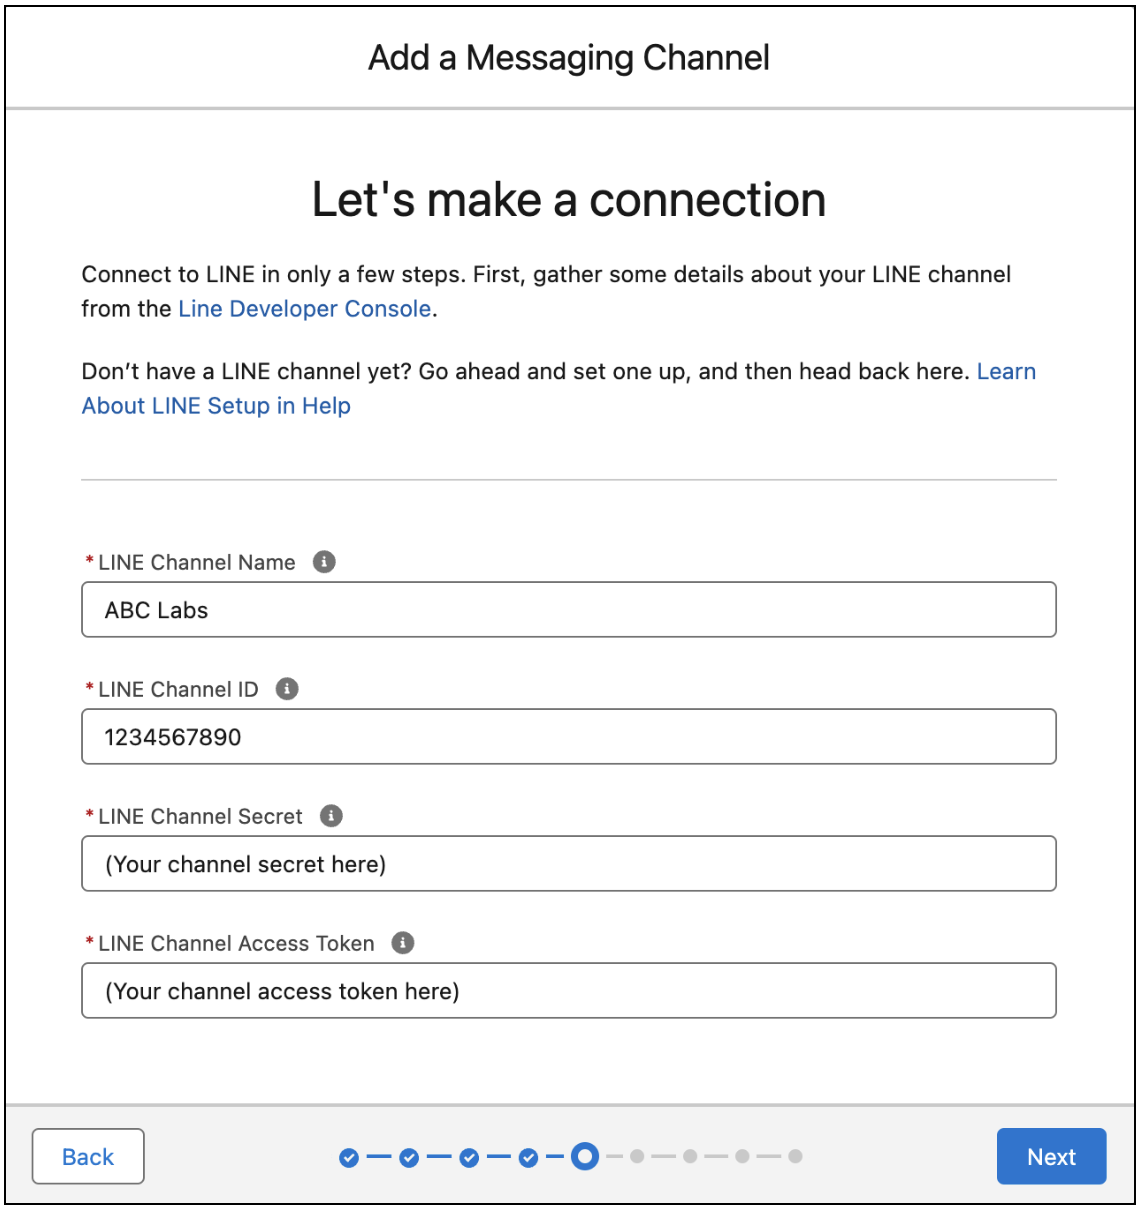
-
Enter the LINE channel name, ID, secret, and access token that you copied from your LINE
settings, and click Next.
-
Choose your routing method, and then click Next.
- To set up a basic routing solution from scratch, select Create a new queue. Queues and routing configurations don’t support routing to bots.
- To use an existing queue or an Omni-Channel flow, which supports bots and more complex routing logic, select Set up routing later.
-
On the final screen, click Go to Channel Settings to add your
routing preferences. If you already closed the setup flow, click your channel's name on the
Messaging Settings page.
- On the channel record home page, click Edit.
- In the Omni-Channel Routing section, select a routing type. Omni-Flow lets you route messages using an Omni-Channel flow, and supports bots. Omni-Queue lets you route using a queue and routing configuration.
-
If you selected the Omni-Flow routing type, select a flow in the Flow Definition field
and a back-up queue in the Fallback Queue field.
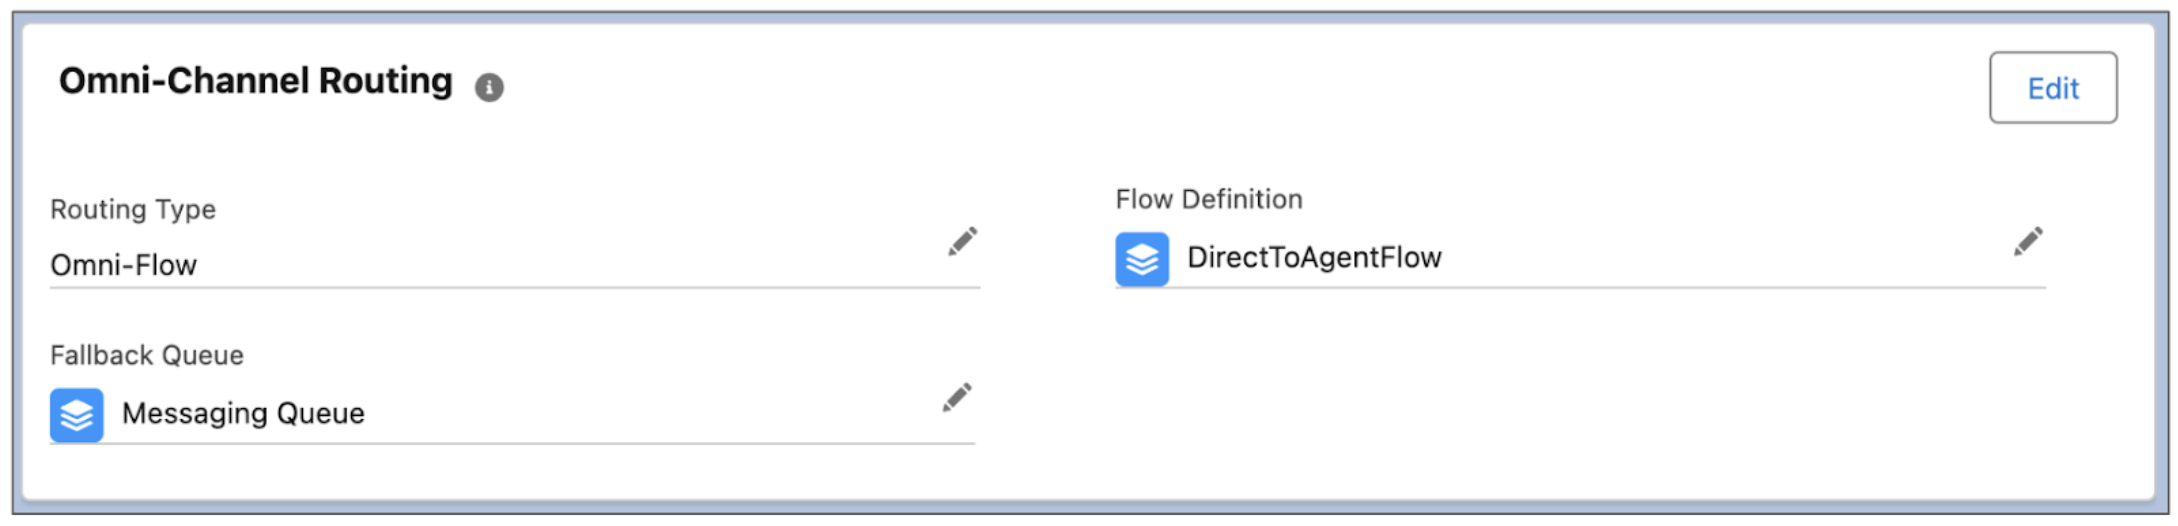
- If you selected the Omni-Queue routing type, select a queue.
- Save your changes.
Step 4: Complete the Connection to LINE
In the LINE Developers Console, provide an essential URL from Salesforce and update other settings.
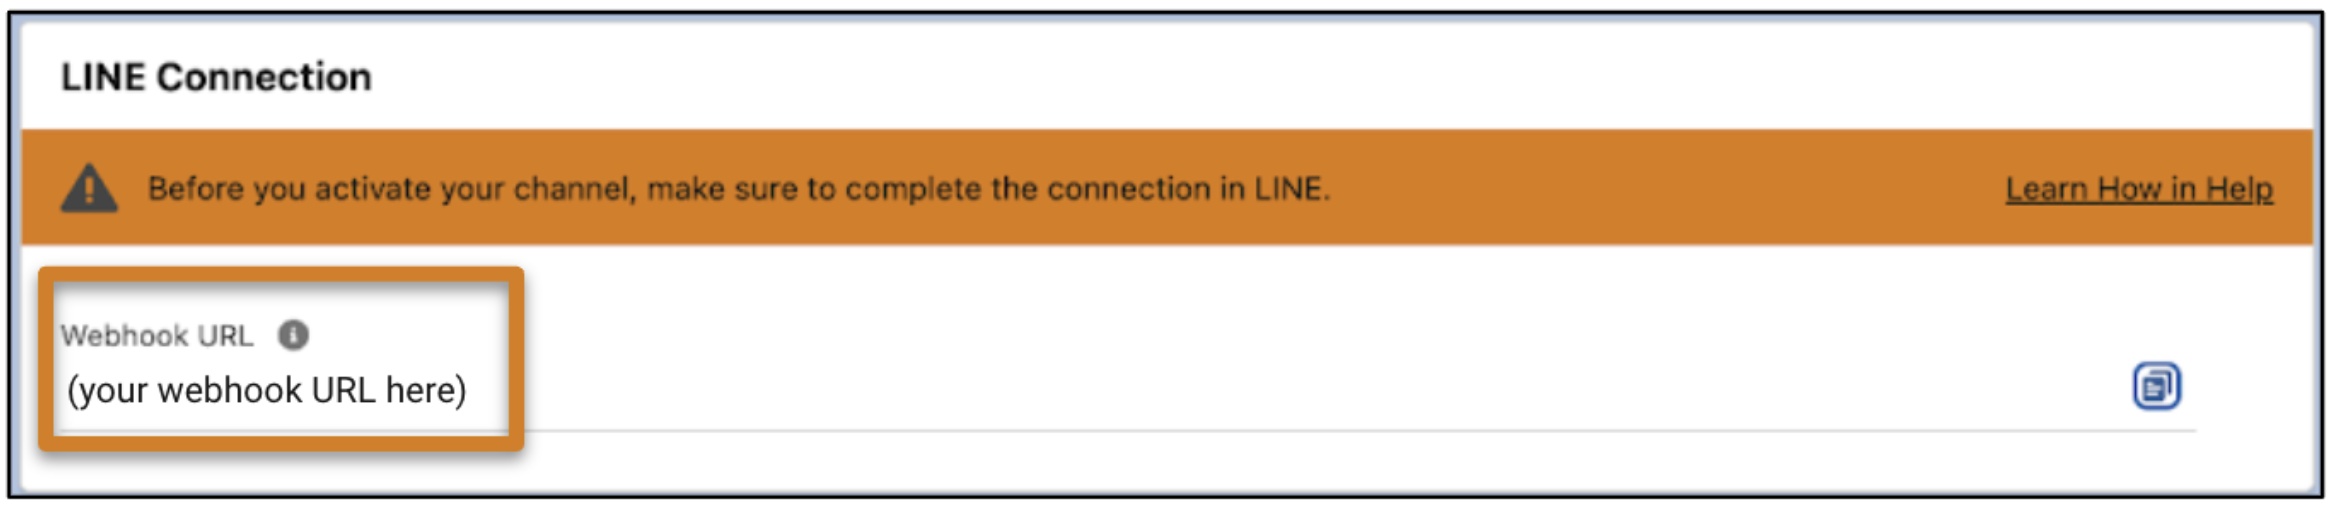
-
On the channel record home page in Salesforce, in the LINE Connection section, copy the
value in the Webhook URL field.
-
In a separate tab, go to the LINE Developers Console and find
the Webhook URL field on the Messaging API tab.
While this field is also visible in the LINE Official Account Manager, the Developers Console contains additional settings that you must update.
- Paste the value into the Webhook URL field.
- Click Verify below the field.
- Select Use webhook.
- (Recommended) On the Messaging API tab in the Developers Console, disable auto-reply messages and greeting messages. Because you’ll configure your auto-responses in Salesforce, disabling these messages in LINE helps your customers avoid redundant or conflicting auto-responses.
Step 5: Activate Your Channel
To start the flow of LINE messaging traffic into Salesforce, activate your channel in Setup.
- Complete the tasks in the Channel Activation Checklist to verify that your channel is ready for business. These tasks include setting up sensitive data rules, auto-responses, and Einstein bots.
- On the Messaging Settings page in Setup, click the name of your LINE channel. If you already have the channel record home open, refresh the page.
-
At the top of the page, click Activate Channel.

What's Next?
When your channel is active, LINE messages are routed to your support team according to the queue or Omni-Channel flow that you selected. Your work doesn’t need to end there, though. To get more out of your LINE channel, explore these resources.
- Increase Messaging Productivity
- Work with Messaging Data
- Message with Customers in the Service Console