
You are here:
Route Service Messaging Sessions to Queues
Route customer messages to the appropriate queue using an Omni-Channel routing configuration. Queue-based routing, an alternative to Omni-Channel flows, is ideal for simple routing scenarios.
Required Editions
| View supported editions. | |
 This article applies to:
|
Enhanced WhatsApp, Standard and Enhanced Facebook Messenger, Standard and Enhanced SMS, Enhanced Apple Messages for Business, Enhanced LINE, and Bring Your Own Channel |
 This article doesn’t apply to:
|
Enhanced In-App Chat or Enhanced Web Chat channels |
| User Permissions Needed | |
|---|---|
| To create or change queues: | Customize Application AND Manage Public List Views |
| To set up and edit Messaging channels: | Configure Messaging |
| To view channels: | View Setup and Configuration |
For help configuring routing for Enhanced Chat, see the Enhanced Chat setup documentation.
Getting Started
Before configuring your channel to route incoming messages to a queue, take care of some Omni-Channel setup.
-
Enable Omni-Channel and rep-to-rep transfers.
- In Setup, go to the Omni-Channel Settings page.
- Select Enable Omni-Channel.
- To let service reps transfer messaging sessions to other reps in enhanced Messaging channels, select Enable Skills-Based and Direct-to-Agent Routing.
- Configure the other settings and save your changes.
-
If you don't already have one, create a service channel for your Messaging channels.
The service channel links your routing logic to the Messaging Session object.
- In Setup, go to the Service Channels page.
- Click New.
- Enter a name for your service channel, such as All Messaging.
- Select Messaging Session as the Salesforce object.
- Configure the other options, and save your service channel.
- Create presence statuses for Messaging so reps can show their availability in Omni-Channel. If you’re not sure which statuses to create, start with these three: Available - Messaging, On Break, Busy.
Set Up Queue-Based Routing for a New Messaging Channel
If your Messaging channel doesn’t exist yet, create the channel and set up queue-based routing at the same time. These steps apply only for standard and enhanced Facebook Messenger channels and enhanced WhatsApp channels.
- From Setup, in the Quick Find box, enter Messaging, and then select Messaging Settings.
- Under Channels, click New Channel.
- Follow the prompts to create your channel.
-
Select Create a new queue. Follow the prompts to:
- Create a queue and assign service reps to the queue.
- Create a routing configuration.
- Adjust the service rep messaging workload.
- Exit the setup flow.
- On the Messaging Settings page, find your new channel in the list.
- In the channel’s action menu, select Edit to view your channel’s routing settings and update them if needed.
Set Up Queue-Based Routing for an Existing Messaging Channel
If you’ve already created your Messaging channel, here’s how to set up queue-based routing for it.
- Create an Omni-Channel queue to receive incoming messages. Add Messaging Session as a supported object.
- Create a routing configuration for your queue.
- Associate your routing configuration and service reps with the queue.
- On the Messaging Settings page in Setup, find your channel in the list.
- In the channel’s action menu, select Edit.
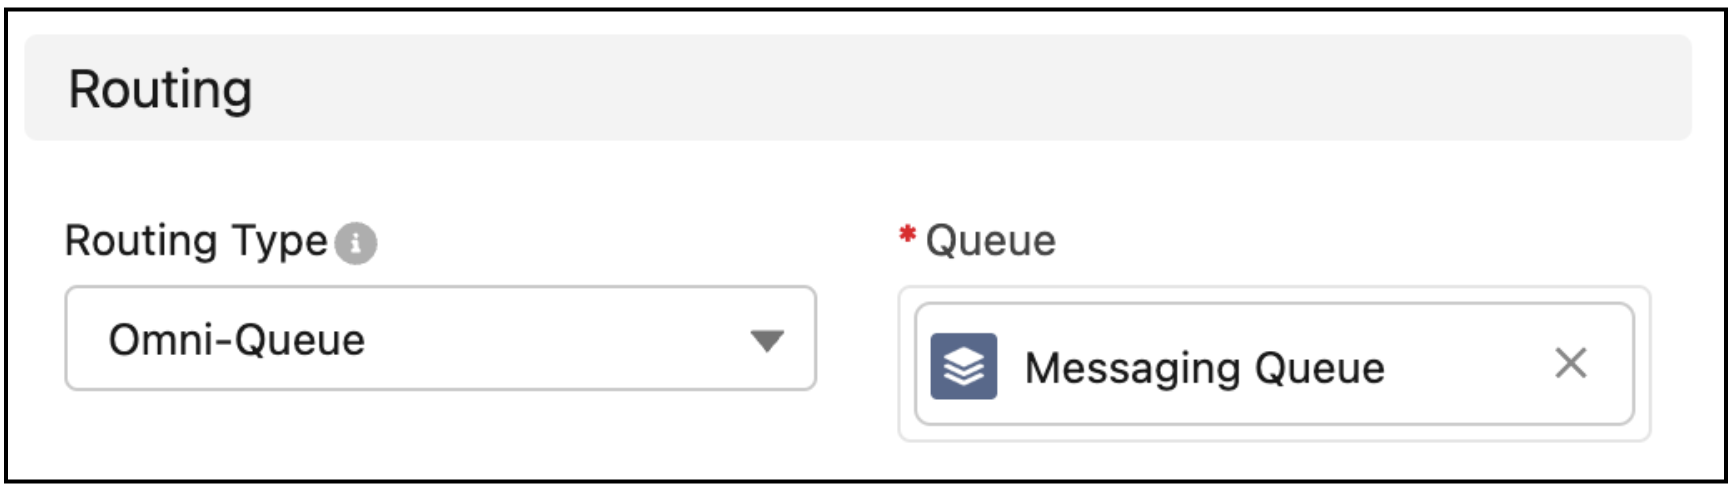
-
Edit the properties in the Routing section.
- (Standard channels only) Leave Enable Advanced Routing deselected, and for Routing Type, select Omni-Channel.
- (Enhanced channels only) For Routing Type, select Omni-Queue.
-
For Queue, select the queue that receives and prioritizes this channel’s messaging
sessions.
- Save your changes.