
You are here:
Route All Messages to One User
If the situation calls for it, route all incoming messages in an enhanced channel to a specific user. For example, if individual reps have their own SMS number, route all messages sent to that number directly to them. While this routing approach is simple, businesses of different sizes need to consider whether it makes sense to always have messages routed to one rep.
Required Editions
| View supported editions. | |
 This article applies to:
|
Enhanced In-App Chat, Enhanced Web Chat v1, Enhanced Web Chat v2, Enhanced WhatsApp, Enhanced Facebook Messenger, Enhanced SMS, Enhanced Apple Messages for Business, Enhanced LINE, and Bring Your Own Channel |
 This article doesn’t apply to:
|
Standard Facebook Messenger and Standard SMS channels |
-
In your Omni-Channel settings, turn on direct-to-agent routing and status-based
capacity.
- In Setup, enter Omni-Channel in the Quick Find box and select Omni-Channel Settings.
- Select Enable Skills Based and Direct-to-Agent Routing.
- Select Enable Status Based Capacity Model (recommended). View considerations for using status-based capacity.
-
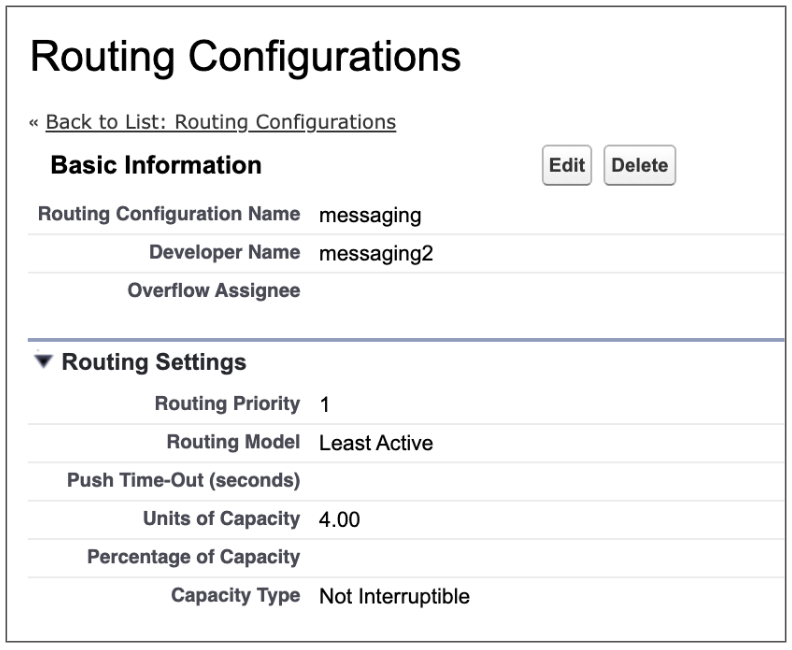
Create a routing configuration to determine how messages are routed to the user. While you
can use a routing configuration in multiple channels, it’s a good idea to create one just for
single user-based routing.
- In Setup, enter Routing in the Quick Find box and select Routing Configurations.
- Click New.
- Name your routing configuration.
- Leave Overflow Assignee blank.
- Enter a Routing Priority. This value reflects the priority of this channel compared to all other work routed to the user. If you're unsure about priority, try starting with 5 to leave room for higher-priority work in the future.
- For Routing Model, select Least Active.
- Leave Push Time-Out and Drop Additional Skills timeout blank, because those aren’t relevant to single user-based routing.
- Select a capacity type. We recommend selecting Not Interruptible. The Interruptible type is for more advanced use cases, such as when reps are assigned to multiple channel types.
- Leave Use with Skills-Based Routing Rules deselected.
-
Enter a number of units or percentage for capacity.
For example, if you want the chosen user to be assigned up to a maximum of 4 active sessions from this channel at a time, enter 4. Additional sessions are routed to them when their capacity frees up. For sales use cases, we recommend using the percentage capacity for simplicity, and using 50% as a starting point.
-
Save your routing configuration.
-
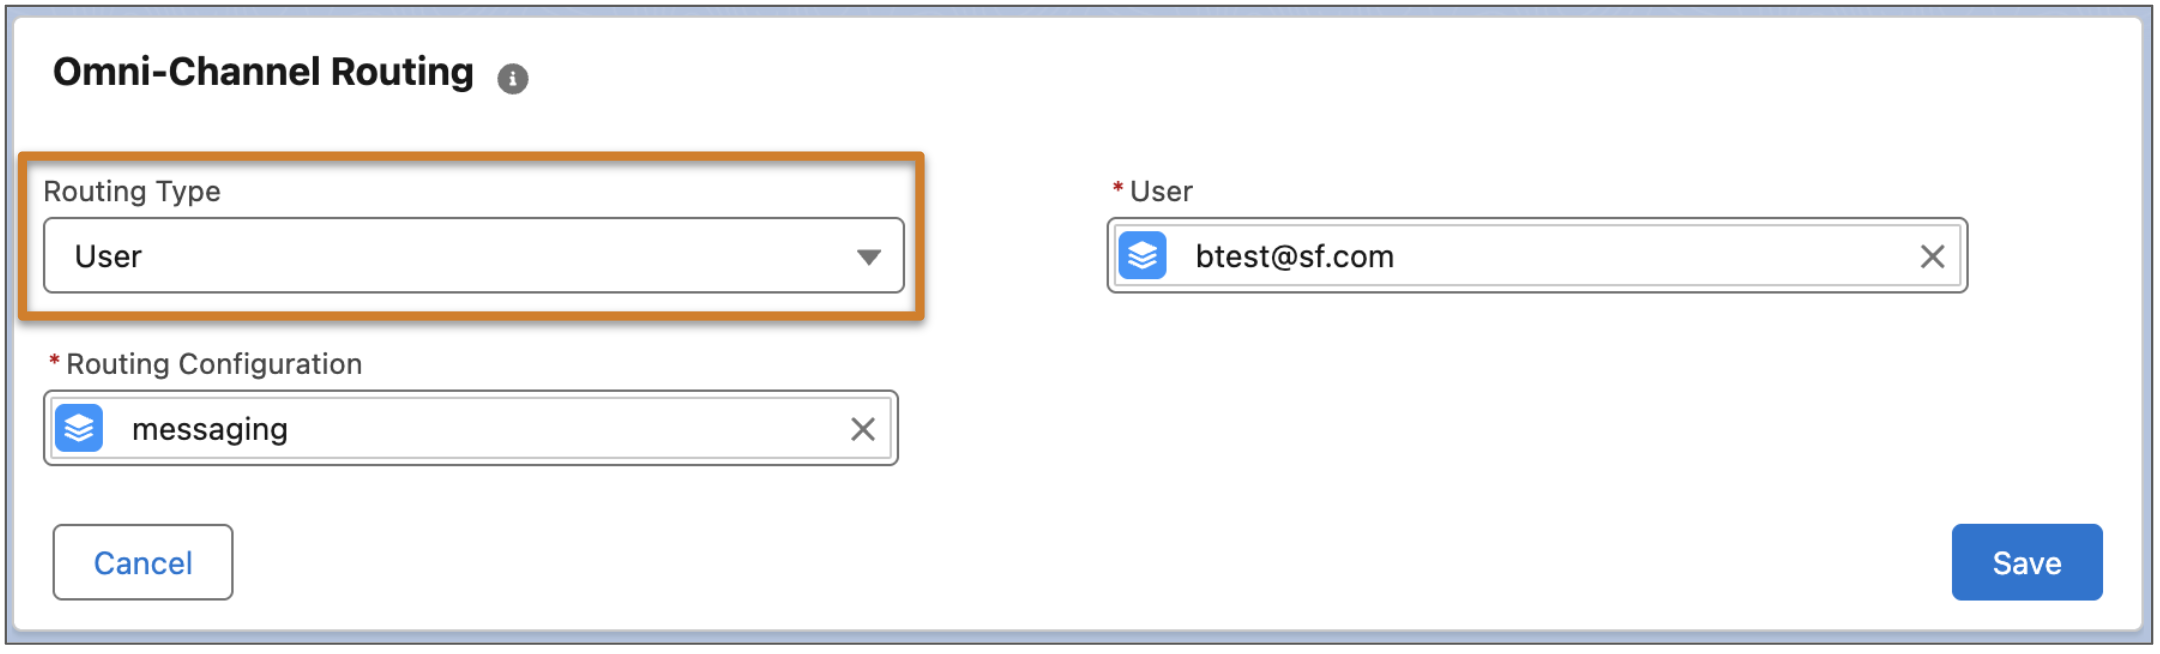
Update your messaging channel settings.
- In Setup, enter Messaging Settings in the Quick Find box and select Messaging Settings.
- Find your messaging channel and click the channel name.
- In the Routing Type dropdown, select User.
- In the User field, use the search to select the username of the user to receive all incoming messages in the channel.
-
In the Routing Configuration field, select the routing configuration you created.
-
Click Save.
All messages sent to this channel address are now routed directly to the selected rep.
See Also
Did this article solve your issue?
Let us know so we can improve!