
You are here:
Create a Form Based on an Apex Class
Apex-based forms offer more flexibility than global action-based forms, enabling you to create both static and dynamic WhatsApp messages. To create an Apex-based form, create the Apex class, and then link it to a form messaging component. When the messaging end user submits their responses to the form, Salesforce executes the Apex, sending the data to Salesforce. You must configure how to save that data.
Required Editions
| View supported editions. | |
 This article applies to:
|
Enhanced WhatsApp channels |
 This article doesn’t apply to:
|
Enhanced In-App Chat, Enhanced Web Chat v1, Enhanced Web Chat v2, Standard and Enhanced Facebook Messenger, Standard and Enhanced SMS, Enhanced Apple Messages for Business, Enhanced LINE, and Bring Your Own Channel |
| User Permissions Needed | |
|---|---|
| To create messaging components: | Customize Application AND View Setup and Configuration OR System Administrator |
| To send and receive messages in Messaging: | Messaging Agent |
See Also
Create the Apex Class
- From Setup, in the Quick Find box, enter Apex Classes, then select Apex Classes and click New.
- In the class editor, enter this class definition.
- Click Save.
Create the Form Messaging Component
- Go to the Messaging Components page in Setup.
- Click New Component.
- Select the Form messaging component and click Next.
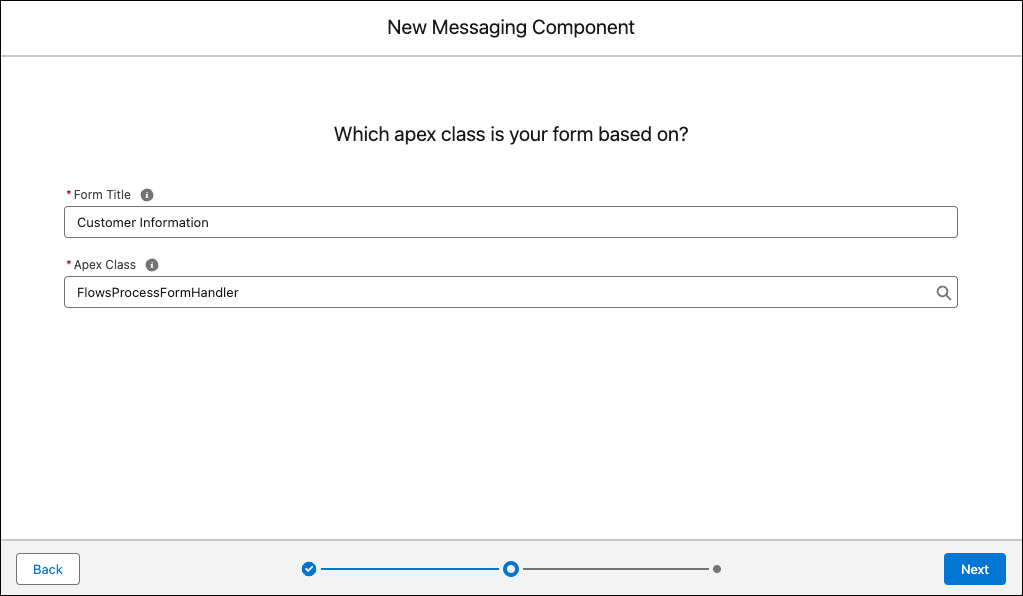
- Select Apex Class and click Next.
-
Enter the form title, select the Apex class that you just created, and then click
Next. The title appears in the messaging session as a link to
the form.
- Enter a name and description of your component. Messaging end users can’t see this information. But, it helps service reps quickly identify the component’s purpose when choosing a message to send from the Service Console.
- Click Done. The Messaging Component Builder opens.
Add the Flow Format to the Apex Form Messaging Component
To create a WhatsApp Flow, add a Flow format to the form messaging component. Configure the message content in the flow.
- Open the Apex-based form messaging component. To create an Apex-based form messaging component, see Create and Send Secure Forms in Messaging Sessions.
- In the Component Formats section, click Details, and then click Add Format.
- Select Flow, and then click Done. The format controls how the component looks in messaging sessions. Each messaging component is available in one or more formats, and some formats work only in certain channels. For a list of formats that each channel supports, see Messaging Component Types and Formats. It’s a good idea to add at least one supported format for each channel where the component will be sent. If no formats are added, the component uses the default text format.
-
In the left-hand sidebar, under Component Formats, click Flow.
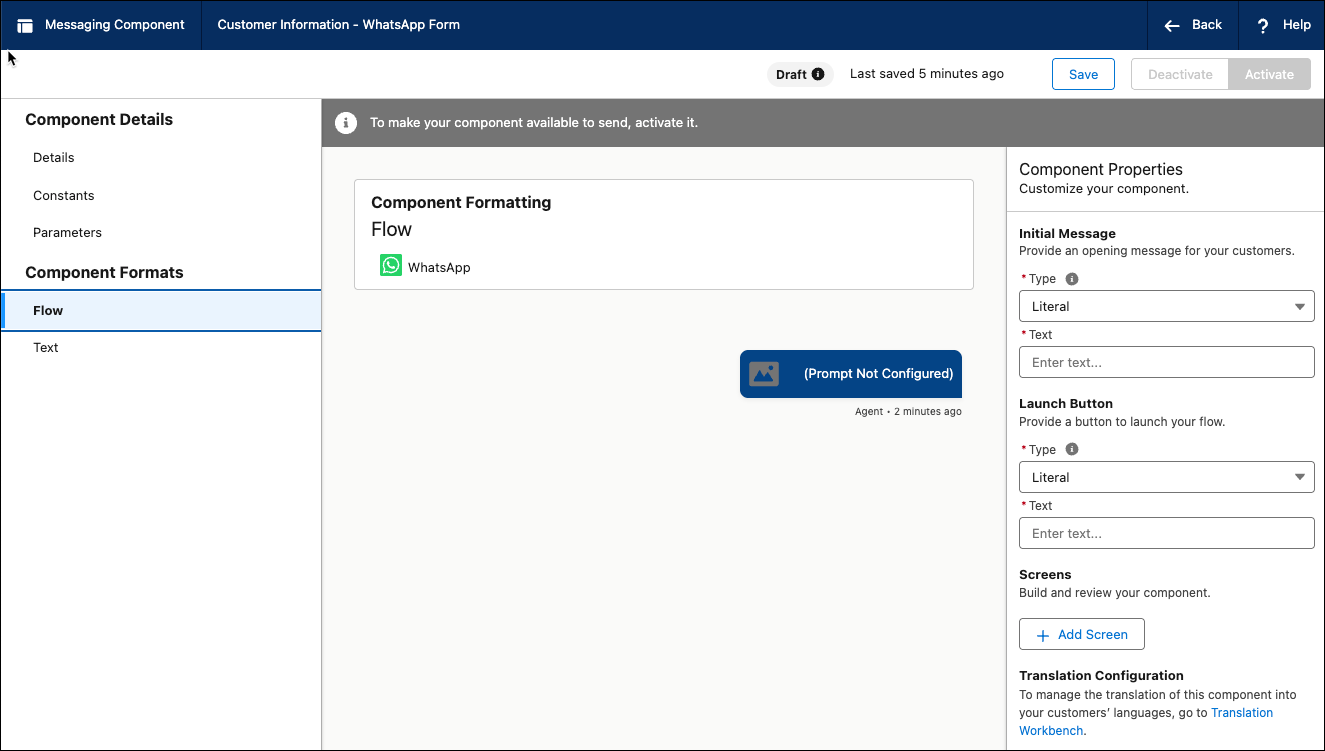
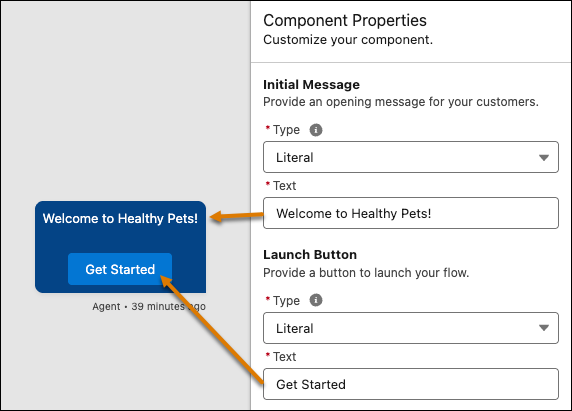
- In the Initial Message section, enter the message that appears when a conversation starts with the customer.
-
In the Launch Button section, enter a name for the button that launches this WhatsApp
Flow.
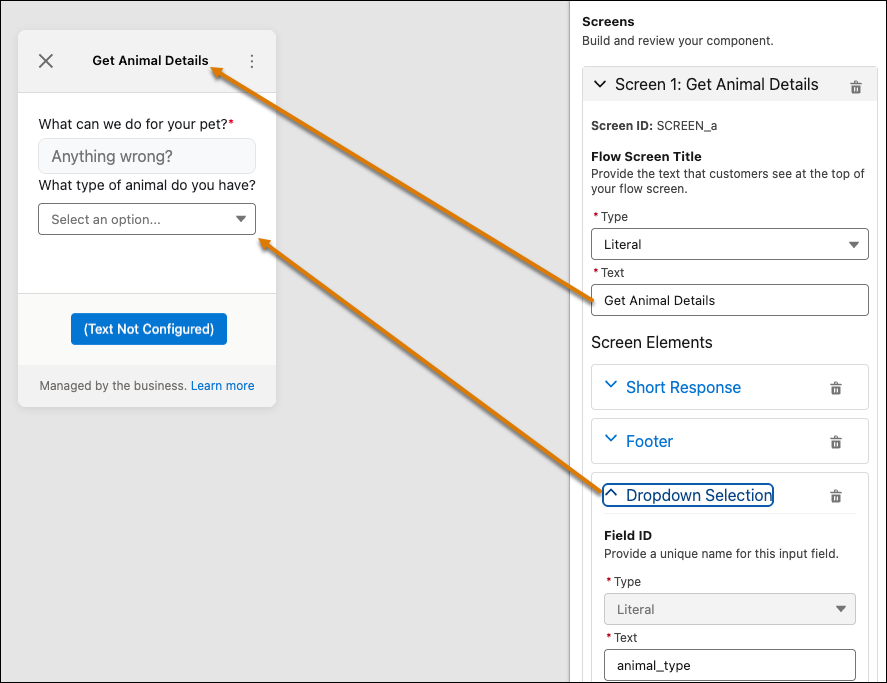
- To add a screen, click Add Screen. You can add multiple screens to the Flow.
- Enter a title for the screen.
- To add content to the screen, click Add Content.
-
Expand one or more content type boxes and then select one or more screen elements.
For example, expand the Media and Selection boxes and then select
Image and Multi-Select Question. To show
content and control screen navigation using conditional logic, under the Conditional
Logic box, select a Switch or If screen element.
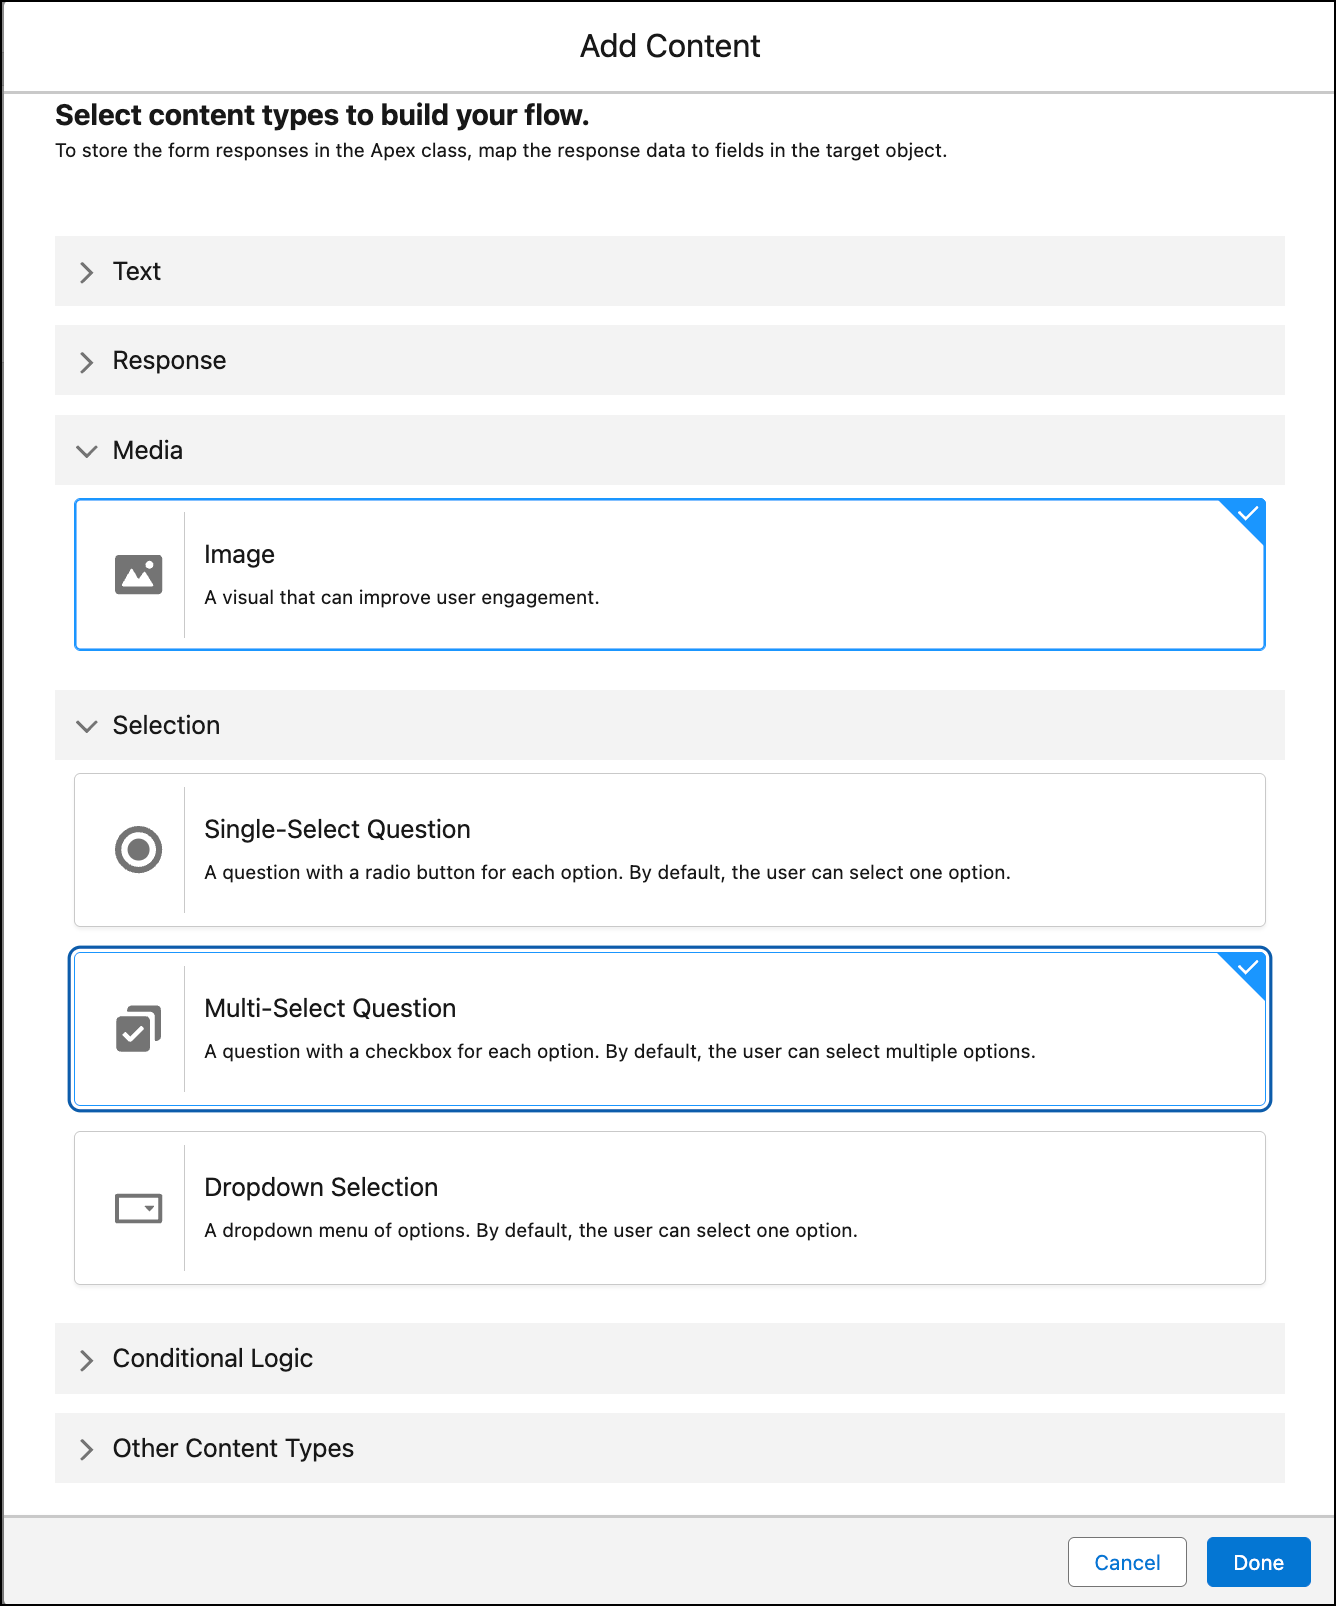
- To add the selected screen elements to the screen, click Done. Each screen can have only one footer with a button. Each button either navigates to a subsequent screen in the flow or completes the flow. A button can’t navigate to a former screen. For example, screen 2 can’t navigate back to screen 1.
-
In the Component Properties, configure each screen element.

-
The canvas shows a preview of the screen that is currently expanded.
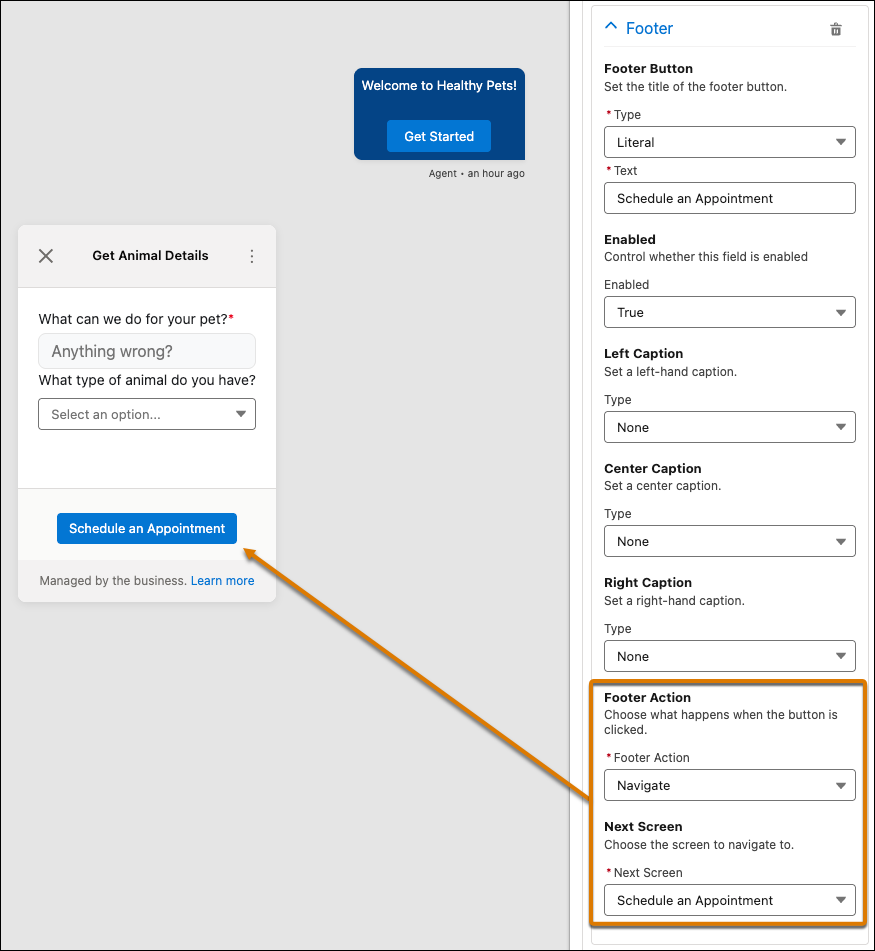
- To create a second screen, click Add Screen again.
- Enter the details for the second screen.
- If this screen is the last screen in the Flow, add a Footer with a Complete footer action, which completes the Flow.
-
Expand the Screen 1 section, select the Footer content type, and configure the footer
action to navigate to the next screen.
- After you update the Flow format properties, save the messaging component.
-
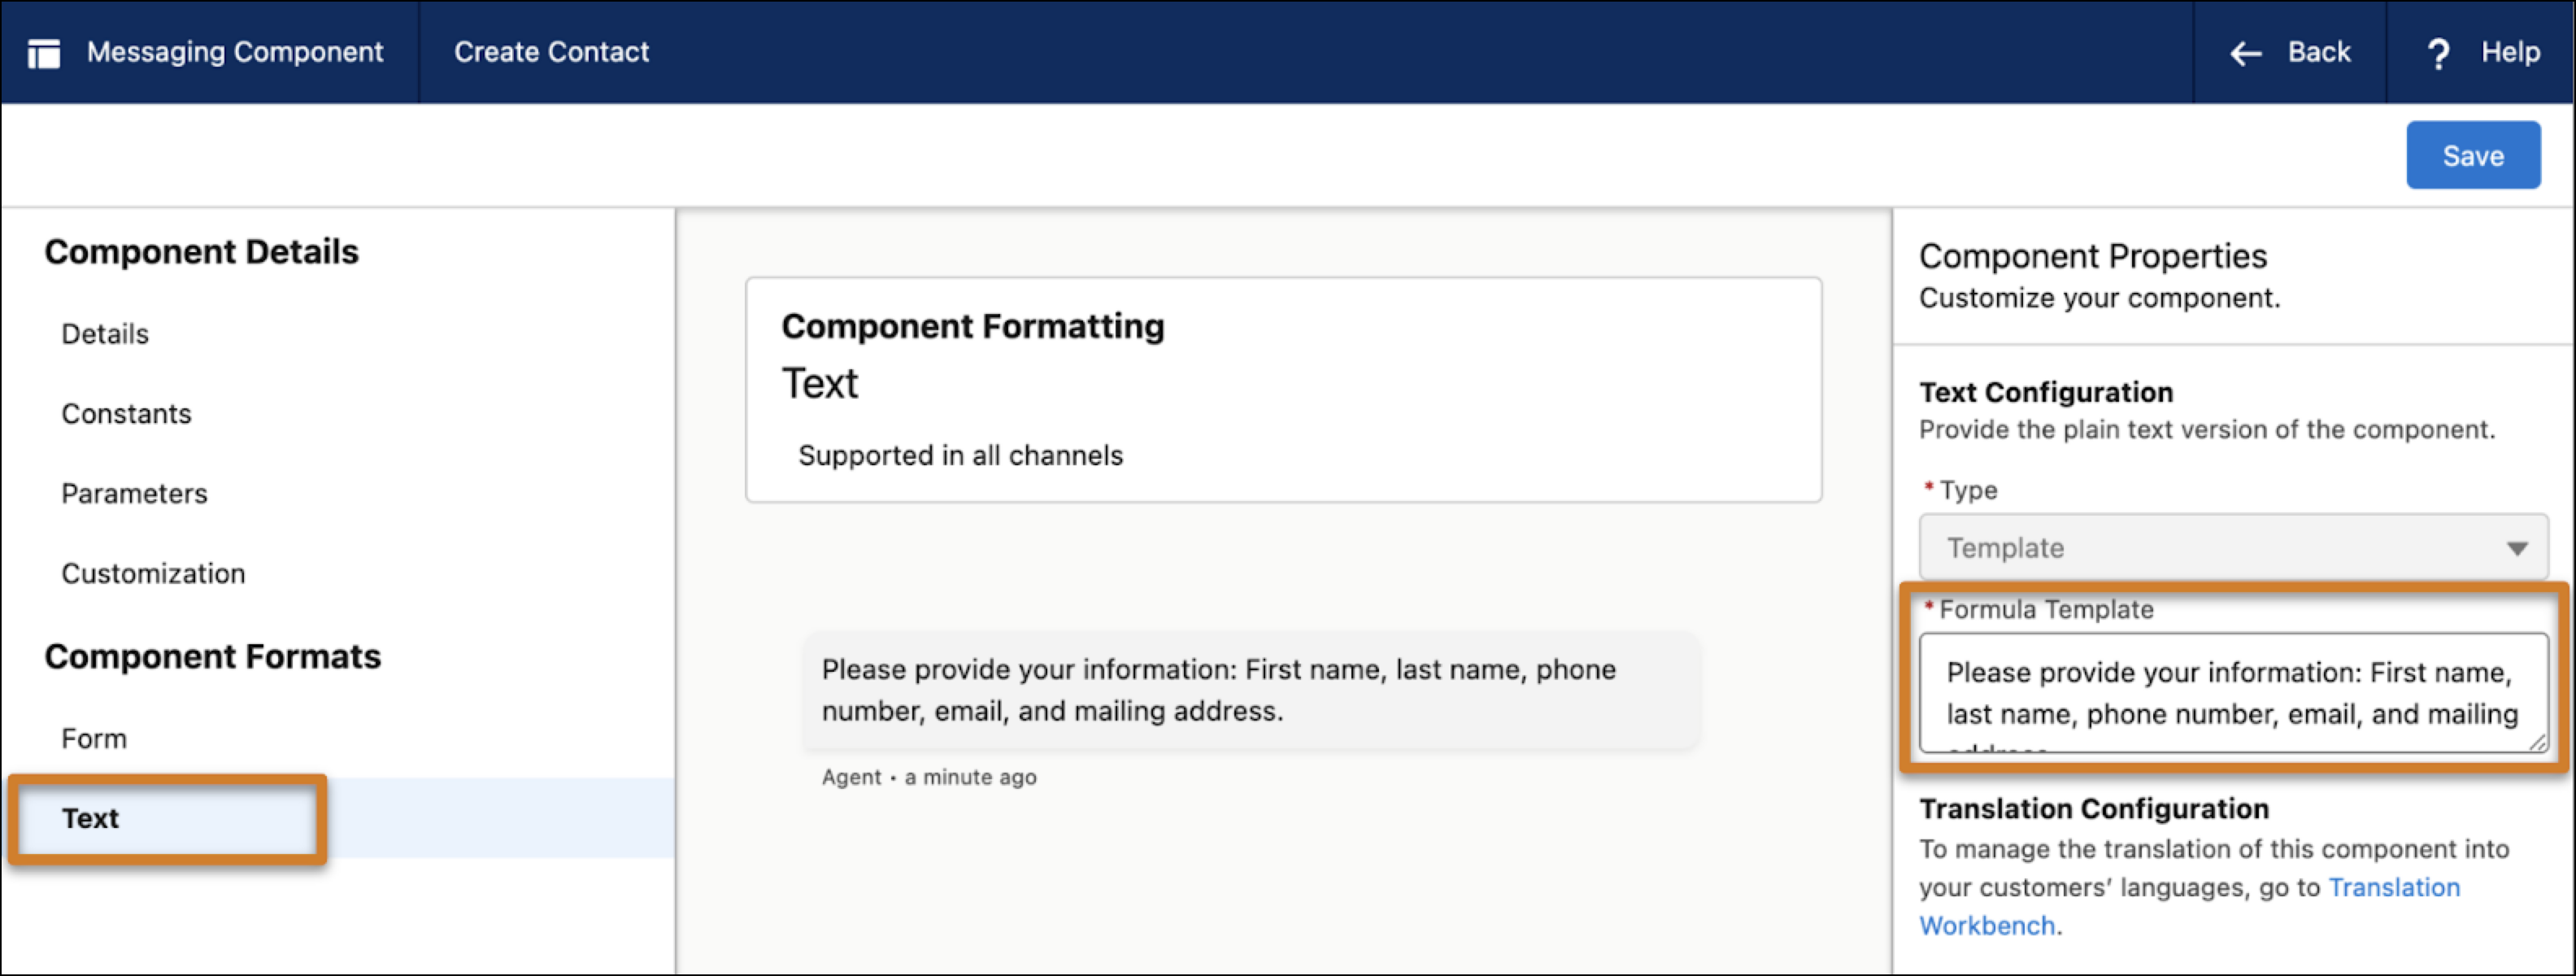
In the left-hand sidebar, under Component Formats, click the Text format type to
update its properties. The plain text version is sent if your preferred format isn’t
available or doesn’t load. While global action-based and Apex class-based forms can’t be
sent in plain text, you can edit your component’s plain text version so it contains a
link to a public form or shows a text-only list of the questions that appear in your
form.
- When you’re done editing your component, click Save. Your component is saved in a draft state.
- To make this messaging component available to service reps, click Activate.
- To take the component offline—for example, to give you time to reconfigure it—open it in the Messaging Component Builder and click Deactivate. When you're ready, activate it again.
Configure an Expiration Timer for the Component
By default, an Apex-based form expires 5 minutes after being sent to the customer. Optimally, customize the expiration timer in the component builder.
- Open the Apex-based form messaging component in the component builder.
- Select Customize.
- Fill in the Apex Class and Time to Expiration (Minutes) fields.
- Save your changes and activate the component.