
You are here:
Create Customer Flows for Enhanced Chat
Enhanced Chat offers a powerful method to gather pre-chat details from your customer before the service rep connects. Standard Pre-Chat form fields you select, such as first name and last name, and new custom fields like account numbers, drive the experience. Here’s an example of how to create your first customer flow for efficient conversations.
Required Editions
| View supported editions. | |
 This article applies to:
|
Enhanced In-App Chat and Enhanced Web Chat channels |
 This article doesn’t apply to:
|
Enhanced WhatsApp, Standard and Enhanced Facebook Messenger, Standard and Enhanced SMS, Enhanced Apple Messages for Business, Enhanced LINE, and Bring Your Own Channel |
| User Permissions | |
|---|---|
| To set up Omni-Channel Flow and Enhanced Chat: | Customize Application |
| To modify permission sets and profiles: | Manage Profiles and Permission Sets |
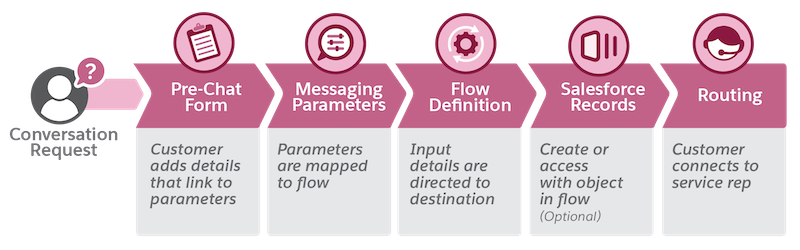
Before getting started, let’s review how data passes through a messaging channel in a customer flow. This diagram shows each stage of the process.
A customer requests a messaging conversation and provides their contact info and other details in a Pre-Chat form. Their form-field inputs travel in your new messaging channel and are mapped as parameters. The flow you define guides where the inputs go, such as an email address or an order number. A service rep connects with specific information about the customer at their fingertips. Optionally, a new Salesforce record can be created or updated as part of your enhanced flow
Set Up Enhanced Chat
If you’re new to messaging, read the requirements and then follow the steps to Prepare a Salesforce Org for Enhanced Chat with Omni-Channel, Omni Flow, and a new Messaging channel. Then configure your Enhanced In-App Chat or configure your Enhanced Web Chat.
Create a Pre-Chat Form
Decide on the combination of standard and custom fields, which link as parameters to your flow. Pick the standard fields for your use case. If you need specific information for your service reps, create your own custom fields. We recommend a maximum of 5-6 total fields.
| Standard Field choices | Custom Field Examples |
|---|---|
| First Name | Account Number |
| Last Name | Order Number |
| Service Request | |
| Subject | Your Custom Requirement |
Follow these steps to create your Pre-Chat form.
- From Setup, in the Quick Find box, enter Embedded Service Deployments, and then click to select.
- Find your deployment and select Edit.
-
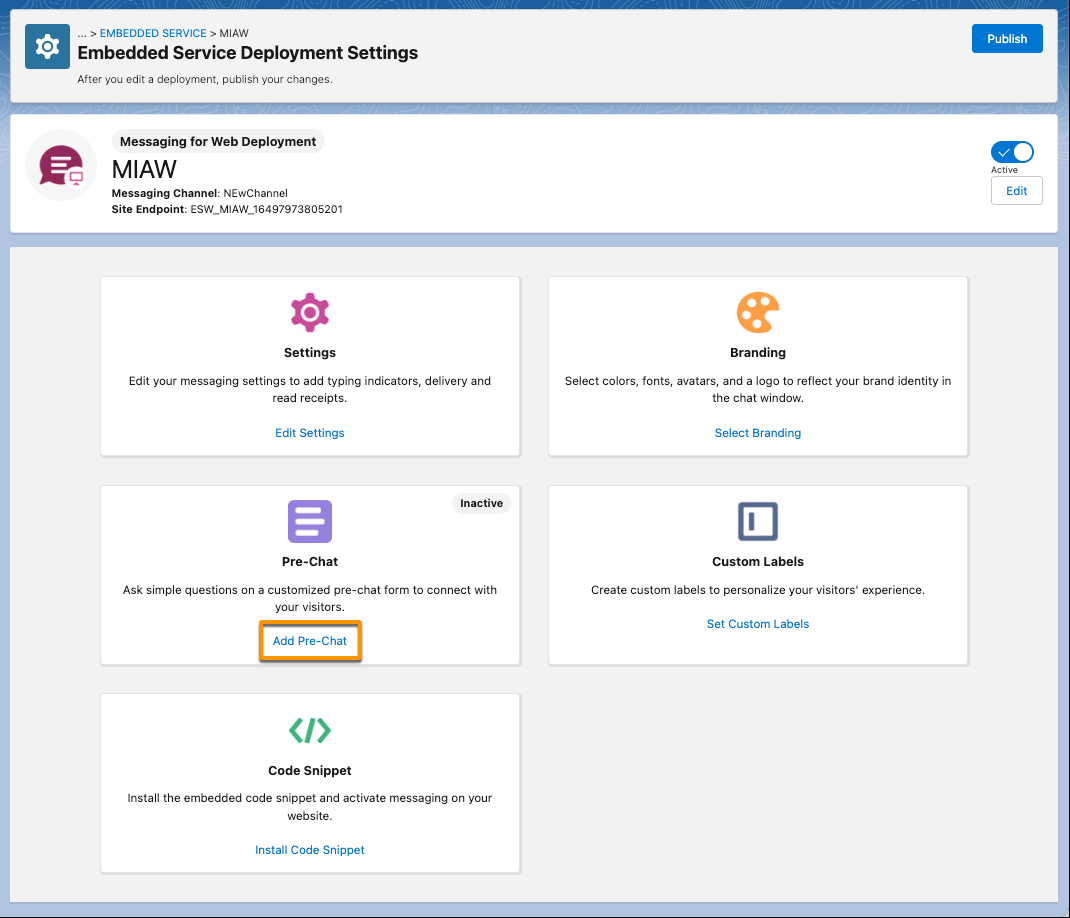
From the Deployment Settings page for your new web or mobile deployment, select
Add Pre-Chat.
-
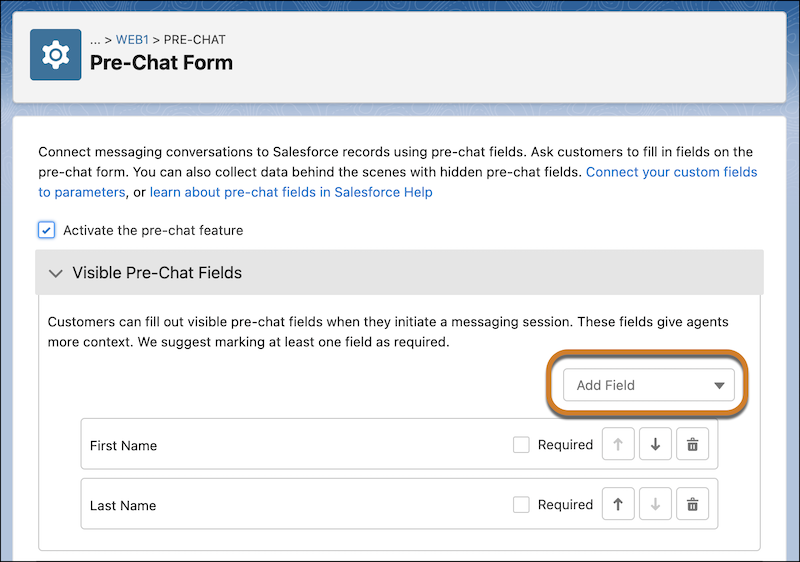
For this example, use Add Field to select First
Name and then Last Name, which are standard fields.
- Save your work.
- To add your custom field, you first must create a custom parameter in Messaging Settings. This process sets a Channel Variable Name, which you need for your Pre-Chat form.
- From Setup, in the Quick Find box, enter Messaging Settings, and then click to select.
- Find the Messaging Channel Name that you set up for your Enhanced Chat deployment from the list and select it.
- In the Custom Parameters section, click New.
-
Name your parameter CustomerAccountNumber, select the type, and character maximum limit for your customer’s input.
 Note String is the only option for Data Type. While the pre-chat form allows you to display text, email, phone, number, and checkbox fields, a flow automatically converts them to string fields. If you use a flow to populate another record with the output of a pre-chat form field, the output renders as a string field. While most letters, numbers, and special characters allowed by the original field type are also allowed by a string field, you notice slight differences. For example, the flow converts a checkbox field to a string statement of “true” or a string statement of “false” in the resulting flow output.
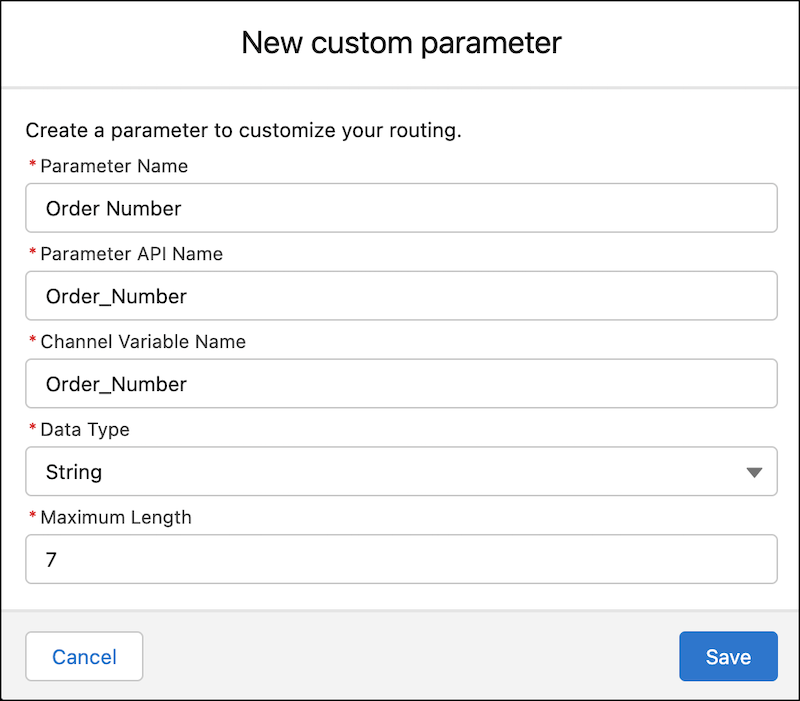
- Save your work.
- From Setup, in the Quick Find box, enter Embedded Service Deployments, and then click to select.
- Return to your previous deployment settings page and edit the Pre-Chat form.
- From the Add Field list, select Custom.
-
In the New Custom Field window, select Field Type and
Text for your customer account number field. Find the Channel Variable
Name that you set in Messaging Settings,
CustomerAccountNumber, and select it.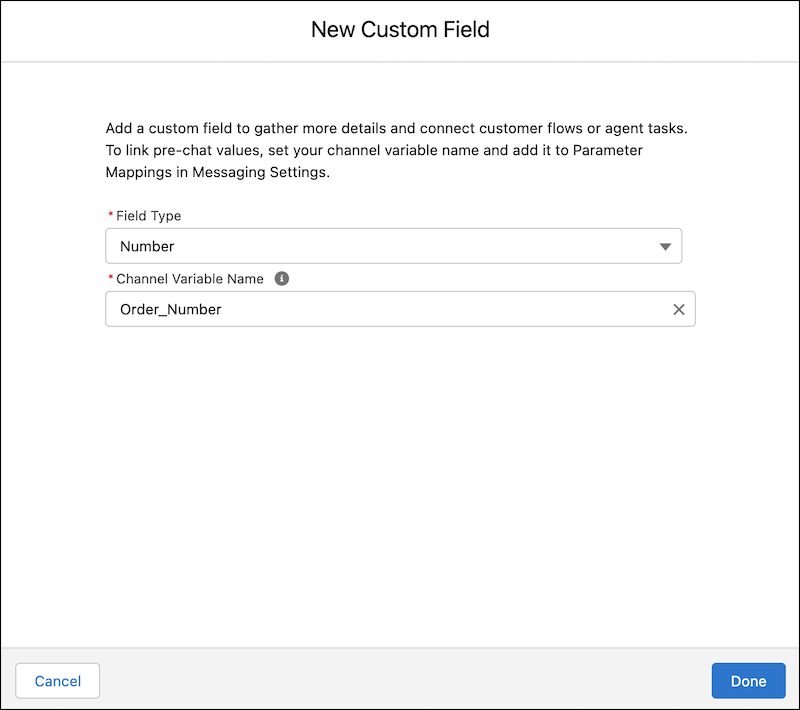
- If you want the customer to complete the fields, check the Required box.
- Review the Pre-Chat form order, set the toggle to Active, and save your work.
Parameters are the connection points between your pre-chat form and the flow. To map your standard and custom Pre-Chat field values, follow these steps.
- From Setup, in the Quick Find box, enter Messaging Settings, and then click to select.
- Find the Messaging Channel Name you set up for your Messaging for In-App or Web deployment from the list and select it.
- In the Parameter Mapping section, click New.
- In the Parameter field, select an item for your Pre-Chat form.
- Add a Flow Variable Name that describes the action. The Flow Variable
Name matches what you use for Omni-Flow.
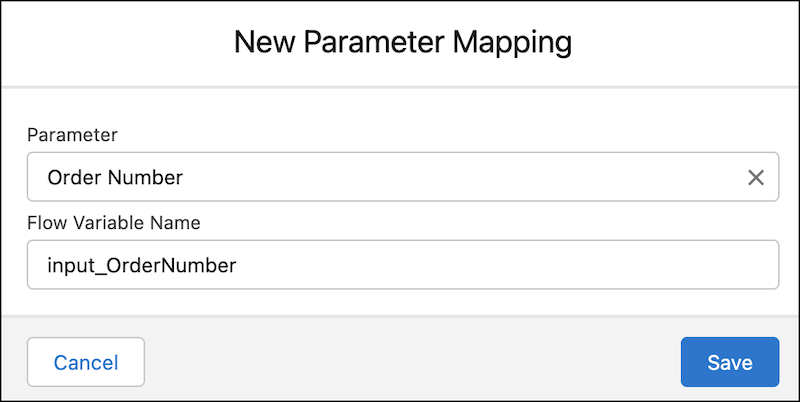
- Save your work.
- Continue the process with each standard and custom field in your Pre-Chat form. When
finished, you have a parameter mappings list.
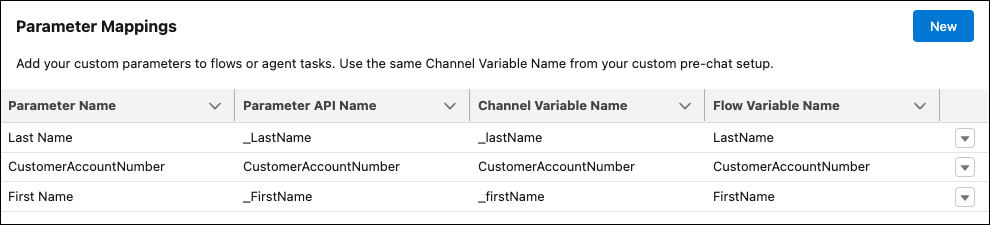 Note Standard Parameter API Names, such as first name and last name, have an underscore and no spaces. For example,
_FirstNameand_LastName. Custom Parameters don’t have underscores.
Return to the Omni-Channel Flow that you created when you set up your Salesforce org. Previously, you selected the Route To Queue action to direct a customer request to the right queue. In this section, we add one more element to store your pre-chat fields.
Before starting, you must create three custom fields on the Messaging Session object, FirstName, LastName, and
CustomerAccountNumber. See Create Custom Fields.
- From Setup, in the Quick Find box, enter Flows, and then click to select.
- Find and select your previous flow from the list.
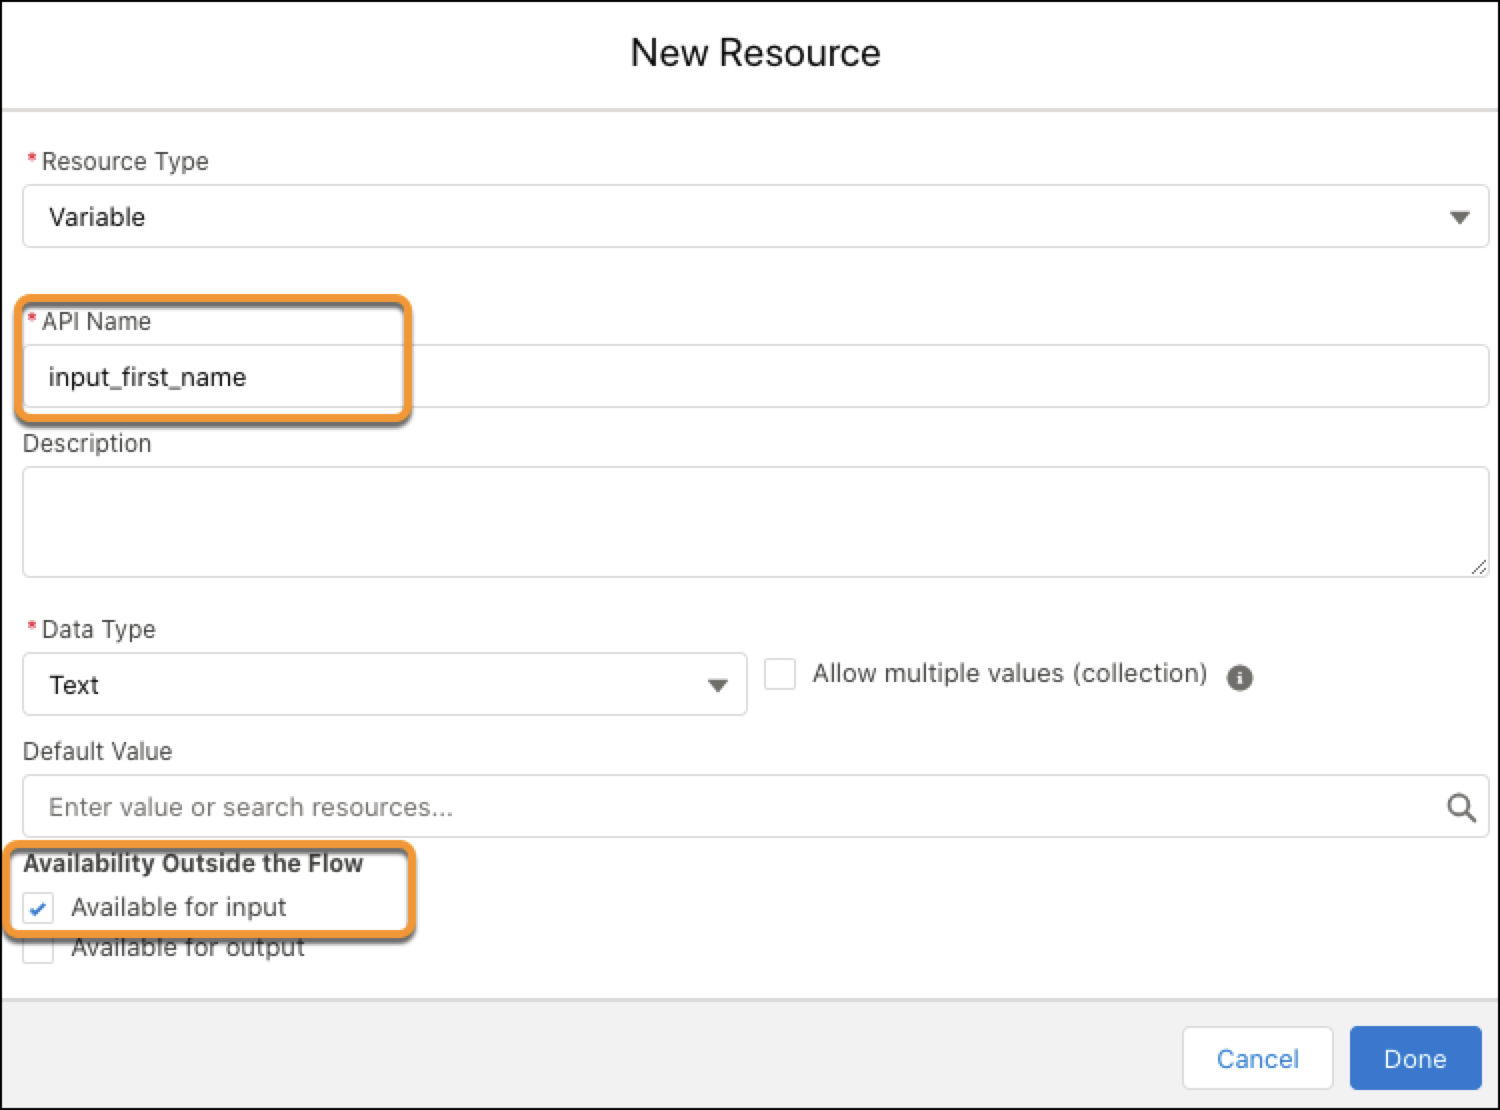
- Add an input variable for each pre-chat field. The API Name must be
identical to the Flow Variable Name from Parameter Mappings. The
variable must be Available for input.
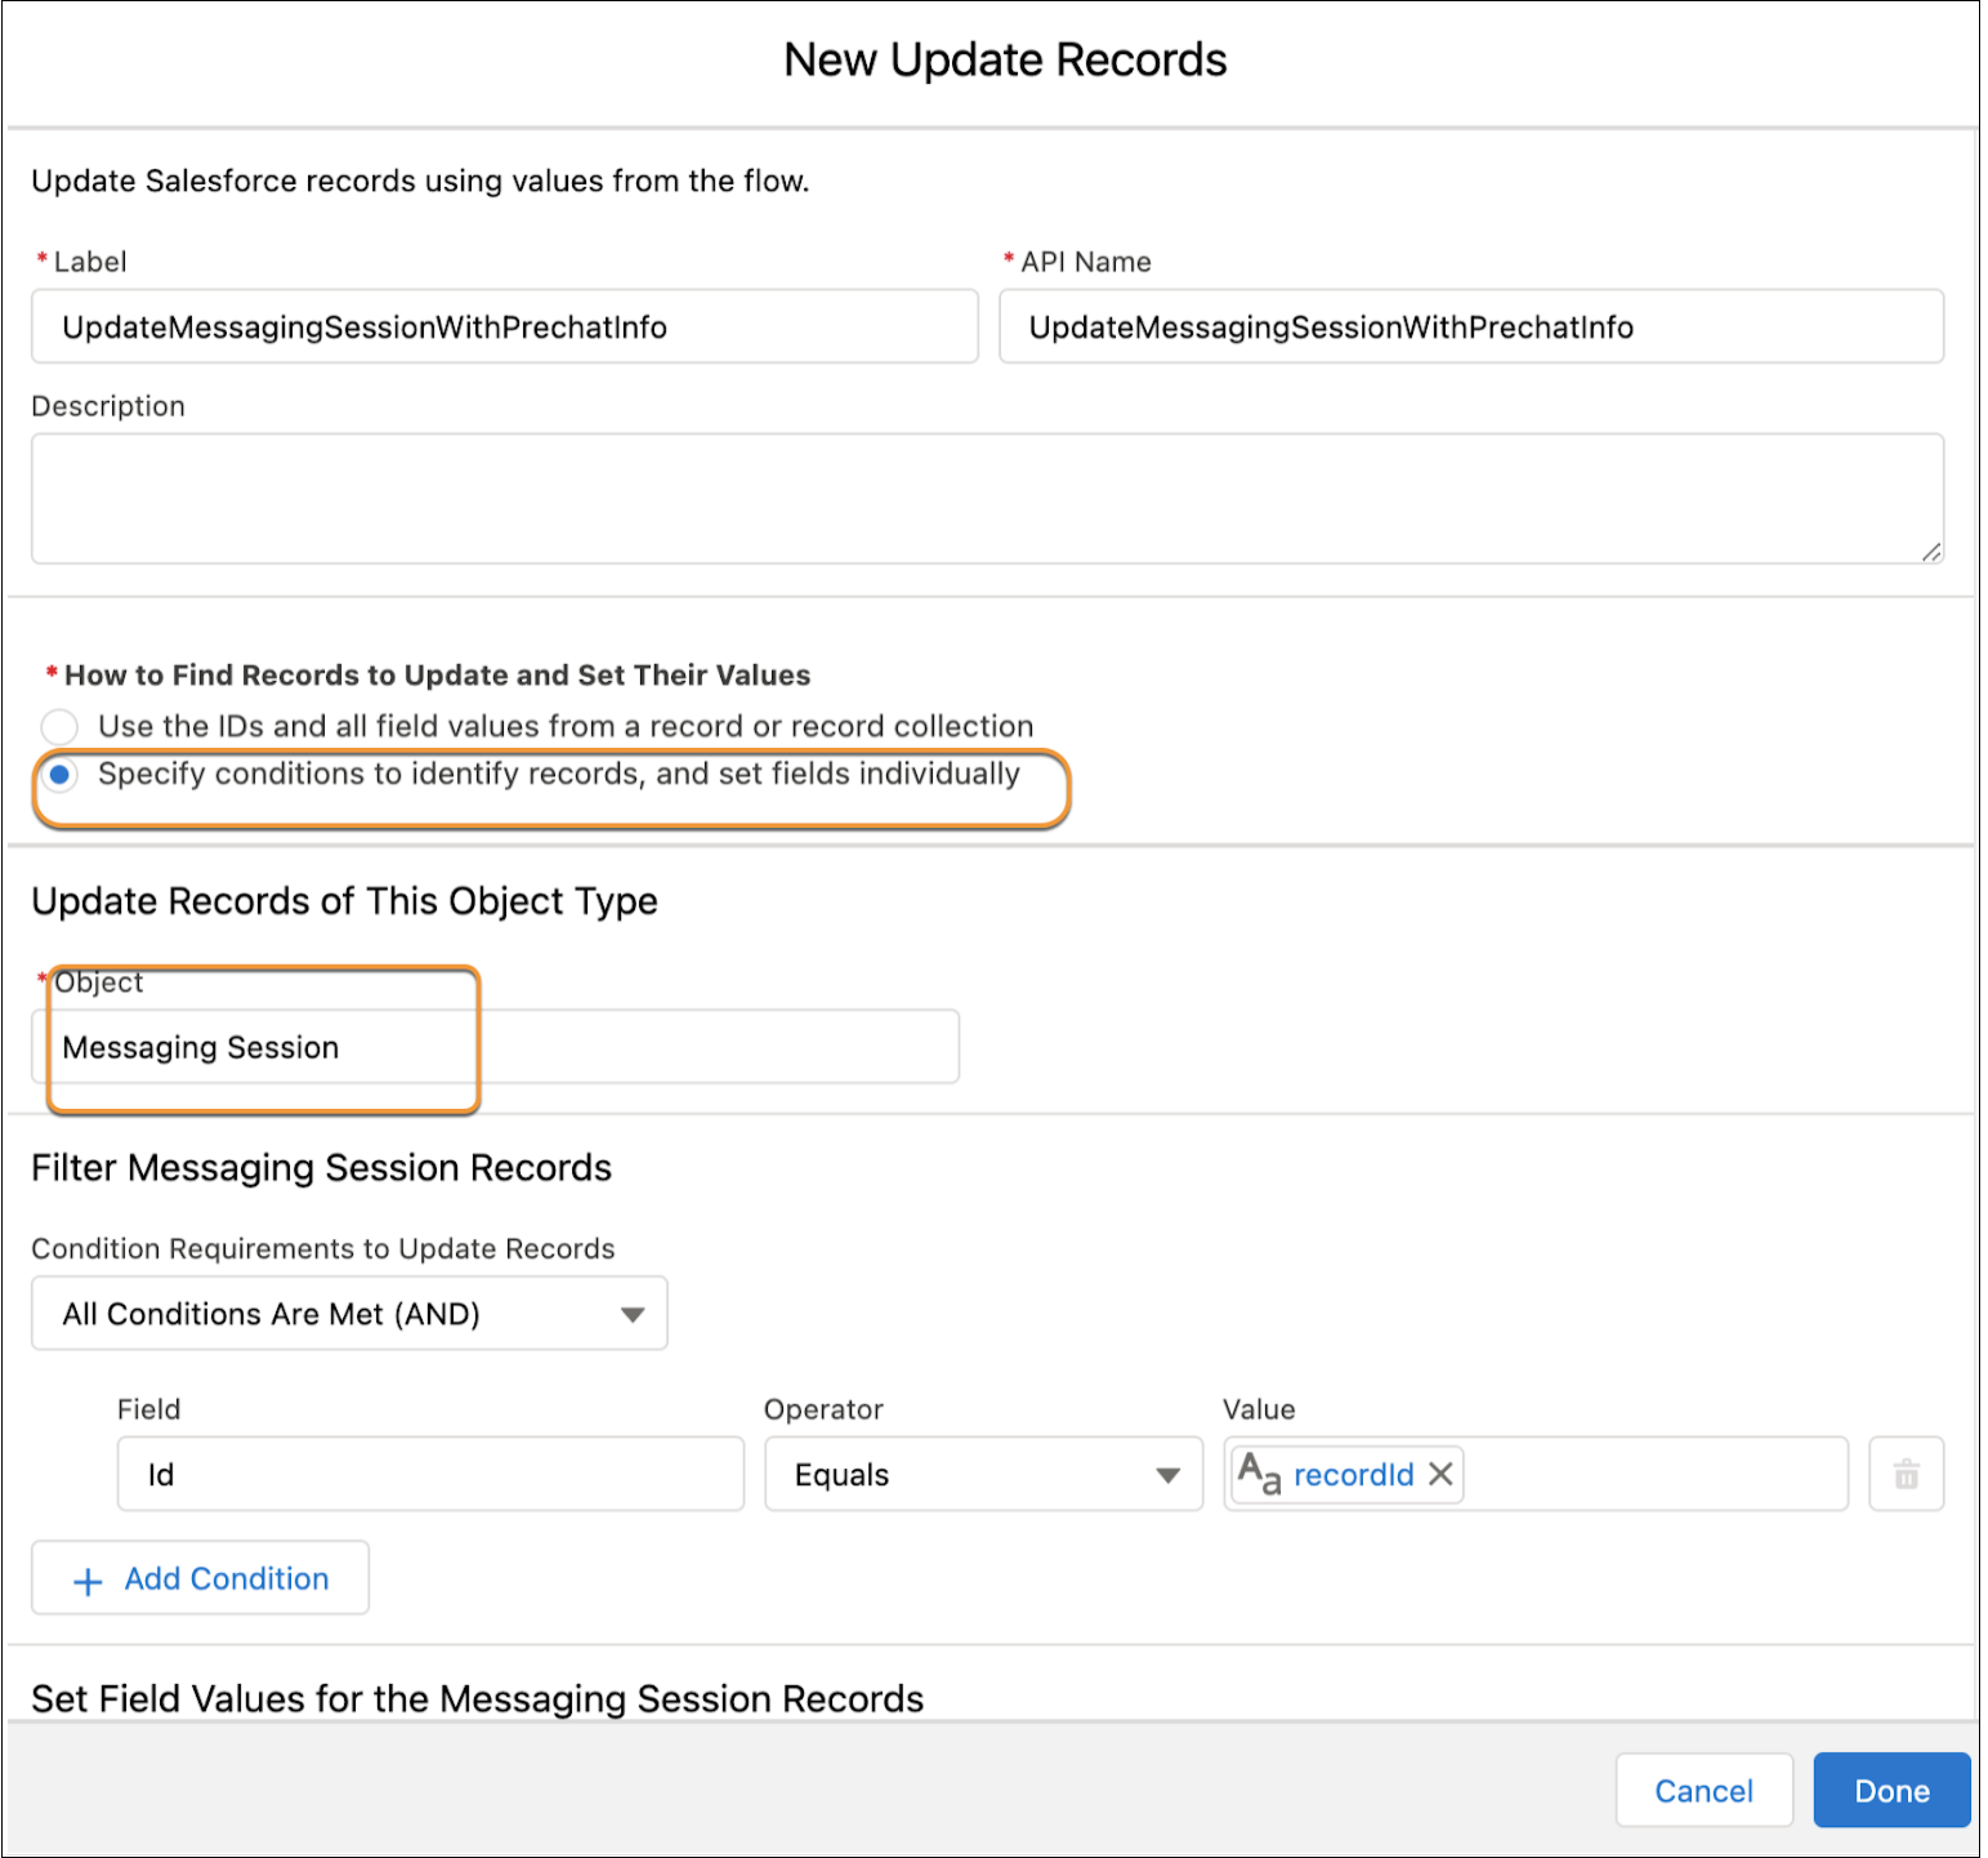
- Create an Update Records element before the Route Work element in
your flow. Select Specify conditions to identify records and set fields
individually. Select Messaging Session as the object. In
the Filter Records section, filter based on the
recordId value.
- Set the Field Values for the Messaging Session Records so that the
fields match the custom field names, which in this case is associated with the Messaging
Session.
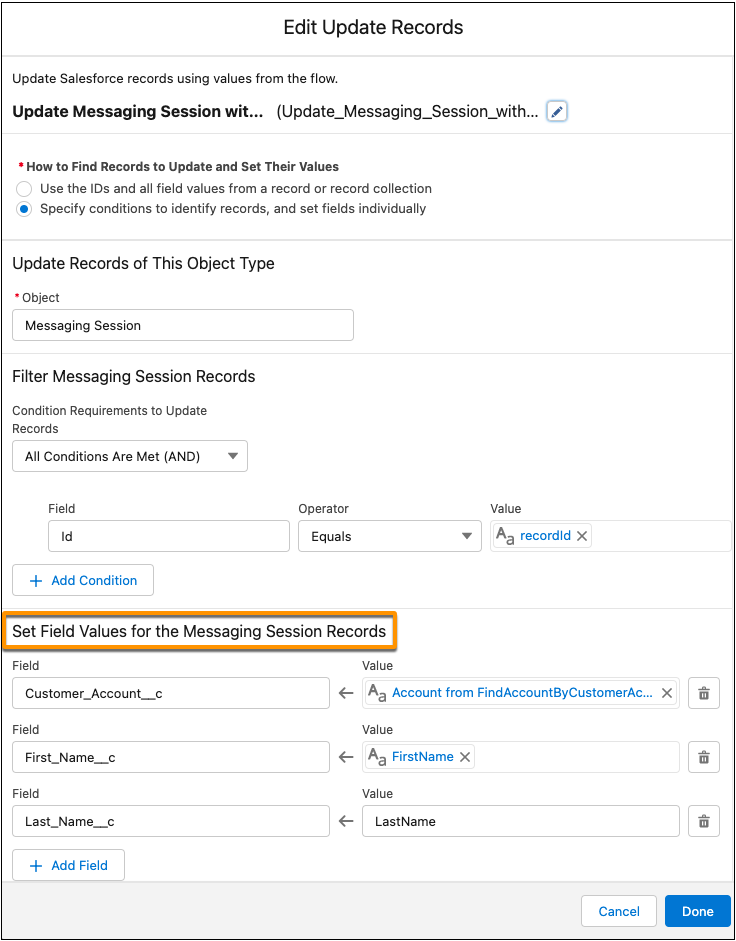
- The Value matches the input variables for the flow.
- Click Done. The complete flow looks like this.
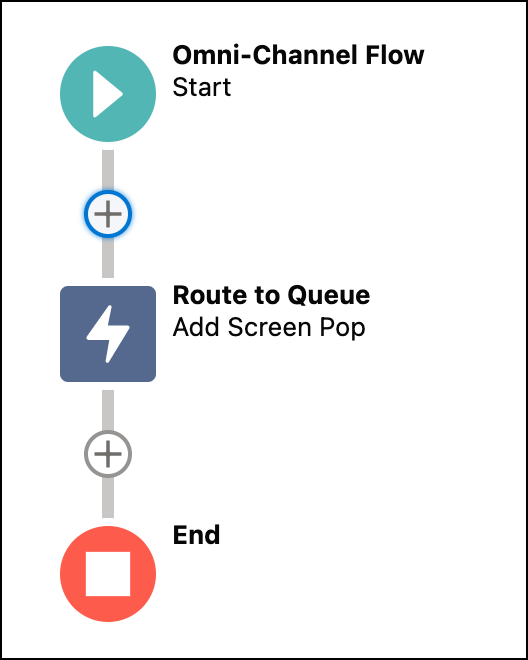
With this flow, a service rep sees the customer’s pre-chat inputs of first name, last name, and customer account number in the session record as they connect.