You are here:
Configure an Enhanced Web Chat Deployment in an Experience Builder or Commerce Cloud site
Use the Embedded Messaging component to add Enhanced Web Chat to your Experience Builder or Commerce Cloud site.
Required Editions
| View supported editions. | |
 This article applies to:
|
Enhanced Web Chat channels |
 This article doesn’t apply to:
|
Enhanced In-App Chat, Enhanced WhatsApp, Standard and Enhanced Facebook Messenger, Standard and Enhanced SMS, Enhanced Apple Messages for Business, Enhanced LINE, and Bring Your Own Channel |
| User Permissions | |
|---|---|
| To set up this feature: | Customize Application AND Modify Metadata Through Metadata API Functions |
| To modify permission sets and profiles: | Manage Profiles and Permission Sets |
| To add the Embedded Messaging component to an Experience Builder site: | Create and Setup Experiences |
Note the following considerations before you begin.
- We support the following Experience Builder templates: Build Your Own (Aura), Customer Account Portal, Partner Central, Help Center, Customer Service, Build Your Own (LWR), and Microsite (LWR).
- We support the following Commerce Cloud templates: B2B Commerce (LWR), B2C Commerce (LWR), and B2B Commerce (Aura).
- Enhanced Chat is supported in Lightning Web Runtime (LWR).
- If you use the Embedded Service or Channel Menu components on your Experience Builder site, remove them. Use the Page Structure panel to find and remove the extra components.
- To effectively iFrame your website and reduce JavaScript library conflicts, Enhanced Web Chat creates a unique site that appears in your All Sites list in Setup. Don’t reuse this generated site URL, which has reduced security, for other purposes. Don’t modify this generated site through Builder or Workspace links.
- There's only one supported way to add Enhanced Chat to an Experience Site: Use drag and drop according to the steps here. Other methods aren't supported.
In this stage of Enhanced Web Chat setup, you’ll:
- Publish a deployment in your Experience Builder or Commerce Cloud site.
- Set security protocols for your deployment.
- Learn where to add additional code when using the Enhanced Web Chat JavaScript API.
Publish Your Enhanced Web Chat Deployment in an Experience Builder Site
- Complete these steps to set up Enhanced Chat.
- From the Experience Builder Components list, select the Embedded Messaging component and drag it onto the footer of the Experience Builder or Commerce Cloud site template.
- On the page, click to highlight the Embedded Messaging component.
- In the property editor, configure properties for the component:
Property Details Embedded Web Deployment Choose your Embedded Service Deployment for Enhanced Web Chat. Enhanced Service URL Select the URL from your Enhanced Web Chat setup, which matches the scrt2field in your code snippet.Site Endpoint Select the site endpoint, which matches the site endpoint on the Embedded Service Deployment Settings page for your deployment. Chat Button Visibility Default Visibility means that the chat button is shown by default or according to any business hours that are configured.
Always Visible overrides your existing visibility settings and ensures that the chat button is always shown on page load.
Always Hidden overrides your existing visibility settings and ensures that the chat button is always hidden on page load.
After publishing your site, the conversation and active messaging button appears on your site.
Set Security Protocols for Your Enhanced Web Chat Deployment
After completing setup, add your Experience Builder site domain to your CORS allowlist. If notice an issue with the *.live-preview domain, add that to the CORS allow list.
- To confirm your site domain, from Setup, enter Digital Experiences in the Quick Find box, and then select Settings. Copy the URL from the Domain section.
- From Setup, enter CORS in the Quick Find box, and then select CORS.
- Select New.
- Enter an origin URL pattern.
- Save your work.
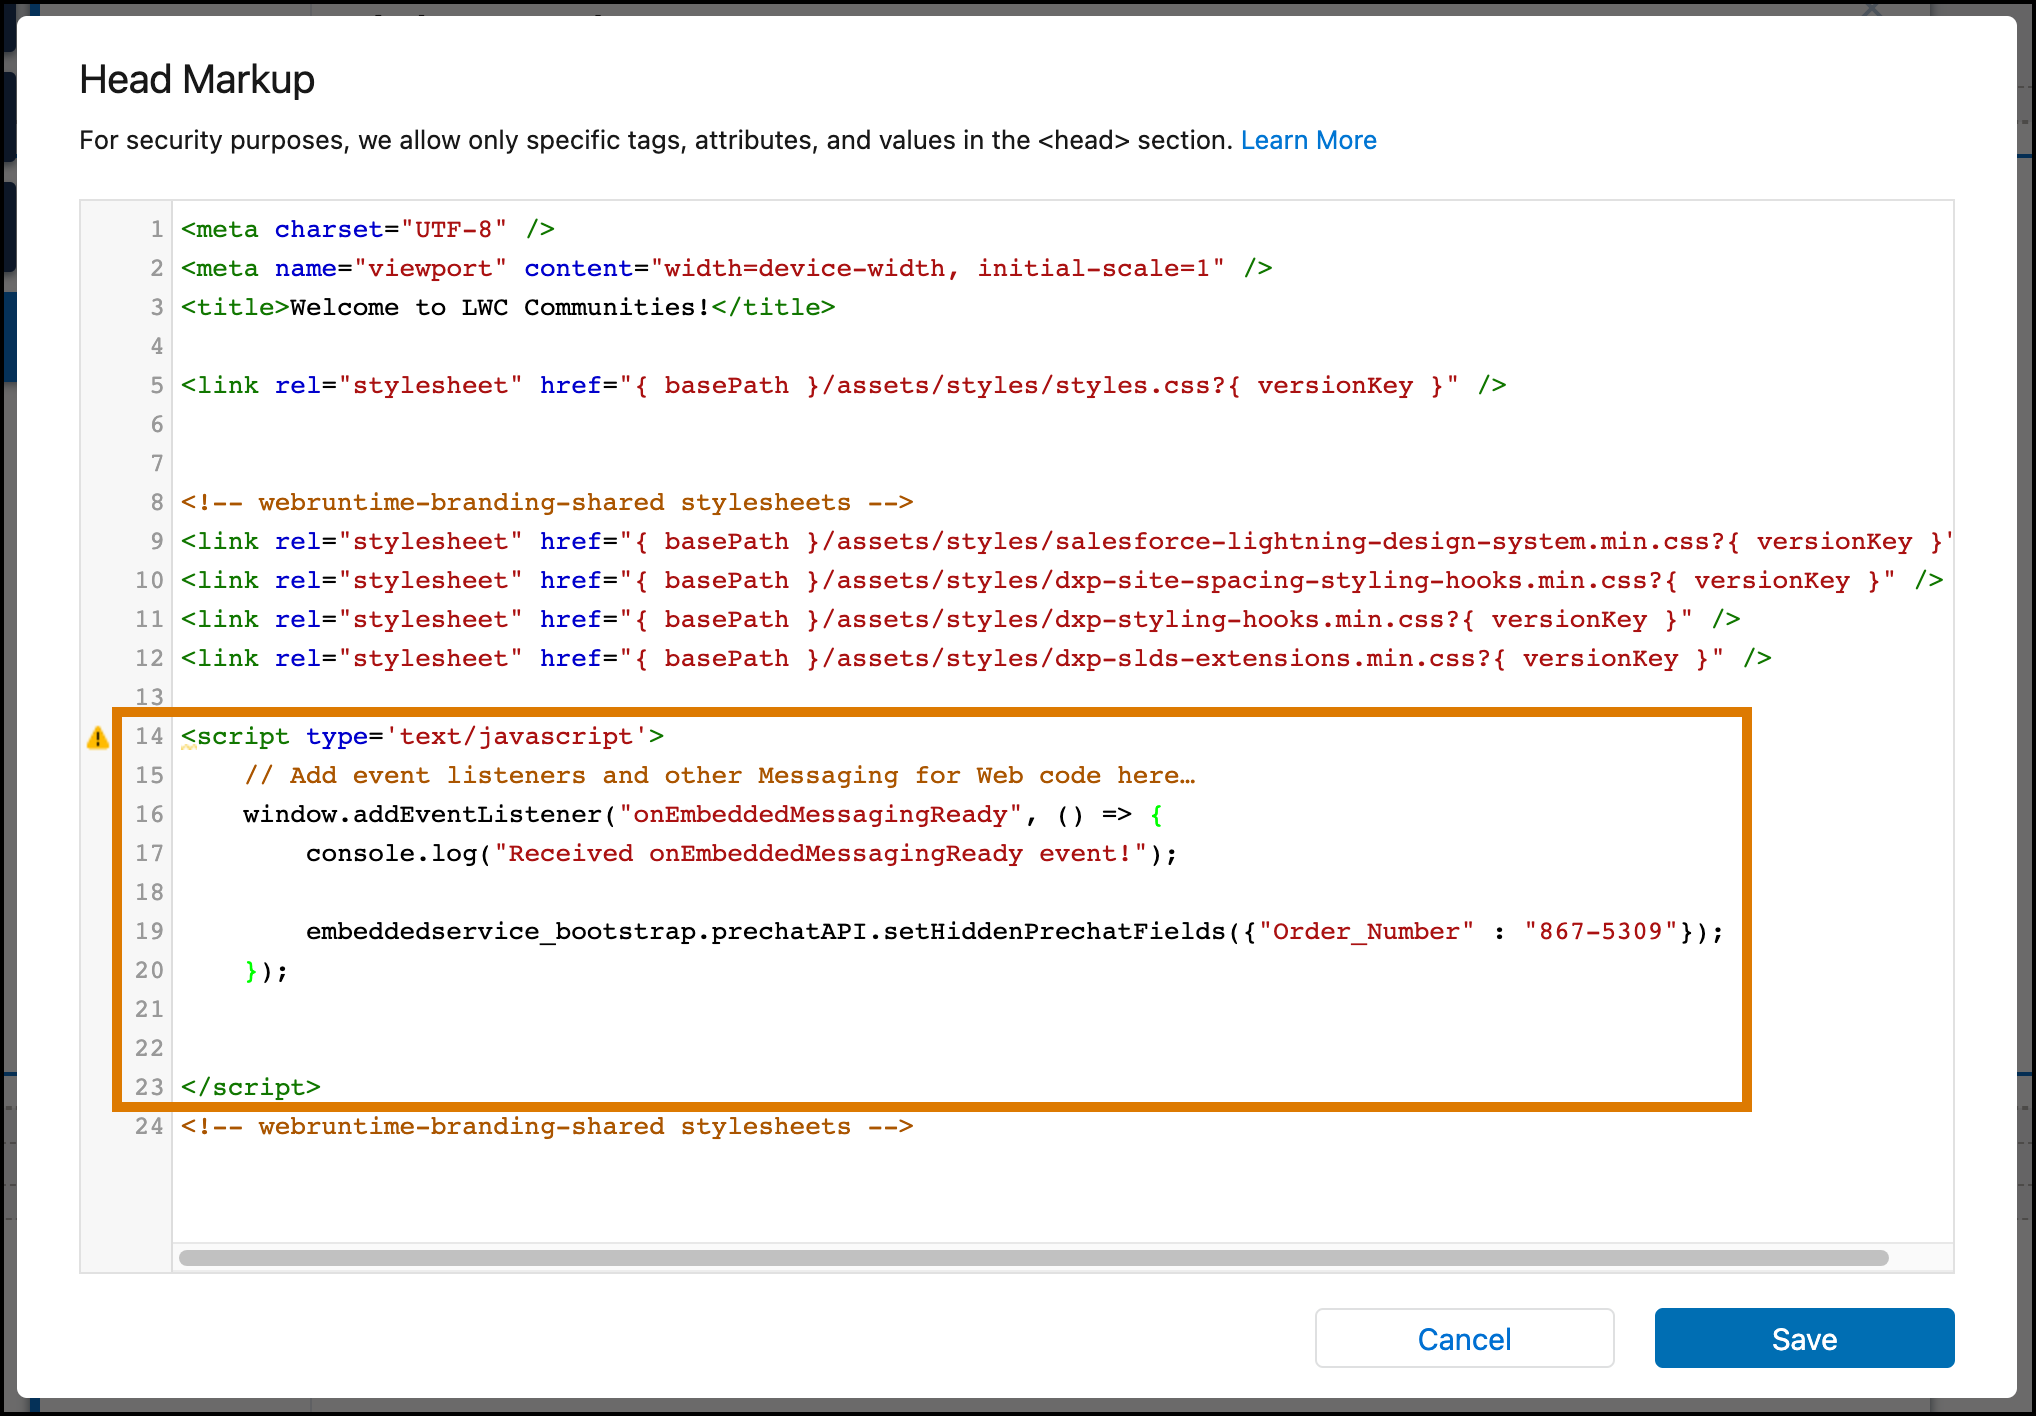
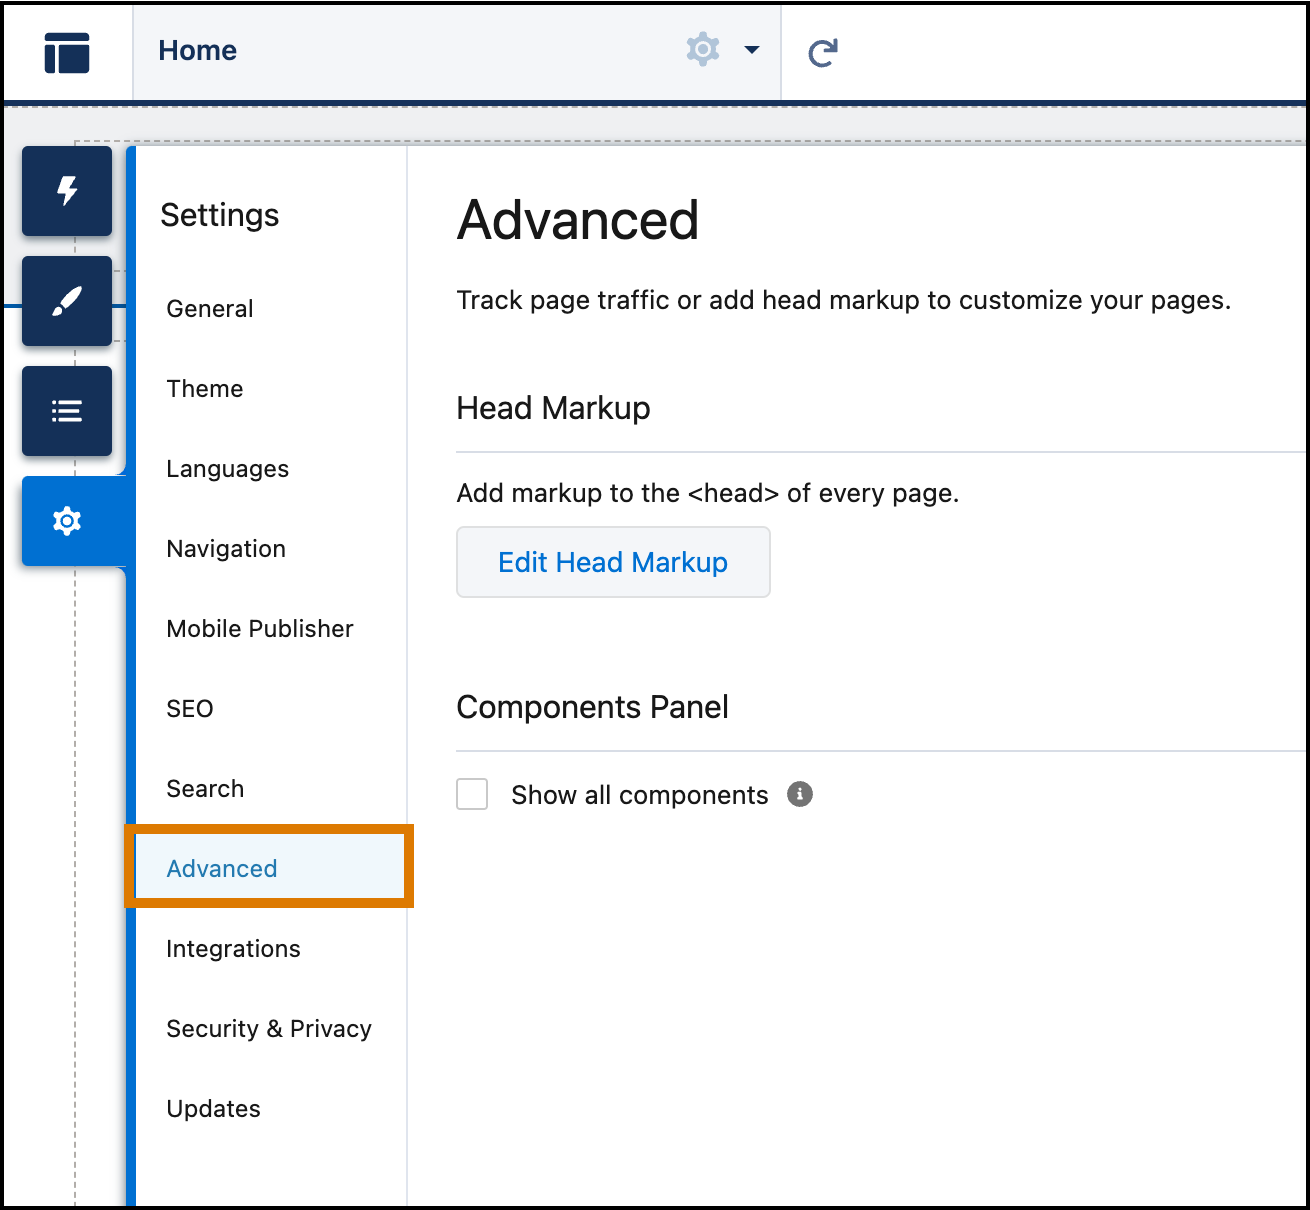
Learn Where to Add Enhanced Web Chat Code
When working with developers on your site, place any additional Enhanced Web Chat code in the head markup section. You can find this area from the Advanced tab of the Experience Builder Settings.
Click Edit Head Markup and then add your JavaScript code within a <script> tag.