
You are here:
Map Pre-Chat Values in Omni-Channel Flow
Omni Flow sends pre-chat form data to the messaging session for a more informed service rep experience. Map visible and hidden fields from your pre-chat form to your Omni flow.
Required Editions
| View supported editions. | |
 This article applies to:
|
Enhanced In-App Chat and Enhanced Web Chat channels |
 This article doesn’t apply to:
|
Enhanced WhatsApp, Standard and Enhanced Facebook Messenger, Standard and Enhanced SMS, Enhanced Apple Messages for Business, Enhanced LINE, and Bring Your Own Channel |
| User Permissions | |
|---|---|
| To set up Omni and Messaging: | Customize Application |
| To modify permission sets and profiles: | Manage Profiles and Permission Sets |
In this stage of Enhanced Chat setup, you:
- Map pre-chat fields to Omni flow variables.
- Update your Omni-Channel flow to set field values for the messaging session after they’re filled out in the pre-chat form.
Map Pre-Chat Fields to Omni Flow Variables
- From Setup, in the Quick Find box, enter Messaging Settings, and then select Messaging Settings.
- Select your channel name.
- In the Parameter Mapping section, click New.
- In the Parameter field, select an item from your pre-chat form.
- Add a flow variable name that describes the action. You reference the flow variable name in
your flow later.
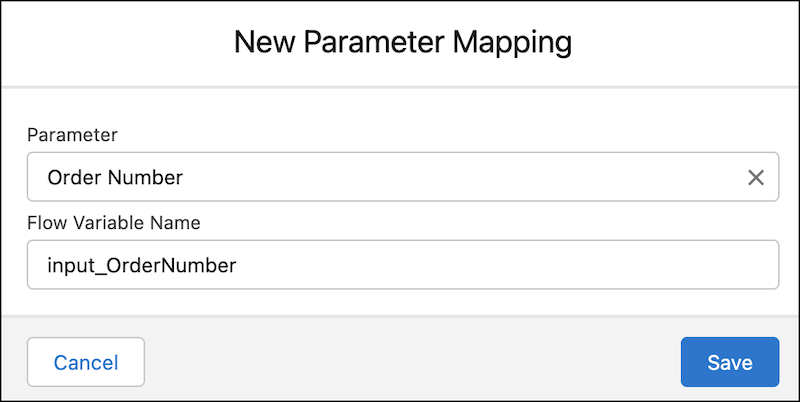
- Save your changes.
- Continue the process with each standard and custom field in your pre-chat form.
Update Your Omni-Channel Flow to Set Field Values in the Messaging Session
Return to the Omni-Channel Flow that you created in the first stage of setup. Add one more element to store your pre-chat fields.
Note String is the only option for Data Type. While the pre-chat form lets you
show visible fields formatted as text, email, phone, number, dropdown, and checkbox
fields, a flow automatically converts these fields to string fields. If you use a flow to
send information from a pre-chat field to another record, the output appears as a string
field. While most letters, numbers, and special characters allowed by the original field
type are allowed by a string field, differences sometimes occur. For example, the flow
converts a checkbox field to a string statement of true or a string statement of false in
the resulting flow output. As another exception, the flow passes the original dropdown API
value from a pre-chat form’s dropdown field, not the custom label for that field
value.
- From Setup, in the Quick Find box, enter Flows, and then select Flows.
- Find and select your previous flow from the list.
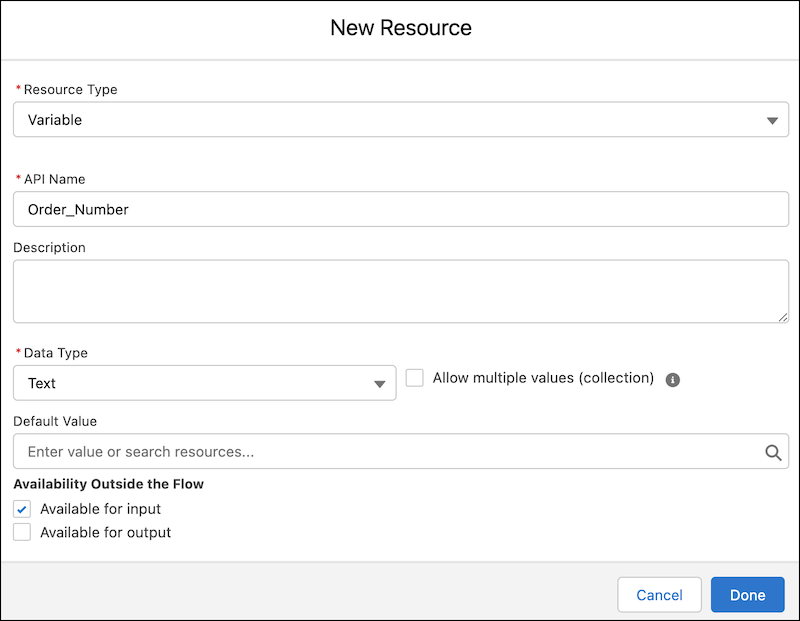
- Add an input variable for each pre-chat field.
- The API Name must be identical to the Flow Variable Name from Parameter Mappings.
- The Data Type must be set to Text.
- The variable must be Available for input.
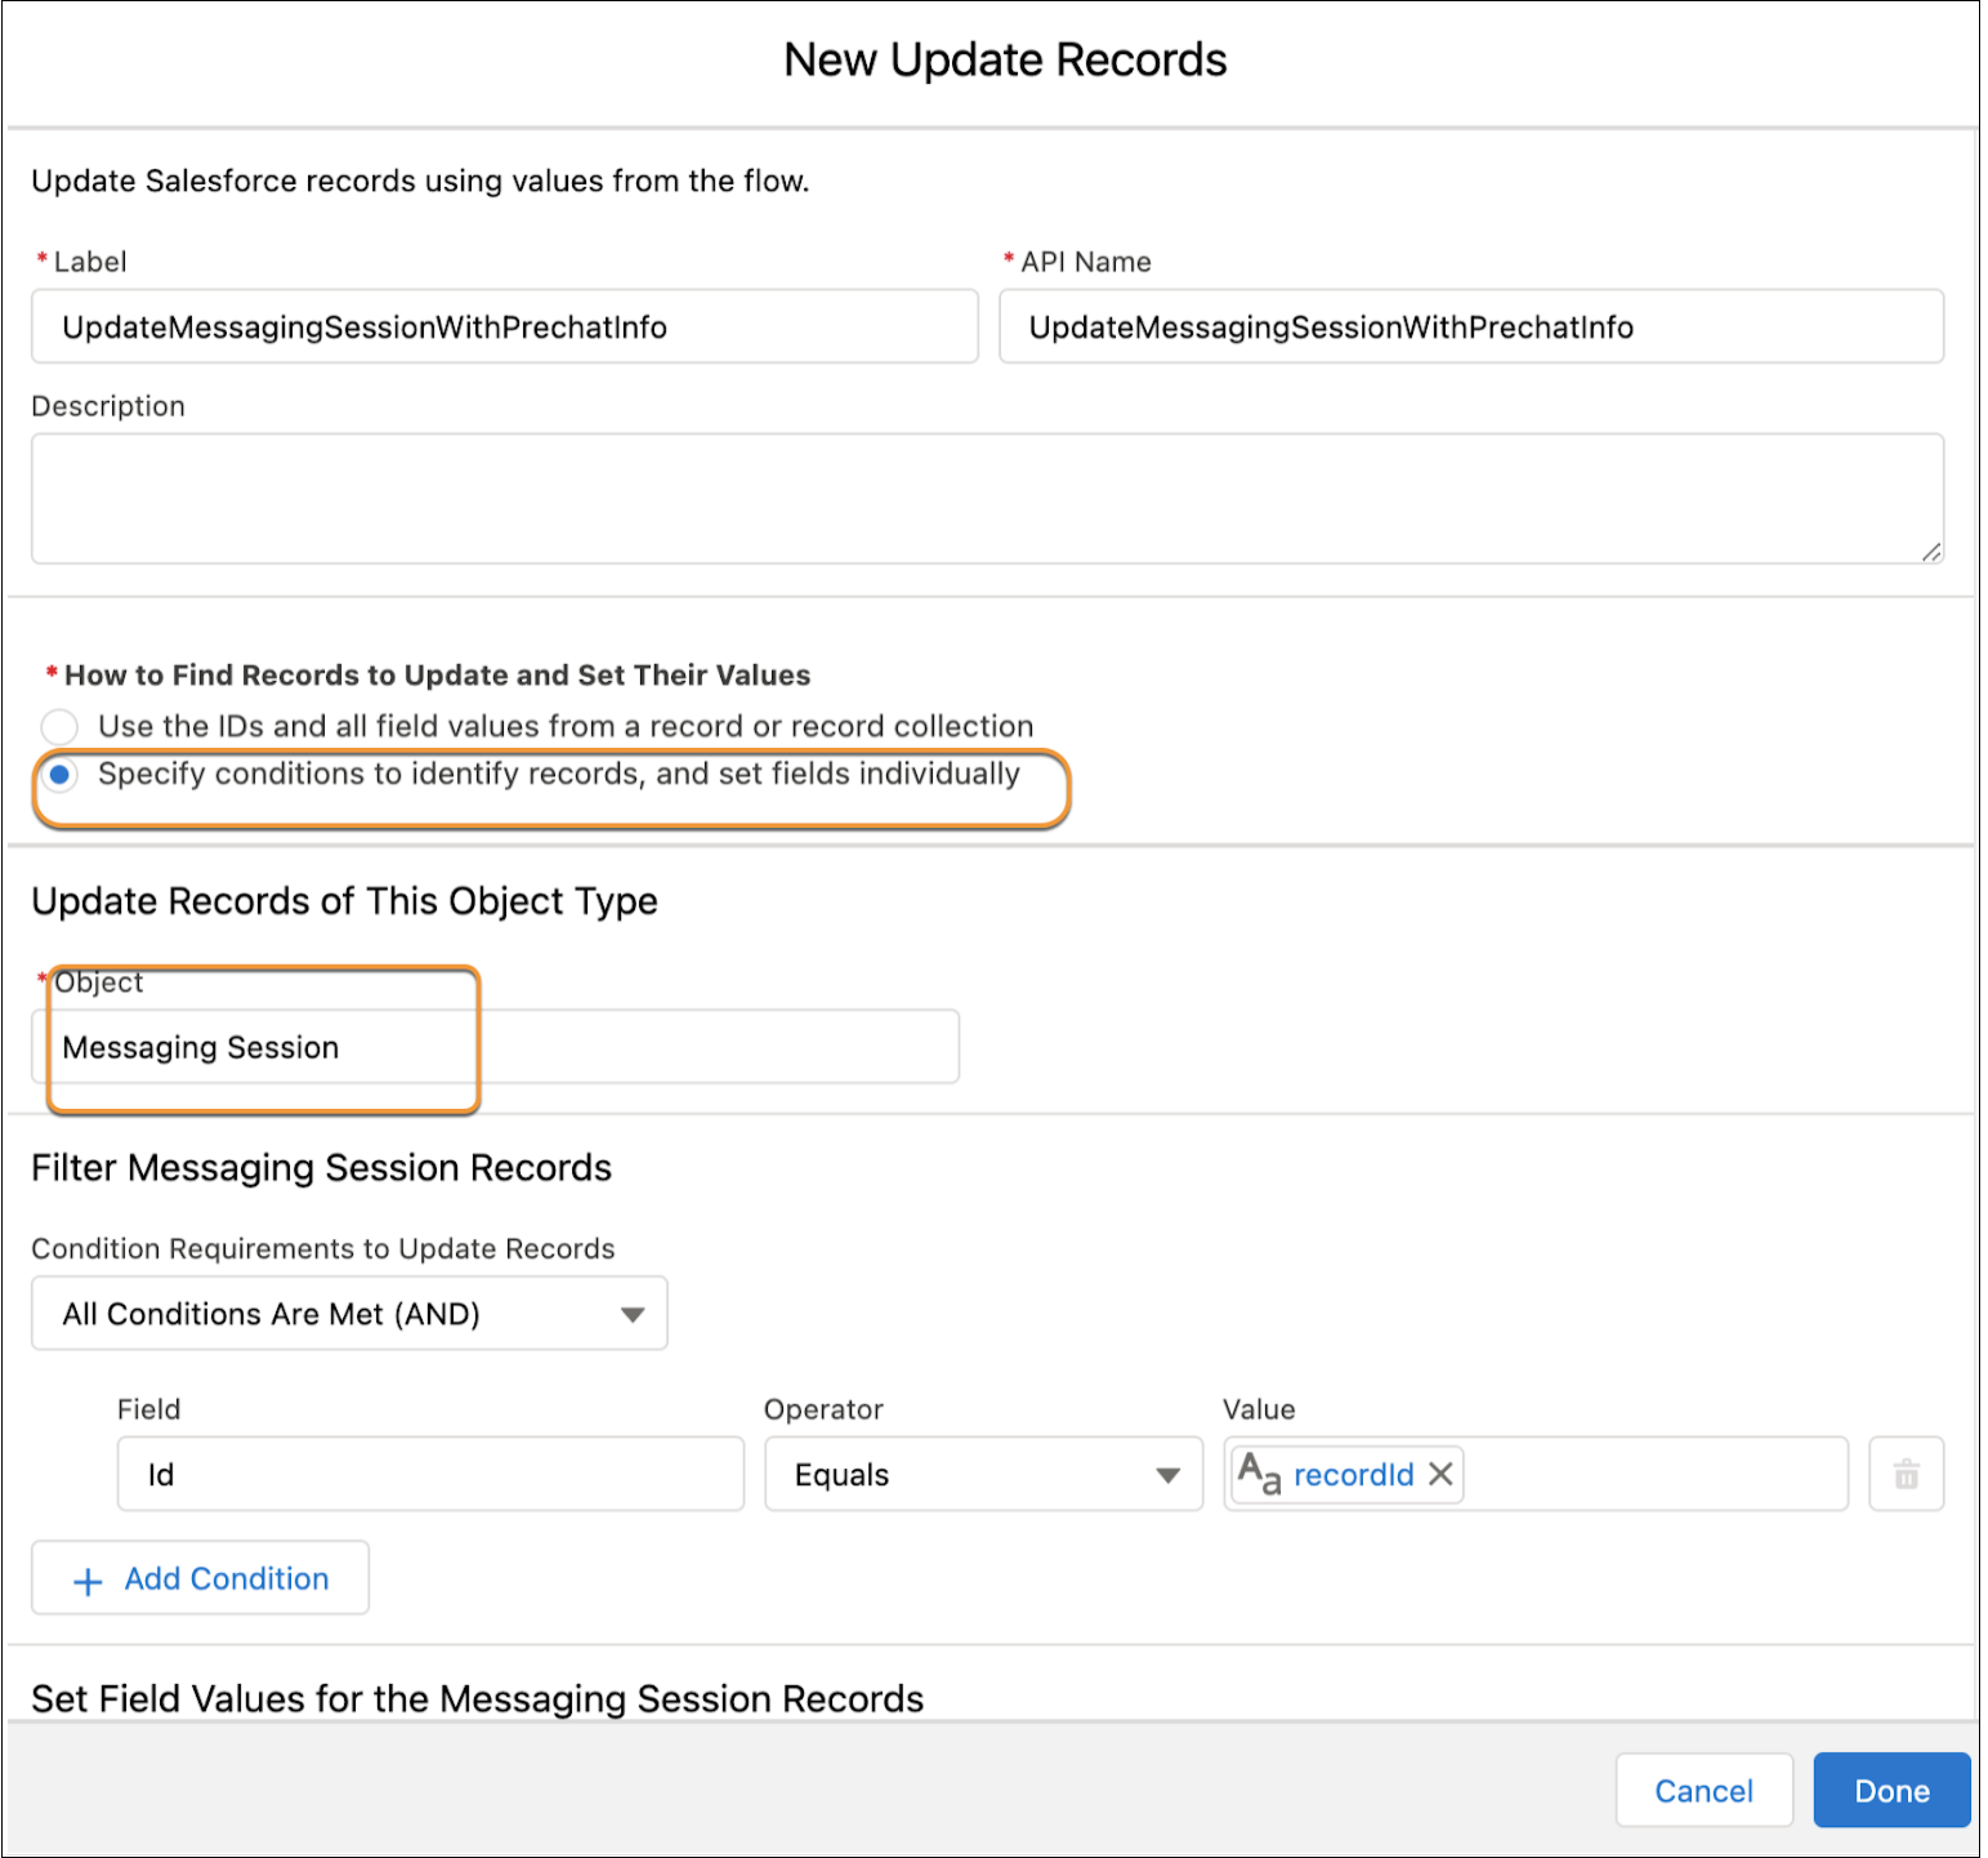
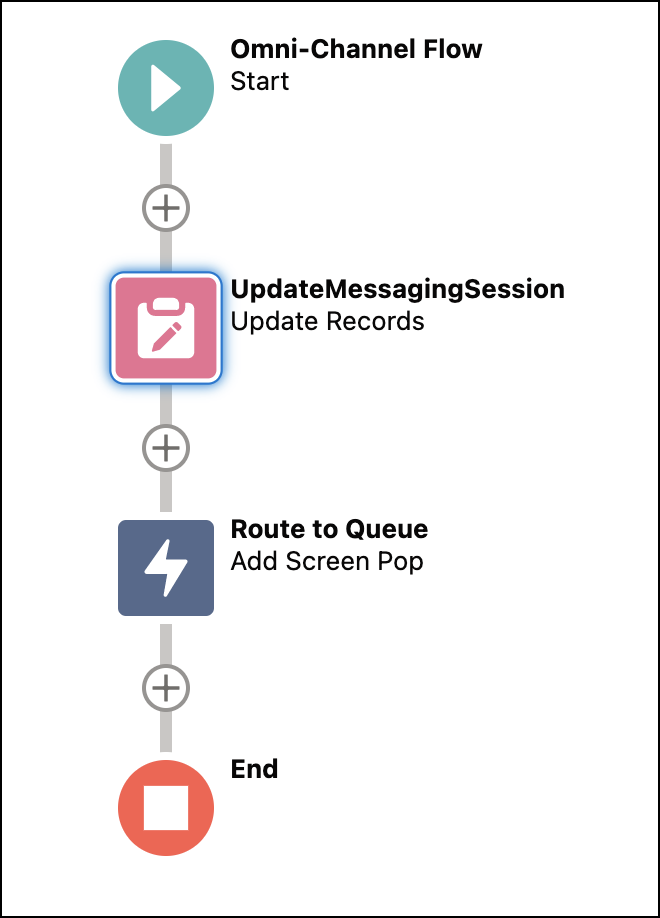
- Create an Update Records element before the Route Work element in your flow. Specify
conditions to identify records and set fields individually. Select Messaging Session as
the object. In the Filter Records section, filter based on the
recordId value.
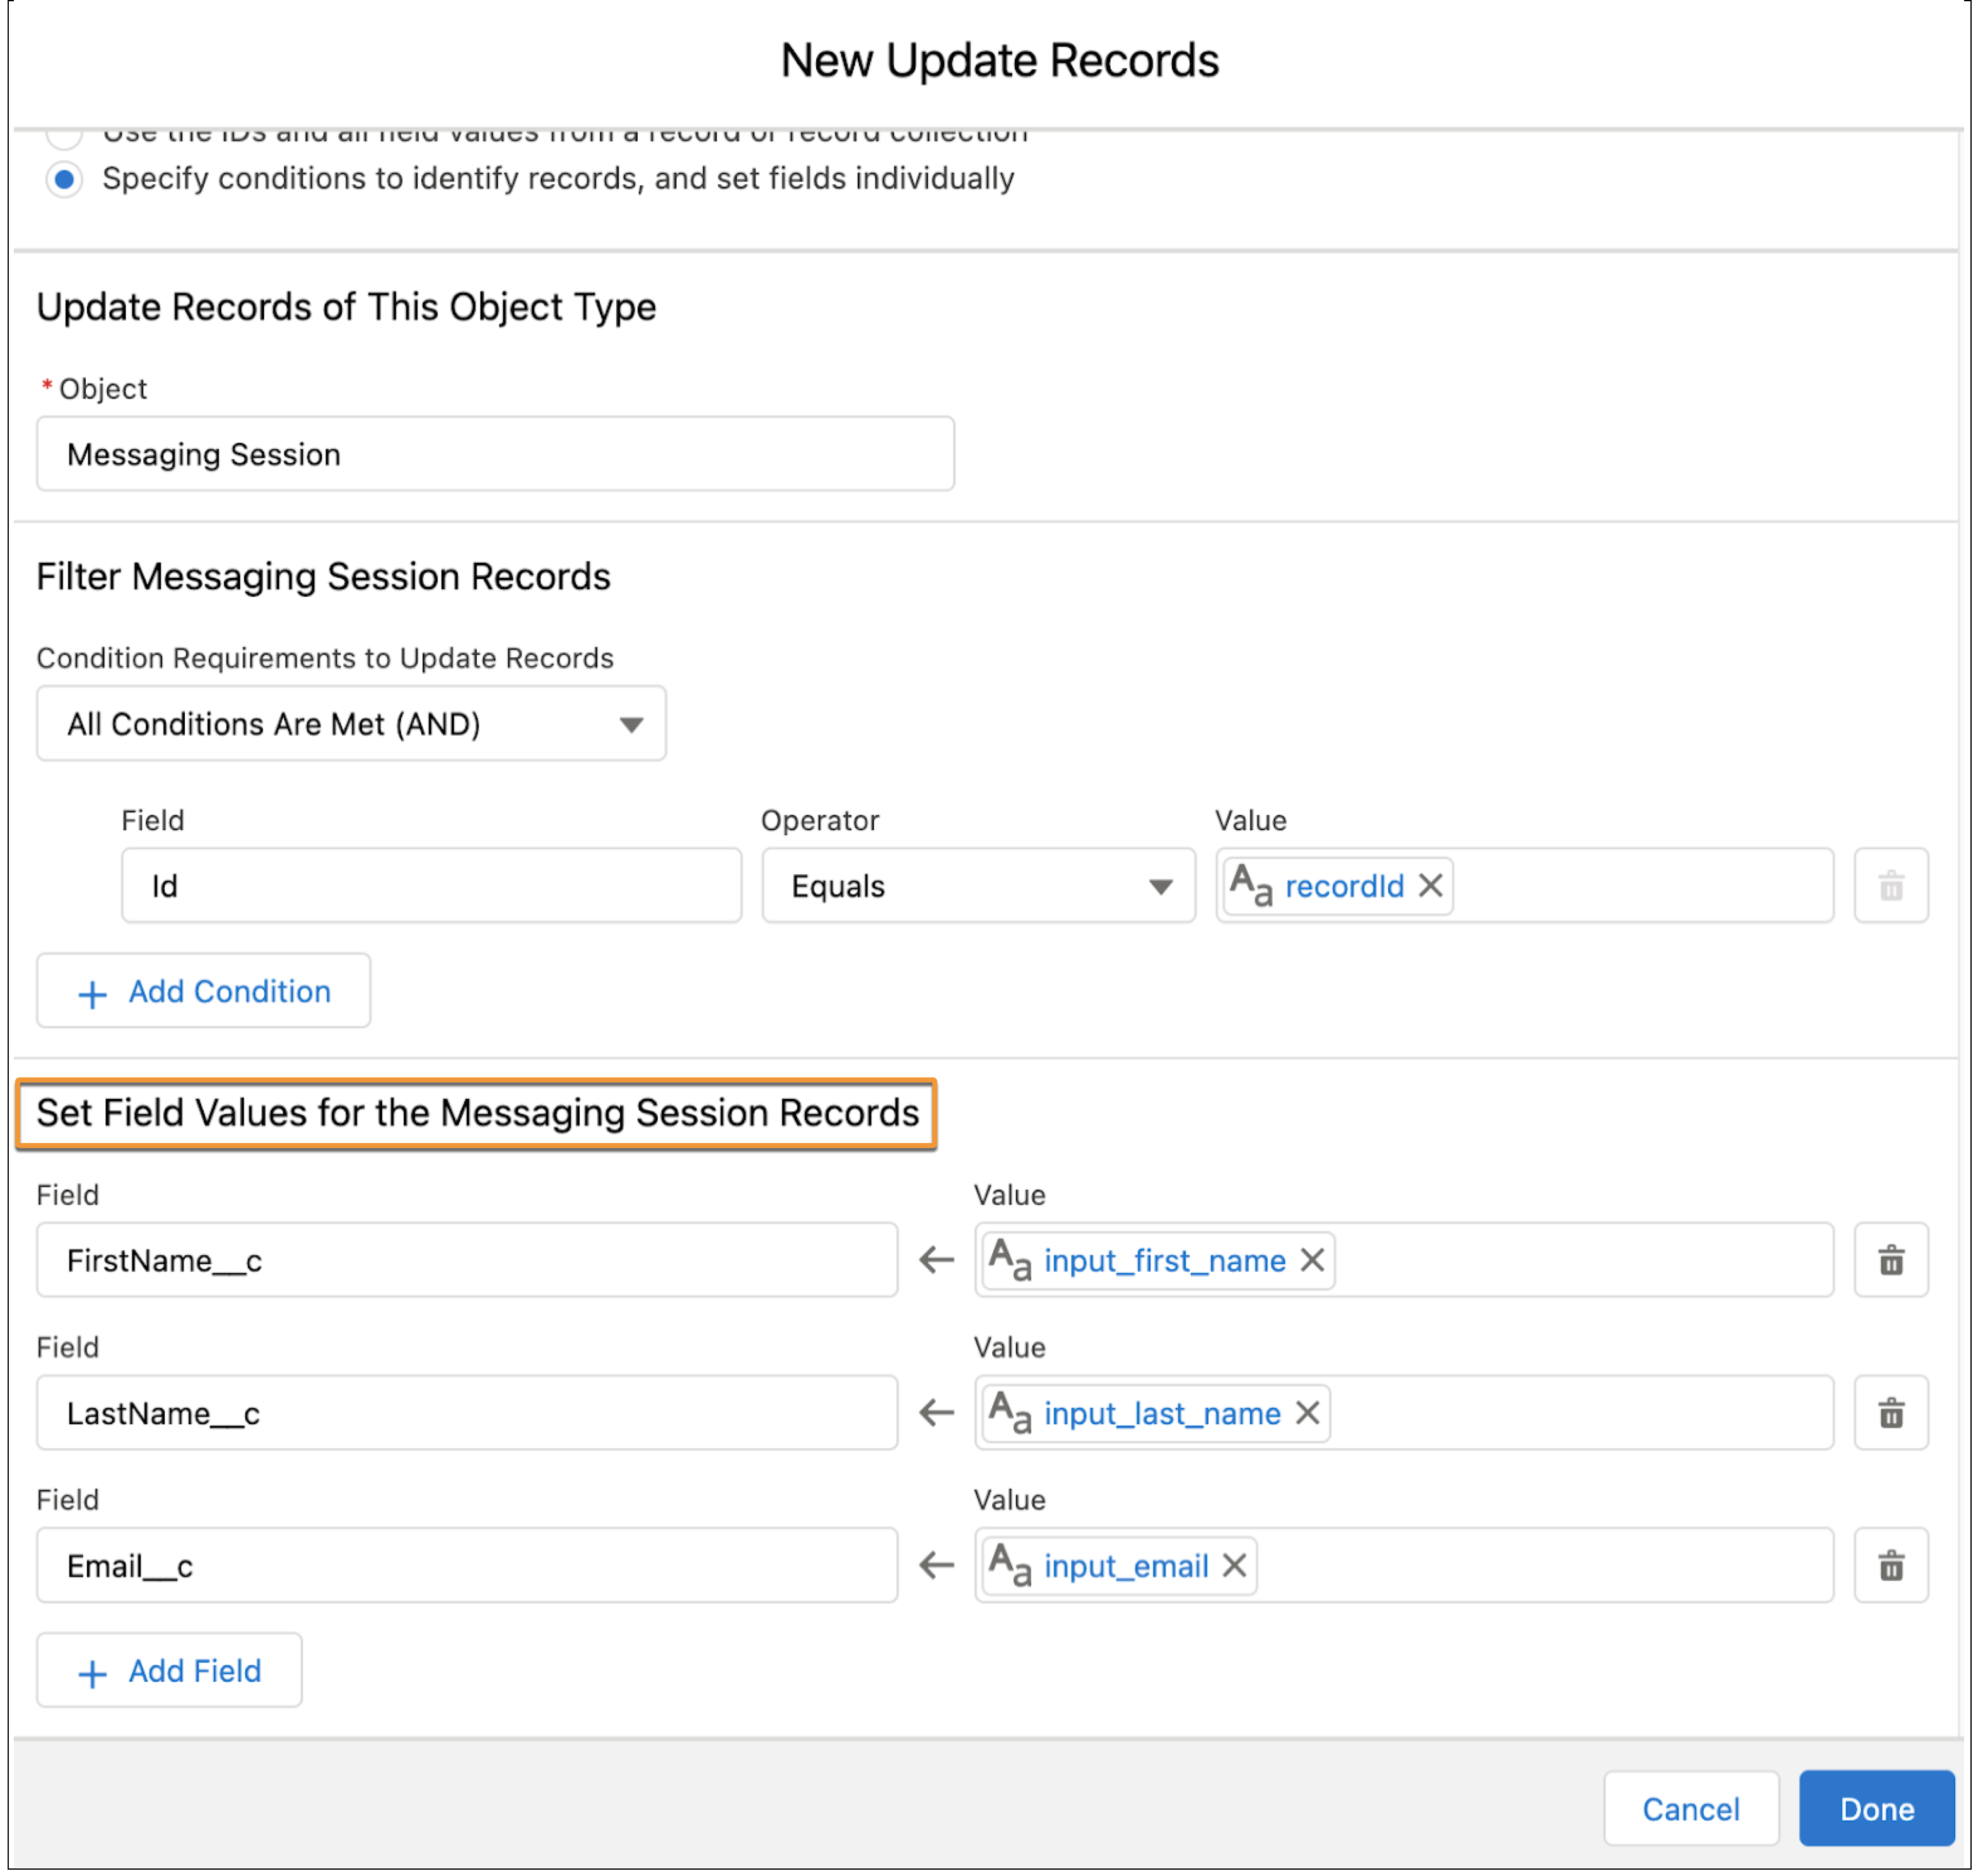
- Under Set Field Values for the messaging session records, enter each field name under
Field, and enter its corresponding flow variable name under Value.
- Click Done. The complete flow looks like this.
- Save this flow as a new version, and verify that it’s activated.
Note When the service rep clicks End Chat, the messaging session ends. If the customer
continues the conversation, another session is created. By default, pre-chat data isn’t
carried over to this new session.
- Use Pre-Chat API to Pass Customer Information to the Service Rep in an External Website
To provide service reps with customer information that helps move an interaction forward, send end-user data to the service console via the pre-chat API. - Use Pre-Chat API to Pass Customer Information to the Service Rep in an Experience Site
To provide service reps with customer information that helps move an interaction forward, send end-user data to the service console via the pre-chat API.
Did this article solve your issue?
Let us know so we can improve!