
You are here:
Invoke an Omni-Channel Flow to Route Non-Real-Time Objects
To route non-real-time objects, such as cases, leads, and custom objects, define the routing logic in an Omni-Channel flow, and then invoke the flow from a parent flow based on your business rules. For example, to trigger the flow to run when cases are created, add it as a subflow in a record-triggered flow. Or, to perform a custom transfer process, add it as a subflow in a screen flow.
| View supported editions. |
To show you one method for invoking an Omni-Channel flow for a non-real-time object, let’s look at how to use a record-triggered flow to invoke an Omni-Channel flow to route cases. To route cases in Email-to-Case, use an Omni-Channel flow instead of a record-triggered flow.
- In the Quick Find box under Setup, enter Flows, and then select Flows under Process Automation.
-
Click New Flow.
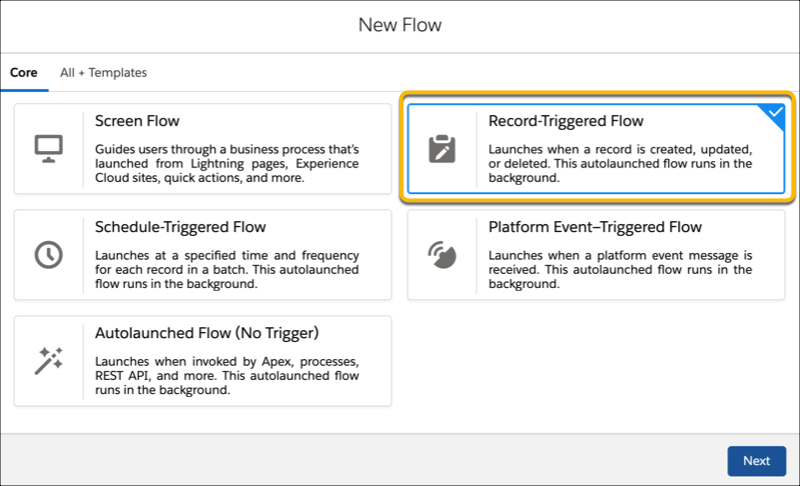
- Click Record-Triggered Flow, and then click Create.
- In Object, select the non-real-time object. For example, to route cases, enter Case and select it.
- In Trigger the Flow When, select when to trigger the subflow. For example, to route the case when it’s created, select A record is created.
-
Click Done.
The record-triggered flow appears in the Flow Builder canvas.
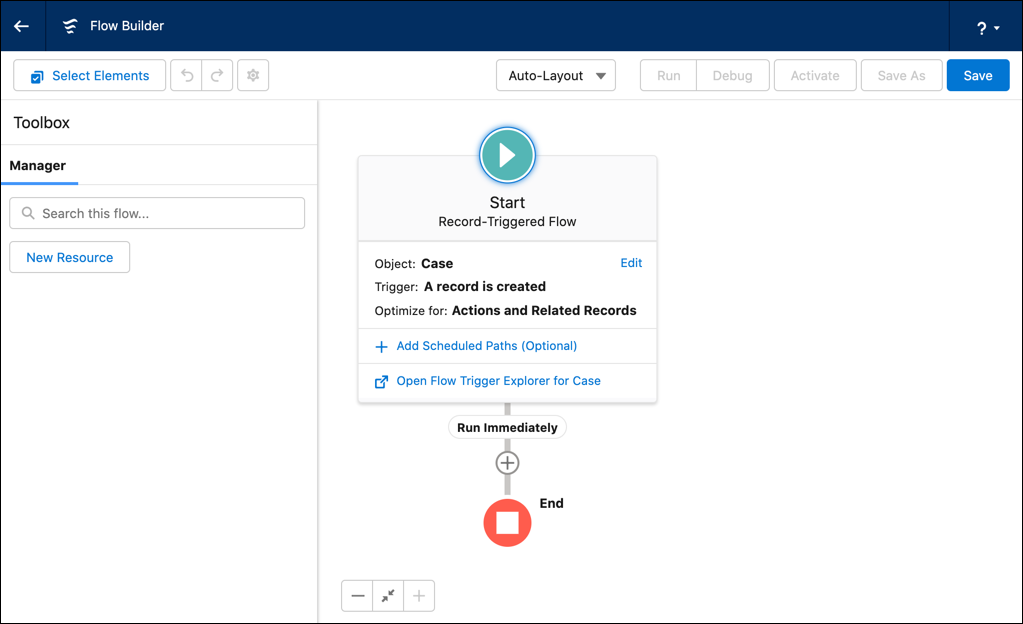
- Add a Subflow element to the flow by dragging the Subflow element from the Elements toolbox or clicking + in the flow.
-
In the New Subflow window, select the Omni-Channel flow.
 Tip To prevent a warning from appearing when you save the record-triggered flow, activate the Omni-Channel flow before adding it as a subflow.
 - Enter the label and API name for the subflow element.
-
In Select Input Values, select the case record ID in the recordId field.
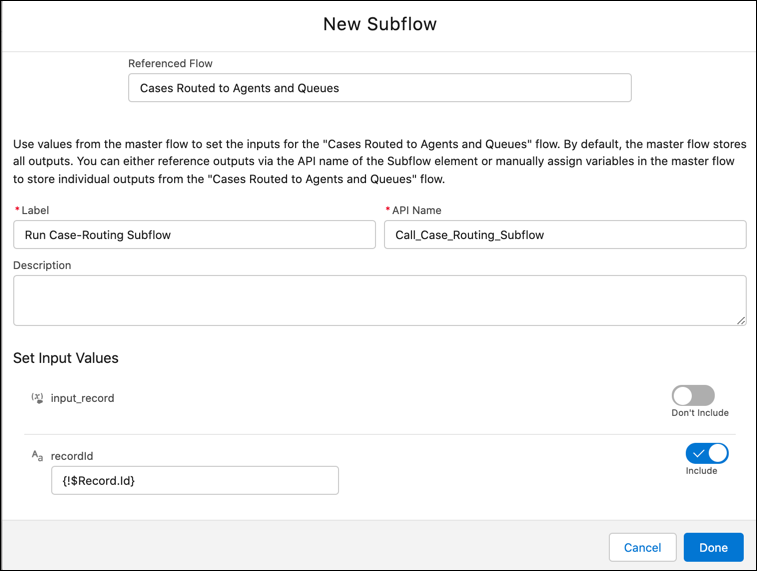
- Click Done.
-
To connect the elements in the flow, drag the Start element onto the Subflow
element.
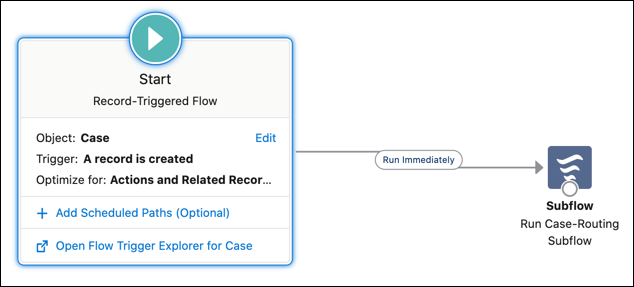
- Save the record-triggered flow.
Did this article solve your issue?
Let us know so we can improve!
