You are here:
Route Data to Objects in Bring Your Own Channel
Use parameters, parameter mappings, and flows to route customer data to Salesforce objects for Bring Your Own Channel for Messaging and Bring Your Own Channel for CCaaS. This data gives service reps more context for who they’re messaging with. For example, create a Support Reason dropdown menu, and then route the customer’s input to the Messaging Session object.
Required Editions
| View supported editions. | |
 This article applies to:
|
Bring Your Own Channel for Messaging and Bring Your Own Channel for CCaaS |
 This article doesn’t apply to:
|
Enhanced In-App Chat, Enhanced Web Chat v1, Enhanced Web Chat v2, Enhanced WhatsApp, Standard and Enhanced Facebook Messenger, Standard and Enhanced SMS, Enhanced Apple Messages for Business, and Enhanced LINE channels |
Because Bring Your Own Channel for Messaging and Bring Your Own Channel for CCaaS messaging channels aren’t using a Salesforce client, we don’t have full control over the mechanics. Your setup requirements may differ based on the needs of your implementation. Use this help topic to familiarize yourself with the basic building blocks that are hosted in Salesforce and how they work together. We’ve provided an example where a Messaging end user’s name is passed to the Messaging User object using a flow and custom parameters and mappings.
-
Create an Omni-Channel flow from scratch with a
variable that’s used to route data to an object. The Omni-Channel flow takes the flow
variable, which receives data from the parameter, and sends that data from the flow
variable to a Salesforce object. The flow then routes the work to a destination like a
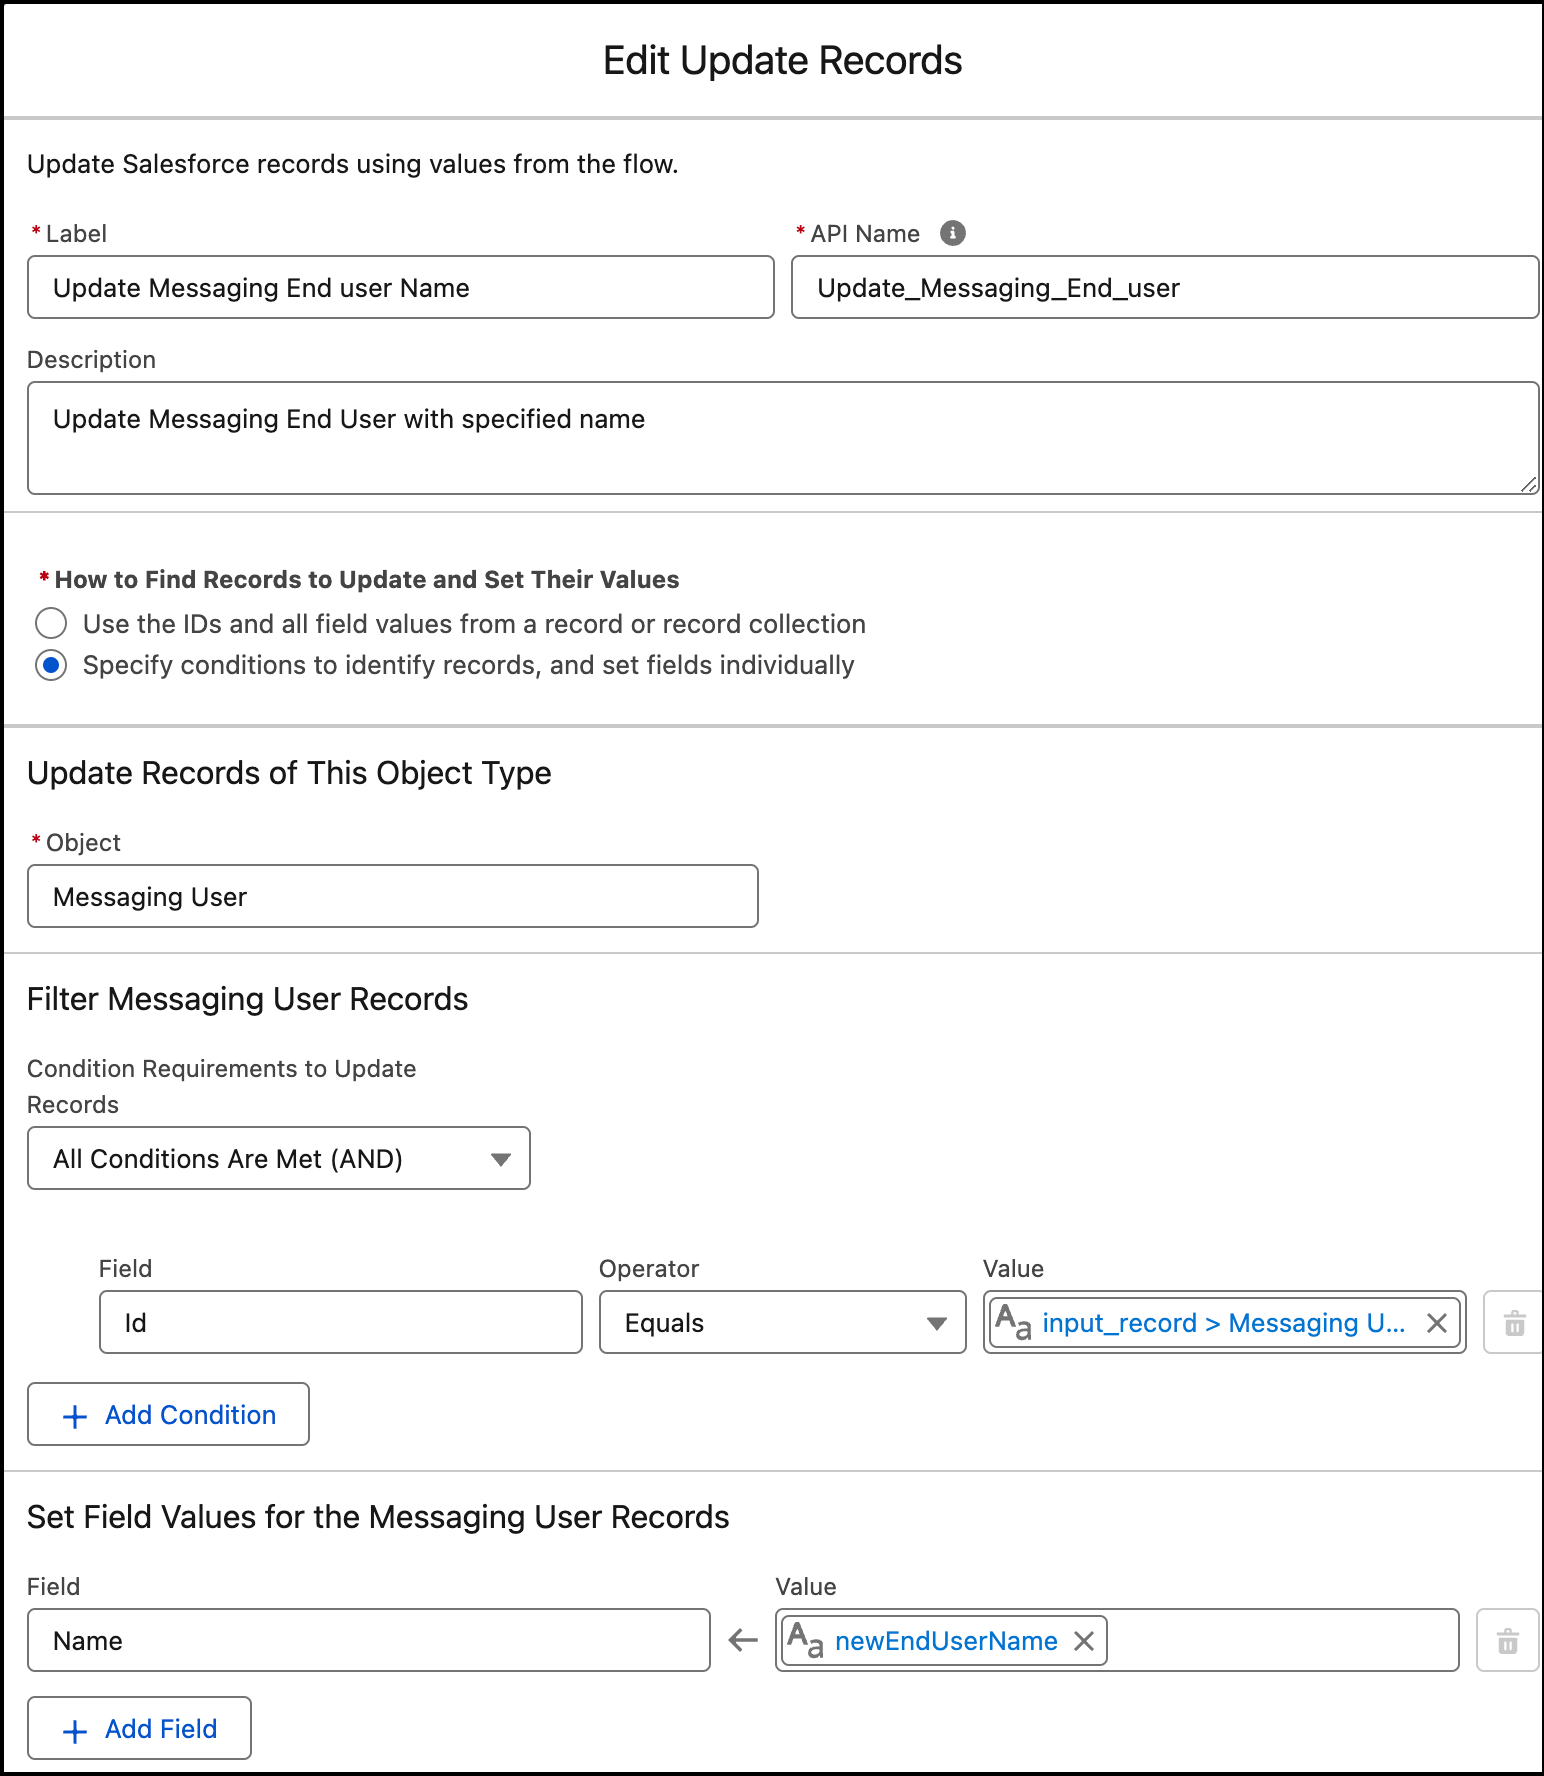
queue or rep. In this example, we use a variable named newEndUserName to update the Name
field of a Messaging User object.
-
In Flow Builder, add an
input_recordvariable andrecordIdvariable that are available for input. -
Create a new variable that will hold the value of the data you want to pass to the
object. In this example, we name it
newEndUserName. The variable is available for input. - In the flow, include an Update Records action and a Route Work action.
For reference, compare your flow to this example.Update Records action example
Route Work action example

-
In Flow Builder, add an
-
If your Bring Your Own Channel for CCaaS implementation uses partner-owned routing,
determine the DurableId of your Omni-Channel flow and share it with your implementation
partner. This isn’t required for Bring Your Own Channel for Messaging. The DurableId
always starts with 300 and differs from the FlowId.
-
To find the Omni-Channel flow ID, from Flow Builder, note the flowId value at the
end of the URL in your browser window. For example,
https://salesforce-example-url/flowBuilder.app?flowId=301Hr000000Ay9EIAS, where301Hr000000Ay9EIASis the flow ID. -
To find the DurableId of the flow, execute a query in the Query Editor in the
Developer Console. Use a query with this syntax, where LatestVersionId is the flow ID
of your Omni-Channel flow.
SELECT ActiveVersionId, ApiName, ApiVersion,
                DurableId FROM FlowDefinitionView WHERE LatestVersionId =
                '301Hr000000Ay9EIAS'
-
To find the Omni-Channel flow ID, from Flow Builder, note the flowId value at the
end of the URL in your browser window. For example,
-
In Setup, in the Quick Find box, enter
Messaging Settings, and select Messaging Settings. - Select your messaging channel.
-
Under Custom Parameters, add a custom parameter that matches the variable name in the
Omni-Channel flow, for example newEndUserName. The parameter establishes the data that you
want to collect from your customer.
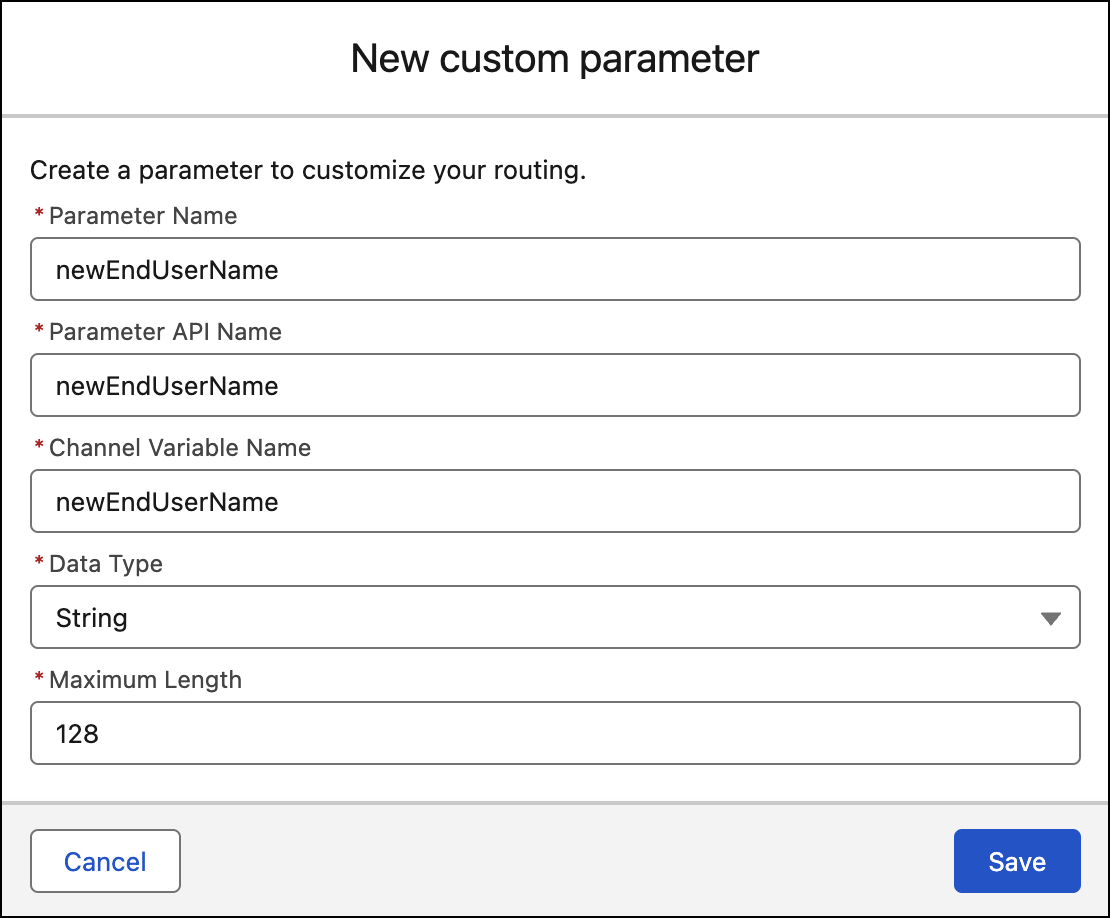
- Specify a Maximum Length for the custom parameter that’s less than or equal to 1500.
- When you create the parameter, note the Channel Variable Name and Maximum Length and share these with your implementation partner.
-
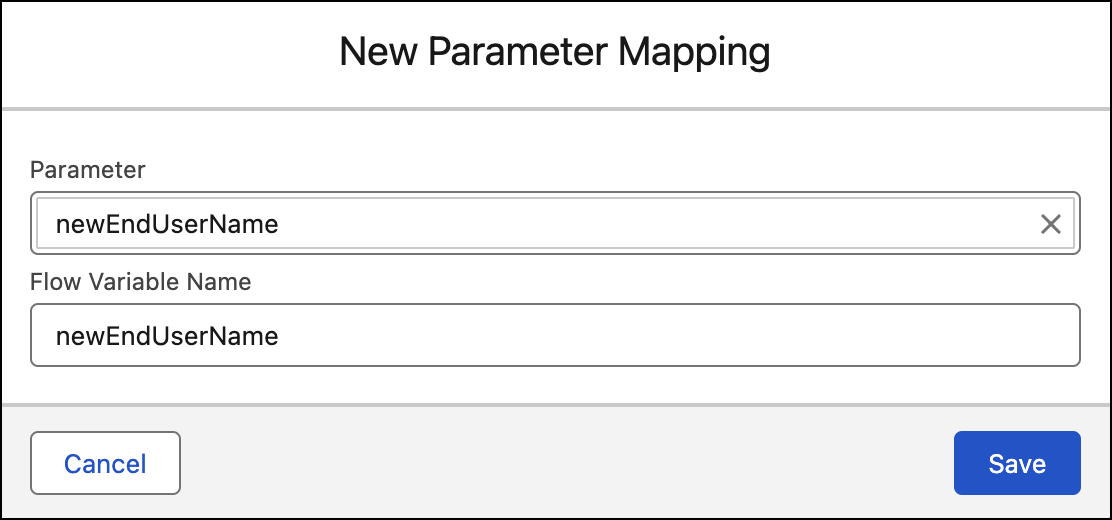
Under Parameter Mappings, add parameter mapping for the custom parameter. Parameter
mapping connects a parameter to a flow variable. This mapping sends the data collected by
the parameter into a flow, where it’s routed to a Salesforce object.