Work with Resource Absences
To make it easier for you to work with resource absences, create and edit resource absences directly on the Gantt, view overlapping absences scheduled to the same resource, hide unapproved absences on the Gantt and show resource absences on the Classic Dispatch Console map.
Required Editions
| Available in: both Salesforce Classic (not available in all orgs) and Lightning Experience |
| The Agentforce Field Service and Operations core features, managed package, and mobile app are available in Enterprise, Unlimited, and Developer Editions. |
| User Permissions Needed | |
|---|---|
| To customize the Field Service managed package: | Customize Application |
| To create resource absences on the Gantt: | Create Absences from Gantt custom permission |
| To edit the duration of a resource absence on the Gantt: | Gantt - Enable Adjusting Duration custom permission |
 This is a Field Service managed package feature.

Add Resource Absences on the Gantt
Create resource absences for service resources on the Gantt.
-
Click the absence creator icon located above the resource list and enter the absence
details.
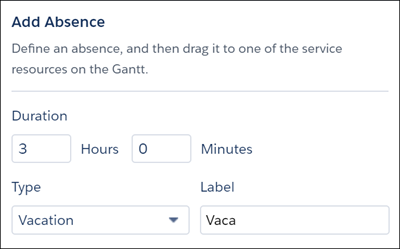 Note The maximum duration that you can enter is 336 hours and 59 minutes. If you want the absence to be longer, create it from the Absences related list in the service resource record, use the Adjust Duration action to extend its duration, or edit the duration from the Gantt.
 - Drag the absence to one of the service resources on the Gantt.
Edit Resource Absences on the Gantt
Modify resource absences for service resources on the Gantt with one or more of these options.
-
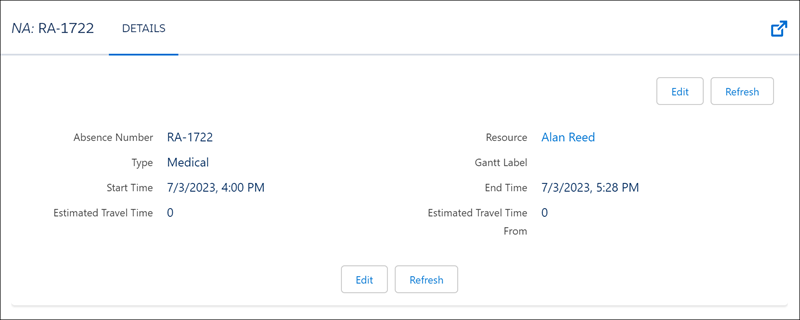
Double-click a resource absence on the Gantt and then click Edit in
the Details window to modify its details.
- Drag a resource absence on the Gantt from one service resource to another to reassign the absence.
- Right-click a resource absence on the Gantt and select Adjust Duration to extend or shorten its duration.
View Overlappinng Resource Absences on the Gantt
Define the height of overlapping resource absences shown on the Gantt to easily identify resource absences.
- Click Dispatch Console Settings.
-
Select the height in Absence Overlap Height.
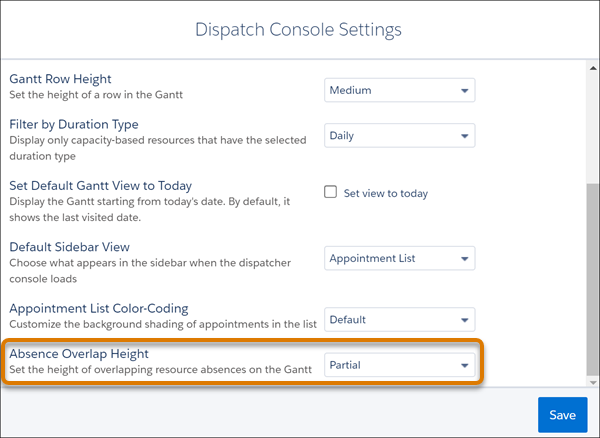 If you select Partial, the overlapping absences appear one on top of the other. If you select Full, only one absence is visible and additional absences are hidden behind it.
Hide Unapproved Absences on the Gantt
When approval confirmation is enabled, only approved absences can block a mobile worker’s availability and appear on the Gantt. Unapproved absences aren’t considered in scheduling or shown on the Gantt.
- Create an approval process for absences that checks the FSL__Approved__c field.
- To avoid confusion, approve all existing absences.
- From the App Launcher, find and open the Field Service Admin app, and then click the Field Service Settings tab.
- Click Scheduling | General Logic and select Activate approval confirmation on resource absences.
- Save your changes.
Show Resource Absences on the Map
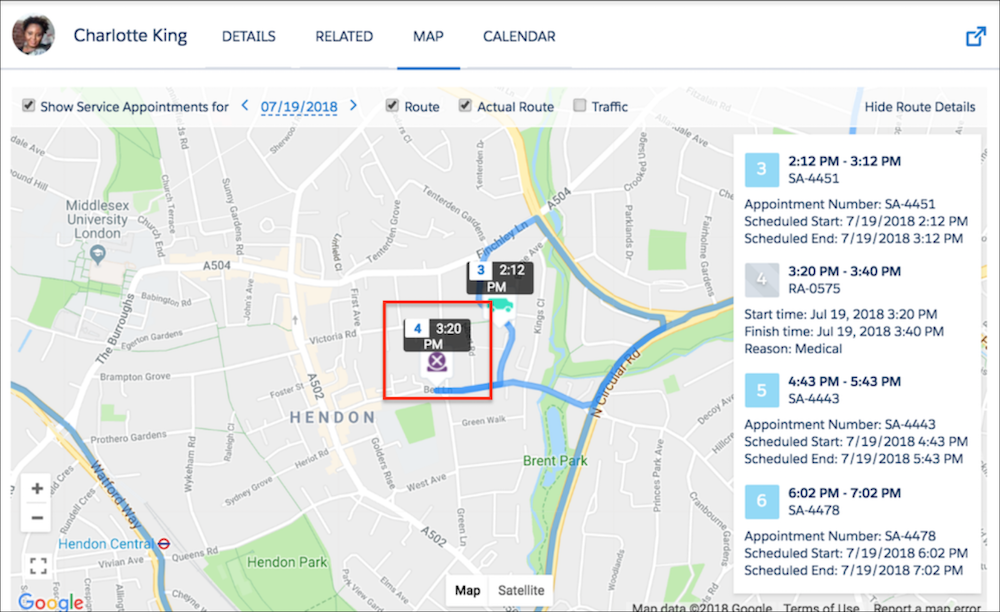
Absences are shown on the Classic Dispatch Console map with a purple icon and the planned route to and from the absence address. If this option isn’t selected, absence length is added to the travel time of adjacent service appointments, which can be confusing for dispatchers.
- From the App Launcher, find and open the Field Service Admin app, and then click the Field Service Settings tab.
- Click Dispatcher Console UI | Gantt Configurations and select Show absences on resource map.
- Save your changes.