
You are here:
Set Up Expert Finder for Swarming
Set up Expert Finder, a key part of swarming, which is powered by Omni-Channel and skills-based routing.
Required Editions
| View supported editions. |
Omni-Channel routes work requests to the most available support reps in your Lightning console. And with skills-based routing, your contact center can route work to the support reps who are the best fit for the job.
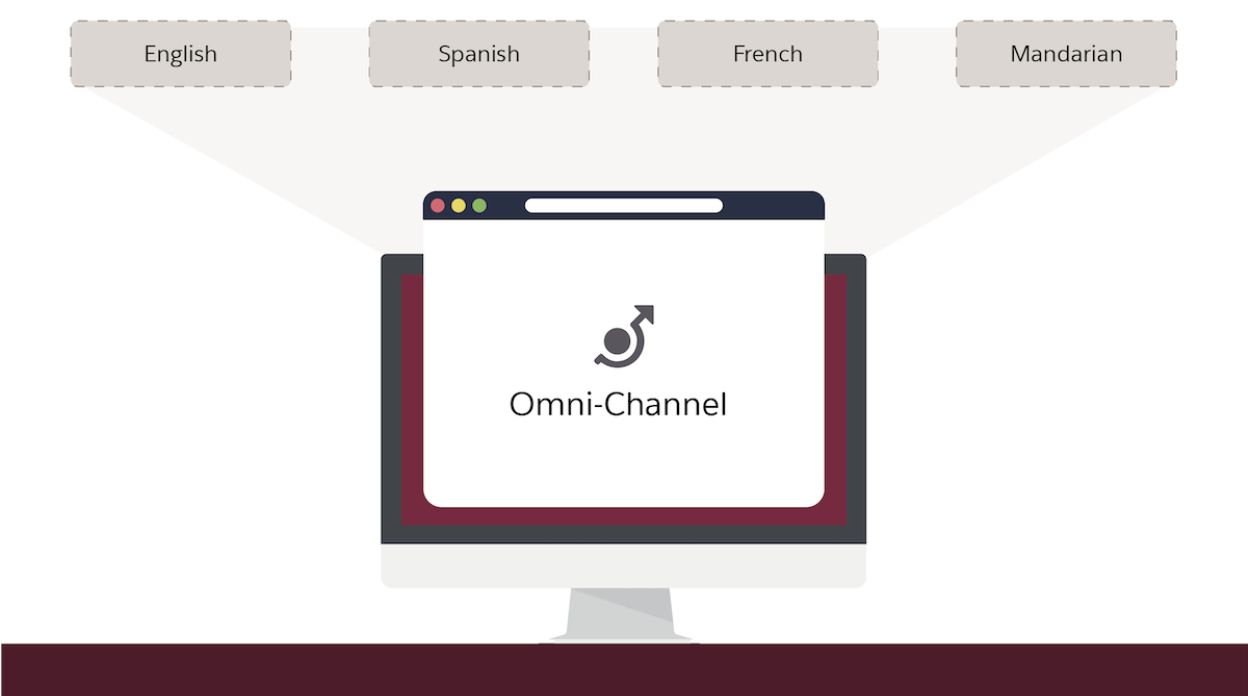
In Swarming, these tools work together to ensure that collaboration requests go to the experts best equipped to resolve them.
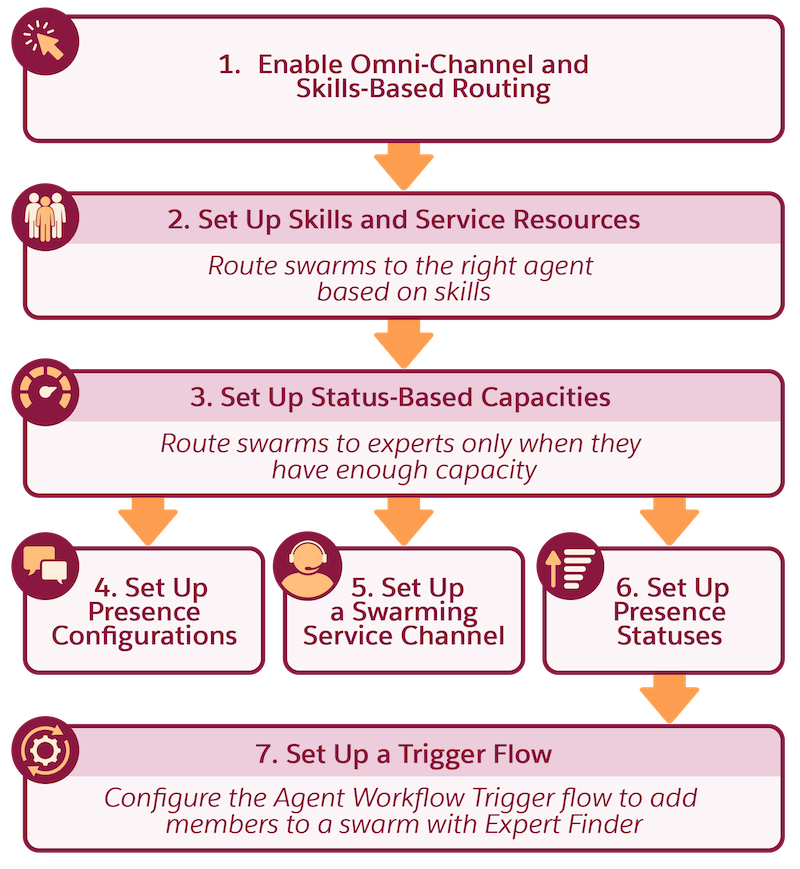
To get the most out of Swarming, set up Omni-Channel and skills-based routing with these licenses.
- Enable Chat
- Service Desk
- Service Cloud User Feature License
- Flow User Feature License
Set Up Skills and Service Resources for Swarming
Service resources reflect individual support reps. Create a service resource to represent the different types of support reps that can use Swarming. For example, one resource can represent a support rep with Python and Perl skills, while another represents a support rep who’s a product expert that speaks Spanish. When configuring the service resource, make sure that Skill Level is enabled for the service resources in the Skill or Requirement object.
- Check that Omni-Channel is enabled.
- Enable skills-based routing to route swarms to the right experts.
- Add the Omni-Channel utility to the Service Console app.
- Create service resources for swarming support
reps.
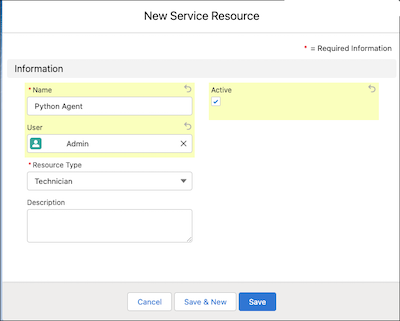
- Create skills for swarming agents, such as Python or French.
- From the swarming service resource, assign the relevant skills.
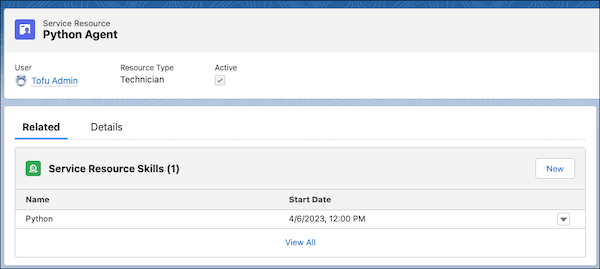
 Note If you don’t see the Skills related list on the Service Resource, add the Skills related list to the page layout.
Set Up Presence Configurations for Swarming
To route swarms to experts only when they have capacity, configure Swarming-specific presence configurations. Presence configurations determine how much capacity your support reps have and the Omni-Channel behaviors that they can access while they assist customers. Make sure that Allow Agents to Decline Requests is selected when you create a default presence configuration for your support reps.
- Create a Swarming presence configuration and assign it to your Swarming users.
- Define your presence configuration’s capacity rules and settings.
See Also
Create a Swarming Service Channel
Create a Swarming service channel to route swarm request records to the right support reps.
- From Setup, in the Quick Find box, enter Omni-Channel, and then select Omni-Channel Settings.
- To route swarm requests to experts only when they’re available to help, enable a status-based capacity model.
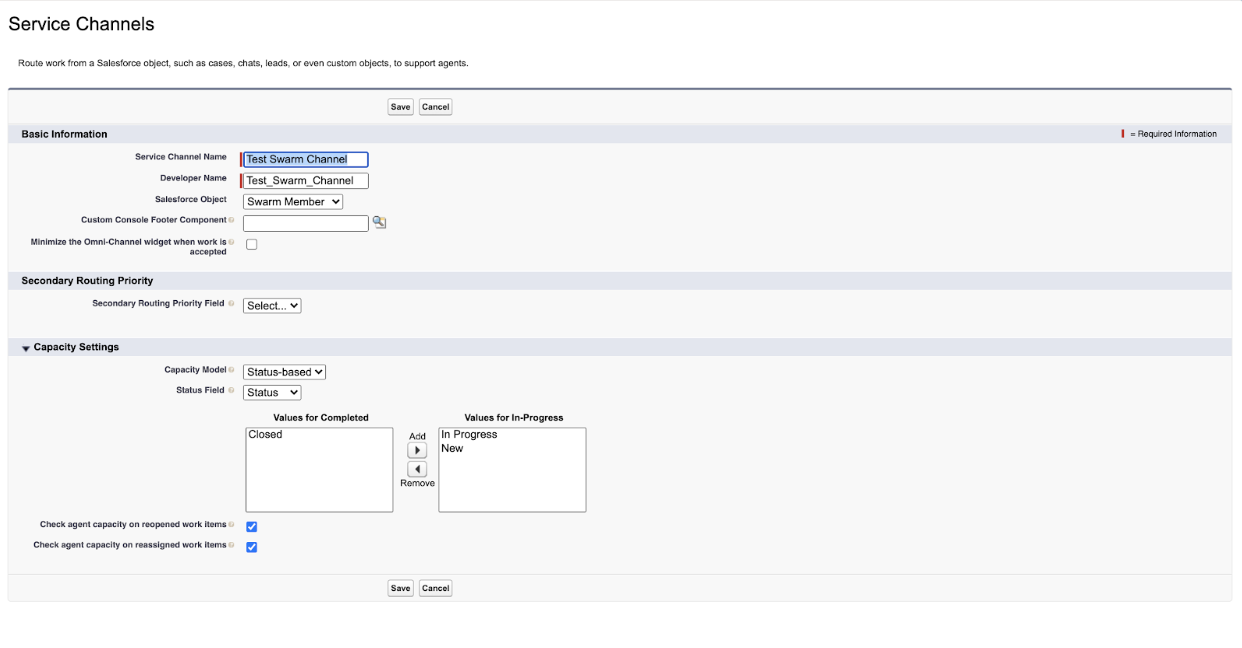
- From Setup, in the Quick Find box, enter Service Channels, and then select New.
- Enter a name for your swarming channel, such as Swarming.
- For Salesforce Object, select Swarm Member.
- For Capacity Model, select Status-based.
- For Status Field, choose Status.
- Set Values for In-Progress to New and In Progress.
-
Select Check agent capacity on reopened work items and
Check agent capacity on reassigned work items, and then save your
changes.
See Also
Set Up Presence Statuses and Permission Sets for Swarming
Use presence statuses to indicate whether a user is online and available to receive swarm requests, or away or offline. With Swarming, your support reps can use presence statuses to enhance the skills-based swarm requests sent through Expert Finder. You can use permission sets to extend support reps’ functional access without making any lasting changes to their profiles.
Support reps need two presence statuses for swarming.
-
Available
If you have multiple channels available such as Swarm Request, Available-Case, this status can be specific to a particular channel. Or it can be a single status that groups multiple channels such as Available for all channels.
-
Busy
This status always applies to all available channels unless otherwise specified.
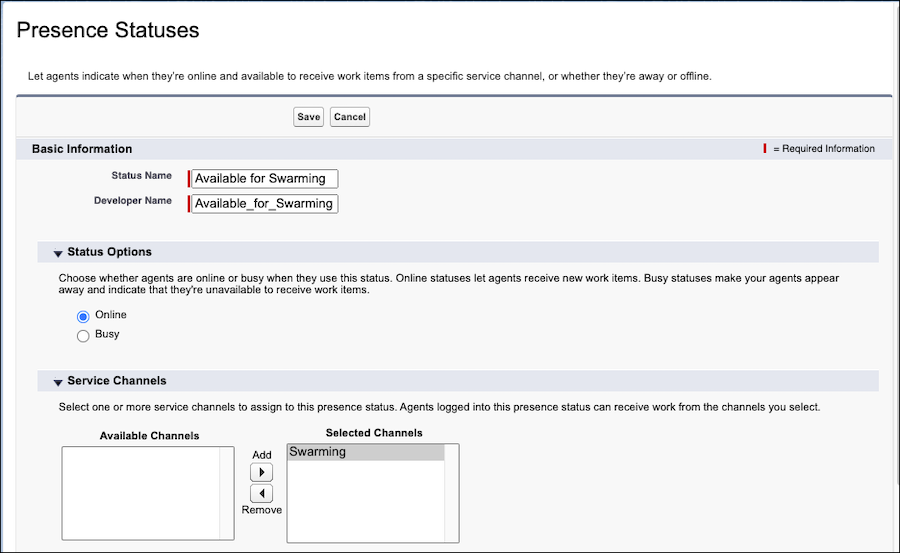
- Create an Available for Swarming presence status and set the channel to Swarm
Channel.
- Create an Unavailable for Swarming Busy presence status.
- Add the presence statuses to the Swarming, Slack Service User, or custom permission sets.
- Save your changes.
Set Up Trigger Flow for Swarming with Expert Finder
To add members to a swarm with Expert Finder, powered by Omni-Channel skills-based routing, configure the Support Rep Workflow Trigger flow in Setup.
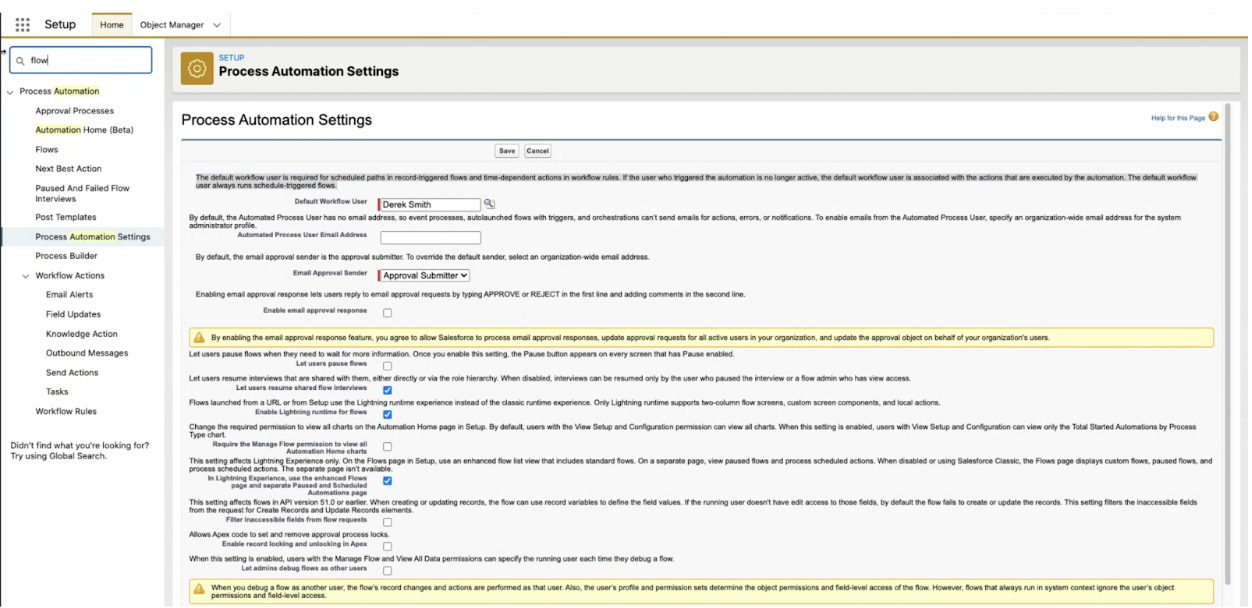
- From Setup, in the Quick Find box, enter Process Automation Settings, and then select Process Automation Settings.
-
Choose a default workflow user, and then save your work. This username is displayed when
the user who triggered the rule isn’t active.
- Save your changes.
-
(Optional) To customize the trigger flow, make and activate a clone.
- From Setup, in the Quick Find box, enter Flows, and then select Flows.
- Select Agent Workflow Trigger from the list of flows, and then click Save As to make a clone.
- Enter a name for your new flow, and then save your work.
- To turn it on, open the cloned trigger flow in Flow Builder, and select Activate.
