
You are here:
Create Automated Dialing Outbound Campaigns with Customer Profiles
Amazon Connect Outbound Campaigns with customer profiles support Predictive and Progressive Dialing. This method uses AI to automatically manage the calling rate based on real-time rep availability. It connects reps only to live, human-answered calls, which improves rep efficiency and campaign effectiveness.
This article applies to:
- Salesforce Voice with Amazon Connect (Outbound Campaign available as Add-on)
- Salesforce Voice with Partner Telephony from Amazon Connect
Make sure your Amazon Connect instance is on the latest version to ensure it supports all campaign features. If it's not on the latest version, use the Upgrade option in the Outbound campaigns section to upgrade your Amazon Connect Instance. Only an AWS root user can enable and set up Outbound Campaigns, see Amazon Help: Set up Amazon Connect outbound campaigns.
-
In your Amazon Connect instance in the AWS Management Console, set up Outbound campaigns
and Customer Profiles. For details on enabling Outbound Campaigns and Customer Profiles, see
Amazon’s documentation. An example setup is:
- Enable Outbound campaigns in your Amazon Connect instance.
- Enable Customer Profiles in your Amazon Connect instance. Enabling Customer Profiles is mandatory for creating a campaign.
-
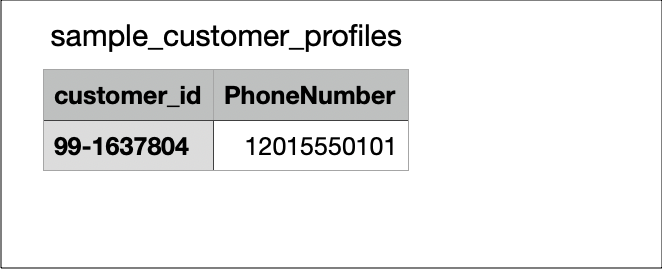
Prepare your customer contact list as a CSV file. In the CSV file, the Customer_id,
and PhoneNumber fields are mandatory. Optional fields are Address, Address1,
Address.City, Address.State, Address.Country, PostalCode, Event_call, Ok_to_call,
Ok_to_email, Campaign, AppointmentDate, AppointmentTime, CallerIdentity, CallStatus,
EmailStatus.
- Upload the CSV file to your S3 bucket.
- Import the customer list into Customer Profiles in Amazon Connect. In the Data Source Integrations tab in the Customer Profiles section, select the S3 bucket where you uploaded the CSV file. Then, select the CSV file, and finish the import setup.
-
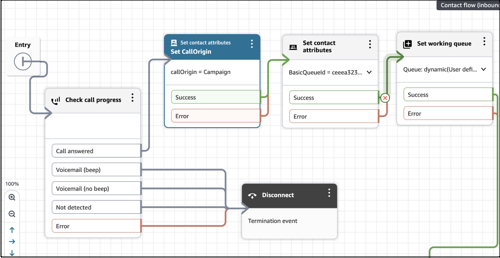
In the Voice setup, create a dedicated queue and contact flow for the campaign to avoid
interfering with the inbound routing logic. You can clone the inbound contact flow to create a
contact flow for the campaign.
- In the contact flow, add the block. This block determines if a call is answered and ensures reps only receive live calls.
-
Add a block with the key as callOrigin and the value as Campaign. This
attribute allows you to filter and create reports in Salesforce for campaign-specific
calls in the VoiceCall object.
- Create the campaign. When creating the campaign, select as the delivery mode, and you must select the contact flow created for the campaign.
To update the customer profile list of the campaign, edit and upload the CSV file to your S3 bucket. The data integration syncs daily to update the Customer Profiles in Amazon Connect.