
You are here:
Route Calls with Omni-Channel Flows
Dynamically route voice calls to the right rep or queue using an Omni-Channel flow. Build a template-based flow in Flow Builder and assign it to one or more Voice channels.
Required Editions
| View supported editions. |
| User Permissions Needed | |
|---|---|
| To open, edit, or create a flow in Flow Builder: | Manage Flow |
| To view channels: | View Setup and Configuration |
- Configure Omni-Channel
To get started, enable Omni-Channel and update its settings. - Create an Omni-Channel Flow
With the help of a flow template, create an Omni-Channel flow to route voice calls to your support team. You can create one flow to provide routing for all your Voice channels or designate a separate flow for each channel. - Connect Your Flow to Your Voice Channel
After creating your Omni-Channel flow, link it to one or more Voice channels.
Configure Omni-Channel
To get started, enable Omni-Channel and update its settings.
This article applies to:
- Salesforce Voice with Amazon Connect
- Salesforce Voice with Partner Telephony
- Salesforce Voice with Partner Telephony from Amazon Connect
- Verify that Omni-Channel is enabled. See Verify that Omni-Channel is Enabled.
- Create presence statuses for Voice. If you’re not sure which statuses to create, start with these three: Available - Calls, On Break, Busy.
Create an Omni-Channel Flow
With the help of a flow template, create an Omni-Channel flow to route voice calls to your support team. You can create one flow to provide routing for all your Voice channels or designate a separate flow for each channel.
This article applies to:
- Salesforce Voice with Amazon Connect
- Salesforce Voice with Partner Telephony
- Salesforce Voice with Partner Telephony from Amazon Connect
To configure an Omni-Channel flow to route calls to a queue, you must first create the queue.
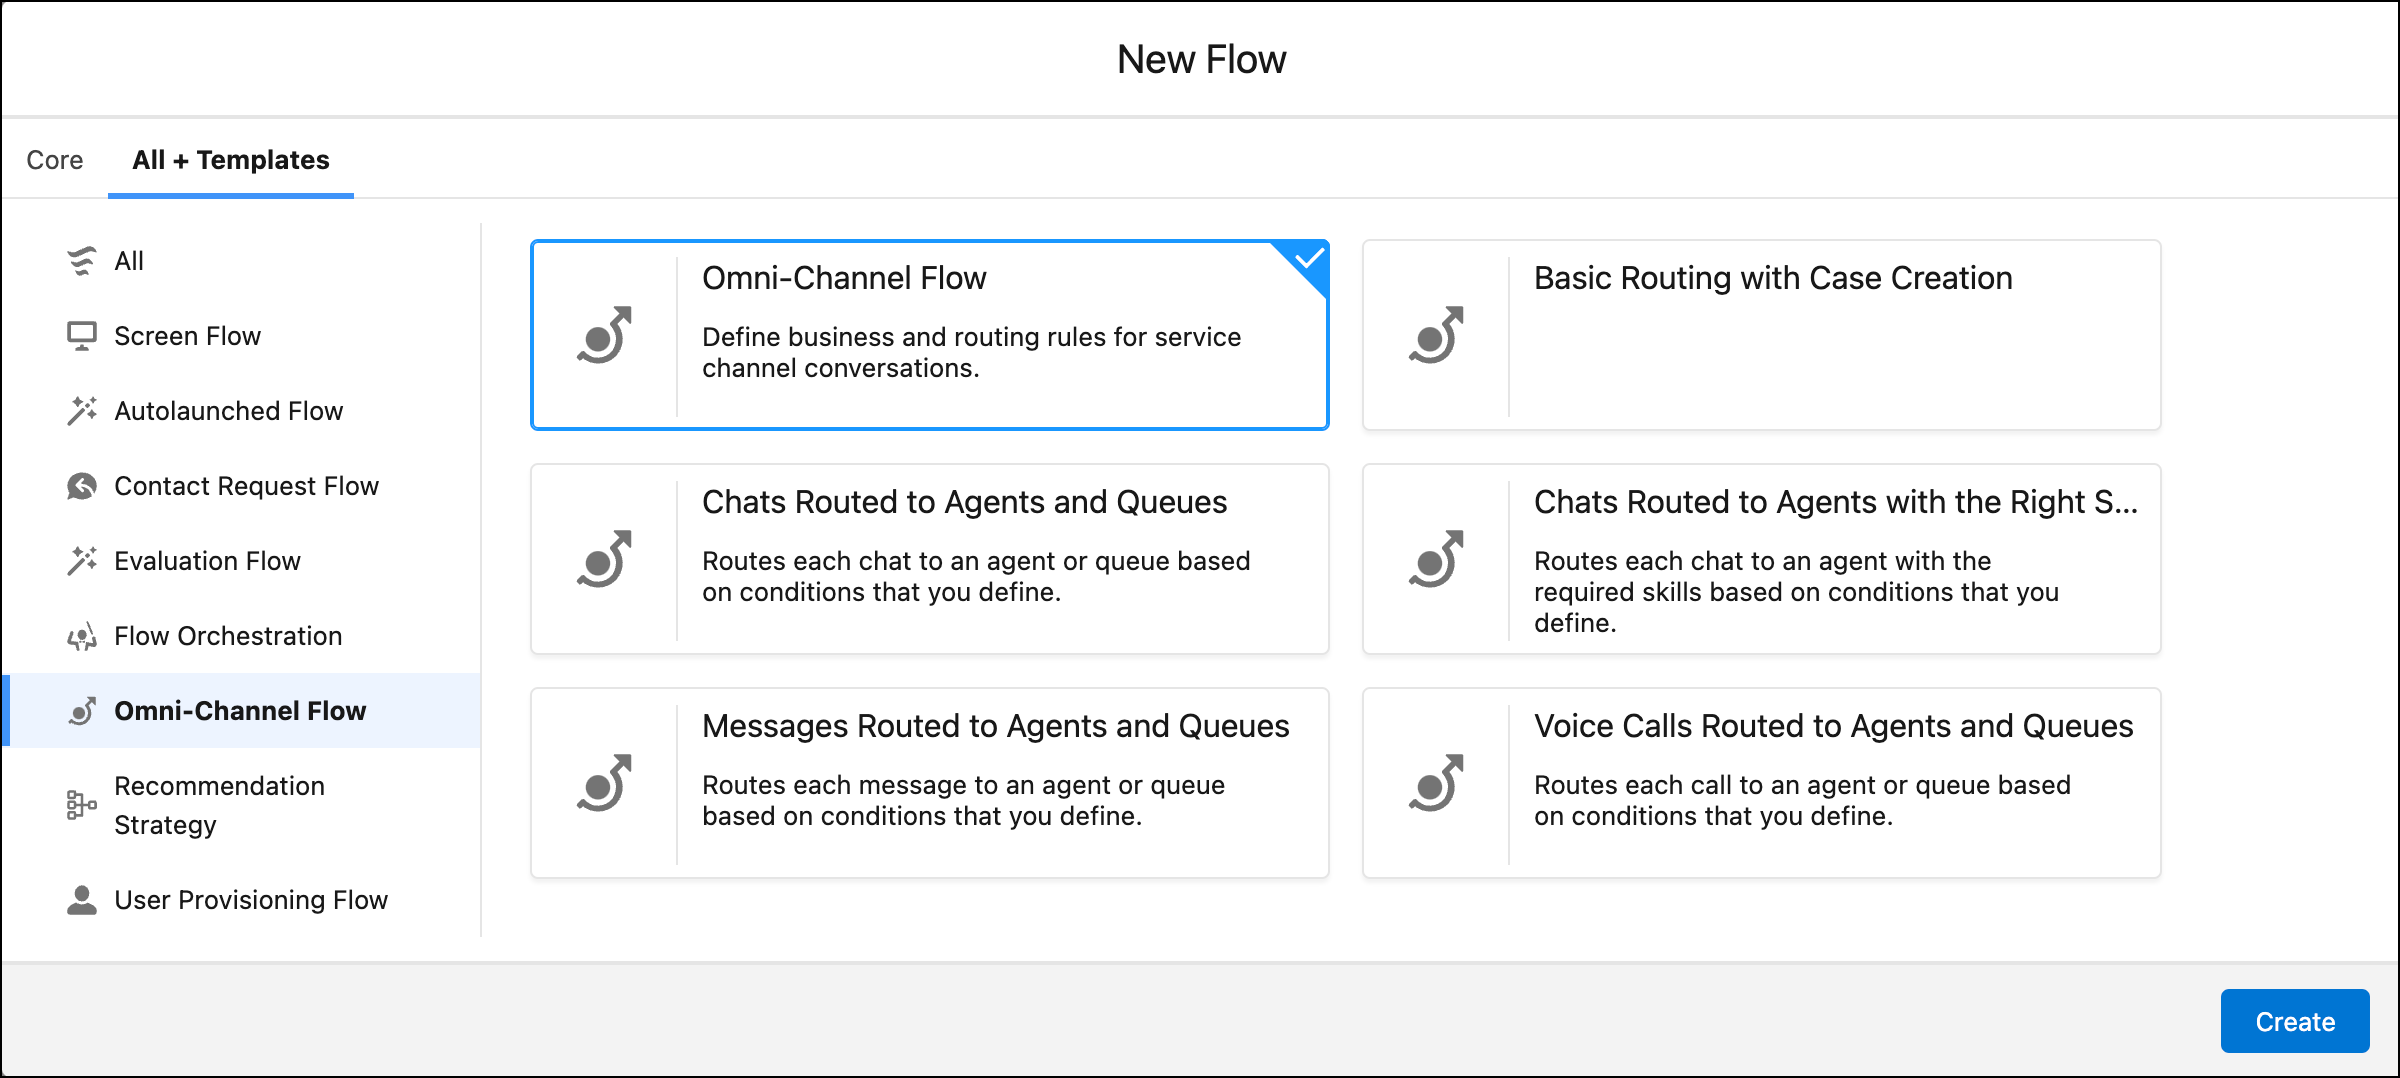
- In Setup, enter Flows in the Quick Find box, and then select Flows under Process Builder.
- Click New Flow.
- Click the All + Templates tab.
- Select Omni-Channel Flow in the left pane, and click the template named Voice Calls Routed to Agents and Queues.
- To open the template, click Create.
- Edit the template to reflect your routing preferences, and save your changes.
Connect Your Flow to Your Voice Channel
After creating your Omni-Channel flow, link it to one or more Voice channels.
This article applies to:
- Salesforce Voice with Amazon Connect
- Salesforce Voice with Partner Telephony
- Salesforce Voice with Partner Telephony from Amazon Connect
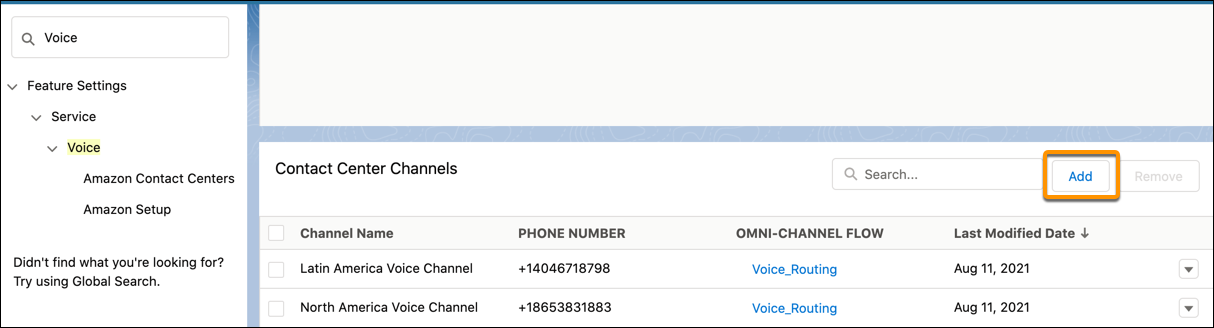
- From Setup in the Quick Find box, enter Voice, and then select Amazon Contact Centers or Partner Telephony Contact Centers, depending on your telephony system.
- Click the contact center.
- Under Contact Center Channels, click Add to add a phone channel. You can also edit an existing channel.
-
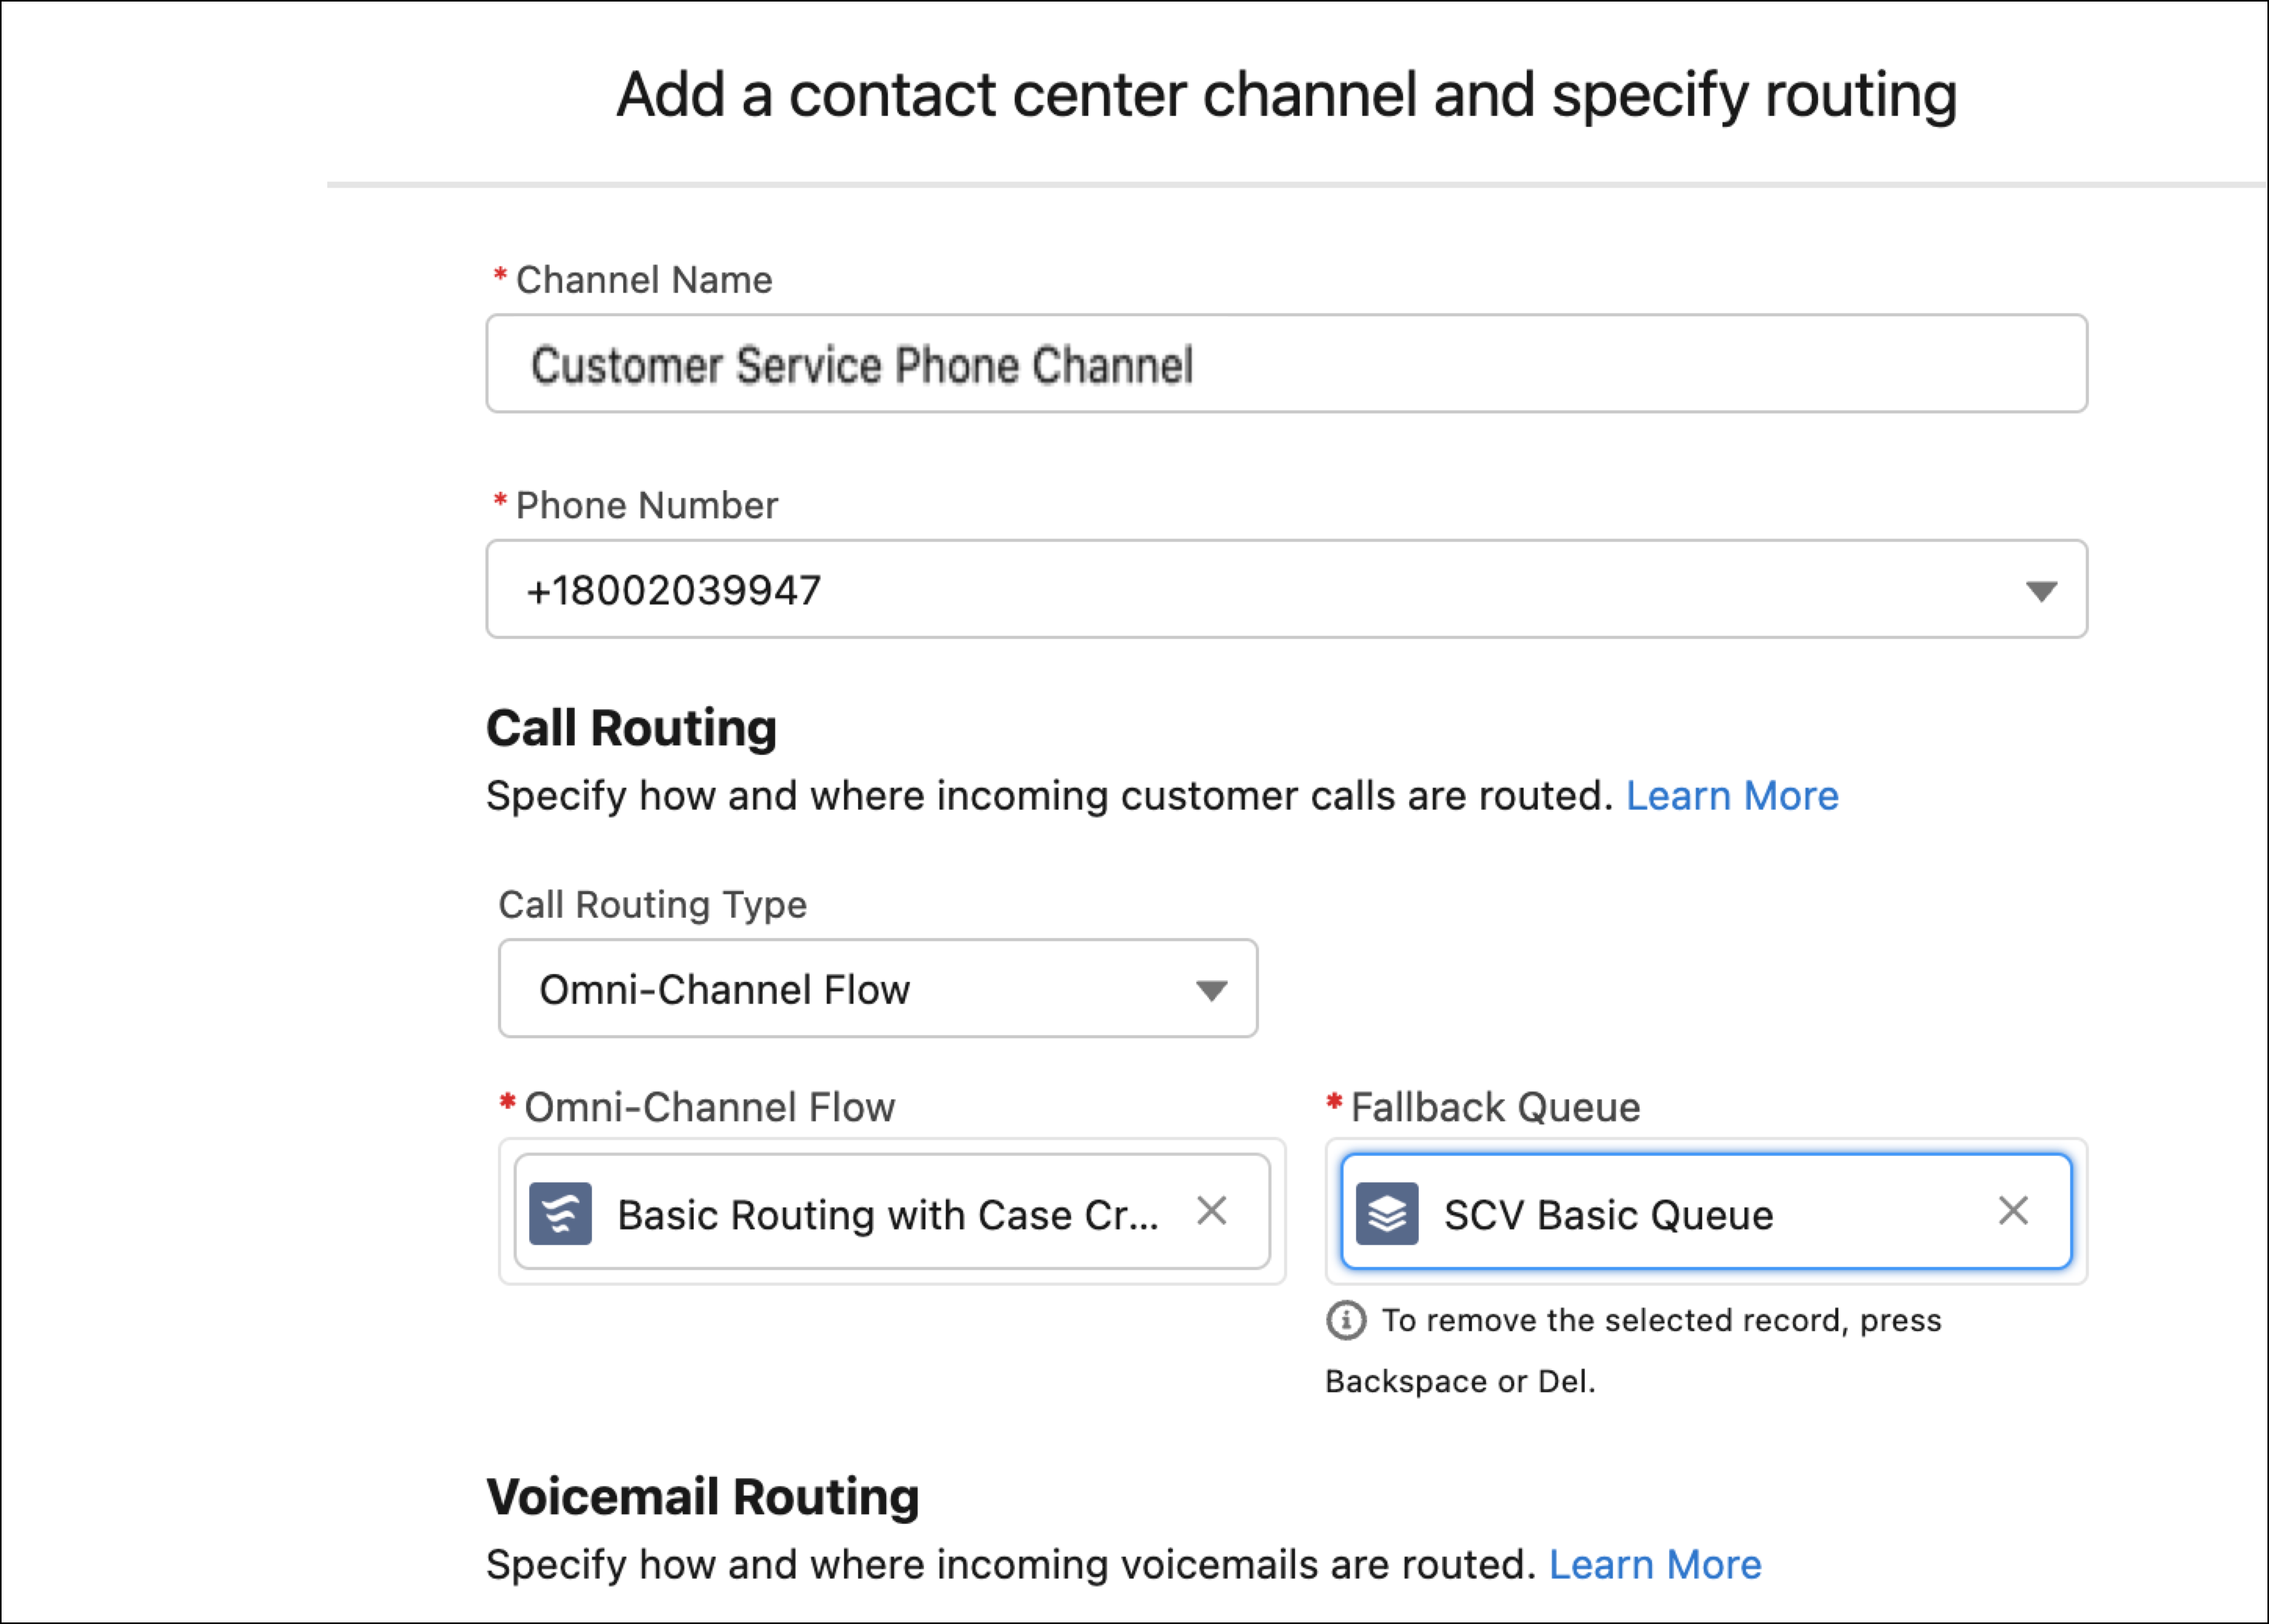
Enter the channel properties.
Property Description Channel Name The name of the phone channel. Phone Number The phone number that customers call to contact you on this channel. Routing Type Select Omni-Channel Flow, and then select the flow and fallback queue. If the flow fails to route the call, the call is routed to the fallback queue. - Click Save.
Did this article solve your issue?
Let us know so we can improve!