Use the Preference Builder to configure a preference form by selecting elements to
populate onto a blank workspace.
Required Editions
User Permissions Needed
To use Preference Manager:
ManagePreferenceManager
To create a preference form:
On the Preference Manager dashboard, under Preference Manager, click
Forms.
Click New Form, then select the Apex method option.
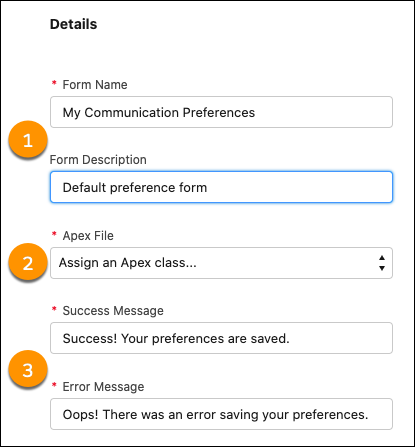
In the Details panel, enter a name and optional description for your form.
These details help you identify the forms on your dashboard (1).
Select the Apex class that you want to use (2).
Enter the success and error messages that you want the user to see when they submit a
preference form (3).
Under Configuration Home in the Sections panel, click Add
Section.
In the Details panel, enter a title for the section. The section title automatically
populates in the middle panel.
Note If no title is required, leave the section title blank. The section title appears as
Untitled Section in the Sections panel, but it isn’t visible in the form.
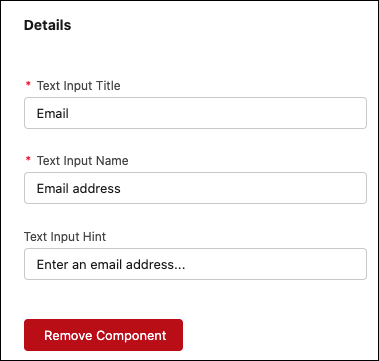
In the Sections panel, under your section name, click Add Component.
Choose a property type for the component.
In the Details panel, enter an optional title for the component that appears in the form.
Each component also requires a name that’s used for the form metadata and that isn’t visible to
users.
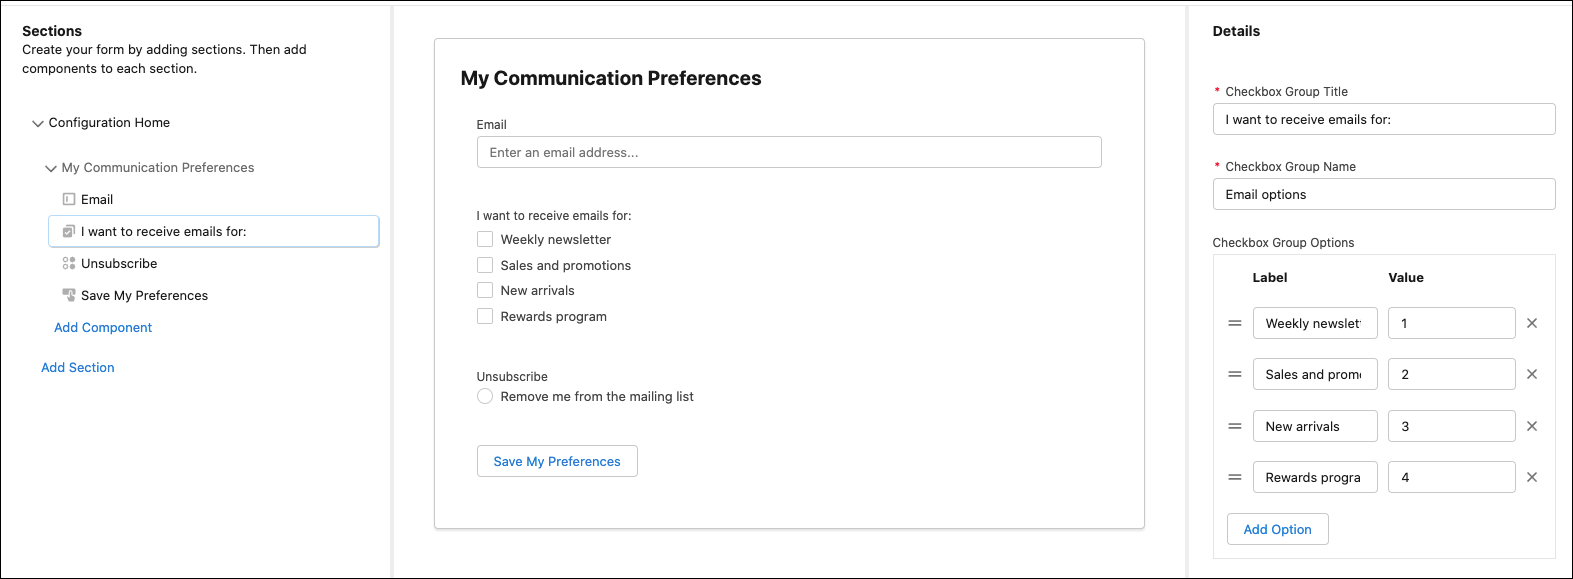
Customize your form with as many sections and components as you want. For example, this
email preference form has checkbox options for types of emails, an unsubscribe option, and a
button to save changes.
Note For the Checkbox, Picklist, and Radio button components, enter a value for each group
option. Then use Apex to update the consent record.
When you’re done building your form, click Save or Save
& Publish. You can also publish the form at any time from the Preference
Manager dashboard.
Did this article solve your issue?
Let us know so we can improve!
Loading
Salesforce Help | Article
Cookie Consent Manager
General Information
Required Cookies
Functional Cookies
Advertising Cookies
General Information
We use three kinds of cookies on our websites: required, functional, and advertising. You can choose whether functional and advertising cookies apply. Click on the different cookie categories to find out more about each category and to change the default settings.
Privacy Statement
Required Cookies
Always Active
Required cookies are necessary for basic website functionality. Some examples include: session cookies needed to transmit the website, authentication cookies, and security cookies.
Functional Cookies
Functional cookies enhance functions, performance, and services on the website. Some examples include: cookies used to analyze site traffic, cookies used for market research, and cookies used to display advertising that is not directed to a particular individual.
Advertising Cookies
Advertising cookies track activity across websites in order to understand a viewer’s interests, and direct them specific marketing. Some examples include: cookies used for remarketing, or interest-based advertising.