
Integrate Service Providers as Connected Apps with SAML 2.0
To integrate a service provider with your Salesforce org, you can use a connected app that implements SAML 2.0 for user authentication. Salesforce supports SAML single sign-on (SSO) when the service provider or the identity provider initiates the flow. To use this option, configure a connected app with SAML 2.0 enabled for your service provider. Define your Salesforce org as the SAML identity provider.
Required Editions
| Available in: both Salesforce Classic and Lightning Experience |
Connected Apps can be created in: Group, Essentials, Professional, Enterprise, Performance, Unlimited, and Developer Editions Connected Apps can be installed in: All editions |
| User Permissions Needed | |
|---|---|
| To read, create, update, or delete connected apps: | Customize Application AND either Modify All Data OR Manage Connected Apps |
| To update all fields except Profiles, Permission Sets, and Service Provider SAML Attributes: | Customize Application AND either Modify All Data OR Manage Connected Apps |
| To update Profiles, Permission Sets, and Service Provider SAML Attributes: | Customize Application AND Modify All Data AND Manage Profiles and Permission Sets |
| To rotate the consumer key and consumer secret: | Allow consumer key and secret rotation |
| To install and uninstall connected apps: | Customize Application AND either Modify All Data OR Manage Connected Apps |
| To install and uninstall packaged connected apps: | Download AppExchange Packages AND Customize Application AND either Modify All Data OR Manage Connected Apps |
See New connected apps can no longer be created in Spring ‘26 for more details.
For example, you build a custom Your Benefits web app that implements SAML 2.0 for user authentication. You want your users to be able to log in to this app with their Salesforce credentials. To set up this SSO flow, configure the Your Benefits web app as a connected app. Define your Salesforce org as the SAML identity provider for the connected app. Your users can now log in to the Your Benefits web app with their Salesforce credentials.
- Complete the prerequisites for defining service providers.
- To direct users to a specific location after they authenticated, enter your app’s start
URL.The Start URL can be an absolute URL, such as https://MyDomainName.my.salesforce.com/001/o, or it can be the link for the application name, such as https://customer.goodApp.com for GoodApp. Specifying a Start URL makes the application available in the app menu and in App Launcher.If the connected app that you’re creating is a canvas app, skip this field. The Canvas App URL field contains the URL that gets called for the connected app.
- Create your connected app, and complete its basic information.
- In the Web App Settings section, select Enable SAML, and enter
this information, which is available from your service provider.
- Entity Id—The globally unique ID of the service
provider. If you’re accessing multiple apps from your service provider, define the
service provider. Then use the
RelayStateparameter to append the URL values to direct the user to the correct app after signing in. - ACS URL—(Assertion Consumer Service) The service provider’s endpoint that receives SAML assertions.
- Subject Type—Specifies which field defines the user’s identity for the app. Options include the user’s username, federation ID, 15-character user ID, a custom attribute, or an algorithmically calculated persistent ID. A custom attribute can be any custom field added to the User object in the org, as long as it’s one of these data types: Email, Text, URL, or Formula (with Text Return Type). After you select Custom Attribute for the subject type, Salesforce displays a Custom Attribute field with a list of the available User object custom fields in the org.
- Name ID Format—Specifies the format attribute sent in
SAML messages. The default selection is Unspecified. Depending
on your SAML service provider, you can set this format to email address, persistent,
or transient. If you set this format to email address, your identity provider
describes org users and Experience cloud users differently in SAML messages. For org
users, SAML messages include only the user’s email address. This sample shows the SAML
message sent when an org user logs in, with the Name ID Format
set to email address.
For Experience Cloud users, SAML messages append the org ID to the user’s email address. This sample shows the SAML message sent when an Experience Cloud user logs in, with the Name ID Format set to email address.<saml:Subject> <saml:NameID Format="urn:oasis:names:tc:SAML:1.1:nameid-format:emailAddress">sandy@salesforce.com</saml:NameID> <saml:SubjectConfirmation Method="urn:oasis:names:tc:SAML:2.0:cm:bearer"> <saml:SubjectConfirmationData NotOnOrAfter="2021-02-04T20:24:41.098Z" Recipient="https://playground-test.salesforce.com?so=00DR00000000R6N"/> </saml:SubjectConfirmation> </saml:Subject>
If your service provider accepts only the email address and not the org ID, create a custom attribute for email address. For more information, see Add Custom Attributes to a Connected App.<saml:Subject> <saml:NameID Format="urn:oasis:names:tc:SAML:1.1:nameid-format:emailAddress">00DR00000008fLq@sandy@play-test.com</saml:NameID> <saml:SubjectConfirmation Method="urn:oasis:names:tc:SAML:2.0:cm:bearer"> <saml:SubjectConfirmationData NotOnOrAfter="2021-02-04T20:17:12.647Z" Recipient="https://playground-test.salesforce.com?so=00DR00000000R6N"/> </saml:SubjectConfirmation> </saml:Subject> - Issuer—By default, your org’s My Domain login URL is the standard issuer for your identity provider. If your SAML service provider requires a different value, specify it here.
- Entity Id—The globally unique ID of the service
provider. If you’re accessing multiple apps from your service provider, define the
service provider. Then use the
- To automatically log users out of the connected app service provider when they log out
of Salesforce, select Enable Single Logout. Then take these
steps.
- Enter the single logout endpoint of the service provider. Salesforce sends logout requests to this URL when users log out of Salesforce. The single logout URL must be an absolute URL starting with https://.
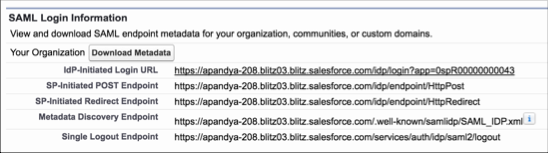
- Provide your service provider with the Salesforce IdP SLO endpoint. The endpoint is
listed in your SAML Login Information as the Single Logout Endpoint. It’s also listed
in the SAML Metadata file as the Discovery Endpoint. The format for the endpoint is
https://MyDomainName.my.salesforce.com/services/auth/idp/saml2/logout,
where MyDomainName is your org’s My Domain name.
- Select the HTTP binding type for single logout provided by your service provider.
- If your service provider requires a unique certificate to validate SAML requests from
Salesforce, upload the certificate from your system. Otherwise, leave this setting as
Default IdP Certificate.The certificate size is limited to 4 KB.
- If the service provider gave you a security certificate, select Verify
Request Signatures. Browse your system for the certificate and upload it.
The certificate is only necessary if you plan to initiate logging in to Salesforce from
the service provider and the service provider signs its SAML requests.
 Important If you upload a certificate, all SAML requests must be signed. If no certificate is uploaded, all SAML requests are accepted.
 - Optionally, select Encrypt SAML Response to browse your system for the certificate and upload it. Select an encryption method for encrypting the assertion. Valid encryption algorithm values are AES–128 (128–bit key) and AES–256 (256–bit key).
- For Signing Algorithm for SAML Messages, select SHA1 or SHA256 to secure SAML messages sent from your Salesforce org. As the identity provider, Salesforce applies the selected algorithm to its SAML requests and responses. The selected signing algorithm is applied to single sign-on and single logout messages from your org to the service provider.
- After you configure all settings for your connected app, save your work.