
Create a Custom Login Page in Visualforce
Create your custom login page in Visualforce, and associate it with your site from the Login & Registration page of the Administration workspace. You can also create custom Visualforce pages for password, forgot password, and self-registration. You can add these login pages to your Experience Cloud site regardless of the template you used to create the site.
Required Editions
| Available in: Salesforce Classic and Lightning Experience |
| Available in: Enterprise, Performance, Unlimited, and Developer Editions |
| User Permissions Needed | |
|---|---|
| To create and edit Visualforce pages: | Customize Application |
| To edit Apex classes: | Author Apex AND Customize Application |
Note You can select a Visualforce page as your custom login page for Aura sites only. If you
used a Visualforce page as your custom login page for an LWR site before Summer ’23, the
site can continue to use the Visualforce page. However, if you change the LWR site’s login
page to another page type, you can’t go back to using the Visualforce page.
-
Create a Visualforce page.
To customize the look of your login page, create a Visualforce page. To determine how the
Apex controller gets invoked, include Apex code. For example, when the user clicks the
Login button:
apex:commandButton action="{!login}" value="Sign in" id="login-submit" styleClass="btn btn-lg btn-primary btn-block"/> -
To make your page available externally, set up public access.
- From Setup, in the Quick Find box, enter All Sites, and then select All Sites.
- Next to your site name, click Workspaces, then click Administration.
- In the Administration workspace, select Pages.
- Click Go to Force.com.
- Click Public Access Settings.
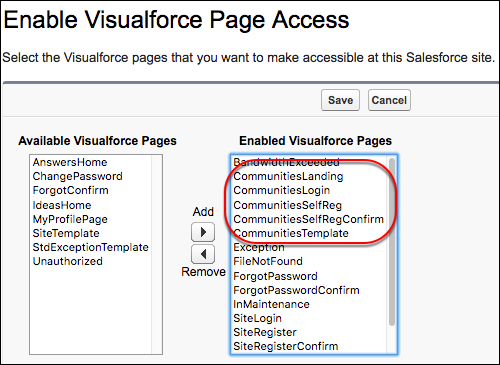
- Under Enabled Visualforce Page Access, click Edit.
-
Select the Visualforce pages you created, add them to Enabled
Visualforce Pages, and save your changes.
- If necessary, enable Apex classes for public access. Under Enabled Apex Class Page Access, click Edit, select the classes, and add them to Enabled Apex Classes.
-
From your Login & Registration page, replace the site’s default pages with your
custom Visualforce pages.
- From Experience Workspaces, select Administration, and then select Login & Registration.
-
Under Login Page Setup, select Visualforce Page, click
 , and then select your custom Visualforce page from
the list. Be sure that your site’s login page and your site’s Reset Password page use
different Visualforce pages.
, and then select your custom Visualforce page from
the list. Be sure that your site’s login page and your site’s Reset Password page use
different Visualforce pages.
- View your custom login page from a browser in private (incognito) mode.
- Example: Create a Custom Visualforce Login Page from a Github Project
When creating custom code for your login page, it’s often helpful to start out with an existing example for guidance. Salesforce Identity provides a Github custom login page project that you can modify. The project includes custom Visualforce pages and Apex controllers.
Did this article solve your issue?
Let us know so we can improve!