
You are here:
Step 3: Enable Embedded Login on a Web Page
On the web page where you want to add login capabilities, enter Embedded Login meta tags
inside the <head> HTML element at the top of the
page.
Embedded Login relies on third-party cookies, which are blocked or restricted in most browsers. And Embedded Login works only on Google Chrome and only as long as third-party cookies are allowed there by default.
Here’s what you see when you inspect the web page.
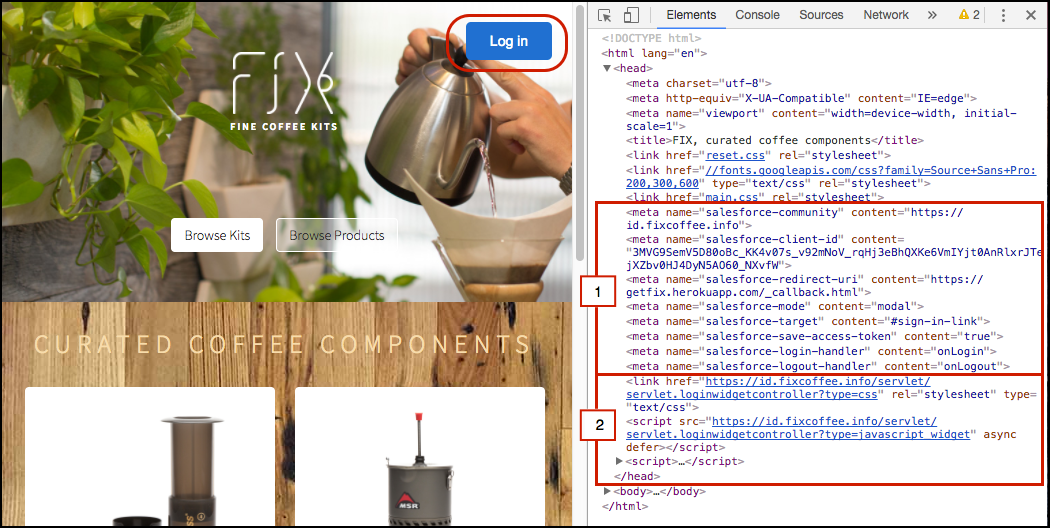
The top (1) contains a set of meta tags that specify how to display the login form. The bottom (2) contains a link to your CSS resources and a script to invoke Embedded Login on the server.
Let’s take a closer look at the code.
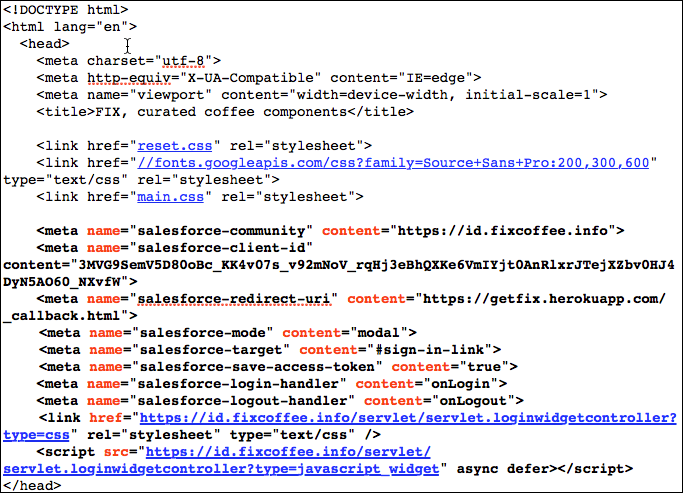
The CSS and servlet URLs reside on static endpoints hosted by your site. You replace https://embeddedlogin-dev-ed.my.site.com/demo/ with the path to your site.
<link href="https://embeddedlogin-dev-ed.my.site.com/demo/servlet/servlet.loginwidgetcontroller?type=css" rel="stylesheet" type="text/css" />
     <script src="https://embeddedlogin-dev-ed.my.site.com/demo/servlet/servlet.loginwidgetcontroller?type=javascript_widget" async defer></script>
Next, let’s see how to implement Embedded Login by populating the web page <head> element.
- Add Embedded Login Meta Tags to Your Web Page
You enter meta tags on your web page where you want to add login capabilities with Embedded Login. You specify the Salesforce site URL, what the login form looks like, and the location of the CSS style sheet. - Replace the Embedded Login CSS with Your Own
Embedded Login comes with a default style sheet, which styles the login button and login form. If you want to replace the default CSS with your own, you have a few options. - Change How to Invoke Embedded Login on the Server
You can change the default behavior of Embedded Login on the server by modifying the<script>tag inside the<head>HTML element at the top of the web page.