
Configure SSO from Salesforce to Amazon Web Services
Let your users log in to Amazon Web Services (AWS) using single sign-on (SSO) from your Salesforce org configured as an identity provider.
Required Editions
| Available in: Lightning Experience and Salesforce Classic |
| Available in: Enterprise, Performance, Unlimited, and Developer Editions |
Configuring Salesforce as an identity provider for AWS involves these high-level steps.
- Get a SAML IdP Certificate.
- Download the Metadata Document
- Create a SAML Provider on AWS
- Create and Configure a Connected App on Salesforce
See Also
Get a SAML IdP Certificate
Get a certificate, either self-signed or issued by a certificate authority, to use to set up service providers. Save the certificate on your local drive.
Download the Metadata Document
- From Setup, enter Identity in the Quick Find box, and then select Identity Provider.
- Click Download Metadata.
On the same page under SAML Metadata Discovery Endpoints, make note of the Salesforce Identity, for example, https://MyDomainName.my.salesforce.com/.well-known/samlidp.xml.
Create a SAML Provider on AWS
Follow AWS instructions to create a SAML identity provider. Log in to the AWS Console as an administrator, navigate to Identity Providers, and follow the instructions to create a SAML provider. AWS generates an Amazon resource number (ARN) for the provider, which you need in a later step.
- Upload the metadata document from your local drive. AWS generates the ARN for your identity provider, for example, arn:aws:iam::365652557137:saml-provider/salesforce. Save the ARN to your local drive.
-
Create one or more roles with the desired policy for users. For each role:
- Create a role for Identity Provider Access.
- Grant Web Single-Sign-On (WebSSO) access to SAML providers.
- Set the desired permissions.
- Save the ARN for the role, for example, arn:aws:iam::365652557137:role/SSOUserRole.
Create and Configure a Connected App on Salesforce
- From Setup, enter External Client Apps in the Quick Find box, then select Settings in the External Client App section.
- Turn on Allow creation of connected apps, if it's off.
- Click New Connected App.
- Configure settings for the connected app. Under Basic Information: name the app Amazon Web Services and enter your own email address.
-
Under Web App Settings:
- Select Enable SAML.
- For Entity Id, enter https://signin.aws.amazon.com/saml.
- For ACS URL, enter https://signin.aws.amazon.com/saml.
- For Subject Type, select Persistent ID.
- For Name ID Format, select urn:oasis:names:tc:SAML:2.0:nameid-format:persistent.
- For Issuer, keep the default value, your subdomain.
- In the field IdP Provider Certificate, keep the default (unselected).
- For Verify Request Signatures, keep the default (unselected).
- Click Save.
 Note It can take a few minutes for Salesforce to create the connected app.
 -
From Setup, enter Apps, in the Quick Find box. If you’re using
Lightning Experience, select Manage Connected Apps. If you’re
using Salesforce Classic, under Manage Apps select
Connected Apps.
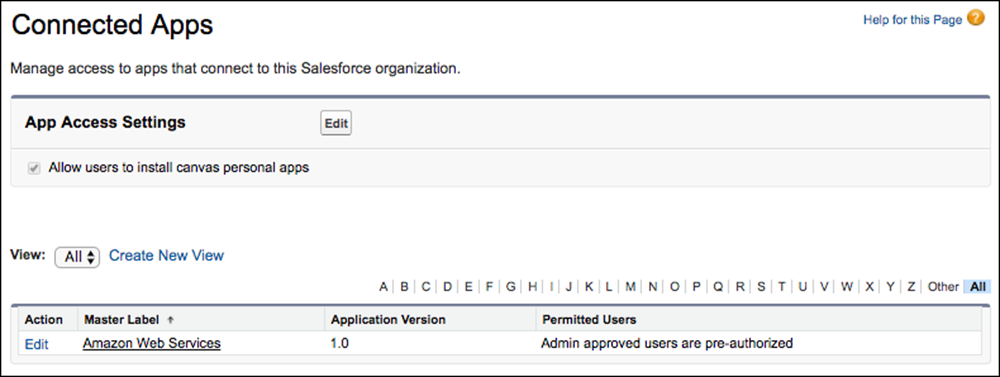
- Click Amazon Web Services. The connected app detail page appears.
-
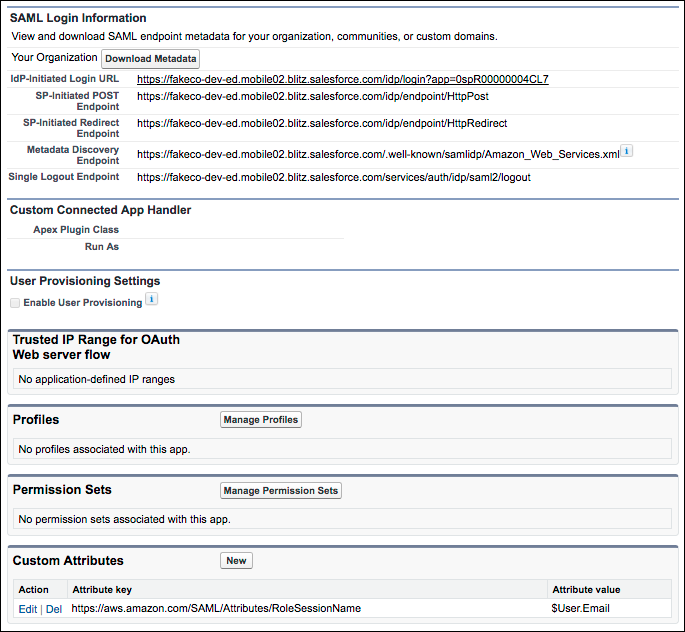
Under Custom Attributes, click New to create custom
attributes.
- For the attribute key, enter https://aws.amazon.com/SAML/Attributes/RoleSessionName. For the attribute value, enter $User.Email.
-
For the next attribute key, enter
https://aws.amazon.com/SAML/Attributes/Role. For the
attribute value, enter
'arn:aws:iam::365652557137:role/SSOUserRole,arn:aws:iam::365652557137:saml-provider/salesforce'.
The attribute value is the saved AWS ARN value for the role and the ARN value for the IdP provider, separated by a comma and entered within single quotes.

 Tip Consider creating a custom user attribute as a picklist with your Amazon roles, allowing you to dynamically select a user’s role.
-
Configure the Start URL for the connected app.
-
On the connected app detail page, copy the IdP-Initiated Login URL from under
SAML Login Information.
- Click Edit Policies.
- For Start URL under Basic Information, paste the IdP-Initiated Login URL and click Save.
-
On the connected app detail page, copy the IdP-Initiated Login URL from under
SAML Login Information.
- Under Profiles or Permission Sets, add the profiles or permission sets of users who can access this app.
- To test access, run the connected app as an end user.